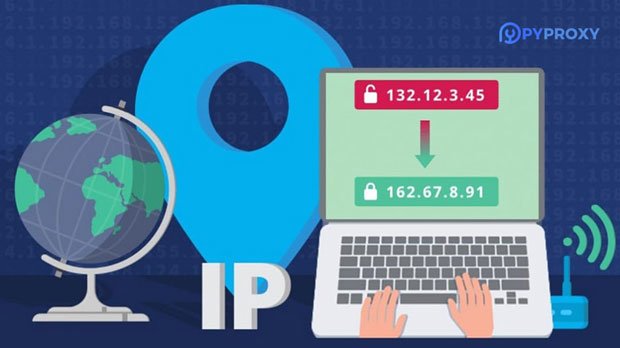
If you are looking to set up a proxy in Google Chrome, you've come to the right place. Google Chrome, like many other web browsers, allows you to configure a proxy server to help you access the internet more securely and privately. In this blog post, we will walk you through the steps to find and set up a proxy in Google Chrome.First, let's start by understanding what a proxy server is and why you might want to use one. A proxy server acts as an intermediary between your computer and the internet. It can help you bypass geo-restrictions, access blocked websites, and enhance your online privacy by hiding your IP address. Additionally, using a proxy server can improve your internet speed by caching frequently accessed web pages.Now, let's dive into the steps to find and set up a proxy in Google Chrome:1. Open Google Chrome and click on the three-dot menu icon in the top-right corner of the browser window.2. Select "Settings" from the drop-down menu.3. Scroll down and click on "Advanced" to expand the advanced settings.4. In the "System" section, click on "Open your computer's proxy settings." This will open the system settings for your network connections.5. In the system settings window, click on "LAN settings" to configure your local area network (LAN) proxy settings.6. Check the box that says "Use a proxy server for your LAN." This will enable the proxy settings for your LAN connection.7. Enter the IP address and port number of the proxy server you want to use. You can obtain this information from your network administrator or your chosen proxy service provider.8. If the proxy server requires authentication, check the box that says "Use a proxy server for your LAN" and enter your username and password in the respective fields.9. Click "OK" to save your changes and close the system settings window.Congratulations! You have successfully set up a proxy in Google Chrome. Now, all your web traffic will be routed through the configured proxy server, providing you with the benefits of enhanced privacy, security, and access to geo-restricted content.It's important to note that while using a proxy server can offer many advantages, it also has some potential drawbacks. For example, some websites may block access from known proxy servers, and using a low-quality or insecure proxy server could expose your data to potential risks. Therefore, it's essential to choose a reputable and trustworthy proxy service provider.In conclusion, setting up a proxy in Google Chrome can be a useful way to enhance your online experience. Whether you want to access geo-restricted content, improve your privacy and security, or simply speed up your internet connection, configuring a proxy server can help you achieve these goals. By following the steps outlined in this blog post, you can easily find and set up a proxy in Google Chrome to suit your specific needs.
Dealing with a Ubuntu proxy server refusing connections can be a frustrating experience, but there are several steps you can take to troubleshoot and resolve the issue. In this blog post, we'll explore some common causes of this problem and provide potential solutions to help you get your proxy server up and running smoothly.1. Check Proxy Server ConfigurationThe first step in resolving connection refusal issues is to verify that the proxy server is configured correctly. This includes ensuring that the proxy settings in your Ubuntu system are accurate and match the requirements of your network environment. You can do this by checking the proxy configuration file, typically located at /etc/environment or /etc/apt/apt.conf.2. Verify Network ConnectivityIt's important to confirm that your Ubuntu server has proper network connectivity to the proxy server. You can do this by pinging the proxy server's IP address and checking for any packet loss or high latency. Additionally, ensure that there are no firewall rules or network restrictions preventing your server from reaching the proxy.3. Check Proxy Server LogsExamining the logs of your proxy server can provide valuable insights into why connections are being refused. Look for any error messages or warnings that may indicate issues with authentication, access control, or other configuration problems. By identifying and addressing these issues, you may be able to resolve the connection refusal problem.4. Test Proxy Server AccessTo further diagnose the issue, try accessing the proxy server from a different machine or network. If you're able to connect successfully from another device, it may indicate that the problem lies with the configuration or network setup of your Ubuntu server. On the other hand, if you encounter the same connection refusal from multiple sources, it's likely that there's an issue with the proxy server itself.5. Restart Proxy Server ServiceSometimes, a simple restart of the proxy server service can resolve connection refusal issues. Use the appropriate command to restart the proxy server service on your Ubuntu system, such as systemctl restart squid for Squid proxy server. After the service has been restarted, attempt to connect to the proxy server again and see if the issue has been resolved.6. Update Proxy Server SoftwareIf you're running an outdated version of the proxy server software, it's possible that known bugs or issues are causing connection refusal. Check for any available updates or patches for your proxy server software and apply them as necessary. Updating to the latest version of the software may fix the problem and improve overall stability and performance.7. Consult with Network AdministratorsIf you're unable to resolve the connection refusal issue on your own, consider reaching out to your network administrators or IT support team for assistance. They may have insights into network configurations, security policies, or other factors that could be contributing to the problem. Collaborating with knowledgeable professionals can help you identify and address underlying issues with your proxy server setup.8. Consider Alternative Proxy SolutionsIn some cases, persistent connection refusal issues may prompt you to explore alternative proxy solutions for your Ubuntu server. There are various proxy server software options available, each with its own features and capabilities. Research alternative proxy solutions and consider implementing a different software package that better suits your requirements and resolves the connection refusal issue.Dealing with a Ubuntu proxy server refusing connections requires a systematic approach to troubleshooting and resolving underlying issues. By checking configuration settings, verifying network connectivity, examining logs, and considering alternative solutions, you can work towards resolving the problem and ensuring smooth operation of your proxy server. If you encounter persistent difficulties, don't hesitate to seek assistance from experienced professionals who can provide valuable guidance and support.
When it comes to browsing the internet anonymously or accessing geo-restricted content, many people turn to free proxy IPs as a solution. These proxy IPs allow users to hide their real IP address and appear as though they are browsing from a different location. However, the question of safety and security often arises when it comes to using free proxy IPs, especially those from countries like Colombia.Colombia is known for its vibrant culture, stunning landscapes, and friendly people. However, it is also known for its complex internet landscape, which can raise concerns about the safety of using free proxy IPs from the country. In this article, we will explore the safety of using free proxy IPs from Colombia and provide insights into the potential risks and benefits.Understanding Free Proxy IPsBefore delving into the safety of free proxy IPs from Colombia, it's important to understand what they are and how they work. A proxy IP acts as an intermediary between a user's device and the internet. When a user connects to the internet through a proxy IP, their requests are routed through the proxy server, which then forwards the requests to the intended web server. This process allows the user to mask their real IP address and appear as though they are browsing from the location of the proxy server.Free proxy IPs are widely available on the internet and are often used by individuals who want to bypass geo-restrictions, access region-locked content, or maintain anonymity while browsing. While paid proxy services offer better security and reliability, free proxy IPs can be appealing due to their cost-free nature.The Safety of Free Proxy IPs from ColombiaWhen it comes to using free proxy IPs from Colombia, there are several factors to consider in terms of safety and security. It's important to note that not all free proxy IPs are created equal, and some may pose risks to users' online security and privacy.One of the primary concerns with free proxy IPs is the potential for malicious activity. Since anyone can set up a proxy server and offer it as a free service, there is a risk of encountering proxies that are operated with malicious intent. These proxies may log users' activity, inject ads or malware into web pages, or even attempt to steal sensitive information.Additionally, free proxy IPs may not offer the same level of encryption and security features as paid services. This can leave users vulnerable to various online threats, including man-in-the-middle attacks, data interception, and identity theft. Without proper encryption and security measures in place, using free proxy IPs from Colombia can expose users to potential risks.Furthermore, the reliability and performance of free proxy IPs can also be questionable. Since these proxies are often operated by individuals or small organizations, there is no guarantee of consistent uptime, speed, or availability. Users may experience slow connection speeds, frequent disconnections, or limited access to certain websites and services.Benefits of Using Free Proxy IPs from ColombiaDespite the potential risks associated with free proxy IPs from Colombia, there are certain benefits that may make them appealing to some users. For individuals who simply want to bypass geo-restrictions or access region-locked content, free proxy IPs can provide a quick and easy solution without the need for a paid service.Additionally, some free proxy IPs may offer basic anonymity and privacy benefits for users who are not engaging in sensitive activities online. While they may not provide the same level of security as paid services, they can still help users mask their real IP address and browse the internet with a certain degree of anonymity.It's also worth noting that not all free proxy IPs are inherently unsafe. There are reputable organizations and individuals who offer free proxy services with transparent privacy policies and security measures in place. By carefully vetting free proxy providers and understanding their practices, users may be able to find safe and reliable options for browsing the internet anonymously.Best Practices for Using Free Proxy IPsFor individuals who choose to use free proxy IPs from Colombia or any other country, there are several best practices to keep in mind in order to mitigate potential risks:1. Research and vet the reputation of the free proxy provider before using their service.2. Avoid entering sensitive information or logging into accounts while using a free proxy IP.3. Use additional security measures such as a virtual private network (VPN) to enhance online security and privacy.4. Regularly monitor for any signs of suspicious activity or unauthorized access when using a free proxy IP.Ultimately, while free proxy IPs from Colombia can offer a convenient way to browse the internet anonymously or access region-locked content, users should approach them with caution and be mindful of potential security risks. By understanding the limitations and risks associated with free proxy IPs, individuals can make informed decisions about their online privacy and security.
Proxy servers play a crucial role in maintaining network security, managing bandwidth, and providing access to restricted content. However, when a proxy server encounters issues, it can disrupt network operations and affect user experience. This article will guide you through the steps to troubleshoot and repair a proxy server.1. Identify the ProblemThe first step in repairing a proxy server is to identify the specific problem. Common issues include:· Slow response times· Failed connections· Error messages· Inability to access certain websitesGathering information from users and checking server logs can help pinpoint the exact problem.2. Check ConnectivityEnsure that the proxy server is physically connected to the network and that all cables and connections are secure. Additionally, verify that the server is powered on and that all network interfaces are functioning properly.3. Review Configuration SettingsInspect the proxy server's configuration settings to ensure they are correct. This includes checking the IP address, port number, authentication settings, and any other relevant configurations. Compare the current settings with the recommended or default settings provided by the proxy server's manufacturer or service provider.4. Check System ResourcesInsufficient system resources, such as CPU, memory, or disk space, can cause performance issues on a proxy server. Use system monitoring tools to check the server's resource utilization and identify any bottlenecks. If necessary, consider upgrading the server's hardware or optimizing its resource allocation.5. Examine Security SettingsA proxy server's security settings are essential for protecting network traffic and preventing unauthorized access. Verify that all security measures, such as firewalls, antivirus software, and encryption, are properly configured and up to date.6. Test Connectivity and FunctionalityOnce you have addressed any configuration or resource issues, test the proxy server's connectivity and functionality. Use a variety of devices and applications to connect to the internet through the proxy server and check for any errors or slowdowns. Additionally, test the proxy server's ability to access restricted content and handle large amounts of traffic.7. Update and PatchEnsure that your proxy server's software is updated to the latest version. Software updates often include bug fixes and security enhancements that can improve the server's performance and stability. Additionally, apply any necessary patches or security updates to protect your server from known vulnerabilities.8. Monitor and MaintainAfter repairing your proxy server, it's essential to monitor its performance and maintain it regularly. Use system monitoring tools to keep track of resource utilization, network traffic, and any potential issues. Regularly check for new updates and apply them as needed. Additionally, consider implementing a backup and recovery plan to ensure that your proxy server can be quickly restored if a failure occurs.By following these steps, you can effectively troubleshoot and repair a proxy server, ensuring that it continues to provide reliable and secure network access for your users.
In the modern digital landscape, maintaining privacy and anonymity online is crucial. One effective way to achieve this is by using an IP proxy server. Setting up your own proxy server on a cloud platform not only enhances your online security but also provides you with greater control over your internet traffic. This article will guide you through the process of setting up an IP proxy server on a cloud server, covering everything from choosing a cloud provider to configuring the server.Understanding Proxy ServersA proxy server acts as an intermediary between your device and the internet. When you connect to a website through a proxy, your request is sent to the proxy server first, which then forwards it to the target website. The response from the website is sent back to the proxy server and then to your device. This process masks your real IP address, allowing for anonymous browsing.Types of Proxy Servers1. HTTP Proxies: These are designed for web traffic and can handle HTTP requests. They are simple to set up and are ideal for basic web browsing.2. SOCKS Proxies: More versatile than HTTP proxies, SOCKS proxies can handle various types of traffic, including email and file transfers.3. Transparent Proxies: These proxies do not modify requests or responses and are often used for caching and filtering content.4. Anonymous Proxies: These hide your IP address but may still identify themselves as proxies to the websites you visit.5. High Anonymity Proxies: These provide the highest level of privacy by not identifying themselves as proxies at all.Step 1: Choosing a Cloud ProviderThe first step in setting up your proxy server is choosing a cloud provider. There are many options available, each with its own advantages. Some popular cloud providers include:- Amazon Web Services (AWS): Offers a wide range of services and scalability.- Google Cloud Platform (GCP): Known for its powerful infrastructure and machine learning tools.- Microsoft Azure: Provides a robust set of tools for developers and businesses.- DigitalOcean: User-friendly and ideal for small to medium projects.- Vultr: Affordable and offers various server locations.When selecting a cloud provider, consider factors such as pricing, server locations, and ease of use.Step 2: Setting Up the Cloud ServerOnce you have selected a cloud provider, the next step is to set up your cloud server.1. Create an AccountSign up for an account with your chosen cloud provider. You may need to provide payment information, even for free-tier services.2. Launch a Virtual Machine (VM)After creating your account, you’ll need to launch a virtual machine. Here’s how to do it on a popular cloud provider like DigitalOcean:- Select an Image: Choose an operating system for your VM. Ubuntu is a popular choice due to its ease of use and extensive community support.- Choose a Plan: Select a plan based on your expected usage. For a basic proxy server, a small instance is usually sufficient.- Configure Settings: Set the data center region close to your location for better performance, and configure any additional settings as needed.- Create the VM: Once you’ve configured everything, click the button to create your VM.3. Access Your ServerAfter your VM is created, you will receive an IP address. Use SSH (Secure Shell) to access your server. Open a terminal and run the following command:```bashssh root@your_server_ip```Replace `your_server_ip` with the actual IP address of your server.Step 3: Installing Proxy SoftwareNow that you have access to your cloud server, the next step is to install proxy software. Two popular choices for setting up a proxy server are Squid and Dante.Installing Squid Proxy1. Update Your Server: Before installing any software, ensure your server is up to date.For Ubuntu:```bashsudo apt updatesudo apt upgrade```2. Install Squid:```bashsudo apt install squid```3. Configure Squid: The configuration file is located at `/etc/squid/squid.conf`. Open it with a text editor:```bashsudo nano /etc/squid/squid.conf```Key configurations to consider:- HTTP Port: Change the port if needed (default is 3128).```plaintexthttp_port 3128```- Access Control: Specify which IP addresses can use the proxy. For example, to allow access from your home IP:```plaintextacl mynetwork src your_home_ip/32http_access allow mynetworkhttp_access deny all```Replace `your_home_ip` with your actual IP address.4. Start Squid: After configuring, start the Squid service:```bashsudo systemctl start squidsudo systemctl enable squid```Installing Dante SOCKS ProxyIf you prefer a SOCKS proxy, you can use Dante:1. Install Dante:For Ubuntu:```bashsudo apt install dante-server```2. Configure Dante: The configuration file is located at `/etc/danted.conf`. Open it with a text editor:```bashsudo nano /etc/danted.conf```Example configuration:```plaintextlogoutput: /var/log/dante.loginternal: your_server_ip port = 1080external: your_server_ipmethod: username noneuser.notprivileged: nobodyclient pass {from: 0.0.0.0/0 to: 0.0.0.0/0log: connect disconnect}pass {from: 0.0.0.0/0 to: 0.0.0.0/0log: connect disconnect}```3. Start Dante: After configuring, start the Dante service:```bashsudo systemctl start dantedsudo systemctl enable danted```Step 4: Testing Your Proxy ServerOnce your proxy server is set up, it’s crucial to test it to ensure it’s functioning correctly.1. Configure Your BrowserSet your browser to use the proxy server. For example, in Chrome, go to:- Settings > Advanced > System > Open your computer’s proxy settings.Enter your server’s IP address and the port you configured (3128 for Squid or 1080 for Dante).2. Check Your IP AddressVisit a website to confirm that your IP address reflects the proxy server’s IP, not your original IP.3. Test FunctionalityTry accessing various websites to ensure the proxy is functioning correctly. Check for any issues with speed or connectivity.Step 5: Securing Your Proxy ServerTo ensure your proxy server remains secure, consider the following best practices:1. Use Strong Passwords: If your proxy requires authentication, use strong, unique passwords.2. Regular Updates: Keep your server software and proxy software updated to protect against vulnerabilities.3. Monitor Logs: Regularly check your proxy logs for any unusual activity.4. Firewall Configuration: Set up a firewall to restrict access to your proxy server. Use tools like UFW (Uncomplicated Firewall) on Ubuntu:```bashsudo ufw allow 3128/tcp For Squidsudo ufw allow 1080/tcp For Dantesudo ufw enable```5. Limit Access: Use access control lists (ACLs) to restrict which IP addresses can use your proxy.Setting up an IP proxy server on a cloud server is a valuable skill that enhances your online privacy and provides greater control over your internet traffic. By following the steps outlined in this guide, you can create a reliable proxy server that meets your needs. Whether you choose to use Squid or Dante, the process is straightforward and manageable, even for those with limited technical experience. With the right configuration and security measures, you can enjoy anonymous browsing and improved online safety.
In the enterprise network environment, the proxy server plays an important role. It not only improves network security, but also optimizes bandwidth usage and improves access speed. However, many employees may encounter situations in their daily work where they need to know the IP address of the company's proxy server. This article will discuss in detail how to find the IP address of the company's proxy server, provide practical methods and tools, and introduce the advantages of the PYPROXY brand.1. Basic concepts of proxy serversA proxy server is an intermediary server through which users access the Internet. When a user's request passes through a proxy server, the proxy server forwards the request to the target website and passes the returned data to the user. In this way, the user's real IP address is hidden, thereby improving the security of Internet access.1.1 Proxy server functions- Privacy protection: Proxy servers can hide the user's real IP address and protect user privacy.- Access control: Enterprises can use proxy servers to restrict employees from accessing certain websites and improve network security.- Cache function: Proxy servers can cache commonly used web pages to increase access speed.2. How to find the IP address of the company's proxy server2.1 Use command line toolsIn Windows, macOS, and Linux systems, you can use command line tools to find the IP address of the proxy server.2.1.1 Windows system1. Open the command prompt:- Press `Win + R`, enter `cmd`, and press Enter.2. Use the `netsh` command:- Enter the following command:```bashnetsh winhttp show proxy```- This command will display the currently configured proxy server address and port.2.1.2 macOS system1. Open the terminal:- Find "Terminal" in the application.2. Use the `networksetup` command:- Type the following command:```bashnetworksetup -getwebproxy Wi-Fi```- If you are using Ethernet, replace `Wi-Fi` with `Ethernet`.2.1.3 Linux System1. Open the terminal:- In the Linux system, open the terminal.2. Use environment variables:- Type the following command:```bashecho $http_proxy```- This command will display the currently set HTTP proxy address.2.2 View browser settingsMany browsers allow users to view the current proxy settings. Here are the steps for some common browsers:2.2.1 Google Chrome1. Open Settings:- Click the three-dot menu in the upper right corner and select "Settings".2. Access System Settings:- On the Settings page, scroll down and click "Advanced", then click "Open my computer's proxy settings" in the "System" section.3. View proxy information:- This will open the corresponding proxy settings window, where you can view the IP address and port of the proxy server.2.2.2 Mozilla Firefox1. Open Options:- Click the three horizontal lines in the upper right corner and select "Options".2. Access network settings:- Under the "General" tab, scroll down to "Network Settings" and click the "Settings" button.3. View proxy information:- In the pop-up window, you can view the current proxy settings, including IP address and port.2.3 Contact IT DepartmentIf the above method cannot find the IP address of the proxy server, the most direct way is to contact the company's IT support department. The IT department usually provides relevant network configuration and proxy information to ensure that you can successfully access the required network resources.3. Use network tools to find the proxy IPIn addition to manual search, you can also use some network tools to help you find the IP address of the proxy server.3.1 Using network monitoring toolsThere are many network monitoring tools that can help you analyze network traffic and identify the IP address of the proxy server. Here are some commonly used tools:- Wireshark: This is a powerful network protocol analysis tool that can capture and analyze network traffic. By analyzing HTTP requests, you can identify the IP address of the proxy server.- Fiddler: This is a tool for debugging HTTP requests that can display all requests and responses sent through the proxy server.3.2 Using online servicesSome online services can help you detect proxy settings. You only need to visit these websites and they will automatically identify your proxy IP address. For example, visiting "whatismyipaddress.com" can display your current IP address and related information.4. Advantages of using PYPROXYIn the process of finding and using a proxy server, it is crucial to choose the right proxy service provider. As a professional proxy service platform, PYPROXY provides the following advantages:- Rich proxy IP resources: PYPROXY has a large number of proxy IPs to meet the needs of different users.- High anonymity: The proxy IP provided by PYPROXY has high anonymity and effectively protects the privacy of users.- Excellent customer service: PYPROXY provides professional technical support to help users solve problems during the setup process.5. SummaryKnowing the IP address of the company's proxy server is essential to improving work efficiency and protecting network security. You can easily find the required proxy information through command line tools, browser settings, contacting the IT department, or using network tools. At the same time, choosing a professional service provider such as PYPROXY can ensure your security and stability when using the proxy. I hope this article can provide you with practical help and make your work smoother.
Setting a password for a good proxy server is an essential step to ensure the security and integrity of your network. Whether you are setting up a proxy server for personal use or for a business environment, it is crucial to implement strong password protection to prevent unauthorized access and potential security breaches.Here are the steps to set up a password for a good proxy server:1. Choose the Right Proxy Server Software:Before setting up a password, it is important to choose the right proxy server software that offers robust security features. Look for proxy server software that supports password authentication and encryption to ensure a secure connection.2. Install and Configure the Proxy Server Software:Once you have selected the appropriate proxy server software, follow the installation and configuration instructions provided by the software provider. During the installation process, you will have the opportunity to set up administrative settings, including the option to create a password for accessing the proxy server.3. Create a Strong Password:When setting up a password for your proxy server, it is crucial to create a strong and complex password that is difficult for unauthorized users to guess or crack. A strong password typically includes a combination of letters (both uppercase and lowercase), numbers, and special characters. Avoid using easily guessable information such as names, dates, or common words.4. Enable Password Authentication:Once the proxy server software is installed and configured, enable password authentication within the administrative settings. This will prompt users to enter a username and password when attempting to access the proxy server, thereby adding an extra layer of security to the connection.5. Regularly Update the Password:It is important to regularly update the password for your proxy server to mitigate the risk of unauthorized access. Set a schedule for changing the password at regular intervals, such as every 90 days, and ensure that all authorized users are aware of the updated password.6. Implement Two-Factor Authentication (Optional):For an added layer of security, consider implementing two-factor authentication for accessing the proxy server. Two-factor authentication requires users to provide two forms of identification before gaining access, such as a password and a unique code sent to their mobile device.7. Educate Authorized Users:Once the password is set up, it is crucial to educate all authorized users on the importance of maintaining the security of the proxy server password. Provide guidelines on creating strong passwords, avoiding password sharing, and recognizing potential security threats.8. Monitor and Audit Access:Regularly monitor and audit access to the proxy server to identify any unauthorized attempts or suspicious activity. By keeping track of who is accessing the proxy server and when, you can quickly identify and address any security concerns.In conclusion, setting up a strong password for your proxy server is an essential step in ensuring the security and integrity of your network. By following these steps and implementing robust password protection measures, you can effectively safeguard your proxy server from potential security threats and unauthorized access.
DNS, or Domain Name System, is a crucial component of the internet that translates human-readable domain names into IP addresses that computers can understand. In simpler terms, it's like the phone book of the internet, matching up website names with their unique numerical addresses.Configuring a DNS server involves setting up and managing the various records that make up the DNS infrastructure. These records include A records, which map domain names to IP addresses, MX records for email routing, CNAME records for aliasing one name to another, and more.To configure a DNS server, you'll typically need to follow these general steps:1. Choose a DNS Server Software:There are various DNS server software options available, such as BIND (Berkeley Internet Name Domain), Microsoft DNS Server, and others. Choose the one that best fits your needs and operating system.2. Install the DNS Server Software:Once you've selected your DNS server software, follow the installation instructions provided by the software's documentation. This will typically involve downloading the software and running an installer.3. Set Up Zone Files:A zone file is a text file that contains the mappings between domain names and IP addresses. You'll need to create and configure these files for your DNS server to function properly.4. Configure Records:Within your zone files, you'll need to configure various types of records, such as A records for IPv4 addresses, AAAA records for IPv6 addresses, MX records for mail servers, CNAME records for aliases, and more.5. Test and Verify Configuration:Once your DNS server is configured, it's essential to test and verify that it's working correctly. You can use tools like nslookup or dig to query your DNS server and ensure that it's resolving domain names to the correct IP addresses.6. Set Up Forwarders and Resolvers:If your DNS server will be resolving queries for external domains, you'll need to configure forwarders or resolvers to handle those requests. This involves specifying other DNS servers that your server can use to resolve queries it can't answer itself.7. Implement Security Measures:DNS servers are a common target for cyber attacks, so it's crucial to implement security measures such as access controls, firewalls, and regular software updates to protect your server from potential threats.8. Monitor and Maintain:Once your DNS server is up and running, it's important to monitor its performance and maintain its configuration over time. This includes keeping an eye on resource usage, resolving any issues that arise, and updating records as needed.Configuring a DNS server involves setting up the necessary software, creating zone files, configuring records, testing the configuration, implementing security measures, and ongoing maintenance. While it may seem complex at first, understanding the fundamentals of DNS and following best practices can help ensure the smooth operation of your DNS infrastructure.
In today's digital age, online security and privacy have become increasingly important. With the rise of cyber threats and privacy concerns, it's essential to take proactive measures to protect your online activities. One effective tool for enhancing your online security and privacy is a High quality proxy network.So, what exactly is a High quality proxy network, and how can you use it to safeguard your online presence? In this post, we'll explore the basics of High quality proxy networks and provide a step-by-step guide on how to use them effectively.What is a High quality Proxy Network?A High quality proxy network is a collection of proxy servers that are strategically distributed across various locations. These servers act as intermediaries between your device and the internet, allowing you to route your online traffic through them. By doing so, High quality proxy networks can help you mask your IP address, encrypt your data, and access geo-restricted content.How to Use a High quality Proxy NetworkNow that we understand the concept of High quality proxy networks, let's delve into the practical steps of using them to enhance your online security and privacy.Step 1: Choose a Reliable High quality Proxy Network ProviderThe first step in using a High quality proxy network is to select a reputable provider. Look for a provider that offers a wide range of proxy servers in diverse locations, robust encryption protocols, and reliable customer support. Additionally, consider factors such as pricing, ease of use, and compatibility with your devices.Step 2: Set Up the High quality Proxy NetworkOnce you've chosen a provider, it's time to set up the High quality proxy network on your device. Most providers offer user-friendly apps and browser extensions that make the setup process straightforward. Simply download the app or extension, log in to your account, and follow the on-screen instructions to configure the proxy settings.Step 3: Choose the Right Proxy ServerAfter setting up the High quality proxy network, you'll have access to a list of proxy servers located in different regions. Depending on your specific needs, you can choose a server in a particular country to bypass geo-restrictions or select a server with high-speed connectivity for seamless browsing.Step 4: Enable Encryption and Privacy FeaturesTo maximize your online security and privacy, make sure to enable encryption and other privacy features offered by the High quality proxy network. This may include features such as HTTPS encryption, IP address masking, and malware protection. By activating these features, you can safeguard your data from prying eyes and potential cyber threats.Step 5: Test the High quality Proxy NetworkBefore fully relying on the High quality proxy network for your online activities, it's advisable to conduct thorough testing. Verify that the network is effectively masking your IP address, encrypting your data, and providing seamless access to geo-restricted content. Additionally, ensure that the network doesn't significantly impact your internet speed and overall browsing experience.Step 6: Stay Informed About Updates and Security Best PracticesAs with any digital tool, High quality proxy networks require regular maintenance and updates to ensure optimal performance. Stay informed about any updates or security best practices recommended by your provider. This may include installing software updates, adjusting settings for enhanced security, or being aware of emerging threats in the cybersecurity landscape.Benefits of Using a High quality Proxy NetworkBy incorporating a High quality proxy network into your online routine, you can enjoy several benefits that contribute to a safer and more private online experience:1. Enhanced Privacy: High quality proxy networks help conceal your real IP address and online activities from potential snoopers, including advertisers, hackers, and government surveillance agencies.2. Access to Geo-Restricted Content: With a High quality proxy network, you can bypass geo-blocks and access content that may be restricted based on your location, such as streaming services, news websites, and social media platforms.3. Improved Security: By encrypting your internet traffic and masking your IP address, High quality proxy networks add an extra layer of security that can help protect you from cyber threats such as identity theft, phishing attacks, and malware infections.4. Anonymity: High quality proxy networks allow you to browse the web anonymously, reducing the likelihood of being tracked or targeted by malicious entities.High quality proxy networks are valuable tools for enhancing online security and privacy. By following the steps outlined in this guide and leveraging the benefits of a High quality proxy network, you can take proactive measures to safeguard your online presence in an increasingly interconnected digital landscape.
Changing your mobile phone's IP address can be necessary for various reasons, such as accessing geo-restricted content, bypassing network restrictions, or enhancing online privacy. While most mobile devices are assigned a dynamic IP address by the network they connect to, there are a few methods you can use to change it. Here's a guide on how to change your mobile phone's IP address.1. Understand IP AddressesBefore you proceed, it's essential to understand the basics of IP addresses. An IP address is a unique numerical identifier that allows devices to communicate with each other over the internet. Mobile devices are usually assigned an IP address by the network they connect to, such as a Wi-Fi network or a mobile data network.2. Restart Your PhoneOne of the simplest ways to potentially change your IP address is by restarting your mobile phone. When your phone reconnects to the network after a reboot, it may be assigned a new IP address. Simply turn off your phone, wait for a few seconds, and then turn it back on.3. Connect to a Different NetworkIf restarting your phone doesn't change your IP address, try connecting to a different network. Each network has its own range of IP addresses, so connecting to a new network will likely assign your phone a different IP. You can connect to a different Wi-Fi network or switch to a different mobile data provider if available.4. Use a VPN (Virtual Private Network)A VPN is a service that encrypts your internet connection and routes it through a server in a different location. This effectively changes your IP address to the one assigned to the VPN server. There are numerous VPN services available for mobile devices, and many of them offer free or paid options. Choose a reliable VPN provider and follow their instructions to set up the VPN on your phone.5. Configure Your Mobile Data SettingsIf you're using mobile data and want to change your IP address, you can try configuring your mobile data settings. Some mobile network providers allow you to change the Access Point Name (APN) settings, which can sometimes result in a new IP address. However, it's important to note that changing APN settings can affect your data connection and may not always work. If you choose to do this, ensure you have the correct settings for your network provider and be prepared to restore the original settings if necessary.6. Use a Proxy ServerAnother way to potentially change your IP address is by using a proxy server. A proxy server acts as an intermediary between your device and the internet, routing your requests through a different IP address. However, it's worth noting that using a proxy server may not always work for mobile devices, and it can also introduce additional latency and security risks.7. Consider the LimitationsIt's important to note that changing your IP address doesn't guarantee anonymity or complete privacy online. Many websites and services use additional tracking methods, and your mobile device itself can still be identified based on other factors. Additionally, some networks may assign static IP addresses to devices, making it difficult to change them.In conclusion, changing your mobile phone's IP address can be achieved through various methods, including restarting your phone, connecting to a different network, using a VPN, configuring your mobile data settings, or using a proxy server. However, it's important to understand the limitations and potential risks involved before proceeding.