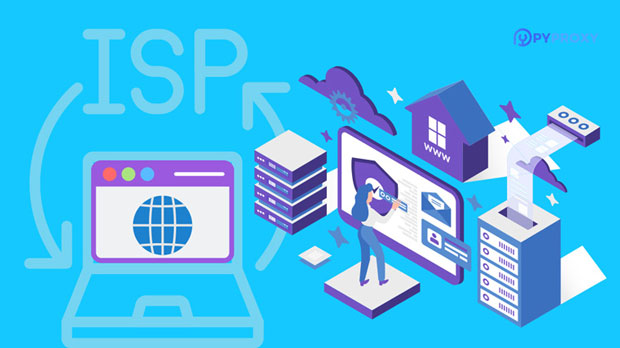
If you’re in the market for residential proxies, you’ve come to the right place. Residential proxies are a valuable tool for many businesses and individuals, offering a range of benefits including enhanced privacy, security, and the ability to access geo-restricted content. In this guide, we’ll cover everything you need to know about residential proxies, including what they are, how they work, and what to consider when buying them.What are Residential Proxies?Residential proxies are IP addresses that are assigned to real residential addresses. Unlike datacenter proxies, which are typically owned by hosting companies, residential proxies are provided by Internet Service Providers (ISPs) to homeowners. This makes them appear more legitimate and less likely to be detected and blocked by websites and online services.How Do Residential Proxies Work?When you use a residential proxy, your internet traffic is routed through the proxy server and assigned an IP address associated with a real residential location. This makes it appear as though your requests are coming from a genuine residential user, rather than a datacenter or commercial entity. This can be useful for a variety of purposes, including web scraping, ad verification, and accessing geo-blocked content.What to Consider When Buying Residential ProxiesWhen purchasing residential proxies, there are several factors to consider to ensure you’re getting the best service for your needs:1. Reliability: Look for a provider with a proven track record of reliability and uptime. You don’t want your proxies to be constantly offline or inaccessible.2. Location: Consider where the proxy IP addresses are located. If you need to access content from a specific region, make sure the provider offers proxies in that area.3. Speed: Fast proxy speeds are essential for many use cases, so be sure to choose a provider with high-performance infrastructure.4. Security: Ensure that the provider offers secure and private proxy connections to protect your data and identity.5. Pricing: Compare pricing plans from different providers to find the best value for your budget.Where to Buy Residential ProxiesThere are many providers offering residential proxies, so it’s important to do your research and choose a reputable and reliable provider. all of which offer a range of residential proxy services tailored to different needs and budgets.Residential proxies are a valuable tool for businesses and individuals looking to enhance their online privacy, security, and access to geo-restricted content. By understanding what residential proxies are, how they work, and what to consider when purchasing them, you can make an informed decision and choose the best provider for your specific needs.Whether you’re looking to improve your web scraping capabilities, verify online ads, or access geo-blocked content, residential proxies offer a versatile solution with numerous benefits. With the right provider and a clear understanding of your requirements, buying residential proxies can be a straightforward process that opens up a world of possibilities for your online activities.
In the world of networking and internet connectivity, IP addresses play a crucial role in identifying and communicating with devices. An IP address is a unique numerical label assigned to each device connected to a computer network that uses the Internet Protocol for communication. It serves as the device's identification and location address on the network. In some cases, changing or switching IP addresses may be necessary for various reasons, such as privacy, security, or accessing region-restricted content. In this article, we will explore the question of whether IP addresses can be changed and discuss five different methods to switch IP addresses.Can IP Addresses Be Changed?The short answer is yes, IP addresses can be changed. There are several methods through which an individual or organization can change or switch their IP address. However, the process of changing an IP address can vary depending on the type of network connection and the specific requirements of the user. It's important to note that in some cases, changing an IP address may require technical knowledge and expertise, especially when dealing with complex network configurations and security measures.Five Different Ways to Switch IP Addresses1. Dynamic IP Address Renewal- Dynamic Host Configuration Protocol (DHCP) is a networking protocol that automatically assigns IP addresses to devices on a network. In a typical home or small office setup, the router acts as a DHCP server and assigns dynamic IP addresses to connected devices. By default, these dynamic IP addresses have a lease period, after which they expire and can be renewed. To switch to a new IP address using this method, users can simply release the current IP address lease and request a new one from the DHCP server.2. Router Reboot- Another simple method to switch IP addresses is by rebooting the router. When a router reboots, it may be assigned a new IP address by the Internet Service Provider (ISP). Additionally, connected devices that obtain their IP addresses from the router's DHCP server will also receive new IP addresses after the reboot.3. Proxy Servers- Using proxy servers is a popular method for changing IP addresses, especially when it comes to accessing region-restricted content or enhancing privacy and anonymity. A proxy server acts as an intermediary between a user's device and the internet. By routing internet traffic through a proxy server, users can effectively change their visible IP address to the one associated with the proxy server.4. Virtual Private Network (VPN)- A VPN is a secure and encrypted network connection that allows users to access the internet through a remote server. VPNs are commonly used to enhance online privacy and security, as well as bypass geo-restrictions. By connecting to a VPN server, users can effectively switch their IP address to the one assigned by the VPN server, thereby masking their true IP address.5. Manually Reconfiguring Network Settings- For more advanced users, manually reconfiguring network settings is another way to switch IP addresses. This method involves modifying the network configuration settings of the device to assign a new IP address manually. It requires knowledge of networking concepts such as subnet masks, default gateways, and DNS servers.Changing or switching IP addresses is indeed possible through various methods such as dynamic IP address renewal, router reboots, proxy servers, VPNs, and manual network configuration. Each method has its own advantages and limitations, and the choice of method may depend on the specific requirements and technical capabilities of the user. It's important to exercise caution and adhere to legal and ethical considerations when changing IP addresses, especially when it involves accessing restricted content or bypassing security measures. As technology continues to evolve, the methods for switching IP addresses may also evolve, offering users more flexibility and control over their online connectivity and privacy.
Configuring your computer's IP address is an essential step in setting up a network. Whether you're connecting to the internet at home or setting up a local area network (LAN) in an office, understanding how to configure your computer's IP address is crucial. In this guide, we'll walk you through the steps to configure your computer's IP address, including both Windows and Mac operating systems.Before we dive into the specific steps for configuring your computer's IP address, let's start with some basic concepts.What is an IP Address?An IP address, short for Internet Protocol address, is a unique numerical label assigned to each device connected to a computer network that uses the Internet Protocol for communication. IP addresses serve two main functions: identifying the host or network interface and providing the location of the host in the network.There are two primary types of IP addresses: IPv4 and IPv6. IPv4 addresses are 32-bit numerical addresses expressed in decimal format, such as 192.168.1.1. On the other hand, IPv6 addresses are 128-bit hexadecimal addresses, such as 2001:0db8:85a3:0000:0000:8a2e:0370:7334.Now that we have a basic understanding of what an IP address is, let's move on to the steps to configure your computer's IP address.Configuring Your Computer's IP Address on WindowsStep 1: Open Network and Sharing CenterTo configure your computer's IP address on Windows, start by opening the Network and Sharing Center. You can access this by clicking on the network icon in the system tray and selecting "Open Network and Sharing Center."Step 2: Change Adapter SettingsIn the Network and Sharing Center, click on "Change adapter settings" in the left-hand menu. This will display a list of network connections on your computer.Step 3: Access PropertiesRight-click on the network connection for which you want to configure the IP address and select "Properties" from the context menu.Step 4: Select Internet Protocol Version 4 (TCP/IPv4)In the Properties window, locate "Internet Protocol Version 4 (TCP/IPv4)" in the list of items and select it. Then click on the "Properties" button.Step 5: Configure IP AddressIn the Internet Protocol Version 4 (TCP/IPv4) Properties window, select the option to "Use the following IP address." Enter the IP address, subnet mask, default gateway, and DNS server addresses as provided by your network administrator or ISP. Click "OK" to save the changes.Configuring Your Computer's IP Address on MacStep 1: Open Network PreferencesTo configure your computer's IP address on a Mac, start by opening System Preferences and clicking on "Network."Step 2: Select Network ConnectionIn the Network preferences window, select the network connection for which you want to configure the IP address. This could be Ethernet, Wi-Fi, or another network interface.Step 3: Configure TCP/IP SettingsClick on the "Advanced" button and navigate to the "TCP/IP" tab. Here, you can choose to configure IPv4 or IPv6 settings based on your network requirements.Step 4: Set IP AddressIn the TCP/IP tab, select "Manually" from the Configure IPv4 drop-down menu. Enter the IP address, subnet mask, router (default gateway), and DNS server addresses as provided by your network administrator or ISP.Step 5: Save ChangesClick "OK" to save the changes and close the Network preferences window.Configuring your computer's IP address is a fundamental aspect of networking. By following these steps for Windows and Mac operating systems, you can ensure that your computer is properly configured to communicate on a network. Whether you're setting up a home network or configuring a business environment, understanding how to configure your computer's IP address is an essential skill for any computer user.
In the realm of proxy servers, two prominent types stand out: residential proxies and dedicated proxies. Each serves a distinct purpose and offers a unique set of advantages, making it crucial for users to understand the key differences between them. This article delves into the nuances of residential and dedicated proxies, exploring their definitions, functionalities, use cases, and more.Residential ProxiesDefinition:Residential proxies are proxies that route internet traffic through actual IP addresses assigned by internet service providers (ISPs) to residential users. These IPs are associated with physical locations, just like those of regular households or apartments. Residential proxies mimic natural browsing patterns, making them appear as if they originate from a genuine end-user device.Functionalities: · Authenticity: They mimic regular user behavior, making them harder to detect as proxies. · Geographic Diversity: Residential proxies often cover a wide range of geographical locations, enabling users to access location-specific content. · Privacy Enhancement: While not as secure as VPNs, residential proxies can still offer some level of privacy by concealing the user's true IP.Use Cases: · Market Research: For businesses conducting market research across different regions, residential proxies provide a more realistic and accurate view of local markets. · Ad Verification: They are used to verify the effectiveness of online ads by simulating real-world browsing conditions. · SEO Tools: Residential proxies help SEO professionals analyze search engine results from various locations, ensuring that their optimization strategies are tailored to local audiences.Dedicated ProxiesDefinition:Dedicated proxies, also known as private proxies, are assigned exclusively to a single user. These proxies do not share their IP address with anyone else, offering a higher level of control and security. Dedicated proxies can be either datacenter-based or residential, but the term is commonly associated with datacenter proxies due to their scalability and affordability.Functionalities: · Exclusivity: Users have sole access to the proxy's IP address, eliminating the risk of bandwidth throttling or IP blacklisting due to other users' activities. · High Speed and Reliability: Dedicated proxies often provide faster speeds and better uptime than shared proxies, ensuring a seamless browsing experience. · Customizable: Users can configure dedicated proxies to suit their specific needs, such as setting up specific ports or protocols.Use Cases: · Web Scraping: Dedicated proxies are ideal for large-scale web scraping projects, as they ensure uninterrupted access to target websites and minimize the risk of getting blocked. · SEO and Link Building: They enable SEO professionals to create multiple backlinks from unique IPs, improving the diversity of their link profiles. · Online Gaming and Social Media Management: Dedicated proxies allow gamers and social media managers to manage multiple accounts simultaneously without risking account suspensions or bans.Key Differences · IP Allocation: Residential proxies use real IP addresses assigned to residential users, while dedicated proxies (especially datacenter-based ones) can have either real or virtual IPs assigned exclusively to a single user. · Anonymity and Detection: Residential proxies mimic natural browsing patterns, making them harder to detect. Dedicated proxies, especially if datacenter-based, may be easier to identify as proxies. · Performance: Dedicated proxies often offer faster speeds and better uptime due to their exclusive nature. However, residential proxies can provide better access to location-specific content. · Cost: Residential proxies tend to be more expensive than dedicated datacenter proxies due to their scarcity and the added benefits of geographic diversity and authenticity.ConclusionChoosing between residential and dedicated proxies ultimately depends on your specific needs and use case. Residential proxies offer authenticity, geographic diversity, and enhanced privacy, making them ideal for market research, ad verification, and SEO tools. On the other hand, dedicated proxies provide exclusivity, high speed, reliability, and customizability, making them perfect for web scraping, SEO and link building, online gaming, and social media management. Understanding these differences will help you make an informed decision when selecting the right proxy solution for your needs.
In an age where online privacy and security are paramount, setting up your own SOCKS5 proxy server can be an effective way to enhance your internet experience. A SOCKS5 proxy allows you to route your internet traffic through a server, masking your IP address and providing a layer of anonymity. This article will guide you through the process of setting up your own SOCKS5 proxy server, covering everything from choosing the right server to configuration and testing.What is a SOCKS5 Proxy?SOCKS5 (Socket Secure version 5) is a protocol that facilitates the transfer of network packets between a client and a server through a proxy server. Unlike HTTP proxies, which only handle web traffic, SOCKS5 can manage any type of traffic, including TCP and UDP. This versatility makes SOCKS5 suitable for various applications, such as web browsing, gaming, and file sharing.Benefits of Setting Up Your Own SOCKS5 Proxy Server1. Enhanced Privacy: By routing your internet traffic through your own server, you can mask your IP address and protect your online identity.2. Bypass Geo-Restrictions: You can access content that may be restricted in your region by routing your connection through a server in another location.3. Improved Security: Setting up your own server allows you to implement security measures that suit your needs, reducing the risk of data leaks.4. Greater Control: You have complete control over the server configuration, allowing you to customize it to meet your specific requirements.Requirements for Setting Up a SOCKS5 Proxy ServerBefore you begin, you will need the following:1. A VPS (Virtual Private Server): You will need a VPS to host your SOCKS5 proxy server. Providers like DigitalOcean, AWS, Linode, or Vultr offer affordable options.2. Basic Knowledge of Command Line: Familiarity with the command line interface (CLI) is essential, as you will need to execute commands to set up the server.3. A Domain Name (Optional): While not necessary, having a domain name can make it easier to connect to your server.Step-by-Step Guide to Setting Up a SOCKS5 Proxy ServerStep 1: Choose a VPS ProviderSelect a VPS provider that fits your budget and requirements. For instance, DigitalOcean offers plans starting at $5 per month, which is sufficient for a basic SOCKS5 proxy server.Step 2: Create and Configure Your VPS1. Sign Up: Create an account with your chosen VPS provider.2. Deploy a Server: Choose an operating system for your server. Ubuntu is a popular choice due to its user-friendly interface and extensive community support. Select a plan that meets your resource needs.3. Access Your Server: After deploying your server, you will receive an IP address. Use an SSH client (like PuTTY for Windows or Terminal for macOS/Linux) to connect to your server:```bashssh root@your_server_ip```Step 3: Install SOCKS5 Proxy SoftwareFor this guide, we will use `Dante`, a popular and reliable SOCKS5 server. Follow these steps to install it:1. Update Your System: Before installing any software, update your package list:```bashsudo apt updatesudo apt upgrade```2. Install Dante: Install the Dante server using the following command:```bashsudo apt install dante-server```Step 4: Configure DanteOnce Dante is installed, you need to configure it to run as a SOCKS5 proxy.1. Edit the Configuration File: Open the configuration file using a text editor (like `nano` or `vim`):```bashsudo nano /etc/danted.conf```2. Basic Configuration: Replace the contents of the file with the following configuration. Adjust the settings as necessary:```plaintextlogoutput: /var/log/danted.loginternal: your_server_ip port = 1080external: your_server_ipmethod: username noneuser.notprivileged: nobodyclient pass {from: 0.0.0.0/0 to: 0.0.0.0/0log: connect disconnect}sock pass {from: 0.0.0.0/0 to: 0.0.0.0/0log: connect disconnect}```- Replace `your_server_ip` with the actual IP address of your VPS.- The `port` directive specifies the port on which your SOCKS5 proxy will listen. The default is usually 1080.3. Save and Exit: If you are using `nano`, press `CTRL + X`, then `Y`, and hit `Enter` to save the changes.Step 5: Start the SOCKS5 Proxy Server1. Start Dante: Use the following command to start the Dante server:```bashsudo systemctl start danted```2. Enable Dante to Start on Boot: To ensure that the SOCKS5 proxy starts automatically when the server reboots, enable the service:```bashsudo systemctl enable danted```Step 6: Configure Firewall RulesIf your VPS has a firewall enabled, you need to allow traffic on the SOCKS5 port (default 1080).1. Allow Port 1080: Use the following command to allow traffic on port 1080:```bashsudo ufw allow 1080```2. Check Firewall Status: Verify that the firewall rules are correctly set:```bashsudo ufw status```Step 7: Testing Your SOCKS5 Proxy ServerAfter setting up your SOCKS5 proxy server, you should test it to ensure it works correctly.1. Use a Proxy Client: Download a SOCKS5-compatible application or use a web browser that supports proxy settings. Popular options include:- Shadowsocks- ProxyCap- Firefox (with manual proxy configuration)2. Configure the Proxy Client: Set the proxy settings in your application:- SOCKS Host: your_server_ip- Port: 1080- Username/Password: If you set up authentication, enter your credentials.3. Test the Connection: Visit a website like whatismyip.com to check if your IP address has changed to that of your SOCKS5 server.Step 8: Securing Your SOCKS5 ProxyTo enhance the security of your SOCKS5 proxy, consider implementing the following measures:1. Set Up Authentication: Modify the `danted.conf` file to require a username and password for connections. You can manage user accounts using the system’s user management commands.2. Limit Access: Restrict access to your SOCKS5 proxy by specifying allowed IP addresses in the configuration file. For example:```plaintextclient pass {from: your_client_ip to: 0.0.0.0/0log: connect disconnect}```3. Regularly Update Your Server: Keep your server and software up to date to protect against vulnerabilities.ConclusionSetting up your own SOCKS5 proxy server can significantly enhance your online privacy and security. By following the steps outlined in this guide, you can create a reliable proxy server that meets your needs. Whether you want to bypass geo-restrictions, maintain anonymity, or improve your online security, a SOCKS5 proxy offers a versatile solution. With proper configuration and security measures in place, you can enjoy a safer and more private internet experience.
In today's digital age, the need for online privacy and security is more important than ever. One way to enhance your online security and privacy is by using a proxy server. A proxy server acts as an intermediary between your device and the internet, allowing you to browse the web anonymously and access restricted content. In this blog post, we will discuss how to change proxy settings on various devices and browsers.Changing Proxy Settings on Windows:1. Open the Control Panel and click on "Internet Options."2. In the Internet Properties window, go to the "Connections" tab and click on the "LAN settings" button.3. Check the box next to "Use a proxy server for your LAN" and enter the IP address and port number of the proxy server.4. Click "OK" to save the changes.Changing Proxy Settings on Mac:1. Go to the Apple menu and select "System Preferences."2. Click on "Network" and select your active network connection.3. Click on the "Advanced" button and go to the "Proxies" tab.4. Check the box next to the type of proxy you want to use (e.g., HTTP, HTTPS, FTP) and enter the proxy server details.5. Click "OK" to save the changes.Changing Proxy Settings on Chrome:1. Open Chrome and click on the three-dot menu in the top-right corner.2. Select "Settings" and scroll down to the bottom of the page.3. Click on "Advanced" to expand the advanced settings.4. Under the "System" section, click on "Open your computer's proxy settings."5. In the Internet Properties window, go to the "Connections" tab and follow the same steps as changing proxy settings on Windows.Changing Proxy Settings on Firefox:1. Open Firefox and click on the three-line menu in the top-right corner.2. Select "Options" and go to the "General" tab.3. Scroll down to the "Network Settings" section and click on "Settings."4. Choose the type of proxy you want to use and enter the proxy server details.5. Click "OK" to save the changes.Benefits of Using a Proxy Server:1. Enhanced Privacy: By using a proxy server, your real IP address is hidden, making it difficult for websites to track your online activities.2. Access Blocked Content: Some websites and services may be restricted based on your geographical location, but using a proxy server can help bypass these restrictions.3. Improved Security: Proxy servers can act as a barrier between your device and potentially harmful content, reducing the risk of malware and phishing attacks.In conclusion, changing proxy settings can provide added security and privacy when browsing the web. Whether you're using a Windows PC, Mac, or specific web browsers like Chrome and Firefox, understanding how to change proxy settings is essential for maximizing your online privacy and security. By following the steps outlined in this blog post, you can take control of your online security and enjoy a safer browsing experience.
Moving or changing an IP address can have various effects, depending on the specific circumstances and the reasons for the change. Whether it's a personal device or a business network, there are several factors to consider when it comes to the impact of changing an IP address.For personal devices, such as computers, smartphones, and tablets, changing the IP address can affect the device's ability to connect to the internet and access local network resources. This is because the IP address serves as a unique identifier for the device on the network. When the IP address changes, the device may need to re-establish its network connections and update its network settings accordingly.In a business or organizational setting, changing an IP address can have more far-reaching implications. It can impact the ability of employees to access internal resources, such as servers, printers, and other networked devices. It can also affect the organization's ability to communicate with external partners, customers, and service providers.In addition to these immediate effects, changing an IP address can also have security implications. For example, if an organization changes its public-facing IP address, it may need to update its firewall and other security settings to ensure that external access is properly controlled and monitored.From a technical perspective, changing an IP address involves updating the device's network configuration settings. This can be a relatively straightforward process for individual devices, but it can be more complex for larger networks with multiple devices and networked resources.In some cases, changing an IP address may also involve coordinating with internet service providers (ISPs) and network administrators to ensure that the change is implemented smoothly and does not cause any disruptions to network operations.It's also important to consider the reasons for changing an IP address. For example, if the change is driven by a need to improve network security or to accommodate growth and expansion, then the potential benefits of the change may outweigh any short-term disruptions or challenges.Ultimately, the impact of changing an IP address will depend on the specific circumstances and the measures taken to manage and mitigate any potential effects. Careful planning, coordination, and communication are key to ensuring a smooth transition and minimizing any negative impact on network operations and user productivity.
In today's digital age, having a stable and secure internet connection is essential for both personal and professional use. One way to ensure a smooth connection is by managing your computer's IP address. Whether you need to troubleshoot network issues or enhance your online security, changing your IP address can be a useful solution. In this article, we will discuss the methods and important considerations for changing your computer's IP address.Methods to Change Your Computer's IP Address:1. Using the Command Prompt:- Open the Command Prompt as an administrator.- Type "ipconfig /release" and press Enter to release your current IP address.- Then type "ipconfig /renew" and press Enter to obtain a new IP address from the DHCP server.2. Changing Network Settings:- Go to Control Panel > Network and Sharing Center.- Click on "Change adapter settings" on the left-hand side.- Right-click on your network connection and select "Properties."- Select "Internet Protocol Version 4 (TCP/IPv4)" and click on "Properties."- Choose "Use the following IP address" and enter the new IP address, subnet mask, default gateway, and DNS server addresses.3. Using Third-Party Software:- There are various third-party software applications available that can help you change your IP address with a few clicks. Look for reputable software that offers this feature and follow the instructions provided.Important Considerations:1. Check for IP Address Conflict:Before changing your IP address, ensure that the new address you intend to use is not already in use by another device on the same network. IP address conflicts can cause connectivity issues and disrupt network operations.2. Understand DHCP and Static IP Addresses:DHCP (Dynamic Host Configuration Protocol) automatically assigns IP addresses to devices on a network. If your network uses DHCP, changing your computer's IP address may only be temporary, as it will be reassigned by the DHCP server. On the other hand, using a static IP address means manually configuring the address on your computer, which will remain constant unless changed.3. Consider Network Configuration:If you are part of a larger network, such as in an office or educational institution, changing your IP address may require coordination with network administrators. Altering network settings without proper authorization can lead to network disruptions and security concerns.4. Security Implications:Changing your IP address can impact your online security and privacy. If you are changing your IP address to avoid restrictions or improve anonymity, be aware that it may not provide complete protection. Consider using additional security measures such as VPNs (Virtual Private Networks) for enhanced privacy.5. Document Your Current Settings:Before making any changes to your IP address, it is advisable to document your current settings. This includes noting down your current IP address, subnet mask, default gateway, and DNS server addresses. In case you encounter any issues after changing the IP address, having this information will facilitate troubleshooting.Changing your computer's IP address can be a valuable troubleshooting or security measure when done correctly. By understanding the methods and important considerations outlined in this article, you can effectively manage your computer's IP address to suit your specific needs. Whether for resolving network issues or enhancing online security, the ability to change your IP address empowers you to take control of your internet connectivity.Remember to exercise caution and seek guidance if you are unsure about making changes to your network settings. With the right knowledge and precautions, you can navigate the process of changing your computer's IP address with confidence and ensure a seamless online experience.
In the world of online anonymity and data scraping, residential proxies have emerged as a powerful tool, enabling users to access the internet through actual IP addresses assigned to residential internet connections. These proxies mimic real-world browsing patterns, making them a valuable asset for market research, ad verification, SEO optimization, and more. However, one common question that arises among users is: "How long can residential proxies last?" This article delves into the longevity of residential proxies, exploring factors that influence their duration, maintenance requirements, and strategies for maximizing their lifespan.Factors Influencing the Longevity of Residential Proxies · IP Pool Size and Rotation:The size of the IP pool available to a residential proxy provider plays a crucial role in determining the longevity of individual proxies. A larger IP pool allows for more frequent rotation of IPs, reducing the risk of overuse and eventual blacklisting. Frequent IP rotation helps maintain the authenticity of the proxies and ensures continued access to target websites. · Usage Patterns:How a residential proxy is used significantly impacts its lifespan. High-volume scraping or automated activities that mimic abnormal user behavior can quickly attract the attention of website administrators, leading to IP blocking. Moderate and varied usage patterns that mimic natural browsing behavior tend to prolong the life of residential proxies. · Target Website Policies:The policies of the websites being accessed through residential proxies also play a part. Some websites are more aggressive in detecting and blocking proxy IPs, while others may be more lenient. Understanding the specific policies of target websites can help users adjust their proxy usage strategies accordingly. · Provider Reputation and Maintenance:The reputation and maintenance practices of the residential proxy provider are crucial factors. Reputable providers regularly refresh their IP pools, monitor for IP blacklisting, and take proactive measures to ensure the continued availability of their proxies. Poorly maintained proxy networks can quickly degrade in quality and effectiveness.Maintenance RequirementsTo maximize the longevity of residential proxies, users must adopt certain maintenance practices: · Regular IP Rotation: Implement a strategy for regularly rotating IPs to avoid overuse and minimize the risk of detection. · Monitoring and Logging: Keep track of proxy performance and usage patterns to identify potential issues early on. · Compliance with Website Policies: Ensure that proxy usage complies with the terms of service of target websites to avoid IP blocking. · Communication with Providers: Maintain open communication with your residential proxy provider to address any issues promptly and receive updates on IP pool refreshes and maintenance.Strategies for Maximizing Lifespan · Diversify Your Proxy Portfolio:Use a mix of residential and other types of proxies (e.g., datacenter proxies) to distribute the load and reduce the risk of any single IP or proxy type being overused. · Limit Concurrent Connections:Avoid overwhelming a single proxy with too many concurrent connections, as this can quickly attract attention and lead to IP blocking. · Implement Intelligent Scraping Strategies:Use intelligent scraping techniques, such as random delays between requests, to mimic natural browsing behavior and reduce the risk of detection. · Stay Updated:Keep abreast of changes in website policies and proxy provider offerings to adjust your strategies accordingly. · ConclusionThe longevity of residential proxies is influenced by a multitude of factors, including IP pool size, usage patterns, target website policies, and provider reputation. By adopting effective maintenance practices and implementing strategies to maximize lifespan, users can ensure that their residential proxies remain a valuable asset for their online activities. Regular communication with providers, diversifying your proxy portfolio, and staying updated on industry developments are key to maximizing the longevity of your residential proxies.
Changing the IP address of your TP-Link router can be essential for various reasons, such as improving security, managing network traffic, or resolving connectivity issues. This article will guide you through the steps to modify your TP-Link router's IP address, ensuring you have a seamless experience.Understanding IP AddressesBefore diving into the modification process, it's crucial to understand what an IP address is. An Internet Protocol (IP) address is a unique identifier assigned to each device connected to a network. It allows devices to communicate with each other over the internet. TP-Link routers typically use a default IP address, such as 192.168.0.1 or 192.168.1.1. Changing this address can help avoid conflicts with other devices and enhance your network's security.Reasons to Change Your Router's IP Address1. Avoiding IP Conflicts: If multiple devices on the same network have the same IP address, it can lead to connectivity issues. Changing the router's IP address can resolve these conflicts.2. Improving Security: Using a non-default IP address can make it harder for unauthorized users to access your router’s settings, enhancing your network security.3. Network Management: Changing the IP address can help you organize your network better, especially if you have multiple routers or devices.Steps to Change the IP Address of Your TP-Link RouterStep 1: Connect to Your RouterTo change the IP address, you need to be connected to your TP-Link router. You can do this via a wired Ethernet connection or wirelessly.Step 2: Access the Router's Admin Panel1. Open a Web Browser: Launch your preferred web browser (Chrome, Firefox, Safari, etc.).2. Enter the Router’s IP Address: In the address bar, type the default IP address of your TP-Link router (usually 192.168.0.1 or 192.168.1.1) and press Enter.3. Log In: You will be prompted to enter a username and password. The default credentials are usually:- Username: admin- Password: adminIf you have changed these credentials previously, use your custom username and password.Step 3: Navigate to the Network Settings1. Locate the Network Tab: Once logged in, look for the “Network” tab in the main menu. The exact wording may vary slightly depending on your router model.2. Select LAN Settings: Click on “LAN” from the dropdown menu under the Network tab.Step 4: Change the IP Address1. Modify the IP Address: In the LAN settings, you will see the current IP address of your router. Change it to your desired IP address. Make sure to choose an address within the same subnet (e.g., if your current IP is 192.168.1.1, you can choose 192.168.1.2 or any other address that doesn’t conflict with existing devices).2. Subnet Mask: Ensure that the subnet mask remains as 255.255.255.0 unless you have specific network requirements.3. Save Changes: After entering the new IP address, click the “Save” button to apply the changes.Step 5: Reboot the RouterAfter saving the changes, you will need to reboot your router for the new IP address to take effect. Most TP-Link routers will prompt you to reboot automatically. If not, you can manually reboot the router by unplugging it for a few seconds and then plugging it back in.Step 6: Reconnect to the RouterOnce the router has rebooted, you will need to reconnect to it using the new IP address. Open your web browser and enter the new IP address to access the router's admin panel again. You may need to log in using your credentials.Troubleshooting Common Issues1. Cannot Access the Router: If you cannot access the router after changing the IP address, ensure you are using the correct new IP address. If necessary, reset the router to factory settings and try again.2. IP Address Conflict: If you encounter an IP address conflict, make sure no other device is using the same IP address. You can check connected devices in the router's admin panel.3. Loss of Internet Connection: If you lose internet connectivity after changing the IP address, check your WAN settings. Ensure your ISP settings are correctly configured.ConclusionChanging the IP address of your TP-Link router is a straightforward process that can greatly enhance your network's security and performance. By following the steps outlined in this article, you can easily modify your router's IP address and manage your network more effectively. Always remember to keep your router's firmware updated and regularly check for any security vulnerabilities to maintain a secure and efficient network environment.