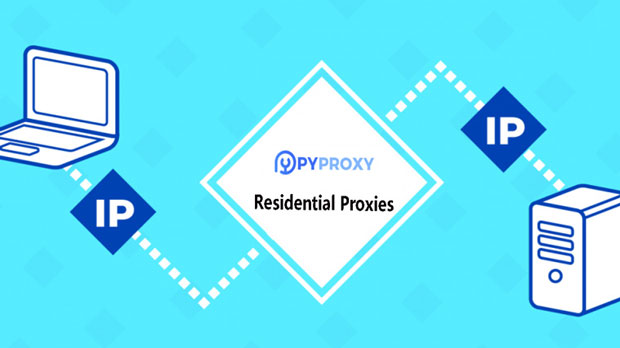
In the digital landscape, where online privacy, security, and access to geo-restricted content are paramount, the demand for IP proxies has surged. An IP proxy pool is a collection of IP addresses that users can utilize to route their internet traffic. Purchasing an IP proxy pool offers numerous advantages that can significantly enhance your online activities, whether for business or personal use. This article explores the key benefits of acquiring an IP proxy pool.1. Enhanced Privacy and AnonymityOne of the primary reasons individuals and businesses invest in an IP proxy pool is to enhance their online privacy. When you use a proxy, your real IP address is masked, making it difficult for websites and online services to track your online activities. This is particularly important for:- Avoiding Surveillance: In an age where data privacy is under constant threat, using a proxy helps protect your identity from prying eyes.- Preventing Data Profiling: Many websites track user behavior to create detailed profiles. By using a proxy pool, you can reduce the amount of data collected about you.2. Bypassing Geo-RestrictionsMany online services and content providers restrict access based on geographic location. An IP proxy pool allows you to bypass these restrictions effectively. Here’s how:- Accessing Global Content: If you want to stream a show available only in a specific country, using a proxy from that region allows you to access the content seamlessly.- Conducting Market Research: Businesses can use proxies to view localized content and pricing, gaining insights into different markets without being physically present.3. Improved Web Scraping CapabilitiesWeb scraping is a common practice for gathering data from various online sources. However, many websites employ anti-scraping measures that can block or limit access based on IP address. An IP proxy pool mitigates these challenges by:- Rotating IP Addresses: By using a pool of IPs, you can rotate through different addresses, reducing the risk of being blocked by target websites.- Increased Data Collection: With a reliable proxy pool, you can scrape larger volumes of data without triggering anti-bot protections.4. Greater SecuritySecurity is a significant concern for anyone engaging in online activities, especially when dealing with sensitive information. An IP proxy pool enhances security in several ways:- Encryption: Many proxy services offer encrypted connections, safeguarding your data from potential interception during transmission.- Protection Against DDoS Attacks: Using a proxy can help shield your server from Distributed Denial of Service (DDoS) attacks by masking your real IP address.5. Cost-Effective SolutionsPurchasing an IP proxy pool can be a cost-effective solution compared to other methods of maintaining online anonymity and accessing restricted content. Here’s why:- Bulk Pricing: Many proxy providers offer discounts for bulk purchases, allowing you to save money while gaining access to a large number of IP addresses.- Reduced Risk of IP Bans: By utilizing a proxy pool, you can minimize the risk of IP bans, which can be costly and time-consuming to resolve.6. Flexibility and ScalabilityAn IP proxy pool provides flexibility and scalability that can adapt to your changing needs:- Multiple Use Cases: Whether you need proxies for web scraping, social media management, or ad verification, a proxy pool can accommodate various applications.- Easily Expandable: As your needs grow, you can easily expand your proxy pool by purchasing additional IPs without significant hassle.7. Better PerformanceUsing an IP proxy pool can enhance your overall online performance in several ways:- Reduced Latency: Many proxy providers offer high-speed connections, resulting in faster load times and improved browsing experiences.- Load Balancing: By distributing requests across multiple IP addresses, you can balance the load and prevent any single IP from becoming overwhelmed.8. Access to Residential and Datacenter ProxiesWhen purchasing an IP proxy pool, you often have the option to choose between residential and datacenter proxies:- Residential Proxies: These are IP addresses assigned by Internet Service Providers (ISPs) to homeowners. They are less likely to be flagged as suspicious, making them ideal for tasks that require high anonymity.- Datacenter Proxies: These are IPs generated from data centers. They are generally faster and more affordable but can be more easily detected by websites.Having access to both types allows you to choose the best option for your specific needs.9. Improved SEO and Ad Campaign ManagementFor businesses involved in digital marketing, an IP proxy pool can be invaluable:- Keyword Research: By using proxies, marketers can conduct keyword research from different locations, gaining insights into local search trends.- Ad Verification: Proxies allow businesses to verify their ads’ placements and performance across different regions, ensuring that their marketing strategies are effective.10. Continuous AvailabilityA reliable proxy pool provider ensures that you have continuous access to IP addresses, which is crucial for uninterrupted online activities:- 24/7 Access: Many providers offer round-the-clock access to their proxy pools, allowing you to conduct business or research at any time.- Customer Support: Quality proxy services often come with dedicated customer support, helping you troubleshoot any issues that may arise.ConclusionPurchasing an IP proxy pool offers a multitude of advantages that can significantly enhance your online experience. From improved privacy and security to the ability to bypass geo-restrictions and conduct efficient web scraping, the benefits are substantial. As the digital landscape continues to evolve, having a reliable proxy pool can be a game-changer for individuals and businesses alike. By investing in an IP proxy pool, you can ensure that you are well-equipped to navigate the complexities of the online world while maintaining your privacy and security.
In today’s digital environment, maintaining online privacy and security is crucial. A SOCKS5 proxy server is an excellent way to achieve this, allowing users to route their internet traffic through a secure server. Setting up a SOCKS5 proxy on an Alibaba Cloud server can provide flexibility and control over your internet connection. This article will guide you through the process of setting up a SOCKS5 proxy server on Alibaba Cloud, including prerequisites, installation steps, configuration, and testing.What is a SOCKS5 Proxy?SOCKS5 (Socket Secure version 5) is a protocol that facilitates network communication through a proxy server. Unlike HTTP proxies, which only handle web traffic, SOCKS5 can manage any type of traffic, including TCP and UDP. This makes it suitable for various applications such as web browsing, online gaming, and file sharing.Key Features of SOCKS51. Protocol Versatility: SOCKS5 supports multiple protocols, allowing it to handle diverse types of internet traffic.2. User Authentication: It offers secure authentication methods, ensuring that only authorized users can access the proxy server.3. UDP Support: SOCKS5 can handle both TCP and UDP traffic, making it ideal for applications requiring real-time communication.4. IPv6 Compatibility: It supports IPv6, ensuring compatibility with modern internet standards.PrerequisitesBefore you begin setting up a SOCKS5 proxy on Alibaba Cloud, ensure you have the following:1. Alibaba Cloud Account: You need an active account on Alibaba Cloud.2. Elastic Compute Service (ECS): Launch an ECS instance with a compatible operating system (Ubuntu, CentOS, etc.).3. Basic Knowledge of SSH: Familiarity with SSH commands is essential for connecting to your server.4. Root Access: Ensure you have root or sudo access to install software.Step 1: Launch an Alibaba Cloud ECS Instance1. Log in to Alibaba Cloud: Go to the Alibaba Cloud console and log in to your account.2. Create a New ECS Instance:- Click on Elastic Compute Service.- Choose the desired region and zone.- Select an operating system (Ubuntu is commonly used for this purpose).- Choose an instance type based on your requirements (CPU, memory, etc.).- Configure network settings, including security group settings to allow SSH (port 22) and the port you will use for SOCKS5 (default is 1080).- Launch the instance and note down the public IP address.Step 2: Connect to Your ECS InstanceUsing an SSH client, connect to your ECS instance:```bashssh root@your_instance_ip```Replace `your_instance_ip` with the public IP address of your ECS instance. If you are using a non-root user, replace `root` with your username.Step 3: Install Required SoftwareFor this guide, we will use Dante, a popular SOCKS5 server. Install the required packages:On Ubuntu:```bashapt updateapt install dante-server```On CentOS:```bashyum updateyum install epel-releaseyum install dante-server```Step 4: Configure the SOCKS5 Proxy ServerAfter installing Dante, you need to configure it by editing the configuration file.1. Open the Configuration File:```bashnano /etc/danted.conf```2. Basic Configuration: Replace the content with the following example configuration:```plaintextlogoutput: /var/log/dante.logDefine the internal and external network interfacesinternal: eth0 port = 1080external: eth0Set up user authenticationmethod: username Use "none" for no authenticationSpecify the allowed clientsclient pass {from: 0.0.0.0/0 to: 0.0.0.0/0log: connect disconnect}Specify the allowed connectionssocks pass {from: 0.0.0.0/0 to: 0.0.0.0/0log: connect disconnect}```Explanation of Configuration- logoutput: Specifies where to log the server activity.- internal: The internal network interface and port for the SOCKS5 service.- external: The external network interface used to connect to the internet.- method: The authentication method. You can set this to `none` for no authentication or `username` for basic username/password protection.- client pass: Defines which clients can connect to the SOCKS5 proxy.- socks pass: Defines which connections are allowed through the SOCKS5 proxy.3. Save and Exit: Save the changes and exit the editor (Ctrl + X, then Y, and Enter for nano).Step 5: Start the SOCKS5 Proxy ServerTo start the Dante SOCKS5 server, use the following command:```bashsystemctl start danted```To ensure that the service starts automatically on boot, enable it with:```bashsystemctl enable danted```Step 6: Configure Firewall SettingsMake sure that the firewall allows traffic on the SOCKS5 port (default 1080).On Ubuntu (using UFW):```bashufw allow 1080/tcp```On CentOS (using firewalld):```bashfirewall-cmd --zone=public --add-port=1080/tcp --permanentfirewall-cmd --reload```Step 7: Testing Your SOCKS5 ProxyTo verify that your SOCKS5 proxy is working correctly, you can use various tools or applications that support SOCKS5.Using a Web Browser1. Configure Proxy Settings:- For example, in Firefox, go to Options > General > Network Settings > Settings.- Select Manual proxy configuration and enter your server's IP address and port (1080) under SOCKS Host.- Ensure to select SOCKS5.2. Test Connectivity: Visit a website like [whatismyip.com](https://www.whatismyip.com) to check if your IP address reflects the server’s IP.Using Command LineYou can also test the SOCKS5 proxy using `curl`:```bashcurl --socks5 your_instance_ip:1080 http://example.com```Replace `your_instance_ip` with your server's public IP address.Troubleshooting Common Issues1. Connection Refused: Ensure that the Dante service is running and that the firewall allows traffic on the specified port.2. Authentication Errors: If you set up username authentication, make sure you are using the correct credentials.3. Log Files: Check the log file specified in the configuration (`/var/log/dante.log`) for any error messages that can provide insight into issues.Security ConsiderationsWhile setting up a SOCKS5 proxy can enhance privacy, it’s essential to consider security implications:1. Data Encryption: SOCKS5 does not encrypt your data by default. For sensitive activities, consider using a VPN alongside your SOCKS5 proxy.2. Access Control: Ensure that your proxy server is not open to the public without authentication. Use firewall rules and authentication methods to restrict access.3. Regular Updates: Keep your server and software updated to protect against vulnerabilities.ConclusionSetting up a SOCKS5 proxy server on an Alibaba Cloud ECS instance can significantly enhance your online privacy and security. By following the steps outlined in this article, you can effectively configure and manage your own SOCKS5 proxy server. Whether for personal use or business purposes, a SOCKS5 proxy server provides greater control over your internet traffic, allowing you to browse securely and access content freely. Always remember to consider security implications and implement best practices to ensure a safe and enjoyable online experience.
In the Internet age, proxy IPs are widely used for various online activities, including privacy protection, data scraping, and bypassing geographical restrictions. However, many users often encounter problems when using proxy IPs to access platforms such as 58.com. This article will delve into the reasons why proxy IPs may not work properly on 58.com, and provide some solutions and suggestions to help users make better use of proxy IPs.What is a proxy IP?A proxy IP refers to an IP address provided by a proxy server. When a user accesses the Internet through a proxy server, the target website can only see the IP address of the proxy server, but cannot obtain the user's real IP. This method can effectively protect user privacy, improve anonymity, and bypass geographical restrictions in some cases.Introduction to 58.com58.com is one of the largest classified information websites in China, providing a variety of information such as recruitment, real estate, second-hand transactions, and life services. Due to its large number of users, 58.com is also relatively strict in monitoring and managing access behavior. In order to maintain the security of the platform and user experience, 58.com has taken a series of measures to prevent malicious behavior and abuse.Why can't proxy IP be used for 58.com?1. IP address blocked58.com monitors proxy IP very strictly, especially public proxy IP. Many IP addresses of proxy service providers may have been identified and blocked by 58.com. Once an IP address is determined to be a proxy or malicious activity, 58.com will immediately blacklist it, resulting in users being unable to access the platform using that IP.2. Proxy type mismatchDifferent types of proxies (such as HTTP, HTTPS, SOCKS5) differ in functionality and applicability. 58.com may not support certain types of proxies. For example, when using HTTP proxy to access 58.com, you may encounter slow loading or inaccessible problems. Therefore, it is very important to choose the right proxy type.3. Proxy speed and stabilityThe speed and stability of the proxy IP directly affect the user's access experience. If the proxy IP used is slow or unstable, 58.com may consider the request abnormal and restrict access. In this case, users may experience frequent connection interruptions or loading failures.4. Anti-crawler mechanism58.com uses advanced anti-crawler technology to prevent data scraping and abuse. These mechanisms can detect abnormal access patterns and then restrict or block access. Therefore, when using proxy IPs for crawling or automation, they may be identified and blocked by 58.com.5. Abnormal user behaviorWhen using proxy IPs, users' access behavior may be significantly different from normal users. For example, frequent switching of IP addresses, sending a large number of requests in a short period of time, etc. may be identified as abnormal activities by 58.com, resulting in account restrictions or bans.How to solve the problem of proxy IP on 58.com?1. Choose a high-quality proxy serviceTo avoid IP blocking, it is recommended to use a high-quality proxy service provider. Choose proxies that provide dedicated IPs or high anonymity, which can reduce the risk of being identified. At the same time, make sure that the IP address of the selected proxy server is not blacklisted by 58.com.2. Use VPN serviceCompared with ordinary proxy IP, VPN (Virtual Private Network) provides higher security and anonymity. Many VPN services can effectively hide the user's real IP address and encrypt data transmission to reduce the risk of detection.3. Reasonably control the access frequencyWhen using proxy IP to access 58.com, it is recommended to reasonably control the access frequency. Avoid sending a large number of requests in a short period of time and maintain normal user access behavior, which can effectively reduce the risk of being blocked.4. Change IP address regularlyIf you find that a proxy IP cannot access 58.com, you can try to change the IP address. Using dynamic proxy or rotating IP services can help you maintain the stability and security of access.5. Follow platform rulesWhen using proxy IP, be sure to follow the usage rules and policies of 58.com. Avoid using proxies for crawling, data grabbing, etc., so as not to violate the platform's regulations and cause the account to be blocked.Although proxy IP can play an important role in many scenarios, users often encounter various problems when using platforms such as 58.com. Factors such as IP blocking, mismatched proxy types, insufficient speed and stability, anti-crawler mechanisms, and abnormal user behavior may cause proxy IP to fail to work properly. In order to smoothly access 58.com, users should choose high-quality proxy services, reasonably control access frequency, change IP regularly, and follow the platform's usage rules. I hope that through the analysis and suggestions in this article, it can help users better understand the usage restrictions of proxy IP on 58.com and find suitable solutions.
Anonymous IP, also known as anonymous proxy or anonymizing proxy, is a tool used to enhance privacy and security while browsing the internet. It allows users to hide their IP address and browse the web anonymously by routing their internet traffic through a remote server. This remote server acts as an intermediary between the user and the websites they visit, effectively masking their real IP address and location.There are several reasons why someone might want to use an anonymous IP. For example, individuals living in countries with strict internet censorship may use anonymous IPs to access blocked websites and content. Similarly, journalists, activists, and whistleblowers may use anonymous IPs to protect their identity and communicate securely online. Additionally, some users simply want to prevent websites and advertisers from tracking their online activities.Anonymous IPs are commonly used in conjunction with virtual private networks (VPNs) and proxy servers. VPNs create a secure and encrypted connection between the user's device and the VPN server, while proxy servers act as intermediaries for internet requests. Both VPNs and proxy servers can provide users with anonymous IP addresses, though they work in slightly different ways.When using an anonymous IP, it's important to choose a reputable provider that prioritizes user privacy and security. Some providers may log user activity or share data with third parties, compromising the anonymity that users seek. Additionally, users should be aware that while anonymous IPs can enhance privacy, they are not foolproof and may not provide complete anonymity.It's also worth noting that while anonymous IPs can help protect privacy, they can also be used for malicious purposes. Cybercriminals may use anonymous IPs to carry out illegal activities online, such as hacking, fraud, or distributing malware. As a result, some websites and online services may block or restrict access from users with anonymous IPs to mitigate security risks.In conclusion, anonymous IPs offer a way for users to browse the internet privately and securely. Whether to bypass internet censorship, protect one's identity, or simply maintain online privacy, anonymous IPs can be a valuable tool for internet users. However, it's important to use them responsibly and in accordance with the law, while also being mindful of potential security implications.
IntroductionWhen it comes to browsing the internet, one of the key components that can affect your online experience is the Domain Name System (DNS). DNS is responsible for translating human-readable domain names into IP addresses that computers can understand. By optimizing your browser's DNS settings, you can potentially improve your internet speed, security, and overall browsing experience. In this guide, we will walk you through the steps and considerations for configuring your browser's DNS settings.Step 1: Understanding DNSBefore we dive into configuring your browser's DNS settings, it's important to have a basic understanding of how DNS works. When you type a domain name into your browser's address bar, your computer sends a request to a DNS server to look up the corresponding IP address for that domain. This process is crucial for establishing connections with web servers and loading web pages.Step 2: Choosing a DNS ProviderMost internet service providers (ISPs) automatically assign DNS servers to your network when you connect to the internet. However, you have the option to use third-party DNS providers that may offer faster speeds, better security, and additional features. Some popular third-party DNS providers include Google Public DNS, OpenDNS, and Cloudflare DNS. Before selecting a DNS provider, consider factors such as speed, privacy policies, and reliability.Step 3: Configuring DNS Settings in Your BrowserThe process of configuring DNS settings in your browser may vary depending on the browser you are using. Below are general steps for popular browsers:- Google Chrome:1. Click the three-dot menu in the top-right corner and select "Settings."2. Scroll down and click on "Advanced" to expand the settings.3. Under the "Privacy and security" section, click on "Security."4. Click on "Use secure DNS" and select your preferred DNS provider.- Mozilla Firefox:1. Click the menu button and select "Options."2. Navigate to the "General" tab and scroll down to the "Network Settings" section.3. Click on "Settings" and select "Enable DNS over HTTPS" or "Enable DNS over TLS."4. Enter the DNS server address provided by your chosen DNS provider.- Microsoft Edge:1. Click the three-dot menu in the top-right corner and select "Settings."2. Scroll down and click on "Privacy, search, and services."3. Under the "Security" section, click on "Use secure DNS."4. Choose your preferred DNS provider from the dropdown menu.Step 4: Considerations for DNS ConfigurationWhen configuring your browser's DNS settings, there are several considerations to keep in mind:- Speed: Some third-party DNS providers may offer faster lookup times compared to default ISP-provided DNS servers. Consider running speed tests to determine which DNS provider offers the best performance for your location.- Security: Look for DNS providers that offer enhanced security features such as malware protection, phishing prevention, and encrypted connections. Prioritize providers that prioritize user privacy and security.- Reliability: Choose a DNS provider with a strong track record of reliability and uptime. Downtime or slow response times can significantly impact your browsing experience.- Privacy: Consider the privacy policies of third-party DNS providers and opt for providers that commit to not logging or selling user data.Step 5: Testing and MonitoringAfter configuring your browser's DNS settings, it's important to test and monitor the impact on your browsing experience. You can use online tools to measure DNS lookup times, page load speeds, and overall performance before and after making changes to your DNS configuration.Optimizing your browser's DNS settings can have a tangible impact on your internet speed, security, and privacy. By understanding the basics of DNS, choosing a reliable third-party DNS provider, configuring your browser settings, and monitoring the results, you can enhance your overall browsing experience. Keep in mind that while optimizing DNS settings can yield benefits, it's also important to stay informed about potential trade-offs and evolving best practices in the realm of internet infrastructure.In conclusion, taking control of your browser's DNS settings is a proactive step towards optimizing your online experience. Whether it's faster load times, improved security, or enhanced privacy, configuring your DNS settings can empower you to make the most of your time spent on the web.
In today's interconnected world, the Internet Protocol (IP) address is a fundamental identifier for any device communicating over the internet. While static IP addresses remain fixed, dynamic IP addresses change periodically, usually when a device reconnects to the network. In some cases, it may be desirable to have an IP address change automatically, such as for privacy reasons or to obtain a new address from the network's DHCP server. Here's a guide on how to set up automatic IP address changes for various devices and operating systems.1. Understanding DHCPDynamic Host Configuration Protocol (DHCP) is a network protocol that enables a server to automatically assign IP addresses to devices on a network. Most home and office networks use DHCP to manage IP addresses, making it easy for devices to connect and obtain the necessary network settings.2. Setting Up Automatic IP Address Changes on WindowsOn Windows, the default setting is to obtain an IP address automatically from a DHCP server. However, if your device is using a static IP address, you can change it to dynamic by following these steps:Open the Control Panel and navigate to Network and Internet > Network and Sharing Center.Click on "Change adapter settings" on the left side.Right-click on your network connection (e.g., Ethernet or Wi-Fi) and select "Properties."Scroll down and select "Internet Protocol Version 4 (TCP/IPv4)" and click on "Properties."Ensure that the "Obtain an IP address automatically" option is selected.Click on "OK" to save the changes.3. Setting Up Automatic IP Address Changes on macOSOn macOS, you can also configure your network settings to obtain an IP address automatically:Open System Preferences and click on "Network."Select your network connection (e.g., Wi-Fi or Ethernet) from the left side.Click on "Advanced" and then on the "TCP/IP" tab.Ensure that the "Configure IPv4" setting is set to "Using DHCP."Click on "OK" and then "Apply" to save the changes.4. Setting Up Automatic IP Address Changes on LinuxLinux distributions offer various methods to configure network settings, but most desktop environments have a graphical user interface for managing network connections. Here's a general approach:Open your network settings or network manager.Find your network connection and edit its settings.Under the IPv4 settings, select the "Automatic (DHCP)" method.Apply the changes and restart your network connection or your device.5. Additional ConsiderationsRouter Configuration: If your router is configured to assign static IP addresses to specific devices, you may need to change the router's settings to allow DHCP to assign addresses dynamically.DHCP Server: Ensure that your network has a DHCP server running and that it is configured correctly to assign IP addresses.Public Networks: On public networks, such as coffee shops or libraries, you may not have control over the DHCP server, and thus may not be able to change IP address settings.In conclusion, setting up automatic IP address changes involves configuring your device or network to obtain an IP address from a DHCP server. Whether you're using Windows, macOS, or Linux, the process is relatively straightforward and can be completed in a few steps. Remember to consider your network's configuration and the availability of a DHCP server before making any changes.
Web scraping, or web data extraction, is a technique that allows you to automatically extract data from websites. Python, a powerful and versatile programming language, offers numerous tools and libraries that make web scraping a relatively straightforward process. Here's a step-by-step guide on how to perform web scraping with Python.Step 1: Install the Necessary LibrariesBefore you start web scraping, you'll need to install some Python libraries. The most commonly used libraries for web scraping are requests and BeautifulSoup. You can install them using pip, the Python package manager. Open a command prompt or terminal and run the following commands:bashpip install requestspip install beautifulsoup4Step 2: Import the LibrariesOnce you've installed the necessary libraries, you'll need to import them into your Python script. Here's how you can do it:pythonimport requestsfrom bs4 import BeautifulSoupStep 3: Send an HTTP Request to the Target WebsiteNow, you're ready to send an HTTP request to the website you want to scrape. Use the requests.get() function to send a GET request to the website's URL. Here's an example:pythonurl = 'https://example.com' # Replace with the actual URLresponse = requests.get(url)Step 4: Check the Response StatusAfter sending the request, you should check the response status to ensure that the request was successful. If the status code is 200, it means the request was successful. Here's how you can check the status code:pythonif response.status_code == 200:print("Request successful!")else:print("Request failed with status code:", response.status_code)Step 5: Parse the HTML ContentIf the request was successful, you can proceed to parse the HTML content of the response. Use the BeautifulSoup library to create a BeautifulSoup object from the response's text content. Here's an example:pythonsoup = BeautifulSoup(response.text, 'html.parser')Step 6: Extract the DataWith the HTML parsed, you can now extract the desired data from the page. Use the BeautifulSoup object's methods and CSS selectors to find and retrieve the specific elements that contain the data you're interested in. Here's an example of extracting all the links from a page:pythonlinks = soup.find_all('a') # Find all <a> tags (links)for link in links:href = link.get('href') # Extract the href attribute from each linkprint(href)Step 7: Store and Use the DataFinally, you can store the extracted data in a format that's easy to analyze or use. You can save the data to a file like a CSV or JSON, or you can process it directly in your Python script. Here's an example of saving the links to a CSV file:pythonimport csvwith open('links.csv', 'w', newline='', encoding='utf-8') as file:writer = csv.writer(file)writer.writerow(['Link']) # Write the header rowfor link in links:href = link.get('href')writer.writerow([href]) # Write each link to a new rowConsiderations and ChallengesWhile web scraping can be a powerful tool, there are some considerations and challenges to keep in mind:1.Compliance: Always ensure that you have the necessary permissions and comply with the website's terms and conditions before scraping.2.Rate Limits: Some websites impose rate limits on the number of requests you can make. Respect these limits to avoid getting blocked.3.Dynamic Content: Some websites use JavaScript or AJAX to dynamically load content. In such cases, you may need to use a tool like Selenium or Puppeteer to simulate a real browser and execute the necessary JavaScript code.4.Updates and Changes: Websites can change their structure or content at any time, which may affect your scraping scripts. Keep an eye on any changes and update your scripts accordingly.By following these steps and considering the challenges, you can effectively perform web scraping with Python and extract valuable data from the web.
Web scraping is a powerful technique used to extract data from websites. However, many websites implement measures to prevent scraping, such as rate limiting and IP blocking. To overcome these challenges, using proxy IPs can be an effective solution. This article will guide you through the process of using proxy IPs for web scraping with Python, covering the necessary tools, setup, and best practices.Understanding ProxiesBefore diving into the code, it’s essential to understand what proxies are and how they work. A proxy server acts as an intermediary between your computer and the internet. When you send a request through a proxy, the proxy server forwards your request to the target website, masking your real IP address. This allows you to:1. Bypass IP Restrictions: If a website blocks your IP after several requests, using a proxy can help you avoid this issue.2. Scrape Data Anonymously: By hiding your IP address, you reduce the risk of being detected as a bot.3. Access Geo-Restricted Content: Proxies can help you access content that may be restricted in your region.Setting Up Your EnvironmentTo start scraping with proxies in Python, you’ll need a few tools:1. Python: Ensure you have Python installed on your machine. You can download it from [python.org](https://www.python.org/).2. Requests Library: This library simplifies making HTTP requests. Install it using pip:```bashpip install requests```3. Beautiful Soup: This library is useful for parsing HTML and extracting data. Install it using pip:```bashpip install beautifulsoup4```4. Proxy Service: You can either use a free proxy list or subscribe to a paid proxy service for more reliability and speed.Finding Proxy IPsThere are several ways to obtain proxy IPs:1. Free Proxy Lists: Websites like [FreeProxyList](https://www.freeproxylists.net/) and [ProxyScrape](https://proxyscrape.com/) provide lists of free proxies. However, these proxies may be unreliable and slow.2. Paid Proxy Services: Services like [PY proxy](https://www.pyproxy.com/)offer stable and fast proxies, often with features like rotating IPs.3. Residential vs. Datacenter Proxies: Residential proxies are less likely to be blocked and are ideal for scraping, while datacenter proxies are faster but can be more easily detected.Basic Web Scraping with ProxiesHere’s a simple example of how to use a proxy IP with the Requests library to scrape a website:Step 1: Import Libraries```pythonimport requestsfrom bs4 import BeautifulSoup```Step 2: Define Your ProxyYou can define your proxy in the following way:```pythonExample proxyproxy = {"http": "http://username:password@proxy_ip:port","https": "http://username:password@proxy_ip:port"}```Replace `username`, `password`, `proxy_ip`, and `port` with your proxy’s credentials.Step 3: Make a RequestUse the proxy in your request:```pythonurl = "http://example.com"try:response = requests.get(url, proxies=proxy, timeout=5)response.raise_for_status() Raise an error for bad responsesprint("Request successful!")except requests.exceptions.RequestException as e:print(f"Error: {e}")```Step 4: Parse the ContentOnce you have the response, you can parse the HTML content:```pythonsoup = BeautifulSoup(response.text, 'html.parser')Example: Extracting all the linksfor link in soup.find_all('a'):print(link.get('href'))```Rotating ProxiesTo avoid getting blocked, consider rotating your proxies. This can be done by maintaining a list of proxies and randomly selecting one for each request.Step 1: Create a List of Proxies```pythonproxies_list = [{"http": "http://username:password@proxy_ip1:port1"},{"http": "http://username:password@proxy_ip2:port2"},{"http": "http://username:password@proxy_ip3:port3"},]```Step 2: Rotate ProxiesYou can use the `random` library to select a proxy randomly:```pythonimport randomSelect a random proxyproxy = random.choice(proxies_list)try:response = requests.get(url, proxies=proxy, timeout=5)response.raise_for_status()print("Request successful!")except requests.exceptions.RequestException as e:print(f"Error: {e}")```Handling Errors and TimeoutsWhen scraping with proxies, you may encounter errors such as timeouts or connection issues. It’s essential to handle these gracefully:```pythonfor _ in range(5): Try up to 5 timesproxy = random.choice(proxies_list)try:response = requests.get(url, proxies=proxy, timeout=5)response.raise_for_status()print("Request successful!")break Exit loop if successfulexcept requests.exceptions.RequestException as e:print(f"Error with proxy {proxy}: {e}")```Best Practices for Scraping with Proxies1. Respect Robots.txt: Always check the website's `robots.txt` file to understand its scraping policies.2. Limit Request Rates: Avoid sending too many requests in a short period. Implement delays between requests to mimic human behavior.3. Use User-Agent Rotation: Change your User-Agent string to avoid detection. This can be done by modifying the headers in your requests.4. Monitor Proxy Performance: Keep track of which proxies are working and which are not. Some proxies may become blocked over time.ConclusionUsing proxy IPs for web scraping with Python can significantly enhance your ability to extract data while maintaining anonymity and reducing the risk of being blocked. By setting up a robust proxy system, rotating your proxies, and following best practices, you can scrape data efficiently and responsibly. Whether you are collecting data for research, market analysis, or personal projects, mastering the use of proxies will empower you to navigate the web effectively.
In an era where online privacy and security are paramount, many users turn to proxy servers to mask their IP addresses and manage their internet traffic. A SOCKS5 proxy server is a versatile tool that can handle various types of traffic, making it suitable for a wide range of applications, including web scraping, accessing geo-restricted content, and enhancing anonymity. This article will explore how to retrieve URLs using a SOCKS5 proxy server, detailing the process, tools, and best practices.What is a SOCKS5 Proxy Server?SOCKS5 (Socket Secure version 5) is a protocol that allows clients to connect to a server through a proxy. Unlike HTTP proxies, which only handle web traffic, SOCKS5 can manage any type of traffic, including TCP and UDP. This flexibility makes SOCKS5 particularly useful for applications such as:- Web browsing- Online gaming- File sharing- Peer-to-peer (P2P) applications- Web scrapingKey Features of SOCKS51. Protocol Versatility: SOCKS5 supports multiple protocols, allowing it to handle various types of internet traffic.2. User Authentication: It offers secure authentication methods, ensuring that only authorized users can access the proxy server.3. UDP Support: SOCKS5 can handle both TCP and UDP traffic, making it ideal for applications requiring real-time communication.4. IPv6 Compatibility: It supports IPv6, ensuring compatibility with modern internet standards.Why Use a SOCKS5 Proxy for URL Retrieval?Using a SOCKS5 proxy for retrieving URLs offers several advantages:1. Anonymity: By masking your IP address, a SOCKS5 proxy helps maintain your online anonymity.2. Access to Geo-Restricted Content: Many websites restrict access based on geographical location. A SOCKS5 proxy allows you to bypass these restrictions.3. Improved Security: SOCKS5 proxies can add an extra layer of security to your internet connection, particularly when accessing unsecured networks.4. Web Scraping: When scraping data from websites, using a SOCKS5 proxy can help avoid IP bans by distributing requests across multiple IP addresses.How to Set Up a SOCKS5 Proxy ServerBefore you can retrieve URLs using a SOCKS5 proxy, you need to set up a SOCKS5 proxy server. Here’s a brief overview of the setup process:1. Choose a Proxy Server Software: Popular options include Dante, Shadowsocks, and CCProxy.2. Install the Software: Follow the installation instructions for your chosen software.3. Configure the Proxy: Set up the server settings, including the port (default is 1080), authentication methods, and access controls.4. Start the Proxy Server: Ensure the proxy server is running and accessible.Example: Setting Up a SOCKS5 Proxy with Dante on Ubuntu1. Install Dante:```bashsudo apt updatesudo apt install dante-server```2. Configure Dante:Edit the configuration file located at `/etc/danted.conf` to set up your internal and external interfaces, authentication methods, and access rules.3. Start the Service:```bashsudo systemctl start dantedsudo systemctl enable danted```4. Allow Traffic Through Firewall:Ensure that your firewall allows traffic on the SOCKS5 port (1080).Retrieving URLs Using a SOCKS5 ProxyOnce your SOCKS5 proxy server is set up, you can begin retrieving URLs. The following sections will outline how to do this using various programming languages and tools.Method 1: Using Python with `requests` and `PySocks`Python is a popular language for web scraping and URL retrieval. To use a SOCKS5 proxy in Python, you can combine the `requests` library with `PySocks`.1. Install Required Libraries:```bashpip install requests[socks] PySocks```2. Sample Code to Retrieve a URL:```pythonimport requestsDefine the SOCKS5 proxysocks5_proxy = {'http': 'socks5h://username:password@proxy_ip:1080','https': 'socks5h://username:password@proxy_ip:1080',}Make a request through the SOCKS5 proxytry:response = requests.get('http://example.com', proxies=socks5_proxy)print(response.text) Print the retrieved HTML contentexcept requests.exceptions.RequestException as e:print(f"Error: {e}")```Method 2: Using cURL with SOCKS5 ProxycURL is a command-line tool for transferring data with URLs. You can easily use it with a SOCKS5 proxy.1. Basic cURL Command:```bashcurl --socks5 username:password@proxy_ip:1080 http://example.com```2. Saving Output to a File:```bashcurl --socks5 username:password@proxy_ip:1080 http://example.com -o output.html```Method 3: Using Node.js with `axios` and `socks-proxy-agent`Node.js is another excellent option for working with SOCKS5 proxies.1. Install Required Packages:```bashnpm install axios socks-proxy-agent```2. Sample Code to Retrieve a URL:```javascriptconst axios = require('axios');const SocksProxyAgent = require('socks-proxy-agent');const proxy = 'socks5://username:password@proxy_ip:1080';const agent = new SocksProxyAgent(proxy);axios.get('http://example.com', { httpAgent: agent, httpsAgent: agent }).then(response => {console.log(response.data);}).catch(error => {console.error(`Error: ${error.message}`);});```Best Practices for Using SOCKS5 Proxies1. Use Authentication: Always set up authentication on your SOCKS5 proxy to prevent unauthorized access.2. Rotate Proxies: If you are scraping data from websites, consider using multiple SOCKS5 proxies to avoid detection and IP bans.3. Monitor Traffic: Keep an eye on your proxy server’s traffic to identify any unusual activity or potential abuse.4. Respect Robots.txt: When scraping websites, always check the `robots.txt` file to ensure compliance with the site's scraping policies.5. Use HTTPS: Whenever possible, use HTTPS URLs to encrypt your data in transit, even when using a SOCKS5 proxy.Troubleshooting Common Issues1. Connection Errors: Ensure your SOCKS5 proxy server is running and accessible. Check firewall settings and network configurations.2. Authentication Failures: Double-check your username and password. Ensure that the proxy server is configured to allow the specified authentication method.3. IP Bans: If you are scraping data, you may encounter IP bans. Rotate your proxies or reduce the frequency of requests to mitigate this issue.ConclusionRetrieving URLs using a SOCKS5 proxy server can enhance your online privacy and security while providing access to geo-restricted content. By setting up a SOCKS5 proxy and utilizing programming languages like Python, Node.js, or tools like cURL, you can efficiently retrieve data from the web. Remember to follow best practices and respect the rules of the websites you are accessing to ensure a smooth and secure experience. With the right setup and approach, a SOCKS5 proxy can be a powerful tool in your internet toolkit.
When you encounter a "server proxy lookup failed" error, it means that the server proxy was unable to find the requested resource. This error typically occurs when a client, such as a web browser, sends a request to a server through a proxy server, and the proxy server is unable to fulfill the request.There are several potential reasons why this error might occur:1. Proxy Server Unavailable: The proxy server itself might be down or experiencing issues. This could be due to maintenance, network problems, or other technical issues.2. Misconfigured Proxy Settings: The client's proxy settings might be misconfigured, leading to the request being sent to an incorrect or non-functioning proxy server.3. Network Connectivity Issues: There could be network connectivity issues between the client, the proxy server, and the destination server. This could be due to network congestion, routing problems, or other network-related issues.4. Firewall or Security Restrictions: The request might be blocked by a firewall or other security measures in place on the proxy server or the destination server.5. DNS Resolution Problems: The proxy server might be unable to resolve the domain name of the requested resource, leading to the lookup failure.When you encounter a "server proxy lookup failed" error, there are a few steps you can take to try and resolve the issue:1. Check Proxy Server Status: If you have access to the proxy server, check its status to ensure that it is up and running properly.2. Verify Proxy Settings: Double-check the proxy settings on the client to ensure that they are correctly configured.3. Check Network Connectivity: Verify that there are no network connectivity issues between the client, the proxy server, and the destination server. You can do this by checking for any network outages or performing network diagnostics.4. Review Firewall and Security Settings: If you have access to the proxy server or the destination server, review the firewall and security settings to ensure that they are not blocking the request.5. DNS Troubleshooting: If the issue is related to DNS resolution problems, you can try using alternative DNS servers or troubleshooting DNS resolution on the proxy server.If you are unable to resolve the "server proxy lookup failed" error on your own, you may need to reach out to your network administrator or IT support team for further assistance. They can help diagnose the issue and take appropriate steps to resolve it.In conclusion, a "server proxy lookup failed" error indicates that the proxy server was unable to find the requested resource. By understanding the potential reasons for this error and taking appropriate troubleshooting steps, you can work towards resolving the issue and restoring normal network connectivity.