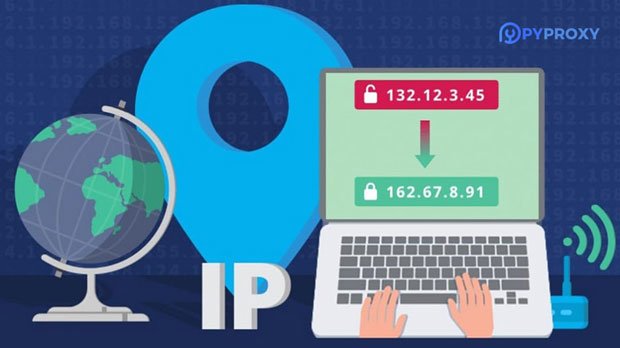
In today's digital landscape, privacy and security are paramount for internet users. With the increasing number of cyber threats and data breaches, many individuals and businesses are turning to proxy servers as a means to safeguard their online activities. Among the various types of proxies available, SOCKS5 stands out due to its versatility and efficiency. This article will explore what SOCKS5 proxies are, their benefits, how to use them, and the potential drawbacks associated with their use.What is a SOCKS5 Proxy?SOCKS5 (Socket Secure version 5) is a networking protocol that facilitates the routing of network packets between a client and a server through a proxy server. Unlike HTTP proxies, which are limited to web traffic, SOCKS5 can handle any type of traffic, including TCP and UDP. This makes it suitable for a wide variety of applications, such as web browsing, online gaming, file sharing, and streaming.Key Features of SOCKS51. Protocol Flexibility: SOCKS5 supports multiple protocols, allowing it to manage different types of internet traffic seamlessly.2. User Authentication: It offers secure authentication methods, ensuring that only authorized users can access the proxy server.3. UDP Support: SOCKS5 can handle both TCP and UDP traffic, making it ideal for applications requiring real-time communication, such as online gaming and video conferencing.4. IPv6 Compatibility: It supports IPv6, ensuring compatibility with modern internet standards.Benefits of Using a SOCKS5 Proxy ServerUsing a SOCKS5 proxy server offers several advantages:1. Enhanced Privacy: By masking your IP address, SOCKS5 proxies help protect your identity online. This is particularly useful for individuals who wish to remain anonymous while browsing the internet.2. Bypassing Geo-Restrictions: SOCKS5 proxies allow users to access content that may be restricted in their geographical location. This is especially beneficial for streaming services that offer different content libraries in different countries.3. Improved Security: SOCKS5 proxies can help encrypt your internet traffic, providing an additional layer of security against potential cyber threats.4. Better Performance: These proxies can optimize traffic and reduce latency, which can lead to improved internet speed, particularly for applications that require real-time data transfer.How to Use a SOCKS5 Proxy ServerUsing a SOCKS5 proxy server involves several steps, from obtaining proxy information to configuring your applications. Here’s a step-by-step guide to help you get started.Step 1: Obtain SOCKS5 Proxy InformationBefore you can use a SOCKS5 proxy, you need to gather the necessary information:- Proxy Address: This is the IP address or hostname of the SOCKS5 proxy server.- Port Number: This is the port through which the proxy server communicates (typically 1080 for SOCKS5).- Username and Password (if required): Some SOCKS5 proxies require authentication, so you’ll need valid credentials.You can obtain this information from various sources:- Proxy Provider Services: Many companies offer SOCKS5 proxy services for a fee, providing reliable and secure proxies.- Free Proxy Lists: Websites often compile lists of free SOCKS5 proxies, but be cautious, as these can be unreliable and insecure.- Community Forums: Online forums may have users sharing SOCKS5 proxy addresses.Step 2: Configuring Your Application to Use the SOCKS5 ProxyOnce you have the necessary information, you need to configure your applications to use the SOCKS5 proxy. Below are instructions for some common applications and operating systems.1. Web BrowsersGoogle Chrome1. Open Chrome and click on the three vertical dots in the upper right corner to open the menu.2. Select Settings.3. Scroll down and click on Advanced.4. Under the System section, click on Open your computer’s proxy settings.5. In the proxy settings window, select Manual proxy setup.6. Enable the Use a proxy server toggle.7. Enter the SOCKS5 proxy address in the Address field.8. Enter the port number in the Port field (default is 1080).9. Click Save.Mozilla Firefox1. Open Firefox and click on the three horizontal lines in the upper right corner to open the menu.2. Select Options.3. Scroll down to the Network Settings section and click on Settings.4. Choose Manual proxy configuration.5. In the SOCKS Host field, enter the proxy address.6. Enter the port number next to it.7. Select SOCKS v5.8. Click OK to save your settings.2. Windows Operating System1. Open Settings and go to Network & Internet.2. Click on Proxy in the left sidebar.3. Under Manual proxy setup, toggle the switch to On.4. Enter the SOCKS5 proxy address in the Address field.5. Enter the port number in the Port field.6. Click Save.3. macOS Operating System1. Open System Preferences and select Network.2. Choose the network interface you are using (e.g., Wi-Fi or Ethernet).3. Click on Advanced.4. Go to the Proxies tab.5. Check the box for SOCKS Proxy.6. Enter the SOCKS5 proxy address and port number.7. Click OK and then Apply.Step 3: Testing Your SOCKS5 Proxy ConnectionAfter configuring your application to use the SOCKS5 proxy, it’s essential to test the connection to ensure it’s working correctly. You can do this by visiting a website that displays your IP address, such as [whatismyip.com]. If the proxy is functioning correctly, the displayed IP address should be different from your original IP address.Step 4: Troubleshooting Common IssuesIf you encounter issues while using a SOCKS5 proxy, consider the following troubleshooting steps:1. Check Proxy Settings: Ensure that you have entered the correct proxy address and port number.2. Test with Different Applications: If one application is not working, try using the proxy with another application to see if the issue persists.3. Firewall Settings: Ensure that your firewall is not blocking the SOCKS5 proxy connection.4. Proxy Status: If using a free proxy, it may be offline or unreliable. Consider switching to a different proxy address.Step 5: Advanced Configuration (Optional)For advanced users, additional configurations may enhance your SOCKS5 proxy experience:- Authentication: If your proxy requires authentication, ensure that you enter your username and password in the appropriate fields in your application’s proxy settings.- Proxy Chains: Some users may want to use multiple proxies in a chain for added security. This requires specialized software and configurations.- VPN vs. SOCKS5: Consider whether you need a VPN in addition to a SOCKS5 proxy. While both enhance privacy, they serve different purposes. A VPN encrypts all your internet traffic, while a SOCKS5 proxy only routes specific application traffic.Potential Drawbacks of Using SOCKS5 ProxiesWhile SOCKS5 proxies offer numerous benefits, there are also potential drawbacks to consider:1. No Built-in Encryption: Unlike VPNs, SOCKS5 proxies do not encrypt your data by default. This means that while your IP address is hidden, your data may still be exposed to potential eavesdroppers. For sensitive activities, consider using a VPN alongside the SOCKS5 proxy.2. Reliability of Free Proxies: Many free SOCKS5 proxies are unreliable and can lead to slow connections, frequent disconnections, or even data theft. It is often better to invest in a reputable paid service.3. Limited Support: Some applications may not support SOCKS5 proxies, limiting their usability. Always check compatibility before relying on a SOCKS5 proxy for specific tasks.ConclusionUsing a SOCKS5 proxy server can significantly enhance your online privacy and allow you to bypass geographical restrictions. By following the steps outlined in this article, you can effectively configure your applications to use a SOCKS5 proxy, improving your browsing experience while maintaining security. However, it’s essential to weigh the benefits against the potential drawbacks and choose a reliable proxy service to ensure a safe and enjoyable online experience. Whether for personal use, business, or accessing restricted content, SOCKS5 proxies offer a powerful tool for navigating the complexities of the internet.
With the rapid development of the Internet, proxy servers have become an important tool for protecting privacy, improving access speed and bypassing geographical restrictions. As a leading cloud service provider in China, Tencent Cloud provides powerful cloud server functions. Users can use Tencent Cloud Server to build their own proxy IP. This article will introduce in detail how to configure a proxy IP on Tencent Cloud Server, including the required tools, steps and precautions, to help you successfully build a proxy server.What is a proxy server?A proxy server is an intermediary server located between the user and the Internet. The user's request is forwarded through the proxy server, and the target website will only see the IP address of the proxy server instead of the user's real IP address. This method can effectively protect the user's privacy and improve access speed in some cases.Why choose Tencent Cloud Server?1. Stability: Tencent Cloud Server has high availability and stability and can carry a large amount of network traffic.2. Security: Tencent Cloud provides a multi-level security protection mechanism to ensure the security of user data.3. Flexibility: Users can choose different configurations according to their needs and flexibly expand resources.4. Global coverage: Tencent Cloud has data centers in many regions around the world, making it convenient for users to choose the appropriate server location.How to set up a proxy IP on Tencent Cloud ServerStep 1: Purchase Tencent Cloud Server1. Register an account: Visit Tencent Cloud official website and register an account.2. Select a product: Select "Cloud Server CVM" on the product page.3. Configure the server:- Select the appropriate region and availability zone.- Select the instance type, and select the CPU and memory configuration according to your needs.- Select an image, and Ubuntu or CentOS system is recommended.- Configure storage and bandwidth to ensure that the usage requirements are met.4. Set up security group: In the security group settings, ensure that the required ports (such as 8080, 3128, etc.) are open.5. Complete the purchase: After confirming that the information is correct, complete the payment.Step 2: Connect to Tencent Cloud Server1. Get connection information: In the Tencent Cloud console, find your cloud server instance and obtain its public IP address.2. Connect using SSH:- Open a terminal on your local computer (Linux/Mac) or use PuTTY (Windows).- Enter the following command to connect to the server:```bashssh root@your_server_ip```- Replace `your_server_ip` with the public IP address of your cloud server.Step 3: Install the proxy softwareOn Tencent Cloud Server, you can choose different proxy software. Here are the steps to use Squid and Shadowsocks.Method 1: Use Squid to build HTTP proxy1. Update system:```bashsudo apt-get updatesudo apt-get upgrade```2. Install Squid:```bashsudo apt-get install squid```3. Configure Squid:- Edit the configuration file:```bashsudo nano /etc/squid/squid.conf```- Modify or add the following configuration:```plaintexthttp_port 3128acl localnet src 0.0.0.0/0 # Allow all IP accesshttp_access allow localnethttp_access deny all```- Save and exit.4. Restart Squid service:```bashsudo systemctl restart squid```5. Check Squid status:```bashsudo systemctl status squid```Method 2: Use Shadowsocks to build a SOCKS5 proxy1. Install Python and pip:```bashsudo apt-get install python3 python3-pip```2. Install Shadowsocks:```bashpip3 install shadowsocks```3. Configure Shadowsocks:- Create a configuration file:```bashsudo nano /etc/shadowsocks.json```- Add the following content:```json{"server": "0.0.0.0","port_password": {"8388": "your_password"},"timeout": 300,"method": "aes-256-gcm"}```- Replace `your_password` with your custom password.4. Start Shadowsocks:```bashsudo ssserver -c /etc/shadowsocks.json -d start```Step 4: Configure the firewallMake sure the server's firewall allows the required ports to pass. Use the following commands to configure UFW (Ubuntu Firewall):```bashsudo ufw allow 3128/tcp # Squidsudo ufw allow 8388/tcp # Shadowsockssudo ufw enable```Step 5: Test the proxy server1. Configure the proxy on your local computer:- In your browser or system's network settings, enter the IP address and port (such as 3128 or 8388) of the Tencent Cloud server.2. Visit IP query website:- Open the browser, visit `whatismyip.com`, and check whether the displayed IP is the IP of your Tencent Cloud server.Notes1. Security: Make sure your proxy server is not abused by malicious users. You can restrict access by setting an access control list (ACL).2. Performance monitoring: Regularly monitor server performance to ensure stable operation of the proxy service.3. Legal compliance: When using proxy services, please follow local laws and regulations to avoid improper use.4. Regular updates: Regularly update the system and software to ensure security and stability.Building a proxy IP through Tencent Cloud Server is an effective way to access the network, which can help users protect privacy, increase access speed and bypass geographical restrictions. This article details the whole process from purchasing a cloud server to configuring proxy software, hoping to help you successfully build your own proxy server. Whether using Squid or Shadowsocks, you can choose the right solution according to your needs and enjoy a safer and more convenient network experience.
In today's digital business environment, advertising strategy is critical to a business's success. The use of proxy servers can provide enterprises with more powerful advertising management tools. This article explores how to enhance the effectiveness of your advertising strategy through proxy server management.Protect the stability and security of ad servingIn the process of advertising, stability and security are crucial factors. The proxy server can provide a stable network connection and ensure the normal delivery of advertisements in various network environments. Through proxy servers, enterprises can hide their real IP addresses, protect their network security, and prevent malicious attacks and data leaks.Achieve precise geographical positioning and target audience targetingAccurate positioning of advertisements and target audience targeting are the keys to improving advertising effectiveness. Proxy servers play an important role in this.Geolocation accuracy: The proxy server can simulate user requests from different regions to achieve geolocation accuracy. By choosing the right proxy server location, businesses can place their ads in front of audiences in specific geographic areas, making their ads more relevant and attractive. This helps companies better understand consumer needs and market trends in different regions and develop targeted advertising strategies.Accuracy of target audience targeting: Proxy servers can help companies achieve more precise target audience targeting. By analyzing proxy server data traffic and access patterns, companies can understand consumers' interests, preferences, and behavioral habits.Monitor competitors and market trendsUnderstanding competitors' advertising strategies and market trends is critical to a company's competitive advantage. Proxy servers can help businesses gain an advantage in this regard.Collect competitor data: Through proxy servers, businesses can collect and monitor competitor advertising data. This includes ad placement, frequency, ad content, and more. By analyzing competitors' advertising strategies, companies can understand the competitive landscape and trends in the market, thereby optimizing their own advertising strategies and staying competitive.Detect market trends and consumer behavior: Proxy servers can help businesses monitor market trends and consumer behavior. By analyzing the data traffic and user behavior of proxy servers, companies can understand consumers' search habits, interests, and purchasing behaviors.ConclusionThrough the management of proxy servers, enterprises can enhance the effectiveness of advertising strategies. The proxy server provides a stable network connection, protects the security of advertising, and achieves precise geographical positioning and target audience targeting. Therefore, using proxy servers to manage advertising strategies can help companies improve advertising effectiveness, improve competitiveness, and achieve better business results.
Proxy Settings ExplainedProxy settings are a crucial aspect of internet connectivity, especially in corporate environments or for individuals who prioritize online privacy and security. In this blog post, we will delve into what proxy settings are, how they work, and why they are important.What are Proxy Settings?Proxy settings, also known as proxy configurations, refer to the rules and parameters that dictate how a device connects to the internet through a proxy server. A proxy server acts as an intermediary between a device (such as a computer or smartphone) and the internet. When a device is configured to use a proxy server, all its internet traffic is routed through the proxy server before reaching its final destination on the web.How Do Proxy Settings Work?When a device is set up to use a proxy server, the user or network administrator specifies the proxy server's address, port number, and any authentication credentials required to establish a connection. Once configured, the device sends all its internet requests to the proxy server instead of directly to the target servers. The proxy server then forwards these requests on behalf of the device, receives the responses from the internet, and sends them back to the device. This process creates a layer of separation and anonymity between the device and the websites or online services it accesses.Why Are Proxy Settings Important?Proxy settings offer several benefits, including:1. Privacy and Anonymity: By routing internet traffic through a proxy server, users can hide their IP addresses and obscure their online activities from prying eyes.2. Security: Proxy servers can act as a barrier between devices and potentially malicious content on the internet, providing an additional layer of security against cyber threats.3. Content Filtering: In organizational settings, proxy settings can be used to filter or block access to certain websites or online content, helping enforce acceptable use policies and prevent unauthorized access to sensitive data.Types of Proxy SettingsThere are various types of proxy settings, each serving different purposes:1. HTTP Proxies: Designed for web browsing, HTTP proxies are commonly used to control and monitor internet access within organizations.2. SOCKS Proxies: Offering a higher level of flexibility, SOCKS proxies can handle various types of internet traffic beyond HTTP, such as email or file transfers.3. Transparent Proxies: These proxies operate without requiring any configuration on the client side, making them suitable for transparently intercepting and filtering web traffic.4. Reverse Proxies: Positioned in front of web servers, reverse proxies can enhance performance, security, and scalability by serving as a buffer between clients and backend services.How to Configure Proxy SettingsConfiguring proxy settings on different devices and operating systems may vary, but it generally involves accessing network or internet settings and entering the necessary details for the designated proxy server. This can typically be done through system preferences, network settings, or browser configurations.Proxy settings play a vital role in managing internet connectivity, safeguarding privacy, and enhancing security. Whether used for individual privacy concerns or organizational network management, understanding how proxy settings work and their implications is essential for navigating the complexities of the online world. By leveraging proxy settings effectively, users can gain more control over their internet experience and mitigate potential risks associated with unrestricted online access.
In this blog post, we will discuss the step-by-step process of changing the IP address of a TP-Link router. Whether you want to improve network security or simply need to reconfigure your network settings, changing the IP address of your router can be a useful task. We will guide you through the process, so you can successfully modify the IP address of your TP-Link router.Step 1: Accessing the Router's Web InterfaceThe first step in changing the IP address of your TP-Link router is to access its web interface. To do this, you will need to connect your computer to the router either via an Ethernet cable or through a wireless connection. Once connected, open a web browser and enter the default IP address of the router in the address bar. The default IP address for TP-Link routers is usually "192.168.0.1" or "192.168.1.1". Press Enter to access the login page.Step 2: Logging into the RouterAfter accessing the router's web interface, you will be prompted to enter the router's username and password. By default, the username is usually "admin" and the password is also "admin". However, if you have changed these credentials in the past, enter the updated username and password to log in.Step 3: Navigating to the Network SettingsOnce logged in, navigate to the "Network" or "LAN" settings tab within the router's web interface. This is where you will find the current IP address configuration for your router.Step 4: Changing the IP AddressIn the Network or LAN settings, look for the option to modify the IP address. You will typically find fields for the IP address, subnet mask, and gateway. Enter the new IP address that you want to assign to the router. Make sure that the new IP address is within the same subnet as your network and does not conflict with any other devices on the network.Step 5: Saving and Applying the ChangesAfter entering the new IP address, save the changes and apply them to the router. This may require clicking a "Save" or "Apply" button within the web interface. Once applied, the router will restart with the new IP address configuration.Step 6: Testing the New IP AddressTo ensure that the new IP address has been successfully configured, disconnect and reconnect your computer to the router. Then, open a web browser and enter the new IP address in the address bar. If you are able to access the router's web interface using the new IP address, then the change was successful.Changing the IP address of a TP-Link router is a straightforward process that can be completed within a few simple steps. By following this guide, you can easily modify the IP address of your router to better suit your network requirements. Whether you need to resolve an IP conflict or enhance network security, having a clear understanding of how to change the IP address of your TP-Link router can be incredibly useful.
In today's digital age, the internet has become a vast repository of information, from news articles to product listings, from social media posts to scientific research. However, extracting and organizing this data manually can be a tedious and time-consuming task. This is where web scraping software comes into play.What is Web Scraping Software?Web scraping software, also known as web data extraction software, is a type of automated tool that allows users to extract structured data from websites. It works by simulating human browsing behavior, navigating through web pages, and identifying specific data points that are then extracted and stored in a structured format, such as a CSV file or a database.How Does Web Scraping Software Work?Web scraping software typically uses a combination of technologies to achieve its goal. These include:1.Web Crawling: The software starts by identifying the initial web pages or URLs that it wants to scrape. It then uses web crawlers, which are automated programs that systematically browse the internet, to follow links and discover new pages.2.HTML Parsing: Once the software has accessed a web page, it needs to parse the HTML code to identify the data it's interested in. This involves analyzing the structure of the HTML document and extracting the relevant data elements.3.Data Extraction: After parsing the HTML, the software identifies the specific data points it wants to extract. This can be done using various techniques, such as identifying specific HTML tags or using CSS selectors or XPath expressions.4.Data Storage: The extracted data is then stored in a structured format, such as a CSV file, a database, or an API. This allows users to easily access, analyze, and manipulate the data.Types of Web Scraping SoftwareThere are several types of web scraping software available, each with its own unique features and capabilities:1.Desktop Applications: These are standalone software programs that are installed on a user's computer. They typically have a graphical user interface (GUI) that allows users to specify the URLs, data points, and other parameters for scraping.2.Web-based Applications: Web-based scraping tools are accessible through a web browser and do not require any software installation. They often provide a cloud-based platform that allows users to set up and manage scraping tasks remotely.3.APIs: Some web scraping software provides application programming interfaces (APIs) that allow developers to integrate scraping functionality into their own applications. This allows for more flexibility and customization.Advantages of Web Scraping SoftwareWeb scraping software offers several advantages, including:1.Automation: It automates the process of extracting data from websites, saving users time and effort.2.Efficiency: The software can quickly and accurately extract large amounts of data from multiple web pages.3.Flexibility: Users can specify the exact data points they want to extract, allowing for customized data collection.4.Scalability: Web scraping software can handle large-scale scraping tasks, making it suitable for enterprises and organizations.In conclusion, web scraping software is a powerful tool that allows users to efficiently extract structured data from websites. By automating the scraping process, it saves time and effort, enabling users to focus on analyzing and utilizing the extracted data.
In an age where online privacy is increasingly important, many users are turning to proxy servers to enhance their internet security and anonymity. A SOCKS5 proxy server is a particularly versatile tool that can handle various types of traffic, making it a popular choice for many users. This article will guide you through the process of setting up a SOCKS5 proxy server on a Windows machine, detailing the necessary software, configuration steps, and potential use cases.What is a SOCKS5 Proxy Server?SOCKS5 (Socket Secure version 5) is a protocol that routes internet traffic through a proxy server. Unlike HTTP proxies, which only handle web traffic, SOCKS5 can manage any type of traffic, including TCP and UDP. This makes it suitable for a wide range of applications, such as web browsing, gaming, and file sharing.Key Features of SOCKS51. Protocol Versatility: SOCKS5 supports multiple protocols, allowing it to handle various types of internet traffic seamlessly.2. User Authentication: It offers secure authentication methods, ensuring that only authorized users can access the proxy server.3. UDP Support: SOCKS5 can handle both TCP and UDP traffic, making it ideal for applications requiring real-time communication.4. IPv6 Compatibility: It supports IPv6, ensuring compatibility with modern internet standards.Why Set Up a SOCKS5 Proxy Server on Windows?Setting up a SOCKS5 proxy server on your Windows machine can provide several benefits:1. Enhanced Privacy: By routing your internet traffic through a proxy, you can mask your IP address and maintain anonymity online.2. Bypassing Geo-Restrictions: A SOCKS5 proxy can help you access content that may be restricted in your geographical location.3. Improved Security: SOCKS5 proxies can add an extra layer of security to your internet connection.4. Customizable Control: Running your own SOCKS5 proxy server gives you complete control over your settings and configurations.RequirementsBefore you start, ensure you have the following:- A Windows computer (Windows 10, 8, or 7).- Administrative access to the machine.- An internet connection.- Software to set up the SOCKS5 proxy server (PYProxy).Recommended Software1. Dante: A free, open-source SOCKS proxy server that is widely used but requires some technical knowledge to configure.2. WinGate: A commercial product that offers a user-friendly interface for setting up a SOCKS5 proxy server.3. PYProxy: Another user-friendly option that provides a free version with limited features.For this guide, we will focus on using PYProxy due to its ease of use and straightforward setup process.Step-by-Step Guide to Setting Up a SOCKS5 Proxy Server on Windows Using PYProxyStep 1: Download and Install PYProxy1. Download PYProxy: Visit the [PYProxy website]and download the latest version of the software.2. Install PYProxy:- Run the installer and follow the on-screen instructions.- Choose the installation directory and complete the installation process.Step 2: Configure PYProxy as a SOCKS5 Server1. Launch PYProxy: Open the PYProxy application.2. Access the Configuration Menu:- Click on the Options button in the main interface.3. Set Up SOCKS5:- In the Proxy tab, check the box for Enable SOCKS.- Set the SOCKS Port (default is 1080).4. User Authentication (Optional):- If you want to restrict access to your SOCKS5 proxy, enable user authentication by checking the Account option.- Click on the Account button to add users and set passwords.5. Network Settings:- In the Network tab, ensure that your local IP address is set correctly.- You can also configure the Max Connections and other settings based on your needs.6. Save Configuration: After setting everything up, click OK to save your configuration.Step 3: Start the SOCKS5 Proxy Server1. Run PYProxy: Make sure PYProxy is running. You should see a green icon in the system tray indicating that the proxy server is active.2. Check the Status: You can check the status of your proxy server by clicking on the PYProxy icon in the system tray. It will show you the number of connections and other relevant information.Step 4: Configure Client Applications to Use the SOCKS5 ProxyNow that your SOCKS5 proxy server is set up, you can configure client applications to route their traffic through the proxy.Example: Configuring Google Chrome1. Open Chrome and click on the three vertical dots in the upper right corner.2. Select Settings.3. Scroll down and click on Advanced.4. Under the System section, click on Open your computer’s proxy settings.5. In the proxy settings window, select Manual proxy setup.6. Enable the Use a proxy server toggle.7. Enter your SOCKS5 proxy address (your local IP address) and the port number (1080).8. Click Save.Example: Configuring Windows System Proxy1. Open Settings and go to Network & Internet.2. Click on Proxy in the left sidebar.3. Under Manual proxy setup, toggle the switch to On.4. Enter your SOCKS5 proxy address in the Address field.5. Enter the port number in the Port field.6. Click Save.Step 5: Testing Your SOCKS5 ProxyTo ensure your SOCKS5 proxy is functioning correctly, you can use various online tools to check your IP address:1. Open your web browser and visit [whatismyip.com].2. If configured correctly, the IP address displayed should be the one assigned by your SOCKS5 proxy, not your original IP address.Potential Use Cases for a SOCKS5 Proxy Server1. Web Browsing: Enhance your online privacy and access restricted content.2. Online Gaming: Reduce latency and bypass geo-restrictions for gaming servers.3. File Sharing: Safely share files while masking your IP address.4. Streaming Services: Access content from platforms like Netflix, Hulu, orBBC iPlayer that may be restricted in your region.Troubleshooting Common IssuesIf you encounter issues while setting up or using your SOCKS5 proxy server, consider the following troubleshooting steps:1. Check Firewall Settings: Ensure that your firewall is not blocking the proxy server. You may need to create an exception for PYProxy.2. Verify Proxy Settings: Double-check the proxy settings in your client applications to ensure they match the configuration in PYProxy.3. Test Connectivity: Ensure that your internet connection is stable and that PYProxy is running properly.4. Restart PYProxy: Sometimes, simply restarting the PYProxy application can resolve connectivity issues.Security ConsiderationsWhile a SOCKS5 proxy can enhance your privacy, there are some security considerations to keep in mind:1. Data Exposure: SOCKS5 proxies do not encrypt your data by default. For sensitive activities, consider using a VPN alongside your SOCKS5 proxy.2. Reliability of Free Proxies: If you decide to use a free SOCKS5 proxy server instead of setting up your own, be cautious. Many free proxies can log your data or expose you to malware.3. Regular Updates: Ensure that your proxy server software is regularly updated to protect against vulnerabilities.ConclusionSetting up a SOCKS5 proxy server on a Windows machine can significantly enhance your online privacy and allow you to bypass geographical restrictions. By following the steps outlined in this article, you can effectively configure your own SOCKS5 proxy server using PYProxy, providing you with greater control over your internet traffic. Whether for personal use or business purposes, a SOCKS5 proxy server can be a valuable tool in your digital toolkit. Always remember to consider security implications and choose reliable software to ensure a safe and enjoyable online experience.
In the modern Internet environment, it has become a common practice to use proxy servers to protect privacy and security. Many people hope to use proxy servers to hide their real IP addresses and achieve more secure network access. For QQ users, how to let QQ identify the proxy server IP is a hot topic. This article will introduce in detail how to configure QQ to identify the proxy server IP, including the required tools, steps, and precautions to help you achieve this goal.What is a proxy server?A proxy server is an intermediary server that sits between users and the Internet. The user's request is forwarded through the proxy server, and the target website only sees the proxy server's IP address instead of the user's real IP address. By using a proxy server, users can hide their real IP, bypass geographical restrictions, and increase network access speed.Why do you need to let QQ identify the proxy server IP?1. Protect privacy: Through a proxy server, the user's real IP will not be exposed by QQ or other services, thereby enhancing privacy protection.2. Bypass blocking: In some cases, QQ may be unavailable due to a blocked IP address. Using a proxy can help users bypass these restrictions.3. Multiple account management: For users who need to manage multiple QQ accounts, using a proxy can avoid the risk of being blocked due to frequent logins.How to let QQ identify the proxy server IPStep 1: Choose a suitable proxy serverBefore you start, you need to choose a reliable proxy server. You can choose the following types of proxies:1. HTTP proxy: used for browsing the web, suitable for ordinary web access.2. SOCKS5 proxy: supports multiple protocols, suitable for instant messaging tools such as QQ.3. VPN: Although not a proxy in the strict sense, it can also hide the real IP.Make sure the proxy server you choose is stable and fast, so as to ensure the normal use of QQ.Step 2: Configure the proxy serverThe following are the specific steps to configure the proxy server, which are applicable to Windows and Mac systems.Configure the proxy on Windows1. Open network settings:- Right-click the "Network" icon and select "Open Network and Sharing Center".- Click "Change adapter settings".2. Select a network connection:- Find the network connection you are using, right-click it, and select "Properties".3. Set up a proxy:- In the "Properties" window, select "Internet Protocol Version 4 (TCP/IPv4)" and click "Properties".- Click "Advanced", check "Use a proxy server" in the "Proxy server" section, and enter the IP address and port number of the proxy server.4. Save settings:- Click "OK" to save the settings, then close all windows.Configuring a proxy on a Mac1. Open System Preferences:- Click the Apple icon in the upper-left corner of the screen and select "System Preferences".2. Enter network settings:- In System Preferences, click "Network".3. Select a network connection:- Select the network connection you are using (such as Wi-Fi or Ethernet) in the list on the left, then click "Advanced".4. Configure Proxy:- In the "Proxy" tab, check "Web Proxy (HTTP)" or "SOCKS Proxy", and enter the IP address and port number of the proxy server.5. Save Settings:- Click "OK" to save the settings, and then close the window.Step 3: Set up a proxy in QQ1. Open QQ:- Start the QQ client and log in to your account.2. Enter Settings:- Click your profile picture in the lower left corner and select "Settings".3. Select Network Settings:- In the Settings menu, select the "Network" option.4. Configure Proxy:- In the Network Settings, find the "Proxy Server" option, check "Use Proxy Server", and enter the IP address and port number of the proxy server you set previously.5. Save Settings:- Click "OK" to save the settings.Step 4: Test whether the proxy is effective1. Check the IP address:- Use a browser to visit `whatismyip.com` or `ipinfo.io` to check whether the displayed IP address is the IP of your proxy server.2. Use QQ functions:- Try to send messages, video calls and other functions to confirm whether QQ can be used normally.Notes1. Choose a reliable proxy server: Make sure the proxy server used is fast and stable to avoid affecting the QQ user experience.2. Security: When using a public proxy server, pay attention to data security and avoid sensitive information leakage.3. Change the proxy regularly: In order to improve security, you can change the proxy server regularly to avoid being blocked.4. Check the network connection: If QQ cannot connect, please check whether the network settings and proxy configuration are correct.FAQ1. Why does QQ not support some proxies?QQ may not support certain types of proxies, especially free public proxies. It is recommended to use a paid and stable proxy service provider.2. How to solve the problem of QQ being blocked?When using a proxy, avoid frequent switching of IP addresses and maintain a stable usage environment. At the same time, follow the usage specifications of QQ and avoid sending spam messages.3. How to find a suitable proxy server?You can find recommended proxy service providers through online searches, or use some proxy testing tools to verify the speed and stability of the proxy.4. Will using a proxy affect the speed of QQ?The speed of the proxy depends on the performance of the proxy server used. If a high-quality proxy is selected, it usually does not have a significant impact on the use of QQ.Allowing QQ to identify the proxy server IP can effectively protect user privacy, bypass geographical restrictions, and manage multiple accounts. With the detailed steps in this article, you can easily configure QQ to use a proxy server. Whether you choose an HTTP proxy or a SOCKS5 proxy, make sure to choose a stable service provider for the best experience. I hope this article can help you successfully implement QQ proxy settings and enjoy safe and convenient network services.
The internet we interact with daily, known as the surface web, represents only a fraction of what the digital world has to offer. Beneath the surface lies the mysterious realm of the deep web, a vast and often misunderstood part of the internet. In this article, we delve into the deep web to demystify its nature and explore its unique characteristics.Understanding the Deep WebThe deep web refers to the part of the internet that is not indexed by search engines and is not readily accessible through traditional web browsers. It encompasses a wide range of unindexed content, including private databases, password-protected websites, academic research, government archives, and more. While some parts of the deep web are innocuous and legitimate, it is also home to illicit activities and hidden marketplaces.Accessing the Deep WebAccessing the deep web requires specialized tools such as the Tor network, which anonymizes users and allows them to browse websites anonymously. Tor routes internet traffic through a network of volunteer-operated servers, making it difficult to trace user activity. However, it is important to note that while Tor provides anonymity, it does not guarantee security. Users should exercise caution and follow best practices to protect their privacy and avoid potential risks.Navigating the Deep WebOnce inside the deep web, users encounter a vast array of websites, forums, and communities. While some offer valuable resources and information, others may be involved in illegal activities and black market transactions. Navigating the deep web requires caution and discretion. Engaging in illegal activities is not only unethical but also carries significant legal repercussions. It is crucial to be aware of the associated risks and exercise responsible behavior while exploring this hidden realm.The Dark Web: Myth vs. RealityOften confused with the deep web, the dark web represents a small subset within it. The dark web consists of intentionally hidden websites that require specific software, such as Tor, to access. It is infamous for hosting illegal activities, including drug trafficking, hacking forums, and illicit marketplaces. While the dark web garners significant media attention, it is vital to recognize that the majority of the deep web is not involved in criminal behavior.ConclusionThe deep web, with its vast unindexed content, offers a glimpse into the hidden corners of the internet. Exploring it requires caution, understanding, and a respect for legal and ethical boundaries.
How to Block VPNVirtual Private Networks (VPNs) have become increasingly popular for individuals and businesses looking to secure their online activities and access geo-restricted content. However, there are instances where organizations or network administrators may want to block VPN usage for various reasons, such as enforcing internet usage policies, preventing unauthorized access, or complying with regulatory requirements. In this blog post, we will explore the methods and considerations for blocking VPNs on a network.1. Identify VPN TrafficThe first step in blocking VPNs is to identify and understand the traffic associated with VPN connections. VPN traffic typically uses specific protocols such as OpenVPN, L2TP/IPsec, PPTP, or SSTP. Network administrators can use deep packet inspection (DPI) tools or network monitoring solutions to analyze the network traffic and identify patterns associated with VPN usage.2. Implement Firewall RulesOnce VPN traffic has been identified, network administrators can implement firewall rules to block specific VPN protocols or IP addresses associated with known VPN servers. This can be done at the network perimeter using firewalls or at the individual device level using host-based firewalls. By blocking the necessary ports and protocols used by VPNs, organizations can effectively prevent VPN connections from being established.3. Disable VPN Ports and ProtocolsAnother approach to blocking VPNs is to disable the ports and protocols commonly used by VPNs at the network level. For example, organizations can disable the GRE protocol used by PPTP VPNs or block UDP port 500 used by L2TP/IPsec VPNs. By disabling these ports and protocols, organizations can effectively prevent VPN traffic from traversing their networks.4. Utilize DNS FilteringDNS filtering can be used to block access to known VPN server domain names and IP addresses. By configuring DNS servers to block resolution of these domain names or redirecting them to a different IP address, organizations can prevent users from connecting to VPN servers. Additionally, DNS filtering can be used to enforce safe search policies and block access to malicious websites associated with VPN usage.5. Monitor Network TrafficContinuous monitoring of network traffic is essential for detecting and preventing unauthorized VPN usage. Network administrators should leverage network monitoring tools to identify anomalies in network traffic that may indicate VPN usage. By proactively monitoring network traffic, organizations can quickly identify and address any attempts to circumvent VPN blocks.6. Consider Legal and Ethical ImplicationsBefore implementing measures to block VPN usage, organizations should consider the legal and ethical implications of such actions. In some jurisdictions, blocking VPNs may be subject to specific regulations or privacy laws. Additionally, organizations should consider the impact on employee privacy and the potential backlash from users who rely on VPNs for legitimate purposes.7. Educate UsersLastly, organizations should educate their users about the reasons for blocking VPN usage and the potential risks associated with unauthorized VPN connections. By raising awareness about the security implications and policy enforcement reasons behind blocking VPNs, organizations can gain user cooperation and minimize resistance to these measures.In conclusion, blocking VPN usage on a network requires a combination of technical measures, monitoring, and user education. By understanding the methods for identifying and blocking VPN traffic, organizations can enforce their internet usage policies while maintaining a secure and compliant network environment.By following these steps, organizations can effectively block VPN usage on their networks while considering the legal, ethical, and technical aspects of implementing such measures.