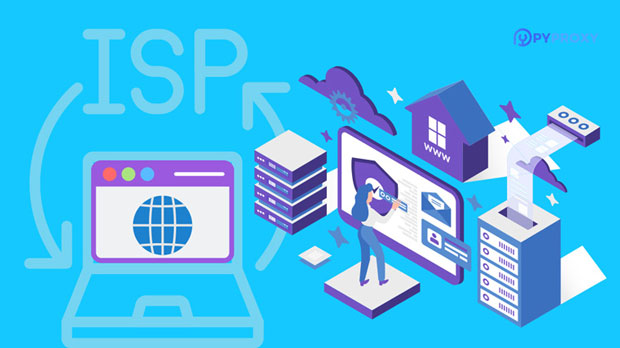
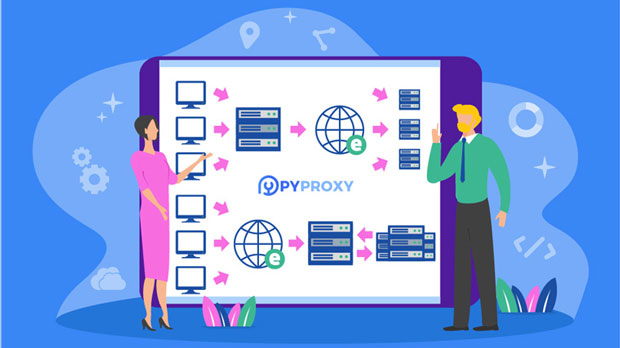
In the intricate landscape of internet infrastructure, various server types play pivotal roles in facilitating seamless online experiences. Among these, Internet Service Provider (ISP) proxy servers occupy a unique niche, offering distinct advantages and functionalities compared to other server types. This article delves into the characteristics of ISP proxy servers and compares them with other prevalent server types, highlighting their strengths and potential limitations.ISP Proxy Servers: An OverviewISP proxy servers are essentially intermediaries between users and the internet. They are often provided by internet service providers to their customers, enabling them to access the web anonymously or to bypass certain restrictions. These servers act as gateways, routing user requests through their own IP addresses before forwarding them to the intended destinations.Key Features:Anonymity: ISP proxies provide a layer of anonymity by masking the user's original IP address, helping to protect privacy.Geographic Diversity: They often have access to a range of IP addresses from different locations, allowing users to bypass geo-restrictions.Authentication: Since they are typically managed by ISPs, ISP proxies often require authentication, ensuring secure access.Comparative Analysis: ISP Proxy Servers vs. Other Server Types1. ISP Proxy Servers vs. Dedicated ServersDedicated Servers: Dedicated servers are physical servers leased by organizations for exclusive use. They offer unparalleled performance, security, and customization options.Comparison:Performance: Dedicated servers typically outperform ISP proxies in terms of raw processing power and bandwidth.Control: Users have complete control over dedicated servers, allowing for extensive customization and optimization. ISP proxies, on the other hand, offer limited customization options.Cost: Dedicated servers are significantly more expensive than ISP proxies, making them suitable for businesses with high-performance requirements and deep pockets.2. ISP Proxy Servers vs. Virtual Private Servers (VPS)VPS: Virtual Private Servers offer a balance between dedicated resources and shared hosting environments. They allow users to have their own virtualized server instances within a larger physical server.Comparison:Isolation: VPSs provide better isolation than ISP proxies, as each VPS instance runs its own operating system and software stack.Flexibility: VPSs offer more flexibility in terms of resource allocation and customization options. ISP proxies, while customizable to some extent, are more constrained.Cost: ISP proxies are often cheaper than VPSs, making them a cost-effective solution for users with less demanding requirements.3. ISP Proxy Servers vs. Cloud ServersCloud Servers: Cloud servers are virtualized computing resources provided by cloud service providers like Amazon Web Services (AWS) or Microsoft Azure. They offer scalability, high availability, and pay-as-you-go pricing models.Comparison:Scalability: Cloud servers excel in scalability, allowing users to quickly adjust their resource requirements as needed. ISP proxies, while scalable to some extent, may not offer the same level of flexibility.Availability: Cloud servers typically offer higher availability through redundancy and disaster recovery mechanisms. ISP proxies may be more susceptible to outages or downtime.Cost: Cloud servers offer a more flexible pricing model, allowing users to pay only for the resources they consume. ISP proxies may have fixed pricing or require longer-term commitments.ISP Proxy Servers in PracticeIn practice, ISP proxy servers are often used by individuals and businesses seeking to maintain anonymity online, bypass geo-restrictions, or access content that is otherwise unavailable in their region. However, it's important to note that ISP proxies may not be suitable for all use cases, particularly those requiring high performance, customization, or scalability.ConclusionISP proxy servers occupy a unique position in the server landscape, offering anonymity, geographic diversity, and authentication capabilities. While they may not match the performance, flexibility, or scalability of dedicated servers, VPSs, or cloud servers, they remain a cost-effective and practical solution for many users. Understanding the strengths and limitations of ISP proxy servers, as well as how they compare to other server types, can help individuals and businesses make informed decisions about their online infrastructure needs.
In an increasingly interconnected world, understanding how to manage your device’s IP address is crucial. For iPhone users, changing the IP address can enhance privacy, improve connectivity, and help bypass certain restrictions. This article will provide a detailed guide on how to change the IP address on your iPhone, the reasons for doing so, and the implications of such changes.Understanding IP AddressesBefore diving into the methods for changing your IP address, it’s important to understand what an IP address is. An IP (Internet Protocol) address is a unique identifier assigned to each device connected to a network. It serves two primary functions:1. Identification: It identifies a device on a network.2. Location Addressing: It provides the location of the device, allowing data to be routed correctly.There are two types of IP addresses: IPv4 and IPv6. IPv4 addresses are the most common, consisting of four sets of numbers (e.g., 192.168.1.1), while IPv6 addresses are longer and designed to accommodate the growing number of devices online.Why Change Your IP Address?There are several reasons why you might want to change the IP address on your iPhone:1. Privacy ConcernsChanging your IP address can help protect your privacy. When you browse the internet, your IP address can reveal your location and online activities. By changing it, you can mask your identity from websites, advertisers, and even your Internet Service Provider (ISP).2. Bypassing Geo-RestrictionsMany streaming services and websites restrict content based on geographical location. Changing your IP address can help you access content that may be blocked in your region, such as specific shows on Netflix or Hulu.3. Troubleshooting Connectivity IssuesIf you are experiencing connectivity problems, changing your IP address can sometimes resolve the issue. A new IP address may help eliminate conflicts with other devices on the network.4. Avoiding Bandwidth ThrottlingSome ISPs may throttle your internet speed based on your usage patterns. Changing your IP address can help you avoid this throttling and maintain a stable connection.Methods to Change Your iPhone's IP AddressThere are several methods to change the IP address on your iPhone, whether you are using Wi-Fi or cellular data.1. Changing IP Address on Wi-FiIf you are connected to a Wi-Fi network, you can easily change your IP address by adjusting the settings.Steps:1. Open Settings: Tap on the “Settings” app on your iPhone’s home screen.2. Select Wi-Fi: Tap on “Wi-Fi” to view the available networks.3. Choose Your Network: Find the Wi-Fi network you are connected to and tap the “i” icon next to it.4. Configure IP: Scroll down to find “Configure IP.” By default, this is set to “Automatic.” Tap on it.5. Select Manual: Change the setting from “Automatic” to “Manual.”6. Enter New IP Address: Fill in the new IP address you want to use. Make sure it is within the range of your network’s IP addresses. You can usually find this information in your router settings.7. Fill in Other Details: Enter the Subnet Mask and Router information. The Subnet Mask is often 255.255.255.0 for home networks, but you should confirm this with your network settings.8. Save Changes: Tap “Save” in the upper right corner to apply the changes.2. Using Airplane ModeAnother quick way to change your IP address is by toggling Airplane Mode on and off. This method works primarily for mobile data connections.Steps:1. Open Control Center: Swipe down from the top right corner of the screen (for iPhones with Face ID) or swipe up from the bottom (for iPhones with a Home button).2. Enable Airplane Mode: Tap the Airplane Mode icon to enable it. This will disconnect all network connections.3. Wait a Moment: Leave Airplane Mode on for about 30 seconds.4. Disable Airplane Mode: Tap the Airplane Mode icon again to disable it. Your iPhone will reconnect to the network, and you may receive a new IP address.3. Resetting Network SettingsIf you are experiencing persistent issues or want to ensure all network configurations are refreshed, you can reset your network settings. This will revert all network settings to their default state, including Wi-Fi networks and passwords.Steps:1. Open Settings: Tap on the “Settings” app.2. Go to General: Scroll down and select “General.”3. Select Transfer or Reset iPhone: Scroll down and tap on “Transfer or Reset iPhone.”4. Choose Reset: Tap on “Reset” and then select “Reset Network Settings.”5. Confirm Reset: You will be prompted to enter your passcode. Confirm that you want to reset the network settings. Your iPhone will restart.4. Using a VPNA Virtual Private Network (VPN) is an effective way to change your IP address while browsing the internet. A VPN routes your internet traffic through a server located in a different geographical location, effectively masking your original IP address.Steps:1. Choose a VPN Service: Select a reliable VPN provider (e.g., NordVPN, ExpressVPN, or CyberGhost).2. Download the App: Go to the App Store and download the VPN app.3. Install and Sign In: Open the app and sign in or create an account.4. Select a Server: Choose a server location from the list provided by the VPN service.5. Connect to the VPN: Tap the connect button. Your IP address will now reflect the location of the VPN server.5. Contacting Your ISPIf you are using a static IP address assigned by your ISP, you may need to contact them to request a change. This is less common for mobile devices but can be an option in some cases.Steps:1. Call Your ISP: Reach out to your ISP’s customer service.2. Request a Change: Ask if they can assign you a new static IP address.3. Follow Instructions: Follow any additional instructions they provide.Considerations When Changing Your IP AddressWhile changing your IP address can offer many benefits, there are some considerations to keep in mind:1. Potential for Connectivity IssuesChanging your IP address can sometimes lead to connectivity issues, especially if the new IP address is not properly configured. Always ensure that the new IP is within the correct range for your network.2. Impact on Network ServicesIf you have devices or services that rely on a specific IP address (such as printers or servers), changing your IP address may disrupt their functionality. Make sure to update any configurations accordingly.3. Legal and Ethical ConsiderationsBypassing restrictions or masking your identity can raise legal and ethical questions, particularly in corporate or educational environments. Ensure that you are aware of the policies governing internet usage in your organization.4. Security RisksWhile changing your IP address can enhance privacy, it is not a foolproof security measure. Always use additional security measures, such as encryption and firewalls, to protect your data.ConclusionChanging the IP address on your iPhone can provide numerous benefits, from enhancing privacy to improving connectivity. Whether you choose to modify your settings manually, toggle Airplane Mode, use a VPN, or reset your network settings, understanding the implications of these changes is essential. By following the steps outlined in this guide, you can effectively manage your iPhone’s IP address and navigate the complexities of internet connectivity with confidence.
In the modern network environment, many people use proxy servers to protect privacy, access restricted websites, or increase Internet speed. However, sometimes users may need to turn off the browser's IP proxy server in order to connect to the Internet directly. This article will detail the steps on how to turn off the IP proxy server in different browsers, as well as relevant precautions.1. What is a proxy server?A proxy server is an intermediary server located between the user and the Internet. The user's request is first sent to the proxy server, which is then forwarded to the target website by the proxy server. In this way, the proxy server can hide the user's real IP address and provide a certain degree of privacy protection. However, in some cases, using a proxy server may cause a slower connection or inaccessibility to certain websites, so it needs to be turned off.2. Steps to turn off the browser IP proxy server1. Google ChromeThe steps to turn off the proxy server in Google Chrome are as follows:1. Open Settings:- Start the Chrome browser, click the three-dot menu (More) in the upper right corner, and select "Settings".2. Access System Settings:- On the settings page, scroll down and click the "Advanced" option to expand more settings.3. Open proxy settings:- In the "System" section, click "Open your computer's proxy settings". This will open the system's network settings window.4. Turn off proxy server:- On Windows, select "LAN settings" and uncheck the "Use a proxy server for your LAN" option. Click "OK" to save changes.- On macOS, select the "Proxy" tab, uncheck all proxy options, and click "OK" to save changes.5. Restart your browser:- Close and restart the Chrome browser to ensure that the changes take effect.2. Mozilla FirefoxThe steps to turn off the proxy server in Firefox are as follows:1. Open settings:- Launch the Firefox browser, click the three horizontal lines menu in the upper right corner, and select "Options" or "Settings".2. Enter network settings:- In the left menu, select the "Network settings" section and click the "Settings" button.3. Select no proxy:- In the pop-up network settings window, select the "No proxy" option. In this way, Firefox will no longer use the proxy server.4. Save changes:- Click "OK" to save the changes.5. Restart the browser:- Close and restart the Firefox browser to ensure that the changes take effect.3. Microsoft EdgeThe steps to turn off the proxy server in Microsoft Edge are as follows:1. Open Settings:- Launch the Edge browser, click the three-dot menu in the upper right corner, and select "Settings".2. Access System Settings:- On the Settings page, select "Privacy, Search, and Services", scroll down to the "Security" section, and click "Open your computer's proxy settings".3. Turn off the proxy server:- In the Windows Network Settings window, select "LAN Settings", and uncheck the "Use a proxy server for LAN" option. Click "OK" to save the changes.4. Restart the browser:- Close and restart the Edge browser to ensure that the changes take effect.4. SafariThe steps to turn off the proxy server in Safari are as follows:1. Open System Preferences:- Click the Apple icon in the upper left corner of the screen and select "System Preferences".2. Enter Network Settings:- In System Preferences, select "Network".3. Select Network Connection:- Select the network connection currently in use (such as Wi-Fi or Ethernet) on the left, and then click "Advanced".4. Turn off proxy settings:- In the "Proxy" tab, uncheck all proxy options.5. Save changes:- Click "OK" and then "Apply" to save changes.6. Restart the browser:- Close and restart the Safari browser to ensure that the changes take effect.3. Turn off the proxy using the system proxy settingsIn some cases, the proxy settings may not only affect a single browser, but global settings. Users can turn off the proxy through the system settings:Windows system1. Open Settings:- Click the "Start" menu and select "Settings".2. Go to Network & Internet:- Select "Network & Internet", then select "Proxy".3. Turn off proxy:- In the "Manual proxy setup" section, turn off the "Use a proxy server" option.macOS system1. Open System Preferences:- Click the Apple icon in the upper-left corner of the screen and select "System Preferences".2. Go to Network Settings:- Select "Network", then select the current network connection.3. Turn off proxy settings:- Click "Advanced", select the "Proxy" tab, and uncheck all proxy options.4. Save changes:- Click "OK", then click "Apply" to save the changes.4. Notes1. Make sure your network connection is normal: After turning off the proxy server, make sure your network connection is normal. If you still cannot access certain websites, you may need to check other network settings.2. Restart the browser: After changing the proxy settings, it is recommended to close and restart the browser to ensure that the settings take effect.3. Check security software settings: If the security software you are using has a network protection function, you may need to check its settings to ensure that direct connections are not blocked.Turning off the browser's IP proxy server is a simple process. Users only need to follow the above steps to set it up in each browser. Whether it is to increase Internet speed or to access specific websites, turning off the proxy server can help users connect to the Internet better. I hope this article can help you successfully turn off the browser's IP proxy server and enjoy a smoother Internet experience.
HTTP headers are an essential part of the communication process between a client, such as a web browser, and a server. They provide crucial information about the request or the response that is being sent, allowing the two parties to understand each other and fulfill the request effectively.When a client sends a request to a server, it includes HTTP headers that convey various details about the request. Similarly, when the server responds to the request, it also includes HTTP headers to provide information about the response. These headers are key-value pairs that consist of a header name and its corresponding value, separated by a colon.There are several types of HTTP headers, each serving a specific purpose in the communication process. Some of the most common types of HTTP headers include:1. Request Headers:- Accept: This header specifies the media types that are acceptable for the response. It allows the client to indicate the type of content it can process.- Host: The Host header specifies the domain name of the server and the port number to which the client is attempting to connect.- User-Agent: This header provides information about the user agent, which is typically the web browser or client application making the request.2. Response Headers:- Content-Type: The Content-Type header indicates the media type of the resource sent in the response. It helps the client understand how to process the received content.- Server: This header reveals information about the server software handling the request. It can provide details about the server's identity and capabilities.- Set-Cookie: The Set-Cookie header is used to send a cookie from the server to the client, allowing the server to maintain stateful sessions with the client.3. General Headers:- Cache-Control: This header specifies directives for caching mechanisms in both requests and responses. It allows for control over how and for how long individual responses are cached.- Connection: The Connection header manages whether the network connection stays open after the current transaction finishes. It can also control various connection options.4. Entity Headers:- Content-Length: The Content-Length header indicates the size of the entity-body in the message. It helps the recipient know when the message ends, particularly for requests without a defined content length.- Content-Encoding: This header specifies the compression algorithm applied to the entity-body. It allows for efficient data compression during transmission.HTTP headers play a crucial role in enabling communication between clients and servers by providing essential metadata and instructions. They facilitate various functionalities such as content negotiation, caching control, and session management. Understanding HTTP headers is important for web developers, network administrators, and anyone involved in web communication to ensure efficient and secure data exchange over the internet.In conclusion, HTTP headers are fundamental components of the HTTP protocol, serving as carriers of essential information between clients and servers. They enable effective communication, provide instructions for handling requests and responses, and contribute to the overall functionality and security of web-based systems. As such, a comprehensive understanding of HTTP headers is vital for anyone working with web technologies.
Are you looking to set up a proxy in your Chrome browser? Whether it's for accessing geo-restricted content, enhancing privacy, or for any other reason, setting up a proxy in Chrome is a straightforward process. In this guide, we'll walk you through the steps to set up a proxy in your Chrome browser.What is a Proxy Server?Before we dive into the steps, let's first understand what a proxy server is. A proxy server acts as an intermediary between your device and the internet. When you connect to the internet through a proxy server, your device's IP address is masked, and the proxy server's IP address is used instead. This can help in accessing region-locked content, enhancing online privacy, and improving network performance.Setting up a Proxy in ChromeNow, let's get into the steps to set up a proxy in your Chrome browser.1. Open Chrome Browser: Launch the Chrome browser on your computer.2. Access Settings: Click on the three-dot menu icon at the top-right corner of the browser window. From the drop-down menu, select "Settings."3. Open Advanced Settings: Scroll down to the bottom of the Settings page and click on "Advanced" to expand more options.4. Open Proxy Settings: Under the "System" section, click on "Open your computer's proxy settings." This will open the Proxy settings in your operating system.5. Configure Proxy Settings: In the proxy settings window, you can configure your proxy settings based on your requirements. You can set up a manual proxy configuration or use an automatic configuration script provided by your network administrator.6. Save Settings: After configuring the proxy settings, click "Save" or "OK" to apply the changes.7. Test the Proxy: Once the proxy is set up, you can test it by visiting a website that shows your IP address. Verify that the IP address displayed is that of the proxy server and not your actual IP address.Common Proxy ErrorsWhile setting up a proxy in Chrome, you may encounter some common errors. Here are a few troubleshooting tips for common proxy errors:1. Proxy Server Refusing Connections: If you receive an error stating that the proxy server is refusing connections, double-check the proxy server address and port number to ensure they are entered correctly.2. Proxy Server Not Responding: If the proxy server is not responding, try accessing it from a different network to see if the issue is specific to your current network.3. Proxy Authentication Required: Some proxies require authentication. Ensure that you have entered the correct username and password for the proxy server.Setting up a proxy in Chrome can be beneficial for various reasons, including accessing geo-restricted content, enhancing online privacy, and improving network performance. By following the steps outlined in this guide and troubleshooting common errors, you can effectively set up a proxy in your Chrome browser. Whether you're using a free web proxy or a dedicated proxy service, configuring it in Chrome can open up a world of possibilities for your internet browsing experience.
In today's interconnected world, the internet has become an indispensable part of our daily lives. From personal browsing to business operations, the web offers a myriad of opportunities. However, with these opportunities come challenges related to security, privacy, and access restrictions. This is where Internet Service Provider (ISP) proxies come into play, enabling users to navigate the online landscape with greater security, anonymity, and efficiency.What are ISP Proxies?ISP proxies are essentially intermediary servers provided by internet service providers (ISPs). These proxies allocate dedicated IP addresses to users, facilitating their online activities through a separate layer of connection. Often hosted in data centers, ISP proxies offer a combination of datacenter network speed and the benefits of residential IP addresses, making them particularly suitable for a wide range of online tasks.Achieving Anonymity and PrivacyOne of the primary advantages of using ISP proxies is the heightened level of anonymity and privacy they provide. When browsing the internet or engaging in sensitive activities like online banking or shopping, your IP address can reveal a lot about you, including your location and browsing habits. ISP proxies mask your original IP address, replacing it with one from their pool, thus making it difficult for third parties to track your online footprint. This feature is especially crucial for individuals and businesses concerned about data privacy and protection from cyber threats.Bypassing Geographical RestrictionsISP proxies also enable users to bypass geographical restrictions imposed by certain websites and online services. Many online platforms, particularly those offering streaming services or regional content, limit access based on the user's IP address. By connecting through an ISP proxy located in a different region, users can gain access to these otherwise restricted resources. This feature is particularly beneficial for individuals traveling abroad or businesses targeting international markets.Enhancing Network OperationsISP proxies are a popular choice for large-scale network operations such as web scraping, SEO monitoring, social media analytics, and ad verification. Their static nature and high anonymity make them ideal for these tasks, ensuring consistent performance and reducing the risk of being blocked or banned by target websites. Additionally, the fast speeds and unlimited bandwidth offered by ISP proxies significantly enhance the efficiency of these operations, enabling users to gather data quickly and efficiently.Legal ConsiderationsWhile ISP proxies offer numerous benefits, it's crucial to consider legal and ethical implications. In some regions, the use of proxies or VPNs may be restricted or prohibited due to concerns over national security, data privacy, or the prevention of illegal activities. Therefore, users must ensure they comply with local laws and regulations when utilizing ISP proxies.ConclusionISP proxies are a powerful tool for enhancing online security, privacy, and efficiency. By masking your IP address, bypassing geographical restrictions, and facilitating large-scale network operations, they empower users to navigate the internet with greater freedom and control. However, it's essential to use them responsibly and within the bounds of the law. As the internet continues to evolve, ISP proxies will likely play an increasingly important role in safeguarding our online activities and unlocking new opportunities.
The PlayStation 5 (PS5) has taken the gaming world by storm since its release, offering cutting-edge graphics, fast load times, and an expansive library of games. However, as with any popular gaming console, players often seek ways to enhance their experience, including the use of proxies. This article will explore what PS5 proxies are, how they work, their benefits, and potential drawbacks.What is a Proxy?A proxy server acts as an intermediary between your device and the internet. When you use a proxy, your requests for data are sent to the proxy server first, which then forwards them to the intended destination. The response from the destination server is sent back to the proxy, which then relays it to your device. This process can help mask your IP address and improve privacy while browsing or gaming online.Types of Proxies1. HTTP Proxies: These are used primarily for web traffic. They are not suitable for gaming but can be useful for browsing.2. SOCKS Proxies: These can handle any type of traffic, including gaming, making them more versatile than HTTP proxies.3. Transparent Proxies: These do not modify requests and can be used without any configuration on the client side. However, they do not provide anonymity.4. Anonymous Proxies: These hide your IP address and allow you to surf the web without revealing your identity.5. Elite Proxies: These provide the highest level of anonymity, masking your IP address and making it difficult for websites to detect that you are using a proxy.Why Use a Proxy for PS5?Using a proxy with your PS5 can offer several advantages:1. Enhanced Privacy and SecurityProxies can help mask your IP address, making it harder for hackers or malicious users to target you. This is particularly important when playing online games, where personal information can be at risk.2. Bypassing Geo-RestrictionsMany games and content on the PlayStation Store are subject to geographical restrictions. By using a proxy, you can connect to a server in a different location, allowing you to access games and content that may not be available in your region.3. Improved Connection SpeedsIn some cases, proxies can help reduce latency and improve connection speeds by routing your traffic through faster servers. This can lead to a smoother gaming experience, especially in multiplayer games.4. Avoiding Bandwidth ThrottlingSome Internet Service Providers (ISPs) throttle bandwidth based on usage patterns, particularly for gaming. Using a proxy can help circumvent these restrictions, allowing for a more stable connection.5. Accessing Exclusive ContentCertain games or downloadable content (DLC) may be released in specific regions before others. By using a proxy, you can access this content as soon as it becomes available.How to Set Up a Proxy on Your PS5Setting up a proxy on your PS5 is a straightforward process. Here’s how to do it:Step 1: Choose a Reliable Proxy ServiceBefore you can configure your PS5, you need to select a reliable proxy service. Look for providers that offer high-speed connections, good customer support, and positive reviews from other gamers.Step 2: Obtain Proxy DetailsOnce you’ve chosen a proxy service, you will need to obtain the necessary details, including the proxy IP address and port number. This information is typically provided by the proxy service upon subscription.Step 3: Configure Proxy Settings on PS51. Turn on your PS5 and navigate to the Settings menu.2. Scroll down and select Network.3. Choose Settings and then select Set Up Internet Connection.4. Depending on your connection type (Wi-Fi or LAN), choose the appropriate option.5. Select Custom to configure your connection settings manually.6. Follow the prompts until you reach the Proxy Server option.7. Select Use and enter the IP address and port number provided by your proxy service.8. Complete the setup by following the remaining prompts.Step 4: Test Your ConnectionAfter entering your proxy details, it’s important to test your connection to ensure everything is working correctly. Go back to the Network settings and select Test Internet Connection. If the test is successful, you’re ready to start gaming!Potential Drawbacks of Using ProxiesWhile there are many benefits to using a proxy with your PS5, there are also some potential drawbacks to consider:1. Connection IssuesUsing a proxy can sometimes lead to connection instability or increased latency, particularly if the proxy server is overloaded or located far from your actual location.2. Security RisksNot all proxy services are trustworthy. Some may log your data or expose you to security vulnerabilities. It’s crucial to choose a reputable provider to minimize these risks.3. Limited BandwidthSome proxy services may impose bandwidth limits, which can affect your gaming experience. Always check the terms of service before subscribing to ensure you understand any limitations.4. Configuration ComplexitySetting up a proxy can be more complex than simply connecting to the internet. If you’re not tech-savvy, you may encounter challenges during the setup process.5. Potential Violation of Terms of ServiceUsing a proxy to bypass geo-restrictions may violate the terms of service of certain games or platforms. This could result in account suspensions or bans, so proceed with caution.Alternatives to ProxiesIf you’re hesitant about using a proxy, there are alternative methods to enhance your PS5 experience:1. VPNs (Virtual Private Networks)A VPN provides a more secure way to mask your IP address and encrypt your internet traffic. Unlike proxies, VPNs route all of your internet traffic through a secure server, providing an additional layer of security.2. Smart DNS ServicesSmart DNS services can help you bypass geo-restrictions without the latency that sometimes comes with proxies or VPNs. They work by changing your DNS settings, allowing you to access content as if you were in a different location.3. Direct ConnectionSometimes, the best solution is simply to optimize your existing connection. Ensure your router is up to date, use a wired connection for stability, and minimize interference from other devices.ConclusionUsing a proxy with your PS5 can greatly enhance your gaming experience by providing increased privacy, bypassing geo-restrictions, and potentially improving connection speeds. However, it’s essential to weigh the benefits against the potential drawbacks, such as connection issues and security risks. By carefully selecting a reliable proxy service and following the setup instructions, you can enjoy a more versatile and secure gaming experience on your PS5. Whether you choose to use a proxy, VPN, or other methods, understanding your options will empower you to make the most of your gaming adventures.
Implementing proxy servers as part of brand protection strategies requires careful planning and execution to maximize their effectiveness in safeguarding brand integrity, reputation, and intellectual property. Here are some best practices for incorporating proxy servers into brand protection strategies:1. Define Clear Objectives and Requirements:Before implementing proxy servers for brand protection, define clear objectives, goals, and requirements based on the specific needs and challenges faced by your brand. Determine the key areas of focus, such as monitoring brand mentions, detecting counterfeit products, or enhancing data privacy, to establish a strategic framework for utilizing proxy servers effectively.2. Select Reliable Proxy Providers:Choose reputable proxy providers that offer reliable services, advanced security features, and robust infrastructure to ensure seamless operation and optimal performance. Evaluate providers based on factors such as network stability, speed, scalability, data encryption capabilities, and compliance with data privacy regulations to select a provider that aligns with your brand protection requirements.3. Configure Proxy Settings Appropriately:Configure proxy settings to meet the unique demands of your brand protection strategy, such as specifying geolocations for monitoring, setting up IP rotation schedules, implementing data encryption protocols, and enabling access controls. Customize proxy configurations to align with your brand's security policies, compliance standards, and operational needs to maximize the effectiveness of brand protection measures.4. Monitor Online Activities Continuously:Utilize proxy servers to monitor online activities, social media channels, e-commerce platforms, and other digital channels regularly to track brand mentions, detect counterfeit products, identify brand abuse, and mitigate reputation risks proactively. Implement automated monitoring tools and alerts to stay informed about potential threats and take immediate action to protect your brand from harm.5. Implement Geoblocking and Content Filtering:Leverage proxy servers to implement geoblocking and content filtering measures to restrict access to high-risk regions, unauthorized websites, or malicious content that could pose a threat to your brand. Configure proxies to block suspicious IP addresses, filter out harmful content, and prevent unauthorized access to sensitive brand assets to enhance brand protection efforts and mitigate security risks effectively.6. Enhance Data Privacy and Compliance:Ensure that proxy servers are configured to enhance data privacy, encrypt sensitive information, and comply with data protection regulations to safeguard customer data and uphold privacy standards. Implement secure communication protocols, anonymize user activities, and encrypt data transmissions to protect against data breaches, unauthorized access, and regulatory violations, thereby strengthening brand trust and loyalty.7. Regularly Assess and Update Proxy Strategies:Continuously evaluate the performance of proxy servers, assess the effectiveness of brand protection measures, and identify areas for improvement or optimization to enhance the overall security posture of your brand. Stay informed about emerging threats, technological advancements, and industry best practices to adapt proxy strategies accordingly and maintain a proactive approach to brand protection.By following these best practices for implementing proxy servers in brand protection strategies, businesses can strengthen their defenses against online threats, safeguard brand reputation, and maintain trust with customers and stakeholders in the dynamic digital landscape.
In today's Internet age, wireless networks have become an indispensable part of people's daily lives. Whether at home, in the office or in public places, the popularity of Wi-Fi networks allows us to access the Internet anytime and anywhere. In order to improve network security, protect privacy or bypass geographical restrictions, many users will choose to use proxy servers. This article will introduce in detail the setting methods of wireless proxy and IP, as well as related precautions.1. What is a wireless proxy?A wireless proxy refers to the use of a proxy server as an intermediary to process network requests when connecting to the Internet via a wireless network. Proxy servers can help users hide their real IP addresses, speed up access, bypass geographical restrictions, etc. Common wireless proxy servers include HTTP proxy, HTTPS proxy, and SOCKS proxy.1. HTTP proxyHTTP proxy is mainly used to process HTTP protocol requests and is suitable for web browsing. When users access web pages through HTTP proxy, the proxy server forwards the request and returns a response.2. HTTPS proxyHTTPS proxy is used to process encrypted HTTPS requests and can provide higher security. It is usually used for websites that need to protect user privacy.3. SOCKS ProxySOCKS proxy is a universal proxy protocol that supports multiple network protocols, including TCP and UDP. It is suitable for various network applications, such as games, video streaming, etc.2. Steps to set up a wireless network proxy1. Windows systemThe steps to set up a wireless network proxy in Windows system are as follows:Step 1: Open network settings1. Click the "Start" menu and select "Settings".2. Go to "Network and Internet".Step 2: Select a wireless network1. In the left menu, select "Wi-Fi".2. Click "Properties" under "Connected Networks".Step 3: Set up a proxy1. Scroll down and find the "Proxy" section.2. Under "Manual proxy settings", turn on the "Use a proxy server" option.3. Enter the IP address and port number of the proxy server.4. If necessary, check the "Use the same proxy for all protocols" option.Step 4: Save settingsClick "Save" to apply the changes.2. macOS systemThe steps to set up a wireless network proxy in macOS are as follows:Step 1: Open Network Settings1. Click the Apple icon in the upper left corner of the screen and select "System Preferences".2. Select "Network".Step 2: Select a wireless network1. Select the wireless network you are currently using (such as Wi-Fi) on the left.2. Click "Advanced".Step 3: Set up a proxy1. Select the "Proxy" tab.2. Check the type of proxy you want to use (such as "HTTP Proxy", "HTTPS Proxy", etc.).3. Enter the IP address and port number of the proxy server.Step 4: Save settingsClick "OK" and then click "Apply" to save the changes.3. Android devicesThe steps to set up a wireless proxy in an Android device are as follows:Step 1: Open Wi-Fi settings1. Open the "Settings" app and select "Network & Internet".2. Tap "Wi-Fi", find and long press the connected network.Step 2: Modify network settings1. Select "Modify network" or "Network settings".2. In the advanced options, find the "Proxy" setting.Step 3: Set up a proxy1. Select "Manual" proxy.2. Enter the IP address and port number of the proxy server.Step 4: Save settingsTap "Save" to apply the changes.4. iOS devicesThe steps to set up a wireless proxy in an iOS device are as follows:Step 1: Open Wi-Fi settings1. Open the "Settings" app and select "Wi-Fi".2. Find and tap the connected network.Step 2: Set up the proxy1. Scroll down and find the "HTTP Proxy" option.2. Select "Manual".3. Enter the IP address and port number of the proxy server.Step 3: Save settingsReturn to the previous menu and the settings will be saved automatically.3. Set the IP addressIn addition to proxy settings, users sometimes need to manually set the IP address. Here are the general steps to set the IP address:1. Windows system1. Open network settings:- Click the "Start" menu, select "Settings", and then go to "Network and Internet".2. Select a wireless network:- In the left menu, select "Wi-Fi" and click the connected network.3. Set the IP address:- Scroll down, find the "IP Settings" section, and select "Edit".- Select "Manual", then enter the desired IP address, subnet mask, and gateway address.4. Save settings:- Click "Save" to apply the changes.2. macOS system1. Open network settings:- Click the Apple icon in the upper-left corner of the screen, select "System Preferences", and then select "Network".2. Select a wireless network:- Select the wireless network you are currently using on the left.3. Set IP address:- Click "Advanced" and select the "TCP/IP" tab.- Select "Manual" under "Configure IPv4", and then enter the IP address, subnet mask, and router address.4. Save settings:- Click "OK", then click "Apply" to save the changes.3. Android device1. Open Wi-Fi settings:- Open the "Settings" app, select "Network & Internet", and then select "Wi-Fi".2. Modify network settings:- Find the connected network, long press and select "Modify network".3. Set IP address:- In the advanced options, find "IP settings" and select "Static".- Enter the required IP address, gateway, and DNS information.4. Save settings:- Click "Save" to apply the changes.4. iOS devices1. Open Wi-Fi settings:- Open the "Settings" app, select "Wi-Fi", and find the connected network.2. Set IP address:- Click the information icon next to the network, scroll down to find the "IPV4 address" section.- Select "Manual", enter the required IP address, subnet mask, and router address.3. Save settings:- Return to the previous menu and the settings will be saved automatically.4. Notes1. Ensure the proxy information is correct: When setting up the proxy, make sure the IP address and port number entered are correct to avoid connection failure.2. Understand the network environment: When using a proxy in a public place, pay attention to network security and avoid using an unsafe proxy server.3. Check the network connection: After completing the setup, make sure the network connection is normal. You can test it by visiting a web page or using a network tool.4. Update proxy information regularly: If the proxy server used is temporary, remember to update the proxy information regularly to ensure smooth network access.Setting up wireless network proxy and IP address is an important step to ensure network security and privacy. Through the detailed steps provided in this article, users can easily complete the setting of proxy and IP address on different devices. Whether it is to increase Internet speed or to protect personal privacy, mastering these setting methods can help users better enjoy the convenience brought by the Internet. I hope this article can help you and make you more comfortable in using wireless networks.
In the digital world, the concept of IP bans is a common occurrence, yet many individuals may not fully understand what it entails. In this blog post, we will delve into the meaning of IP bans, how they work, and their implications for internet users.What is an IP Ban?An IP ban, also known as an IP address ban, is a restriction placed on a specific IP address to prevent it from accessing certain online resources or services. Every device connected to the internet is assigned a unique identifier called an IP address, which serves as its virtual location. When an IP ban is implemented, it effectively blocks the targeted IP address from accessing a particular website, online game, forum, or any other online platform.How Do IP Bans Work?IP bans are typically enforced by website administrators, online service providers, or network administrators. When an entity decides to impose an IP ban, they add the targeted IP address to a blacklist, effectively denying access to the restricted content or service. This can be achieved through various methods, such as configuring firewalls, utilizing security plugins, or implementing server-side scripts to block specific IP addresses.In some cases, IP bans may be temporary, lasting for a predetermined period, while in other instances, they may be permanent. The decision to impose an IP ban and its duration is at the discretion of the entity responsible for administering the ban.Reasons for Implementing an IP BanThere are several reasons why an entity may choose to implement an IP ban. Some common motivations for imposing IP bans include:1. Preventing malicious activities: IP bans are often used to thwart malicious actors engaged in activities such as hacking, spamming, or carrying out distributed denial-of-service (DDoS) attacks. By blocking the offending IP addresses, online platforms can mitigate the impact of such nefarious activities.2. Enforcing content restrictions: Websites and online communities may utilize IP bans to enforce content restrictions, such as preventing access to copyrighted material, adult content, or other prohibited materials based on geographical or legal considerations.3. Managing user behavior: In online gaming communities or forums, IP bans may be employed to discipline users who violate community guidelines or engage in disruptive behavior, such as harassment or cheating.Implications of an IP BanFor individuals on the receiving end of an IP ban, the implications can vary depending on the context and severity of the ban. Some potential consequences of being subject to an IP ban include:1. Restricted access: The most immediate impact of an IP ban is the inability to access the restricted online resources or services. This can be particularly frustrating for individuals who rely on a specific website or platform for work, entertainment, or communication.2. Circumvention efforts: In response to an IP ban, some users may attempt to circumvent the restriction by using proxy servers, virtual private networks (VPNs), or other methods to mask their true IP address. However, such attempts to evade an IP ban may violate the terms of service of the affected platform and could lead to further repercussions.3. Repercussions for legitimate users: In some cases, IP bans may inadvertently affect legitimate users who share the same IP address as the offending party. This can occur in shared network environments, such as universities, workplaces, or public Wi-Fi hotspots, where multiple users are assigned a single external IP address.Legal and Ethical ConsiderationsWhile IP bans can serve as a tool for maintaining security and enforcing policies within online ecosystems, there are legal and ethical considerations that warrant attention. It is important for entities imposing IP bans to ensure that their actions comply with relevant laws and regulations governing internet usage and privacy.Additionally, the indiscriminate use of IP bans without due process or proper justification may raise ethical concerns regarding censorship, freedom of expression, and access to information. As such, those responsible for implementing IP bans should exercise prudence and transparency in their decision-making processes.In conclusion, an IP ban represents a mechanism for restricting access to online content and services by targeting specific IP addresses. Whether employed to combat malicious activities, enforce content restrictions, or manage user behavior, IP bans have significant implications for both the entities imposing them and the individuals affected by them.As internet usage continues to evolve and digital landscapes become increasingly complex, understanding the implications and nuances of IP bans is essential for navigating the modern online environment responsibly and ethically. By fostering a deeper comprehension of IP bans and their impact, we can work towards creating a more secure and inclusive digital space for all users.