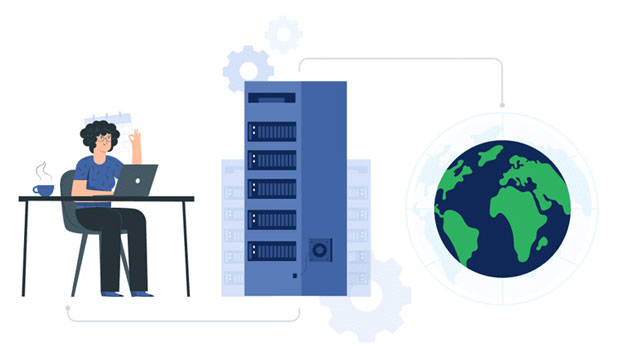
In the vast realm of online activities, having the right tools at your disposal is crucial. That's why PYPROXY is thrilled to announce the launch of our latest package: Rotating Long-term ISP and Rotating Datacenter Proxies. These groundbreaking proxies bring a whole new level of flexibility and performance to your online endeavors. Let's dive into what makes them exceptional.What Are Rotating Long-term ISP Proxies and Rotating Datacenter Proxies?Rotating Long-Term ISP Proxies and Rotating Datacenter Proxies are revolutionary solutions that combine the best features of Static ISP Proxies and Dedicated Datacenter Proxies. With unlimited concurrent sessions and the ability to issue countless parallel requests, these proxies are designed to handle large-scale tasks with ease. By rotating IPs, you gain access to a vast pool of proxies, allowing you to effortlessly switch to the IP that meets your specific needs. With 12 hours of sticky time, say goodbye to session time expirations at the worst time and IP blocks - PYPROXY has got you covered.Unleash the Full Potential of Your Proxies with PYPROXY's New PackagePYPROXY's Rotating Long-term ISP and Rotating Datacenter Proxies offer an array of powerful features that empower your online activities like never before. Let's take a closer look:Charge by traffic: Enjoy unparalleled flexibility with traffic charges. You only pay for the traffic you want, regardless of the number of IPs used. This pricing model ensures optimal cost efficiency tailored to your specific needs.Sticky Sessions up to 12 Hours: Take control of your session durations with the freedom to set the time from 1 to 720 minutes for rotating ISP proxies. For rotating datacenter proxies, you can set 1-30 minutes.No more interruptions or re-authentications - you can focus on what matters most, knowing your sessions will remain stable.User-Pass-Auth Mode: PYPROXY simplifies the proxy setup process with an easy-to-use user password authentication mode. Seamlessly configure and manage your proxies with enhanced security and convenience.Extensive Geographical Coverage: With a wide range of geographical locations offered by ISP and datacenter proxies, PYPROXY has you covered with over 30 countries/regions for ISP proxies and 20+ geographical locations for datacenter proxies, which easily meet your geographical needs.Fast and Stable Servers: PYPROXY guarantees fast and stable servers, backed by reliable infrastructure that ensures up to 99% uptime. You can trust PYPROXY to deliver exceptional performance, allowing you to execute your tasks seamlessly.Upgrade Your Proxy Game with PYPROXYDon't settle for ordinary proxies when you can have extraordinary ones. PYPROXY's Rotating Long-term ISP and Rotating Datacenter Proxies offer unmatched flexibility, performance, and reliability. Unleash the full potential of your online activities, from public data extraction to network security and market research. Get started with PYPROXY today and experience the difference!
In the world of web scraping, obtaining data from websites is a crucial task for various purposes such as market research, price comparison, and data analysis. However, web scraping can be challenging due to restrictions imposed by websites, such as IP blocking and rate limiting. To overcome these challenges, utilizing HTTP proxy API for web scraping can be a powerful solution.HTTP proxy API provides a way to access the web through a large pool of IP addresses, allowing users to make requests from different locations and avoid getting blocked. This blog post will explore the benefits of using HTTP proxy API for web scraping and provide insights into how it can be implemented effectively.Benefits of Using HTTP Proxy API for Web Scraping:1. IP Rotation: HTTP proxy API allows for rotating IP addresses, which helps in avoiding detection and getting blocked by websites. By rotating IPs, web scrapers can mimic human-like behavior and reduce the risk of being identified as a bot.2. Geolocation Targeting: With HTTP proxy API, users can specify the geolocation of the IP addresses they want to use for web scraping. This is useful for accessing region-specific data or bypassing geo-restrictions imposed by websites.3. Scalability: HTTP proxy API offers a scalable solution for web scraping by providing access to a large pool of IP addresses. This ensures that web scrapers can handle a high volume of requests without being restricted by rate limits.4. Anonymity: Using HTTP proxy API ensures anonymity while web scraping, as requests are made through different IP addresses. This helps in protecting the identity of the scraper and avoiding potential legal issues related to data collection.Implementation of HTTP Proxy API for Web Scraping:1. Choose a Reliable Proxy Provider: Selecting a reputable HTTP proxy API provider is essential to ensure the quality and reliability of the IP addresses being used for web scraping. Look for providers that offer a large pool of residential IPs and have a good reputation for uptime and performance.2. Integration with Scraping Tools: Integrate the chosen HTTP proxy API with popular web scraping tools such as Scrapy, BeautifulSoup, or Selenium. Most proxy providers offer APIs or libraries that make it easy to integrate proxy functionality into existing scraping workflows.3. IP Rotation and Rotation Management: Implement IP rotation strategies to switch between different IP addresses at regular intervals during web scraping. This can be achieved through the proxy provider's API or by building custom rotation logic within the scraping code.4. Geolocation Targeting: If geolocation targeting is required for web scraping, ensure that the chosen HTTP proxy API provider offers support for specifying the desired locations for IP addresses. This allows for accessing region-specific data without being restricted by geo-blocks.5. Monitoring and Maintenance: Regularly monitor the performance of the HTTP proxy API and the associated scraping workflows to identify any issues or potential blocks. Maintain a balance between the frequency of requests and the rotation of IP addresses to ensure smooth and uninterrupted web scraping.HTTP proxy API offers a robust solution for overcoming challenges related to web scraping, including IP blocking, rate limiting, and geolocation restrictions. By leveraging HTTP proxy API, web scrapers can enhance their capabilities to access data from websites effectively and ethically. With proper implementation and management, HTTP proxy API can be a valuable asset for web scraping initiatives across various industries.In summary, the utilization of HTTP proxy API for web scraping provides numerous benefits such as IP rotation, geolocation targeting, scalability, and anonymity. By following best practices and integrating HTTP proxy API effectively, web scrapers can optimize their data acquisition processes and achieve successful outcomes in their scraping endeavors.
Network proxy settings refer to the configuration that allows a device to route its internet traffic through a third-party server. This can be useful for various reasons, such as improving security, accessing geo-restricted content, or enhancing privacy. However, there are also situations where you may want to disable network proxy settings, such as when troubleshooting network connectivity issues or when you no longer need to use a proxy.Here's how you can disable network proxy settings on various platforms:On Windows:1. Open the Settings app by pressing the Windows key + I.2. Click on "Network & Internet."3. In the left-hand menu, select "Proxy."4. Under the "Manual proxy setup" section, toggle the switch to turn off the "Use a proxy server" option.On Mac:1. Click on the Apple menu and select "System Preferences."2. Choose "Network."3. Select your active network connection from the list on the left.4. Click on the "Advanced" button.5. Go to the "Proxies" tab and uncheck any protocols that are enabled, such as HTTP, HTTPS, or SOCKS.On iOS (iPhone or iPad):1. Open the Settings app.2. Tap on "Wi-Fi."3. Find the Wi-Fi network you are connected to and tap the "i" icon next to it.4. Scroll down and tap on "Manual" under the "HTTP Proxy" section, then turn off the "Manual" option.On Android:1. Open the Settings app.2. Tap on "Wi-Fi."3. Long-press on the connected Wi-Fi network and select "Modify network."4. Tap on "Advanced options" and then select "None" under the "Proxy" section.Once you have disabled network proxy settings, your device will no longer route its internet traffic through a proxy server. This means that your internet connection will be more direct, potentially improving speed and reducing latency. Keep in mind that if you were using a proxy for specific reasons, such as accessing geo-restricted content, disabling the proxy may result in losing access to that content.It's also important to note that some network proxy settings may be configured at the router level, in which case you would need to access your router's settings to disable the proxy. Additionally, in a corporate or enterprise environment, network proxy settings may be enforced by IT administrators for security and compliance reasons, and disabling them may not be possible without proper authorization.Network proxy settings allow devices to route their internet traffic through a third-party server for various purposes. Disabling network proxy settings can be done through the device's settings, but it's important to consider any potential implications before doing so. Whether you're troubleshooting connectivity issues or simply no longer need to use a proxy, understanding how to disable network proxy settings is an important aspect of managing your internet connection.
In today's digital age, privacy and security are becoming increasingly important concerns for internet users. With the rise of social media platforms like TikTok, many users are looking for ways to protect their personal information and maintain their privacy while using the app. One common method that users have been exploring is modifying the IP location for TikTok, in order to conceal their true geographical location.IP, or Internet Protocol, is a unique address assigned to each device connected to a network. This address can reveal a user's location, making it possible for websites and apps to track their movements and activities. By modifying the IP location, users can effectively mask their true geographical location and prevent their activities from being traced back to them.There are several reasons why users may want to modify their IP location for TikTok. Some users may be concerned about their privacy and want to prevent the app from accessing their true location. Others may want to access content that is restricted in their geographical region. Additionally, some users may simply want to maintain anonymity while using the app.One common method for modifying the IP location for TikTok is through the use of a virtual private network (VPN). A VPN allows users to connect to a server in a different location, effectively masking their true IP address and making it appear as though they are located elsewhere. By using a VPN, users can bypass geographical restrictions and access content that may be unavailable in their region.Another method for modifying the IP location for TikTok is through the use of proxy servers. Proxy servers act as intermediaries between a user's device and the internet, allowing them to mask their true IP address and appear as though they are located in a different location. While proxy servers can be effective in concealing a user's true location, they may not always provide the same level of security and privacy as a VPN.It's important to note that while modifying the IP location for TikTok can help protect a user's privacy and access restricted content, it may also violate the app's terms of service. TikTok's terms of service prohibit the use of VPNs and other methods to mask a user's true location, and engaging in such activities could result in the suspension or termination of a user's account.Before attempting to modify their IP location for TikTok, users should carefully consider the potential risks and consequences. While using a VPN or proxy server may provide temporary benefits, it's important to weigh the potential impact on one's account and adhere to the app's terms of service.In conclusion, modifying the IP location for TikTok is a common practice among users who are concerned about their privacy and security while using the app. By using methods such as VPNs or proxy servers, users can effectively conceal their true geographical location and access restricted content. However, it's important for users to carefully consider the potential risks and consequences before attempting to modify their IP location, and to always adhere to the app's terms of service.
When working with Linux proxy servers, encountering connection refusal errors can be frustrating and challenging. These errors often occur due to various reasons, including incorrect configuration, network issues, or firewall restrictions. This article will guide you through the troubleshooting process to resolve Linux proxy server connection refusal issues.1. Understand the Error MessageThe first step is to understand the error message you're encountering. Common connection refusal errors include "Connection refused," "Connection timed out," or specific error codes such as "ECONNREFUSED." These messages provide crucial clues about the underlying problem.2. Check Proxy ConfigurationThe most common cause of connection refusal is incorrect proxy configuration. Ensure that your proxy server is properly configured and running on the expected port. Check the configuration files of your proxy server software (such as Squid, Nginx, or HAProxy) and verify that the port, IP address, and other settings are correct.3. Verify Network ConnectivityNext, ensure that your system has network connectivity to the proxy server. Use the ping command to check if you can reach the proxy server's IP address. If ping fails, it might indicate a network problem, such as a firewall blocking ICMP packets or a routing issue.4. Test Proxy ConnectivityUse a tool like curl or telnet to test connectivity to the proxy server's port. For example, running curl -x http://proxy_ip:proxy_port http://example.com or telnet proxy_ip proxy_port can help determine if the proxy server is listening on the specified port and accepting connections.5. Check Firewall SettingsFirewalls can often block incoming or outgoing connections to proxy servers. Ensure that your firewall rules allow traffic to pass through the port your proxy server is listening on. If you're using a firewall like iptables or firewalld, check the ruleset and adjust it accordingly.6. Examine Log FilesProxy server software usually generates log files that record events and errors. Examine the log files for your proxy server and look for any error messages or warnings that might indicate the cause of the connection refusal. The location of these log files depends on your proxy server software and configuration.7. Restart the Proxy ServerIf you've made any changes to the proxy server's configuration, it's a good idea to restart the service to ensure that the changes take effect. Use the appropriate command to restart your proxy server software, such as sudo systemctl restart squid for Squid.8. Consult Documentation and CommunityIf you've followed the steps above and still can't resolve the issue, consult the documentation for your proxy server software or search for solutions in online communities and forums. There may be specific issues related to your setup or version of the software that require additional steps.Troubleshooting connection refusal issues with Linux proxy servers often requires a combination of network diagnostic tools, configuration checks, and careful examination of log files. By following the steps outlined in this article, you can identify and resolve most common issues related to Linux proxy server connectivity.
In the realm of proxy services, residential proxies stand out as versatile tools designed to provide users with authentic, geographically diverse IP addresses sourced from residential ISPs. Unlike data center proxies, which are often associated with suspicious activities, residential proxies offer a legitimate and reliable means of accessing the internet anonymously.One of the key advantages of residential proxies is their ability to cloak users' actual IP addresses with those of genuine residential devices. This not only enhances online anonymity but also enables users to access region-locked content, conduct market research, and engage in web scraping activities without the risk of detection.The expansive pool of residential IPs, spanning multiple countries and regions, grants users unparalleled global connectivity. Whether bypassing geo-restrictions on streaming platforms or conducting localized SEO audits, residential proxies empower users to navigate the internet as if they were physically present in various locations worldwide.Furthermore, the dynamic nature of residential proxies, which rotate IP addresses at regular intervals, ensures consistent performance and mitigates the risk of IP bans. This feature is particularly valuable for tasks requiring continuous and uninterrupted access to online resources.By leveraging the power of residential proxies, users can unlock a world of opportunities for secure, anonymous, and unrestricted online interactions. With their ability to bridge geographical boundaries and enhance digital experiences, residential proxies are reshaping the way individuals and businesses engage with the internet.The utilization of residential proxies has become increasingly prevalent in various online activities, owing to their unique benefits and capabilities. One of the primary advantages of residential proxies is their ability to provide users with genuine IP addresses associated with residential ISPs, making them appear as regular users rather than automated bots or suspicious entities.This authenticity is crucial for tasks that require accessing location-specific content or conducting market research that necessitates interaction with websites as a real user would. By utilizing residential proxies, users can overcome geo-restrictions imposed by streaming services or websites, accessing content that may be otherwise unavailable in their region.Moreover, the global coverage offered by residential proxies enables users to simulate their presence in multiple countries, facilitating activities such as localized SEO audits or market analysis. This geographical flexibility is particularly valuable for businesses seeking to expandtheir online reach or individuals looking to access region-specific content.The dynamic nature of residential proxies, with their ability to rotate IP addresses, ensures consistent performance and reduces the likelihood of IP bans. This feature is essential for tasks that require continuous and uninterrupted access to online resources, such as web scraping or social media management.In conclusion, the power of residential proxies lies in their ability to provide users with secure, anonymous, and unrestricted access to the internet. By leveraging these versatile tools, individuals and businesses can navigate the online world with confidence, expanding their digital footprint and optimizing their online experiences.
Managing your IP address is an essential skill for anyone using a computer, especially when troubleshooting network issues or configuring network settings. In Windows 10, you have the flexibility to manually change your IP address, whether you want to set a static IP or refresh your dynamic IP. This article will guide you through the process of manually modifying your IP address in Windows 10.Understanding IP AddressesWhat is an IP Address?An IP (Internet Protocol) address is a unique identifier assigned to each device connected to a network. It allows devices to communicate with each other over the internet or a local network. There are two types of IP addresses:1. IPv4: The most common format, consisting of four numbers separated by periods (e.g., 192.168.1.1).2. IPv6: A newer format designed to replace IPv4, consisting of eight groups of hexadecimal numbers.Dynamic vs. Static IP Addresses- Dynamic IP Address: Assigned by a DHCP (Dynamic Host Configuration Protocol) server, these addresses can change over time. Most home networks use dynamic IP addresses.- Static IP Address: Manually assigned and does not change unless modified. Static IPs are often used for servers or devices that need consistent access.Why Change Your IP Address?There are several reasons you might want to change your IP address:1. Troubleshooting Network Issues: Sometimes, changing your IP can resolve connectivity problems.2. Avoiding IP Conflicts: If two devices on the same network have the same IP address, it can cause conflicts.3. Remote Access: Setting a static IP can make it easier to access devices remotely.4. Privacy: Changing your IP can help maintain privacy when browsing the internet.How to Manually Change Your IP Address in Windows 10Step 1: Open Network Settings1. Right-click on the Network Icon: In the system tray (bottom right corner), right-click the network icon (Wi-Fi or Ethernet).2. Select "Open Network & Internet settings": This will open the settings window for your network.Step 2: Access Network Properties1. Click on "Change adapter options": This link is found on the left side of the window.2. Locate Your Network Connection: You will see a list of network connections. Identify the one you are currently using (e.g., Ethernet or Wi-Fi).Step 3: Open the Properties of Your Connection1. Right-click on Your Connection: Select the connection you want to modify and right-click on it.2. Select "Properties": This will open the properties window for that connection.Step 4: Select Internet Protocol Version1. Find "Internet Protocol Version 4 (TCP/IPv4)": In the list of items, locate and click on "Internet Protocol Version 4 (TCP/IPv4)".2. Click on "Properties": This will open the properties window for IPv4.Step 5: Manually Set Your IP Address1. Select "Use the following IP address": You will see two options: one for obtaining an IP address automatically and one for using a specific IP address. Choose the latter.2. Enter Your IP Address:- IP Address: Enter the desired static IP address (e.g., 192.168.1.100).- Subnet Mask: This is usually `255.255.255.0` for home networks. It defines the range of IP addresses available on your network.- Default Gateway: This is typically the IP address of your router (e.g., 192.168.1.1). It allows your device to communicate with devices outside your local network.3. Enter DNS Server Addresses: You can use your ISP’s DNS servers or public DNS servers like Google (8.8.8.8 and 8.8.4.4) or Cloudflare (1.1.1.1).Step 6: Save Changes1. Click "OK": After entering the information, click "OK" to save your settings.2. Click "Close": Close the properties window for your network connection.Step 7: Verify Your New IP AddressTo ensure your changes have taken effect:1. Open Command Prompt: Press `Windows + R`, type `cmd`, and hit Enter.2. Type `ipconfig`: This command will display your current network configuration.3. Check Your IP Address: Look for your network adapter and verify that the IP address matches the one you set.Troubleshooting Common IssuesIf you encounter issues after changing your IP address, consider the following troubleshooting steps:1. IP Address ConflictIf you receive an error indicating an IP address conflict, it means another device on the network is using the same IP address. Change your IP address to a different one within the same subnet.2. Cannot Connect to the InternetIf you cannot access the internet after changing your IP address, check the following:- Ensure that the default gateway is correctly set to your router’s IP address.- Verify that the subnet mask is appropriate for your network.- Check your DNS settings. You may want to revert to automatic DNS settings to see if that resolves the issue.3. Reverting ChangesIf you need to revert to automatic IP addressing:1. Go back to the IPv4 properties window.2. Select "Obtain an IP address automatically" and "Obtain DNS server address automatically."3. Click "OK" to save changes.Advanced IP Address ManagementFor more advanced users, consider the following options:1. Using PowerShellYou can also change your IP address using PowerShell:1. Open PowerShell as Administrator: Right-click the Start button and select "Windows PowerShell (Admin)."2. Use the following command:```powershellNew-NetIPAddress -InterfaceAlias "Ethernet" -IPAddress "192.168.1.100" -PrefixLength 24 -DefaultGateway "192.168.1.1"```Replace "Ethernet" with your connection name and adjust the IP address and gateway accordingly.2. Using Command PromptYou can also use the `netsh` command to change your IP address:1. Open Command Prompt as Administrator.2. Enter the following command:```cmdnetsh interface ip set address name="Ethernet" static 192.168.1.100 255.255.255.0 192.168.1.1```Adjust the interface name, IP address, subnet mask, and gateway as needed.ConclusionChanging your IP address in Windows 10 is a straightforward process that can help resolve network issues, avoid conflicts, and improve your online experience. By following the steps outlined in this article, you can easily set a static IP address or refresh your dynamic IP. Whether you’re troubleshooting connectivity problems or configuring a home server, understanding how to manage your IP address is a valuable skill for any Windows 10 user. Always ensure that your settings are correct to maintain a stable and secure network connection.
In today's digital landscape, online privacy and security are increasingly important. One effective way to enhance your anonymity while browsing the internet is by using a SOCKS5 proxy server. This article will guide you through the process of setting up a SOCKS5 proxy server in Mozilla Firefox, allowing you to browse the web more securely and privately.What is a SOCKS5 Proxy?SOCKS5 is an internet protocol that facilitates the routing of network packets between a client and a server through a proxy server. Unlike HTTP proxies, which only handle web traffic, SOCKS5 can manage any type of traffic, including email, file transfers, and peer-to-peer connections. This versatility makes SOCKS5 proxies popular among users who want to maintain privacy, bypass geo-restrictions, or access blocked content.Why Use a SOCKS5 Proxy in Firefox?Using a SOCKS5 proxy in Firefox can provide several benefits:1. Anonymity: By routing your internet traffic through a proxy server, your IP address is masked, making it harder for websites to track your online activities.2. Bypassing Restrictions: SOCKS5 proxies can help you access content that may be restricted in your geographical location.3. Improved Security: Although SOCKS5 does not encrypt traffic by default, it can still provide a layer of security by acting as an intermediary between your device and the internet.4. Flexibility: SOCKS5 proxies can handle various types of traffic, making them suitable for different applications beyond just web browsing.PrerequisitesBefore you begin setting up a SOCKS5 proxy in Firefox, ensure you have the following:1. Firefox Installed: Make sure you have the latest version of Mozilla Firefox installed on your computer.2. Access to a SOCKS5 Proxy: You need the address and port number of the SOCKS5 proxy server you wish to use. This could be a proxy you set up yourself or a third-party service.3. Basic Understanding of Firefox Settings: Familiarity with navigating Firefox settings will be helpful.Step 1: Open Firefox Preferences1. Launch Mozilla Firefox.2. Click on the menu button (three horizontal lines) in the upper right corner of the window.3. From the dropdown menu, select Settings (or Options depending on your version).Step 2: Navigate to Network Settings1. In the Settings menu, scroll down to the Network Settings section.2. Click on the Settings… button located at the bottom of this section.Step 3: Configure the SOCKS5 Proxy1. Select Manual Proxy Configuration: In the Connection Settings window, select the Manual proxy configuration radio button.2. Enter SOCKS5 Proxy Details:- In the SOCKS Host field, enter the IP address of your SOCKS5 proxy server.- In the Port field, enter the port number used by the SOCKS5 proxy (commonly 1080).3. Choose SOCKS5: Make sure to select SOCKS v5 by checking the appropriate box.4. Proxy DNS When Using SOCKS v5: If your SOCKS5 proxy supports DNS resolution, check the box that says Proxy DNS when using SOCKS v5. This ensures that DNS queries are also routed through the proxy, enhancing privacy.5. No Proxy for: If there are specific addresses or domains for which you do not want to use the proxy, you can enter them in the No Proxy for field, separating them with commas.Step 4: Save Your Settings1. After entering the necessary details, click on the OK button to save your settings.2. Close the Settings tab to return to your browsing session.Step 5: Testing the SOCKS5 ProxyTo verify that your SOCKS5 proxy is functioning correctly, follow these steps:1. Open a new tab in Firefox.2. Visit a website that displays your IP address, such as [whatismyip.com](https://www.whatismyip.com) or [ipinfo.io](https://ipinfo.io).3. Check the displayed IP address. If the SOCKS5 proxy is set up correctly, the IP address shown should be that of the proxy server rather than your actual IP address.Step 6: Troubleshooting Common Issues1. Connection RefusedIf you encounter a "Connection refused" error, ensure that the SOCKS5 proxy server is running and accessible. Double-check the IP address and port number you entered in the settings.2. Authentication FailedIf your SOCKS5 proxy requires authentication, you may need to enter your username and password. Unfortunately, Firefox's built-in settings do not support SOCKS5 authentication directly. In this case, consider using an extension like FoxyProxy to manage authentication.3. Slow Browsing SpeedsIf you notice slower browsing speeds after configuring the SOCKS5 proxy, it could be due to the proxy server's load or your internet connection. Try switching to a different proxy server or testing your connection speed.4. Inconsistent ResultsIf you receive inconsistent results when testing the proxy, it may indicate that the proxy server is overloaded or misconfigured. Check the proxy settings and consider using a different server.Step 7: Using Proxy Extensions for Advanced FeaturesWhile Firefox’s built-in proxy settings are sufficient for basic use, you may want to explore additional features offered by proxy management extensions. Step 8: Security ConsiderationsWhile using a SOCKS5 proxy can enhance your privacy, it’s essential to be aware of certain security considerations:1. Trustworthiness of the Proxy: Always use a reliable and trustworthy SOCKS5 proxy server. Free proxy servers may log your data or inject ads.2. Encryption: SOCKS5 does not inherently encrypt your traffic. For sensitive activities, consider using a VPN alongside your proxy for added security.3. Data Leakage: Ensure that your DNS queries are routed through the proxy to prevent DNS leaks, which can expose your true IP address.ConclusionSetting up a SOCKS5 proxy server in Firefox is a straightforward process that can significantly enhance your online privacy and security. By following the steps outlined in this article, you can effectively configure Firefox to use a SOCKS5 proxy, allowing you to browse the web anonymously and access restricted content.Whether you’re a casual user looking to protect your privacy or a developer needing to test applications, mastering the use of SOCKS5 proxies in Firefox will provide you with greater control over your internet experience. Remember to choose a reliable proxy service and stay informed about best practices for online security. Happy browsing!
In daily Internet surfing, using a proxy IP can help users protect privacy, access restricted websites, and increase browsing speed. 360 Speed Browser is a powerful browser that supports setting a proxy IP address. This article will introduce in detail how to set a proxy IP address in 360 Speed Browser, and provide practical tips and precautions.1. What is a proxy IP?A proxy IP is an intermediary server through which users access the Internet. When a user uses a proxy IP, the target website can only see the IP address of the proxy server, but cannot obtain the user's real IP. This method is often used for:- Protect privacy: Hide the real IP address and protect the user's Internet behavior.- Bypass geographical restrictions: Access websites or content restricted in certain regions.- Increase access speed: Select a proxy server closer to the target website to reduce latency.2. Introduction to 360 Speed Browser360 Speed Browser is a browser launched by Qihoo 360, focusing on security and speed. It integrates a variety of practical functions, such as ad blocking, web acceleration and privacy protection, and is popular among users. By setting the proxy IP, users can further enhance the functions of the browser.3. How to set the proxy IP address in 360 Speed Browser3.1 Open the browser settings1. Start 360 Speed Browser: First, open your 360 Speed Browser.2. Enter the settings menu: Click the "three horizontal lines" icon in the upper right corner, open the menu, and select "Settings".3.2 Find the network settings1. Select "Advanced Settings": In the settings menu, scroll down and find the "Advanced Settings" option, click to enter.2. Enter the "Network" settings: In the advanced settings, find the "Network" option and click to enter.3.3 Set the proxy server1. Select "Manually set the proxy": In the network settings, you will see the "Proxy Server" option. Select "Manually set the proxy".2. Enter the proxy IP address and port:- Proxy address: Enter the proxy IP address you want to use in "HTTP Proxy" or "SOCKS Proxy".- Port number: Enter the corresponding port number, usually 8080, 1080, etc., depending on the settings of the proxy server.3.4 Save settings1. Confirm settings: After entering the proxy IP and port, click the "OK" or "Save" button to save your settings.2. Restart the browser: To ensure that the settings take effect, it is recommended to close and restart 360 Speed Browser.4. Test whether the proxy IP setting is successfulAfter setting the proxy IP, you can test whether it is successful in the following ways:4.1 Check the IP addressVisit a website that displays your current IP address, such as [WhatIsMyIP.com](https://www.whatismyip.com). If the IP address displayed is the proxy IP you set, it means that the setting is successful.4.2 Access restricted websitesTry to access some websites that were previously inaccessible and check whether they can be opened smoothly. If they can be accessed normally, it means that the proxy settings are valid.5. Common problems and solutions5.1 Proxy IP cannot connectIf the set proxy IP cannot connect, it may be due to the following reasons:- Proxy IP invalid: Check whether the proxy IP you are using is still valid, and try to change to another proxy IP.- Network problem: Make sure your network connection is normal, try restarting the router or changing the network.5.2 Slow speedWhen using a proxy IP, you may encounter slow speed issues. This is usually related to the performance of the selected proxy server. It is recommended to choose a high-quality proxy service provider to ensure the speed and stability of its servers.5.3 Unable to access certain websitesSome websites may detect and block access to proxy IPs. At this time, you can try to change to other proxy IPs, or use VPN services to increase the access success rate.6. Precautions for using proxy IPWhen using proxy IP, please pay attention to the following points:6.1 Choose a trusted proxy serviceUsing an unreliable proxy service may lead to privacy leakage and data security issues. It is recommended to choose a reputable proxy service provider to ensure the security and stability of its services.6.2 Update proxy IP regularlyThe effectiveness of proxy IP is usually limited. Regularly updating the proxy IP used can ensure a better access experience.6.3 Pay attention to laws and regulationsWhen using proxy IP, you must comply with local laws and regulations to avoid illegal activities.Setting a proxy IP address in 360 Speed Browser is a simple and effective operation that can help users protect privacy, bypass geographical restrictions and increase access speed. With the detailed steps and tips provided in this article, you can easily complete the setting of proxy IP. I hope this article can provide you with valuable help when using 360 Speed Browser and improve your Internet experience.
There are always community rules online, such as some websites, games and apps. That’s made to remind people to behave properly online. If someone break the rules, the site can lock their IP and prevent them from visiting the site again. Yes, the site and the games you are visiting will track your IP and record it. They can even bind the IP with your personal information and device information. Although many IPs are banned due to improper online behaviour, there are still many IPs be banned by mistake or other reasons. In that case, we need to find solutions to solve the problem. There are many solutions for get around an IP ban. We list some of them. You can check them below and choose one which suits you the most. Wait for it to be unblockedMost websites will lock one IP temporarily, like 24 hours or three days, if someone break their rules one time and it’s not very serious. Therefore, if you are not in a hurry, you can just wait for it to be unblocked and use it again afterwards. It’s actually the easiest and safest way to solve this problem, because it’s what the platform want you to do. Ask for a new IP addressIf you are unlucky that your IP has been banned forever, you have to change your IP to visit the site. IP addresses are assigned by the Internet service provider (ISP), so you have to contact them to change it. The IPs won’t change frequently if you’re using a residential IP. Actually, the IP is always fixed. If you want the ISP to change one for you, they may ask for some extra fees. Some may even deny your request. Then you have to find other ways to solve the problem. Use a proxy serverWhen you use a proxy service, it’s the proxy server which send and receive data on behalf of you. In this case, the website you are visiting won’t detect your real IP. What the site can get is only the IP from the proxy server. In this way, your online behaviour and security can be protected. However, there’s still risk. If your IP changes too often when you login one account, the site may recognize this as an abnormal behaviour and disable your account for some time, even forever. So you need to be sure what you use the proxy for and how long do you need your IP to stick.There are many free proxy service online, most of them are not reliable. Setting up a proxy server cost a lot, so a reliable proxy service will charge for some money to maintain the business. Make sure what you need and search for a reliable proxy service will be the best choice.PYPROXY is a market-leading proxy solution provider. We provide rotating residential proxies and static ISP proxies. All of our proxies are highly anonymous, you can rest assured that your online behaviour is safe. Check our site and select your own proxy.