In the quest for online privacy and security, many users turn to proxy servers, particularly SOCKS5 proxies. These proxies serve as intermediaries between users and the internet, allowing for anonymous browsing and access to geo-restricted content. While the allure of free SOCKS5 proxy servers is strong, especially for those looking to save money, the potential dangers associated with these services can far outweigh their benefits. This article will explore the risks of using free SOCKS5 proxy servers and why investing in a reputable, paid service is often the safer choice.Understanding SOCKS5 ProxiesBefore delving into the dangers, it’s essential to understand what SOCKS5 proxies are. SOCKS5 is an internet protocol that routes network packets between a client and a server through a proxy server. Unlike HTTP proxies, which are limited to web traffic, SOCKS5 can handle any type of traffic, including email, file transfers, and peer-to-peer connections. This versatility makes SOCKS5 proxies appealing for various applications, but it also opens the door to potential misuse.The Allure of Free SOCKS5 ProxiesMany users are drawn to free SOCKS5 proxies due to their cost-effectiveness. The idea of accessing the internet anonymously without spending a dime is tempting, especially for individuals who are not tech-savvy or those who only need occasional proxy usage. However, this seemingly harmless choice can lead to severe consequences.1. Lack of SecurityOne of the most significant dangers of free SOCKS5 proxies is the lack of security measures. Many free proxy servers do not encrypt data, meaning that any information transmitted through them can be intercepted by malicious actors. This lack of encryption can expose sensitive data, such as login credentials, credit card numbers, and personal information, to hackers.ExampleImagine using a free SOCKS5 proxy to access your online banking account. If the proxy does not encrypt your data, a hacker could easily capture your login details and gain unauthorized access to your account.2. Data Logging and Privacy IssuesFree SOCKS5 proxy providers often log user activity to monetize their services. This means that while you may think you are browsing anonymously, your online actions are being recorded. These logs can include websites visited, data transmitted, and even personal information.ConsequencesIf a free proxy provider is compromised or decides to sell user data to third parties, your privacy is no longer secure. This could lead to targeted advertising, identity theft, or even legal issues, depending on the nature of your online activities.3. Malware and VirusesAnother serious risk associated with free SOCKS5 proxies is the potential for malware and viruses. Many free proxy servers are set up by malicious actors looking to distribute harmful software. When you connect to such a proxy, you might unknowingly download malware onto your device.ImpactOnce infected, your device can become part of a botnet, used for various malicious activities without your knowledge. Additionally, malware can steal sensitive information, damage files, and compromise your overall system security.4. Unreliable PerformanceFree SOCKS5 proxies often suffer from performance issues. Since these services are provided at no cost, they are usually overloaded with users, leading to slow connection speeds and frequent disconnections. This unreliability can be frustrating, especially for users who need a stable connection for work or streaming.User ExperienceImagine trying to watch a movie on a streaming platform using a free SOCKS5 proxy. The constant buffering and interruptions can ruin the experience, leading to dissatisfaction and wasted time.5. Legal RisksUsing free SOCKS5 proxies can also expose users to legal risks. Some free proxies may allow or even encourage illegal activities, such as torrenting copyrighted materials or accessing restricted content. If you are caught using such a proxy, you could face legal consequences, including fines or other penalties.ExampleIf a free SOCKS5 proxy is used to download pirated content, law enforcement agencies may track the activity back to your IP address, leading to potential legal action against you.6. Phishing and ScamsFree SOCKS5 proxy servers can also be used as a tool for phishing scams. Malicious actors can create fake proxy servers that mimic legitimate ones, tricking users into providing sensitive information. These phishing attempts can lead to identity theft and financial loss.How It WorksA user connects to a malicious SOCKS5 proxy, believing it to be a safe service. The attacker can then intercept all data, including login credentials for various accounts, leading to unauthorized access and potential theft.7. Limited Support and ResourcesWhen using a free SOCKS5 proxy, users typically have limited or no access to customer support. If you encounter issues or have questions, you may be left to troubleshoot on your own. This lack of support can be particularly problematic for users who are not technically inclined.ConsequencesWithout proper support, users may struggle to resolve connectivity issues, leaving them vulnerable and frustrated.ConclusionWhile the idea of using a free SOCKS5 proxy may seem appealing, the potential dangers are significant. From security vulnerabilities and data logging to legal risks and performance issues, free proxies can expose users to a host of problems that can compromise their privacy and security.Investing in a reputable, paid SOCKS5 proxy service is often the safest choice. These services typically provide better security measures, faster speeds, and reliable customer support. By prioritizing your online safety and choosing a trusted provider, you can enjoy the benefits of a SOCKS5 proxy without the associated risks.In summary, while free SOCKS5 proxies may save you money in the short term, the long-term consequences can be detrimental to your online security and privacy. Always weigh the risks and consider investing in a trustworthy service to protect your digital life.
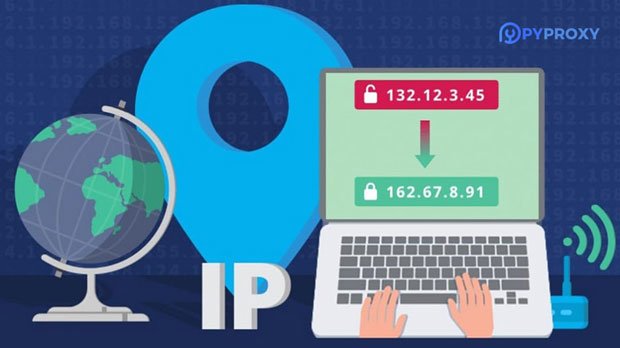
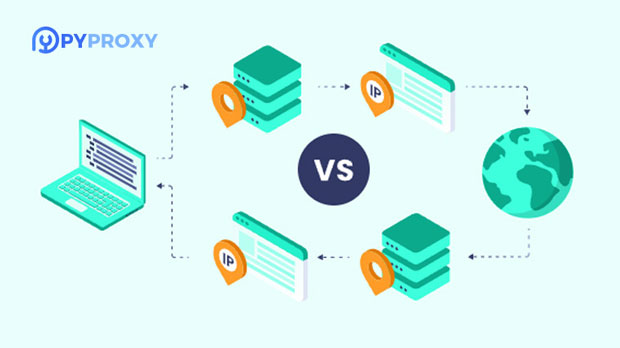
Proxy is a technology that hides the real IP address through a proxy server. It can be used to protect user privacy, increase access speed, and bypass network restrictions. Among IP proxies, static IP proxies and rotating IP proxies are two common working principles.Static IP proxy means that the proxy server uses a fixed IP address for proxying. In this case, the proxy server's IP address is fixed and does not change. When a user sends a request, the request is first sent to the proxy server, which then forwards it to the target website. Since the IP address of the proxy server is fixed, the target website cannot obtain the user's real IP address. This method is suitable for scenarios that require a stable proxy for a long time, such as users who need to bypass regional restrictions or protect privacy.Rotating IP proxy means that the proxy server uses dynamically assigned IP addresses for proxying. In this case, the IP address of the proxy server is changed regularly to avoid being identified and blocked by the target website. When a user sends a request, the request is first sent to the proxy server, which then forwards it to the target website. Since the IP address of the proxy server is dynamically assigned, the target website cannot track and block the IP address for a long time. This method is suitable for scenarios that require frequent proxy changes, such as users who need to access the target website in large numbers or perform crawling operations.There are some differences in how static IP proxies and rotating IP proxies work. First, static IP proxies use fixed IP addresses for proxies, while rotating IP proxies use dynamically assigned IP addresses for proxies. Secondly, static IP proxy is suitable for scenarios that require a stable proxy for a long time, while rotating IP proxy is suitable for scenarios that require frequent proxy changes. Finally, static IP proxies are easier to identify and block by target websites than rotating IP proxies because their IP addresses are fixed.Whether it is a static IP proxy or a rotating IP proxy, they can help users hide their real IP addresses, increase access speeds, and bypass network restrictions. Users can choose a suitable IP proxy method according to their own needs to achieve the required functions.
Proxy servers play a crucial role in the world of networking and internet security. They act as intermediaries between clients and servers, providing various benefits such as enhanced security, improved performance, and access control. In this article, we will explore the significance and purpose of using proxy servers in today's digital landscape.Enhancing SecurityOne of the primary functions of a proxy server is to enhance security. By acting as a middleman between a client and a server, a proxy server can effectively hide the client's IP address and other sensitive information from the server. This can help protect the client's identity and prevent potential security breaches. Additionally, proxy servers can be configured to filter and block malicious content, such as malware and phishing sites, thereby providing an extra layer of security for users.Improved PerformanceProxy servers can also contribute to improved network performance. By caching frequently accessed web content, a proxy server can reduce the load on the original server and accelerate the delivery of content to clients. This can result in faster load times for websites and a more seamless browsing experience for users. Furthermore, proxy servers can optimize network traffic by compressing data and minimizing bandwidth usage, which can be particularly beneficial in bandwidth-constrained environments.Access ControlAnother significant benefit of using proxy servers is the ability to enforce access control policies. Organizations can use proxy servers to regulate and monitor internet usage within their networks, allowing them to block access to specific websites or categories of content deemed inappropriate or non-essential for work-related activities. This can help improve productivity, reduce bandwidth consumption, and mitigate security risks associated with unrestricted internet access.Content FilteringProxy servers can also be employed for content filtering purposes. By inspecting and filtering web traffic, proxy servers can prevent users from accessing unauthorized or objectionable content, such as adult material or gambling sites. This can be particularly valuable for educational institutions, public Wi-Fi hotspots, and corporate environments where restricting access to certain types of content is necessary.Anonymity and PrivacyFor individual users, proxy servers offer a means to maintain anonymity and privacy while browsing the internet. By routing their traffic through a proxy server, users can conceal their IP addresses and avoid being tracked by websites or online services. This can be especially important for individuals concerned about their online privacy and those seeking to bypass geo-restrictions imposed by certain websites or streaming services.The use of proxy servers serves multiple important purposes in today's digital landscape. From enhancing security and improving performance to enabling access control and privacy protection, proxy servers play a vital role in safeguarding networks and facilitating secure and efficient internet usage. Whether used by individuals or organizations, the deployment of proxy servers can bring about significant benefits in terms of security, performance, and control over internet access. As such, the adoption of proxy servers should be considered an essential component of any comprehensive network infrastructure or internet security strategy.
In today's digital world, protecting your online privacy and bypassing geo-restrictions has become increasingly important. SOCKS5 proxies offer a secure and reliable way to achieve this, and setting them up on your iPhone is relatively straightforward. Here's a step-by-step guide on how to use SOCKS5 proxy on your iPhone.Step 1: Understand SOCKS5 ProxiesSOCKS5 is a protocol that provides a method for routing network connections through a proxy server. It offers a higher level of security and flexibility compared to other proxy protocols. SOCKS5 proxies can handle any type of traffic, including TCP and UDP, making them suitable for a wide range of applications.Step 2: Obtain a SOCKS5 Proxy ServerBefore you can use a SOCKS5 proxy on your iPhone, you need to have a SOCKS5 proxy server. You can either set up your own proxy server or use a third-party service. There are various paid and free SOCKS5 proxy services available online, so choose one that meets your needs and trustworthiness requirements.Step 3: Install a VPN or Proxy AppTo configure SOCKS5 proxy settings on your iPhone, you'll need to install a VPN or proxy app. There are several options available in the App Store, including both free and paid apps. Some popular choices are Shadowrocket, Quantumult, and Surge. These apps allow you to easily manage your proxy settings and bypass geo-restrictions.Step 4: Configure the SOCKS5 ProxyOnce you've installed a VPN or proxy app, open it and navigate to the settings section. Here, you'll find options to configure your SOCKS5 proxy settings. You'll need to provide the following information:· Server Address: The IP address or hostname of your SOCKS5 proxy server.· Port: The port number used by your SOCKS5 proxy server.· Authentication: If your SOCKS5 proxy requires authentication, you'll need to provide your username and password.Enter these details into the app's settings and save your changes.Step 5: Enable the SOCKS5 ProxyAfter configuring your SOCKS5 proxy settings, you'll need to enable the proxy. In most VPN or proxy apps, you can toggle a switch to turn on the proxy. Once enabled, all your network traffic will be routed through the SOCKS5 proxy server.Step 6: Test the ConnectionTo ensure that your SOCKS5 proxy is working correctly, you can try accessing a website or service that's typically blocked in your region. If you're able to access it without any issues, it means that your SOCKS5 proxy is working properly.Step 7: Enjoy Enhanced Online Privacy and Unblocked ContentWith your SOCKS5 proxy set up and working on your iPhone, you can now enjoy enhanced online privacy and access to previously blocked content. Remember to keep your proxy settings up to date and choose a reliable proxy service to ensure optimal performance and security.In conclusion, using a SOCKS5 proxy on your iPhone is a great way to protect your online privacy and bypass geo-restrictions. By following the steps outlined in this article, you can easily set up and use a SOCKS5 proxy on your iPhone and enjoy a more secure and unrestricted online experience.
In an era where online privacy and security are paramount, many users turn to proxy servers to enhance their browsing experience. A proxy server acts as an intermediary between your device and the internet, allowing you to browse anonymously, access geo-restricted content, and improve security. This article will guide you through the process of changing the proxy settings in Windows 10, ensuring you can manage your internet connection effectively.What is a Proxy Server?A proxy server is a server that forwards requests from clients seeking resources from other servers. When you use a proxy, your internet traffic is routed through this server, which can provide several benefits:1. Anonymity: Your real IP address is hidden, making it difficult for websites to track your online activities.2. Access to Restricted Content: Bypass geographical restrictions imposed by certain websites or services.3. Improved Security: Protect your data from potential threats by filtering out malicious traffic.4. Control and Monitoring: Organizations can monitor and control employee internet usage through proxy servers.Why Change Proxy Settings in Windows 10?Changing the proxy settings in Windows 10 can be beneficial for various reasons:- Enhanced Privacy: Using a proxy can help you maintain anonymity while browsing.- Bypassing Restrictions: Access content that may be blocked in your region.- Network Configuration: Organizations may require specific proxy settings for secure internet access.Step-by-Step Guide to Change Proxy Settings in Windows 10Step 1: Open Settings1. Click on the Start menu (Windows icon) in the lower-left corner of your screen.2. Select Settings (the gear icon) from the menu.Step 2: Navigate to Network & Internet1. In the Settings window, click on Network & Internet.2. This section contains options for managing your network connections, including Wi-Fi, Ethernet, and VPN.Step 3: Access Proxy Settings1. In the left sidebar, click on Proxy.2. This will open the proxy settings page, where you can configure your proxy settings.Step 4: Configure Automatic Proxy SetupWindows 10 provides an option for automatic proxy setup, which can simplify the process:1. Automatically detect settings: Toggle the switch to On. This allows Windows to automatically detect proxy settings in your network.2. Use setup script: If your organization provides a script for automatic configuration, toggle this option to On and enter the URL of the script in the provided field.Step 5: Configure Manual Proxy SetupIf you prefer to set up a proxy manually, follow these steps:1. Manual proxy setup: Toggle the switch to On under the Manual proxy setup section.2. Enter Proxy Address and Port: Fill in the Address and Port fields with the proxy server information provided by your proxy service.- For example, if your proxy server is `123.45.67.89` and the port is `8080`, you would enter these values accordingly.3. Bypass Proxy for Local Addresses: If you want to bypass the proxy for local addresses (like your home or office network), check the box that says Bypass proxy server for local addresses.4. Save Your Settings: After entering the required information, click on the Save button to apply the changes.Step 6: Test Your Proxy SettingsTo ensure your proxy settings are working correctly, you can test them by visiting a website that displays your IP address:1. Open a web browser (like Chrome, Firefox, or Edge).2. Go to a website such as [WhatIsMyIP.com](https://www.whatismyip.com) or [IPChicken.com](http://www.ipchicken.com).3. Check the displayed IP address. If it matches the IP address of the proxy server you configured, your settings are working.Step 7: Troubleshooting Common IssuesIf you encounter issues after changing your proxy settings, consider the following troubleshooting tips:1. Verify Proxy Details: Double-check the IP address and port number you entered to ensure there are no typos.2. Check Internet Connection: Make sure your internet connection is active. If you can’t connect to the internet, the proxy settings may not be the issue.3. Disable Proxy Temporarily: If you experience slow internet speeds or connectivity issues, try disabling the proxy temporarily to see if the problem persists.4. Clear Browser Cache: Sometimes, clearing your browser cache can resolve connectivity issues. Go to your browser settings and clear the cache and cookies.Step 8: Using a Proxy ApplicationIf you prefer not to change the system-wide proxy settings, you can use third-party proxy applications. These applications allow you to manage proxy settings directly from the application without affecting the entire system. Some popular proxy applications include:- Proxifier: Allows you to route network connections through a proxy.- ProxyCap: Lets you tunnel your internet connection through a proxy server.- VPN Services: Many VPN services also provide proxy options.Step 9: Reverting Proxy SettingsIf you want to revert your proxy settings back to the default:1. Go back to the Proxy settings in Windows 10.2. Toggle off the Manual proxy setup option.3. Toggle off the Automatically detect settings option if it was previously enabled.4. Click Save to apply the changes.ConclusionChanging the proxy settings in Windows 10 is a straightforward process that can significantly enhance your online privacy and security. By following the steps outlined in this guide, you can easily configure a proxy server to mask your IP address and access restricted content. Whether you choose to configure the settings manually or use an automatic setup, having a proxy in place can provide you with greater control over your internet experience. Always remember to choose a reliable proxy service and keep your settings updated for optimal performance.By understanding how to manage proxy settings in Windows 10, you can navigate the online world more securely and efficiently, ensuring a safer browsing experience.
In today’s digital age, privacy and security are paramount. One way to enhance your online anonymity is by using a SOCKS5 proxy server. This article will guide you through the process of setting up a SOCKS5 proxy server using PHP, providing you with a powerful tool for secure browsing and data protection.What is a SOCKS5 Proxy?SOCKS5 is an internet protocol that routes network packets between a client and a server through a proxy server. Unlike HTTP proxies, which only handle web traffic, SOCKS5 can manage any type of traffic, including email, file transfers, and peer-to-peer connections. This versatility makes SOCKS5 proxies appealing for various applications, particularly for users looking to maintain privacy and bypass geo-restrictions.Why Use PHP for a SOCKS5 Proxy?PHP is a popular server-side scripting language that is widely used for web development. While PHP is not traditionally associated with networking tasks, it can be utilized to create a simple SOCKS5 proxy server. This can be particularly useful for developers who want to experiment with proxy servers or for those who need a lightweight solution.PrerequisitesBefore we dive into the setup process, ensure you have the following:1. A Web Server: You can use Apache, Nginx, or any other web server that supports PHP.2. PHP Installed: Make sure PHP is installed on your server. You can check this by running `php -v` in your terminal.3. Basic Knowledge of PHP: Familiarity with PHP syntax and basic programming concepts will be helpful.Step 1: Install Required PHP ExtensionsTo create a SOCKS5 proxy server, you may need to install some PHP extensions. The most important one is the `sockets` extension, which allows PHP to communicate over the network.Installing PHP SocketsOn Ubuntu, you can install the necessary PHP extensions using the following commands:```bashsudo apt updatesudo apt install php php-sockets```After installing, restart your web server:```bashsudo systemctl restart apache2```Step 2: Create the SOCKS5 Proxy ScriptNow that you have the necessary extensions installed, you can create the PHP script that will handle the SOCKS5 proxy functionality.Writing the Proxy ScriptCreate a new PHP file, for example, `socks5_proxy.php`, and open it in your favorite text editor:```bashnano socks5_proxy.php```Add the following code to set up a basic SOCKS5 proxy server:```php<?phpset_time_limit(0);error_reporting(E_ALL);ini_set('display_errors', 1);// Define the SOCKS5 server settings$host = '0.0.0.0'; // Listen on all interfaces$port = 1080; // Default SOCKS5 port// Create a TCP socket$sock = socket_create(AF_INET, SOCK_STREAM, SOL_TCP);socket_bind($sock, $host, $port);socket_listen($sock);echo "SOCKS5 Proxy Server running on $host:$port...\n";while (true) {// Accept incoming connections$client = socket_accept($sock);if ($client === false) {continue;}// Handle the SOCKS5 handshake$data = socket_read($client, 1024);if (substr($data, 0, 1) === "\x05") {// SOCKS5 version$response = "\x05\x00"; // No authentication requiredsocket_write($client, $response, strlen($response));// Read the SOCKS5 request$data = socket_read($client, 1024);$cmd = ord($data[1]);if ($cmd === 1) { // CONNECT command$dest_addr = long2ip(unpack('N', substr($data, 4, 4))[1]);$dest_port = unpack('n', substr($data, 2, 2))[1];// Establish a connection to the destination$remote = socket_create(AF_INET, SOCK_STREAM, SOL_TCP);if (socket_connect($remote, $dest_addr, $dest_port)) {// Connection successful$response = "\x05\x00\x00\x01" . inet_pton($dest_addr) . pack('n', $dest_port);socket_write($client, $response, strlen($response));// Relay data between client and remote serverwhile (true) {$read = [$client, $remote];$write = null;$except = null;if (socket_select($read, $write, $except, null) > 0) {if (in_array($client, $read)) {$data = socket_read($client, 2048);if ($data === false) break;socket_write($remote, $data, strlen($data));}if (in_array($remote, $read)) {$data = socket_read($remote, 2048);if ($data === false) break;socket_write($client, $data, strlen($data));}}}} else {// Connection failed$response = "\x05\x01\x00\x01" . inet_pton($dest_addr) . pack('n', $dest_port);socket_write($client, $response, strlen($response));}}}socket_close($client);}socket_close($sock);?>```Explanation of the Code1. Socket Creation: The script creates a TCP socket to listen for incoming connections on the specified host and port.2. SOCKS5 Handshake: It handles the SOCKS5 handshake, allowing clients to connect without authentication.3. CONNECT Command: The script processes the CONNECT command, establishing a connection to the requested destination.4. Data Relay: It relays data between the client and the destination server, allowing for seamless communication.Step 3: Running the SOCKS5 Proxy ServerTo run your SOCKS5 proxy server, execute the following command in your terminal:```bashphp socks5_proxy.php```You should see a message indicating that the SOCKS5 proxy server is running.Step 4: Configuring Your ClientNow that your SOCKS5 proxy server is running, you can configure your applications to use it. Most web browsers and applications that support SOCKS5 proxies allow you to specify the proxy settings.Example Configuration in Firefox1. Open Firefox and go to Options.2. Scroll down to Network Settings and click on Settings.3. Select Manual proxy configuration.4. Enter `127.0.0.1` as the SOCKS Host and `1080` as the Port.5. Choose SOCKS v5 and click OK.Testing the ProxyTo test your SOCKS5 proxy, you can visit a website that shows your IP address, such as `whatismyip.com`. If everything is set up correctly, the IP address displayed should be that of the destination server you are connecting to through the proxy.Step 5: Security ConsiderationsWhile setting up a SOCKS5 proxy server with PHP can be a fun project, it’s important to consider security implications:1. Access Control: Limit access to your proxy server to trusted IP addresses. You can implement this by checking the client’s IP address upon connection.2. Encryption: Consider using additional layers of encryption (like SSH tunnels) to secure the data transmitted through your proxy.3. Monitoring: Regularly monitor the server logs to detect any unauthorized access attempts or unusual activities.ConclusionSetting up a SOCKS5 proxy server using PHP is a straightforward process that can provide you with a valuable tool for enhancing your online privacy. While the provided script is a basic implementation, it can be expanded with additional features, such as user authentication and logging.By understanding the workings of SOCKS5 proxies and how to implement them, you can take control of your online security and enjoy a more private browsing experience. However, always remain aware of the potential risks and take necessary precautions to protect your data and privacy.
Are you tired of being blocked or banned from websites when trying to gather data or access information? If so, you may want to consider using residential proxies. Residential proxies are a type of proxy that uses an IP address provided by an Internet Service Provider (ISP), allowing you to appear as a regular residential user. This can be incredibly useful for a variety of purposes, including web scraping, ad verification, and more.So, what exactly are residential proxies? How do they work, and why might you want to use them? In this blog post, we’ll explore the world of residential proxies and discuss their benefits and potential use cases.What are Residential Proxies?Residential proxies are IP addresses provided by an ISP to a homeowner. When you use a residential proxy, you are essentially borrowing the IP address of a residential user, allowing you to blend in with regular internet traffic. This can be incredibly useful for tasks that require a high level of anonymity and authenticity, such as web scraping or ad verification.How do Residential Proxies Work?When you connect to the internet using a residential proxy, your requests are routed through the proxy server and then through the ISP that owns the IP address. This makes it appear as though the requests are coming from a regular residential user, rather than from a data center or server farm. This can help you avoid detection and bypass any restrictions or blocks that may be in place.Benefits of Using Residential ProxiesThere are several benefits to using residential proxies, including:1. Anonymity: Residential proxies provide a high level of anonymity, making it difficult for websites to detect that you are using a proxy.2. Authenticity: Because residential proxies use IP addresses provided by ISPs, they appear as regular residential users, making them more authentic and less likely to be blocked.3. Reliability: Residential proxies are less likely to be banned or blocked by websites, as they appear as regular residential traffic.4. Geolocation: Residential proxies can be used to access content that is restricted to specific geographic locations, allowing you to bypass these restrictions and access the content you need.Potential Use Cases for Residential ProxiesResidential proxies can be used for a variety of purposes, including:1. Web Scraping: Residential proxies are commonly used for web scraping, allowing businesses to gather data from websites without being blocked or banned.2. Ad Verification: Advertisers can use residential proxies to verify that their ads are being displayed correctly and not being blocked by websites or ad blockers.3. Sneaker Bots: Sneaker enthusiasts often use residential proxies with sneaker bots to increase their chances of purchasing limited-edition sneakers online.4. Price Aggregation: Retailers and e-commerce businesses can use residential proxies to gather pricing information from competitors’ websites without being blocked.In conclusion, residential proxies can be incredibly useful for a variety of purposes, providing a high level of anonymity, authenticity, and reliability. Whether you’re interested in web scraping, ad verification, or accessing geographically restricted content, residential proxies can help you achieve your goals while avoiding detection and blocks. If you’re in need of residential proxies, be sure to do your research and choose a reputable provider to ensure that you’re getting the best possible service.
It seems like you're having trouble changing the IP address of your cloned application. There could be several reasons why you're experiencing this issue, but don't worry, we'll go through some troubleshooting steps to help you resolve it.1. Check Network Configuration:Ensure that the network configuration of your cloned application is set up correctly. This includes verifying the subnet mask, gateway, and DNS settings. Any discrepancies in these configurations could prevent the IP address from being changed successfully.2. Administrative Privileges:Make sure that you have administrative privileges to change the IP address. Without the necessary permissions, you may encounter restrictions when attempting to modify network settings.3. Conflict with DHCP:If your network is using DHCP (Dynamic Host Configuration Protocol) to assign IP addresses automatically, there may be a conflict when trying to manually change the IP address. In such cases, you may need to release the current IP lease and then assign a static IP address to your cloned application.4. Virtualization Environment:If your cloned application is running in a virtualized environment, such as VMware or VirtualBox, there may be specific network configurations within the virtualization software that need to be adjusted in addition to the operating system settings.5. Firewall and Security Software:Check if any firewall or security software is blocking the changes to the IP address. Temporarily disable any such software and attempt to change the IP address again to see if it resolves the issue.6. Reboot:Sometimes a simple reboot can resolve networking issues. Try restarting your cloned application and see if it allows you to change the IP address afterwards.7. Consult Documentation or Support:If you're using a specific software or platform for cloning applications, refer to the documentation or seek support from the provider. They may have specific guidelines or troubleshooting steps tailored to their product.8. Network Hardware:Consider checking the network hardware, such as routers, switches, or access points, to ensure that they are functioning properly and not causing any conflicts with the IP address change.By following these steps and investigating these potential causes, you should be able to troubleshoot and resolve the issue of not being able to change the IP address of your cloned application. If you continue to experience difficulties, consider seeking assistance from a professional IT support team or network administrator for further guidance.
In an increasingly digital world, access to information is vital. However, many users face restrictions that prevent them from accessing certain websites or online services. Whether due to geographical limitations, government censorship, or workplace restrictions, these barriers can be frustrating. Fortunately, a Virtual Private Network (VPN) can help you bypass these restrictions and unlock websites anytime, anywhere. This article will guide you through the process of using a VPN effectively.What is a VPN?A VPN, or Virtual Private Network, is a technology that creates a secure connection between your device and the internet. By routing your internet traffic through a remote server, a VPN masks your IP address and encrypts your data, providing anonymity and security. This allows you to access websites and services as if you were in a different location, effectively bypassing any restrictions that may be in place.Benefits of Using a VPN1. Access to Restricted Content: A VPN allows you to bypass geographical restrictions, enabling access to websites, streaming services, and social media platforms that may be blocked in your region.2. Enhanced Privacy and Security: By encrypting your internet connection, a VPN protects your data from hackers, ISPs, and government surveillance. This is especially important when using public Wi-Fi networks.3. Anonymity: A VPN masks your IP address, making it difficult for websites to track your online activities. This adds an extra layer of privacy to your browsing experience.4. Bypass Censorship: In countries with strict internet censorship, a VPN can help you access blocked websites and services, allowing for free expression and communication.Choosing the Right VPN ServiceBefore you can unlock websites using a VPN, you need to choose a suitable VPN service. Here are some factors to consider:1. Reputation and Reliability: Look for a VPN provider with a good reputation for security and privacy. Read reviews and check for any past data breaches.2. Server Locations: Ensure the VPN has servers in multiple countries, especially in regions where you want to access content.3. Speed and Performance: A good VPN should not significantly slow down your internet connection. Look for providers that offer high-speed servers.4. Security Features: Check for features such as strong encryption, a no-logs policy, and a kill switch that disconnects your internet if the VPN connection drops.5. User-Friendly Interface: Choose a VPN that is easy to use, with a straightforward interface for both desktop and mobile devices.6. Customer Support: Reliable customer support can be invaluable if you encounter issues while using the VPN.Setting Up Your VPNOnce you’ve chosen a VPN service, follow these steps to set it up:Step 1: Sign Up for a VPN Service- Go to the website of your chosen VPN provider.- Select a subscription plan that suits your needs and create an account.Step 2: Download and Install the VPN Application- After signing up, download the VPN application for your device (Windows, macOS, Android, or iOS).- Follow the installation instructions to install the application on your device.Step 3: Log In to the VPN Application- Open the VPN application and log in using the account credentials you created during the sign-up process.Step 4: Choose a Server Location- Once logged in, you will see a list of available servers. Choose a server in the location that you wish to connect to. For example, if you want to access content available only in the United States, select a server located in the U.S.Step 5: Connect to the VPN- Click on the “Connect” button in the application. The VPN will establish a secure connection to the selected server. You will typically see a notification indicating that you are connected.Step 6: Verify Your Connection- To ensure your VPN is working correctly, visit a website that displays your IP address, such as [WhatIsMyIP.com](https://www.whatismyip.com). If the displayed IP address matches the location of the server you connected to, your VPN is functioning properly.Unlocking Websites with Your VPNNow that you have set up your VPN, you can easily unlock websites by following these steps:Step 1: Connect to the VPN- Before attempting to access a restricted website, make sure your VPN is connected to the desired server location.Step 2: Visit the Website- Open your web browser and enter the URL of the website you want to access. The VPN will route your request through its server, allowing you to bypass any restrictions.Step 3: Troubleshooting Access IssuesIf you encounter issues accessing a website even with the VPN connected, consider the following troubleshooting tips:1. Switch Servers: Some websites actively block known VPN IP addresses. Try connecting to a different server location to see if that resolves the issue.2. Clear Browser Cache: Sometimes, cached data can cause access issues. Clear your browser’s cache and cookies and then try accessing the website again.3. Disable WebRTC: WebRTC can leak your real IP address even when using a VPN. Disable WebRTC in your browser settings or use a browser extension designed to block it.4. Check VPN Settings: Ensure that your VPN settings are correctly configured. Some VPNs have specific settings for bypassing geo-restrictions.5. Contact Customer Support: If you continue to have issues, reach out to your VPN provider’s customer support for assistance.Using a VPN on Different DevicesWindows and macOSThe steps outlined above are generally applicable to desktop operating systems like Windows and macOS. The VPN application will provide a user-friendly interface for connecting and managing your VPN settings.Mobile Devices (Android and iOS)1. Download the VPN App: Visit the Google Play Store or Apple App Store and download the VPN application.2. Install and Log In: Follow the installation process and log in with your account.3. Connect to a Server: Choose a server location and connect to the VPN as you would on a desktop.Browser ExtensionsSome VPN providers offer browser extensions for Chrome, Firefox, and other browsers. These extensions allow you to use the VPN directly within your browser, providing an easy way to unlock websites without affecting your entire device’s internet connection.ConclusionUsing a VPN is an effective way to unlock websites and access content anytime, anywhere. By following the steps outlined in this article, you can easily set up a VPN, connect to a server, and bypass any restrictions that may be in place. With the added benefits of enhanced privacy and security, a VPN is a valuable tool for anyone looking to navigate the internet freely and safely. Always remember to choose a reputable VPN provider and stay informed about the legalities of using a VPN in your region. Enjoy unrestricted access to the internet!
Web scraping is a powerful technique used to extract data from websites, including social media platforms, for analysis, research, and monitoring purposes. When it comes to social media data, web scraping can provide valuable insights into user behavior, trends, engagement metrics, and competitor activities. Here's a breakdown of the process of web scraping for social media data:1. Identify Data Sources:Determine the social media platforms from which you want to scrape data (e.g., Facebook, Twitter, Instagram, LinkedIn).Identify the specific types of data you wish to extract, such as user profiles, posts, comments, likes, shares, or follower counts.2. Choose a Web Scraping Tool:Select a web scraping tool or framework that suits your requirements. Popular options include BeautifulSoup, Scrapy, Selenium, and Octoparse.Consider factors such as ease of use, scalability, compatibility with social media platforms, and the complexity of data extraction.3. Understand the Website Structure:Familiarize yourself with the structure of the social media platform you intend to scrape.Identify the HTML elements, classes, and tags that contain the data you want to extract, such as post content, timestamps, user profiles, or engagement metrics.4. Develop a Scraping Strategy:Define the scraping parameters, including the starting URLs, the depth of the crawl, and the frequency of data extraction.Consider implementing proxy rotation to avoid IP bans and ensure smooth scraping operations.5. Write the Scraping Code:Use the selected web scraping tool to write code that navigates the social media platform, locates the desired data elements, and extracts the information.Utilize CSS selectors, XPaths, or other methods to pinpoint the specific data you want to scrape from the webpage.6. Handle Authentication and Rate Limiting:If scraping data from authenticated social media accounts, ensure your scraping tool can handle login credentials securely.Be mindful of rate limits imposed by social media platforms to avoid being blocked. Implement delays between requests to comply with platform guidelines.7. Extract and Store Data:Once the scraping code is executed, extract the data in the desired format (e.g., JSON, CSV, database).Implement data storage mechanisms to organize and manage the scraped data effectively for analysis and further processing.8. Monitor and Maintain the Scraping Process:Regularly monitor the scraping process for errors, interruptions, or changes in the website structure.Update the scraping code as needed to adapt to modifications on the social media platform and ensure continuous data extraction.9. Analyze and Interpret Data:Utilize the scraped social media data for analytics, insights, trend analysis, sentiment analysis, or competitive intelligence.Extract actionable information from the data to inform social media strategies, content creation, audience targeting, and performance optimization.10. Ensure Compliance with Terms of Service:Adhere to the terms of service and usage policies of the social media platforms when scraping data to avoid violations and legal repercussions.Respect copyright and privacy regulations when handling scraped social media data to maintain ethical practices.By following these steps and best practices, businesses can leverage web scraping to extract valuable social media data, gain actionable insights, and enhance their social media management strategies effectively. Web scraping for social media data can provide a competitive edge by empowering businesses with in-depth knowledge of user behavior, market trends, and competitor activities, enabling informed decision-making and strategic growth in the digital landscape.