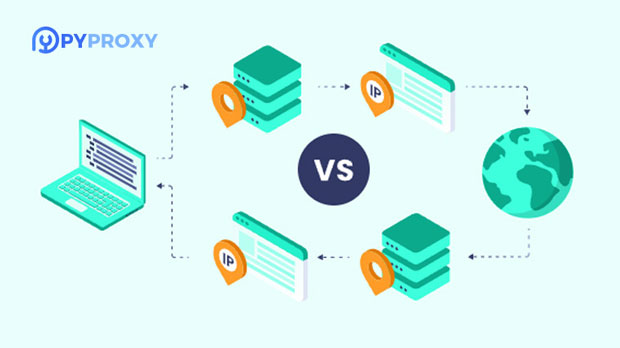
In the modern network environment, the use of proxy IPs is becoming more and more common. Although proxy IPs can help users improve anonymity and privacy protection, in some cases, users may want to disable proxy IPs in order to connect directly to the Internet. Whether it is to increase network speed or to visit specific websites, it is very important to know how to set up a laptop without proxy IP. This article will explore in detail how to set up a laptop without proxy IP in different operating systems and introduce the advantages of the PYPROXY brand.1. The basic concept of proxy IPA proxy IP is an intermediary server through which users access the Internet. When a user's request passes through a proxy server, the proxy server forwards the request to the target website and passes the returned data to the user. The benefits of using a proxy IP include:- Privacy protection: Hide the user's real IP address and protect personal privacy.- Access control: Limit access to certain websites and improve network security.- Improve speed: Some proxy servers can cache commonly used data to speed up access.However, in some cases, users may want to disable the proxy IP in order to access the Internet directly or solve connection problems.2. Set not to use a proxy IP in Windows system2.1 Access network settingsIn Windows system, users can disable proxy IP settings by following the steps below:1. Open Settings:- Click the "Start" menu and select the "Settings" icon (gear shape).2. Go to Network and Internet:- In the Settings window, select the "Network and Internet" option.3. Select Proxy Settings:- In the left menu, find the "Proxy" option.2.2 Disable Proxy SettingsOn the Proxy Settings page, users can disable the proxy:1. Turn off automatic detection of settings:- In the "Automatic proxy settings" section, make sure the "Automatically detect settings" option is turned off.2. Disable manual proxy settings:- In the "Manual Proxy Settings" section, turn off the "Use Proxy Server" switch and make sure the proxy server address and port are empty.3. Save changes:- Close the settings window and the changes will be saved automatically.2.3 Verify settingsAfter completing the settings, users can verify whether the proxy IP is successfully disabled by visiting some websites. You can visit `whatismyip.com` to check whether the displayed IP address is the real IP.3. Set not to use proxy IP in macOS systemFor macOS users, the steps to disable proxy IP are as follows:3.1 Access System Preferences1. Open System Preferences:- Click the Apple icon in the upper-left corner of the screen and select "System Preferences".2. Enter the network settings:- In the System Preferences window, select the "Network" option.3.2 Select the network connection1. Select the current network:- In the list on the left, select the currently connected network (such as Wi-Fi or Ethernet).2. Enter Advanced Settings:- Click the "Advanced" button in the lower right corner to enter the network advanced settings.3.3 Disable Proxy Settings1. Select the Proxy tab:- In the Advanced Settings window, select the "Proxy" tab.2. Cancel the proxy settings:- Make sure all proxy options (such as "Automatic Proxy Configuration", "HTTP Proxy", etc.) are unchecked.3. Save changes:- Click "OK" and then "Apply" to save changes.3.4 Verify SettingsSimilar to Windows systems, users can visit `whatismyip.com` to verify whether the proxy IP is successfully disabled.4. Set not to use proxy IP in Linux systemFor Linux users, the steps to disable the proxy IP may vary depending on the distribution, but the general steps are as follows:4.1 Access Network Settings1. Open System Settings:- Find and open the "Settings" application.2. Enter the network settings:- In the settings window, select the "Network" option.4.2 Select the network connection1. Select the current connection:- Select the network you are currently connected to (such as Wi-Fi or wired connection).2. Enter the proxy settings:- In the network settings, find the "Proxy" or "Network Proxy" option.4.3 Disable the proxy settings1. Select no proxy:- In the proxy settings, select the "No Proxy" or "Turn Off Proxy" option.2. Save the changes:- Make sure to close the window after saving the settings.4.4 Verify the settingsSimilarly, users can confirm whether the proxy IP is successfully disabled by visiting `whatismyip.com`.5. Advantages of using PYPROXYIn some cases, users may need to use a proxy IP to improve network security and privacy protection. As a professional proxy service platform, PYPROXY provides the following advantages:- Rich proxy IP resources: PYPROXY has a large number of proxy IPs to meet the needs of different users.- High anonymity: The proxy IPs provided by PYPROXY are highly anonymous and effectively protect the privacy of users.- High-quality customer service: PYPROXY provides professional technical support to help users solve problems during the setup process.6. FAQ6.1 What should I do if the network speed slows down after disabling the proxy?After disabling the proxy, the network speed usually improves. If the speed is still slow, you can check other network settings or contact your ISP.6.2 How to confirm that the proxy settings have been successfully disabled?You can visit websites such as `whatismyip.com` to check whether the displayed IP address is the real IP to confirm whether the proxy settings have been successfully disabled.6.3 What should I do if my computer still uses a proxy?If you still use a proxy after disabling it, it is recommended to check the browser settings and proxy configurations of other network applications to make sure they have also disabled the proxy.7. SummarySetting not to use a proxy IP on a laptop is an important step to improve network speed and access specific websites. By accessing the system settings, users can easily disable the proxy IP. At the same time, understanding the advantages of professional proxy service providers such as PYPROXY can help users make wise choices when they need to use a proxy. I hope this article can provide you with practical help and make your network management smoother.
DNS, or Domain Name System, is a fundamental part of how the internet functions. It is often referred to as the "phonebook of the internet" because it translates human-friendly domain names (like www.example.com) into IP addresses that computers use to identify each other on the network.When you type a website address into your browser, such as "www.google.com", your computer doesn't immediately know how to find that website on the internet. Instead, it sends a request to a DNS server, which then looks up the IP address associated with the domain name and returns it to your computer. This allows your browser to connect to the correct web server and load the website you requested.The DNS system is hierarchical, with a network of servers organized into a tree-like structure. At the top of the hierarchy are the root servers, which store information about the top-level domains like .com, .org, .net, and country-code domains like .uk, .de, and .jp. Below the root servers are the authoritative name servers for each domain, which store information about specific domain names and their corresponding IP addresses.In addition to translating domain names into IP addresses, DNS also supports other types of records that provide information about mail servers, text-based information about a domain (TXT records), and more. This flexibility allows DNS to be used for a wide range of purposes beyond simple web browsing.One of the key benefits of DNS is its ability to provide fault tolerance and load distribution. By using multiple DNS servers and caching mechanisms, the system can handle large volumes of requests and ensure that domain name resolution remains reliable even in the face of network outages or server failures.DNS is also crucial for security on the internet. It can be used to implement measures like DNS-based blacklists and whitelists to block or allow access to specific websites, as well as to enable encryption technologies like DNSSEC (DNS Security Extensions) to protect against attacks like DNS spoofing and cache poisoning.Overall, DNS plays a vital role in making the internet accessible and usable for billions of people around the world. Without it, navigating the web would be a much more cumbersome and error-prone process. As technology continues to evolve, the importance of DNS in ensuring a secure and reliable internet will only continue to grow.
In today's digital age, privacy and security are of utmost importance. One way to enhance your online privacy is by setting your IP address to a private address. In this blog post, we will explore what a private IP address is, why it's important, and how you can set it up on your devices.What is a Private IP Address?An IP address, or Internet Protocol address, is a unique string of numbers separated by periods that identifies each device connected to a network. A private IP address is an address that is not publicly accessible on the internet. Instead, it is used within a local area network (LAN) to identify devices such as computers, printers, and smartphones.Why is it Important to Use a Private IP Address?Using a private IP address provides an added layer of security for your devices and network. It helps protect your devices from unauthorized access and potential cyber threats. Additionally, using a private IP address can help prevent certain types of attacks, such as IP spoofing and port scanning.How to Set Your IP Address to a Private AddressSetting your IP address to a private address is a relatively straightforward process. Here are the steps to do so on different devices:1. Windows PC:- Click on the Start menu and open the Control Panel.- Select "Network and Sharing Center" and then click on "Change adapter settings."- Right-click on your network connection and select "Properties."- Select "Internet Protocol Version 4 (TCP/IPv4)" and click on "Properties."- Choose the option to "Use the following IP address" and enter the desired private IP address, subnet mask, and default gateway.2. Mac:- Go to the Apple menu and select "System Preferences."- Click on "Network" and select your network connection.- Click on the "Advanced" button and go to the "TCP/IP" tab.- Choose "Manually" from the Configure IPv4 dropdown menu and enter the private IP address, subnet mask, and router address.3. Mobile Devices (iOS and Android):- For iOS devices, go to "Settings," select "Wi-Fi," and tap on the (i) icon next to your connected network. Then, tap on "Configure IP" and choose "Manual" to enter the private IP address details.- For Android devices, go to "Settings," select "Wi-Fi," long-press on your connected network, and select "Modify network." Then, select "Advanced options" and change the IP settings to "Static" to enter the private IP address details.It's important to note that when setting a private IP address, you should ensure that it falls within the reserved ranges for private addresses. The most commonly used private IP address ranges are:- 10.0.0.0 – 10.255.255.255 (10.0.0.0/8)- 172.16.0.0 – 172.31.255.255 (172.16.0.0/12)- 192.168.0.0 – 192.168.255.255 (192.168.0.0/16)After setting your private IP address, it's also important to configure your router or network device to assign IP addresses within the same range using DHCP (Dynamic Host Configuration Protocol).In conclusion, setting your IP address to a private address is an essential step in enhancing your online privacy and security. By following the simple steps outlined in this blog post, you can ensure that your devices are better protected from potential threats and unauthorized access.Remember, in today's digital landscape, safeguarding your online presence is crucial, and setting a private IP address is just one of the many steps you can take towards achieving that goal.Stay safe and secure online!
Setting up a proxy server in Kali Linux can be a useful tool for various purposes, such as anonymizing your internet traffic, bypassing geo-restrictions, or accessing websites that may be blocked in your region. In this guide, we will walk through the steps to set up a proxy server in Kali Linux.Step 1: Install PrivoxyPrivoxy is a non-caching web proxy with advanced filtering capabilities for enhancing privacy, modifying web page data, managing cookies, controlling access, and removing ads, banners, pop-ups, and other obnoxious Internet junk. To install Privoxy, open a terminal and type the following command:```sudo apt-get updatesudo apt-get install privoxy```Step 2: Configure PrivoxyOnce Privoxy is installed, you will need to configure it to work as a proxy server. The configuration file for Privoxy is located at /etc/privoxy/config. Open the configuration file using a text editor such as nano or vim:```sudo nano /etc/privoxy/config```Within the configuration file, you can specify the listening address and port for Privoxy. Look for the following lines and make sure they are uncommented (remove the "#" symbol):```listen-address 127.0.0.1:8118```Save the configuration file and exit the text editor.Step 3: Start PrivoxyAfter configuring Privoxy, you will need to start the Privoxy service using the following command:```sudo service privoxy start```Step 4: Test the Proxy ServerTo test if Privoxy is working as a proxy server, open a web browser and configure it to use the proxy server. In Firefox, you can do this by navigating to Preferences > General > Network Settings and then selecting "Manual proxy configuration." Enter "127.0.0.1" as the HTTP Proxy and "8118" as the Port.Once the proxy settings are configured, try accessing a website. If everything is set up correctly, your internet traffic should now be routed through the Privoxy proxy server.Step 5: Optional - Use ProxychainsProxychains is a tool that forces any TCP connection made by any given application to follow through proxy like TOR or any other SOCKS4, SOCKS5, or HTTP(S) proxy. To install Proxychains, open a terminal and type the following command:```sudo apt-get install proxychains```After installing Proxychains, you can configure it to use Privoxy as the proxy server by editing the configuration file located at /etc/proxychains.conf.In the configuration file, locate the following line:```#socks4 127.0.0.1 9050```Uncomment the line by removing the "#" symbol and change it to:```http 127.0.0.1 8118```Save the configuration file and exit the text editor.Step 6: Use ProxychainsAfter configuring Proxychains to use Privoxy as the proxy server, you can use Proxychains to run commands or applications through the proxy server. For example, to run the "wget" command through Proxychains, use the following syntax:```proxychains wget http://example.com/file.zip```Setting up a proxy server in Kali Linux using Privoxy can be a valuable tool for various purposes. Whether you need to anonymize your internet traffic or bypass geo-restrictions, having a proxy server configured can provide you with added flexibility and security. By following the steps outlined in this guide, you can easily set up and utilize a proxy server in Kali Linux to suit your specific needs.
Are you concerned about your online privacy and security while browsing the web on your iPhone? With the increasing number of online threats and privacy breaches, it's more important than ever to take proactive steps to protect your personal information. One way to enhance your online security and privacy on your iPhone is by using iCloud Private Relay, a new feature introduced in iOS 15.What is iCloud Private Relay?iCloud Private Relay is a feature that allows you to browse the web more securely and privately on your iPhone. It works by encrypting your internet traffic and routing it through two separate internet relays, making it difficult for anyone, including your internet service provider, to track your online activity or determine your IP address. This helps to protect your privacy and prevent third parties from monitoring your online behavior.How does it work?When you enable iCloud Private Relay, your internet traffic is encrypted and sent through two separate relays. The first relay assigns you a temporary IP address that is not linked to your actual location or identity. This IP address is used to connect to the websites you visit. The second relay, operated by Apple, decrypts the traffic and sends it to the destination website. This two-step process helps to ensure that your online activity remains private and secure.Benefits of using iCloud Private Relay1. Enhanced privacy: By masking your IP address and encrypting your internet traffic, iCloud Private Relay helps to protect your online privacy and prevent third parties from tracking your online activity.2. Secure browsing: The encryption of your internet traffic provides an additional layer of security, making it more difficult for hackers and cybercriminals to intercept your data while browsing the web.3. Access to region-restricted content: Since iCloud Private Relay assigns you a temporary IP address that is not linked to your actual location, it can help you access region-restricted content or bypass geo-blocking restrictions on certain websites.4. Protection on public Wi-Fi networks: When using public Wi-Fi networks, such as those in cafes or airports, iCloud Private Relay can help to secure your internet connection and prevent unauthorized access to your data.How to enable iCloud Private RelayTo enable iCloud Private Relay on your iPhone, follow these steps:1. Open the Settings app on your iPhone.2. Tap on your Apple ID at the top of the screen.3. Select "iCloud" from the list of options.4. Scroll down and tap on "Private Relay."5. Toggle the switch to enable Private Relay.6. Choose whether you want to use "Maintain General Location" or "Use Country and Time Zone."7. You can also choose to use iCloud Private Relay with Siri or with specific apps.It's important to note that iCloud Private Relay is part of iCloud+, Apple's subscription service that includes additional features such as iCloud storage, Hide My Email, and HomeKit Secure Video support. If you're not already subscribed to iCloud+, you will need to sign up for a plan to use iCloud Private Relay.Limitations of iCloud Private RelayWhile iCloud Private Relay offers enhanced privacy and security for web browsing on your iPhone, it's important to be aware of its limitations. For example, iCloud Private Relay does not encrypt all internet traffic on your device, such as traffic from certain apps or when using a VPN. Additionally, some websites or services may not function properly when accessed through iCloud Private Relay, as they may rely on accurate location information.In conclusion, iCloud Private Relay is a valuable tool for enhancing your online privacy and security while browsing the web on your iPhone. By encrypting your internet traffic and masking your IP address, it helps to protect your personal information from prying eyes and online threats. If you're concerned about safeguarding your online privacy, consider enabling iCloud Private Relay on your iPhone and take control of your digital security.
In the rapidly evolving world of telecommunications, mobile proxy networks have become a crucial component of modern data transfer. As we move from 3G to 4G and now 5G, these proxy networks play an increasingly significant role in enhancing the speed, security, and efficiency of mobile internet connectivity.3G Mobile Proxy Networks3G, or third-generation, mobile networks were a significant leap forward from their predecessors. They introduced faster data speeds, allowing users to access the internet and stream media content on their mobile devices with much less lag. 3G mobile proxy networks act as intermediaries between mobile devices and the internet, routing data traffic through a proxy server. This not only improves data transfer efficiency but also adds a layer of security by masking the user's true IP address.However, as data consumption and demand for faster speeds grew, 3G networks began to show their limitations. This led to the development of 4G networks.4G Mobile Proxy Networks4G, or fourth-generation, mobile networks took mobile internet connectivity to a new level. With significantly faster data speeds and lower latency, 4G enabled a range of new applications and services, including high-definition video streaming, mobile gaming, and real-time video calling.4G mobile proxy networks build upon the foundation of 3G proxies, offering improved performance and security. These networks utilize more advanced proxy servers that can handle the increased data traffic and complexity of modern mobile internet usage. By routing data traffic through a proxy server, 4G mobile proxies protect users' privacy by hiding their IP addresses and encrypting their data.However, with the advent of 5G, the possibilities for mobile internet connectivity have expanded even further.5G Mobile Proxy Networks5G, or fifth-generation, mobile networks represent the next evolution in mobile internet technology. With speeds up to 20 times faster than 4G and ultra-low latency, 5G is poised to revolutionize how we use mobile devices.5G mobile proxy networks are at the forefront of this revolution. They utilize the latest proxy server technology to handle the massive amounts of data traffic generated by 5G networks. These proxies offer unprecedented levels of performance, security, and scalability, enabling users to access the internet with unprecedented speed and efficiency.By routing data traffic through a proxy server, 5G mobile proxies protect users' privacy by encrypting their data and hiding their IP addresses. This makes it difficult for hackers and other malicious entities to intercept and steal sensitive information.In addition to improved security and privacy, 5G mobile proxy networks also offer other benefits. They can help reduce network congestion and improve overall network performance by routing data traffic more efficiently. They can also be used to bypass geographic restrictions and access content that may be blocked in certain regions.In conclusion, 3G, 4G, and 5G mobile proxy networks play a crucial role in enhancing the speed, security, and efficiency of mobile internet connectivity. As we continue to evolve our mobile internet technology, it is important to understand the role that these proxy networks play in enabling the seamless and secure access to the internet on our mobile devices.
In today's digital landscape, your IP address is a fundamental part of your online identity. It serves as a unique identifier for your device on the internet, allowing websites and services to recognize and communicate with you. However, there are various reasons why you might want to change your IP address, including enhancing privacy, bypassing geographical restrictions, or troubleshooting connectivity issues. This article will explore several methods to change your IP address, along with the benefits and considerations of each approach.Understanding IP AddressesBefore diving into how to change your IP address, it’s essential to understand what an IP address is and its significance. An IP (Internet Protocol) address is a numerical label assigned to each device connected to a computer network that uses the Internet Protocol for communication. It serves two main functions:1. Identification: It identifies the host or network interface.2. Location Addressing: It provides the location of the device in the network.There are two types of IP addresses:- IPv4: The most common format, consisting of four numbers separated by periods (e.g., 192.168.1.1).- IPv6: A newer format designed to replace IPv4, consisting of eight groups of hexadecimal numbers separated by colons.Reasons to Change Your IP Address1. Privacy and Security: Changing your IP address can help protect your online identity and prevent tracking by websites or advertisers.2. Bypassing Geo-Restrictions: Some content is restricted based on geographical location. Changing your IP address allows you to access region-locked content.3. Troubleshooting: If you’re experiencing connectivity issues, changing your IP address can sometimes resolve these problems.4. Avoiding Bandwidth Throttling: Internet service providers (ISPs) may throttle your bandwidth based on your usage. Changing your IP address may help avoid this.Methods to Change Your IP Address1. Restart Your RouterOne of the simplest ways to change your IP address is to restart your router. Most residential ISPs assign dynamic IP addresses, which means they can change periodically.Steps:1. Turn off your router.2. Wait for about 5-10 minutes.3. Turn your router back on.After restarting, your ISP may assign a new IP address.2. Use a VPN (Virtual Private Network)A VPN is one of the most effective ways to change your IP address while enhancing your online privacy. A VPN routes your internet traffic through a server in a location of your choice, masking your real IP address.Steps:1. Choose a reliable VPN provider (e.g., NordVPN, ExpressVPN, or CyberGhost).2. Download and install the VPN application on your device.3. Open the application and log in.4. Select a server location and connect.Once connected, your IP address will appear as that of the VPN server.3. Use a Proxy ServerA proxy server acts as an intermediary between your device and the internet. When you use a proxy, your requests are sent through the proxy server, which changes your IP address.Steps:1. Choose a reliable proxy service.2. Configure your device’s network settings to use the proxy.3. Enter the proxy server’s IP address and port number.Keep in mind that proxies do not encrypt your traffic, so they may not provide the same level of privacy as a VPN.4. Change Your Network SettingsIf you are using a device that allows manual configuration of IP settings, you can change your IP address directly.For Windows:1. Open the Control Panel and go to "Network and Internet."2. Click on "Network and Sharing Center."3. Select "Change adapter settings."4. Right-click on your active network connection and select "Properties."5. Select "Internet Protocol Version 4 (TCP/IPv4)" and click "Properties."6. Choose "Use the following IP address" and enter a new IP address.For macOS:1. Open "System Preferences" and select "Network."2. Choose your active network connection.3. Click "Advanced" and go to the "TCP/IP" tab.4. Change "Configure IPv4" to "Manually" and enter a new IP address.5. Use Mobile DataIf you are using a mobile device, switching from Wi-Fi to mobile data can change your IP address. Mobile carriers assign dynamic IP addresses, so each time you connect, you may receive a different one.Steps:1. Disable Wi-Fi on your device.2. Enable mobile data.3. Open your browser to check your new IP address.6. Contact Your ISPIf you have a static IP address assigned by your ISP and need to change it, contacting them directly is your best option. They can assist you in changing your IP address.Steps:1. Call or email your ISP’s customer support.2. Request a change of your IP address.3. Follow their instructions.Considerations When Changing Your IP Address- Dynamic vs. Static IP: Understand whether you have a dynamic or static IP address. Dynamic IPs can change automatically, while static IPs require manual intervention.- Legal and Ethical Implications: Ensure that you are not violating any terms of service or laws when changing your IP address.- VPN and Proxy Limitations: While VPNs and proxies can provide anonymity, they may slow down your internet speed. Choose reputable services to minimize this impact.- Security Risks: Changing your IP address does not guarantee complete anonymity. Be aware of the potential risks and take additional steps to secure your online presence.ConclusionChanging your IP address can be a valuable tool for enhancing your online privacy, accessing restricted content, or troubleshooting connectivity issues. With various methods available, from simple router restarts to using VPNs or proxies, you can easily manage your IP address to suit your needs.As you navigate the digital landscape, remember to prioritize your online security and privacy. By understanding the implications of changing your IP address and selecting the right method for your situation, you can enjoy a safer and more flexible internet experience.
K2 routers are popular for their reliability and performance, making them a great choice for users looking to enhance their internet experience. This article will guide you through the process of configuring a Socks5 proxy on K2 routers, allowing you to enjoy the benefits of enhanced privacy and security.What is a Socks5 Proxy Server?Socks5 is a protocol that allows clients to connect to the internet through a proxy server. Unlike HTTP proxies, which only handle web traffic, Socks5 can handle any type of traffic, making it suitable for various applications, including gaming, streaming, and file sharing. By routing your traffic through a Socks5 proxy, you can mask your IP address and bypass geo-restrictions.Benefits of Using a Socks5 Proxy on K2 RoutersAnonymity: By masking your IP address, a Socks5 proxy provides a level of anonymity that is essential for privacy-conscious users.Bypassing Restrictions: Many users rely on Socks5 proxies to access content that may be blocked in their region, such as streaming services or websites.Improved Speed: Socks5 proxies can sometimes offer better speeds compared to other types of proxies because they handle data more efficiently.Step-by-Step Guide to Configure Socks5 Proxy on K2 RoutersStep 1: Choose a Socks5 Proxy ProviderBefore configuring your K2 router, you need to select a reliable Socks5 proxy provider. Research various providers to find one that meets your needs in terms of speed, reliability, and security. Paid services often provide better performance and support than free options.Step 2: Gather Your Proxy InformationOnce you’ve selected a provider, you’ll need the following information to configure your router:Proxy Server Address: The IP address of the Socks5 proxy server.Port Number: The port through which the proxy server operates.Username and Password: If your proxy requires authentication, you’ll need these credentials.Step 3: Access Your K2 Router’s Configuration PageOpen a web browser and enter your router’s IP address in the address bar (usually 192.168.1.1 or 192.168.0.1).Log in using your router’s admin credentials.Step 4: Navigate to the Proxy SettingsLook for sections labeled “Network,” “Internet,” or “Advanced Settings.” Depending on your router model, the location of the proxy settings may vary. Some routers may not support Socks5 proxies directly, so check your router's documentation for specific instructions.Step 5: Enter Your Socks5 Proxy DetailsFind the option to enable proxy settings. This might be labeled as “Use Proxy” or “Proxy Configuration.”Enter the Socks5 proxy server address and port number.If authentication is required, enter your username and password.Step 6: Save and RebootAfter entering the necessary information, save your settings. It’s a good idea to reboot your router to ensure that the changes take effect. Once your router restarts, all devices connected to it will route their internet traffic through the Socks5 proxy.Testing Your Proxy ConnectionTo confirm that your K2 router is using the Socks5 proxy, you can visit a website that checks your IP address, such as whatismyip.com. If the displayed IP address matches that of your Socks5 proxy server, you’ve successfully configured your router.Troubleshooting Common IssuesConnection Problems: If you cannot connect to the internet after configuring the proxy, double-check the proxy settings for accuracy. Ensure that the proxy server is operational and that your credentials are correct.Slow Speeds: If you experience slow internet speeds, consider switching to a different Socks5 proxy server or provider. Some proxies may be overloaded, leading to reduced performance.ConclusionConfiguring a Socks5 proxy on your K2 router can significantly enhance your online privacy and security. By following the steps outlined in this article, you can mask your IP address, bypass geo-restrictions, and enjoy a more secure browsing experience. With the right setup, your entire network can benefit from the advantages of using a Socks5 proxy.
Web scraping has emerged as a fundamental tool for extracting valuable data from websites, automating tasks, and gaining competitive insights in various industries. Residential proxies play a pivotal role in enhancing web scraping operations by providing anonymity, circumventing restrictions, and ensuring reliable data extraction from target websites. In this article, we delve into the functionalities, benefits, and best practices of using residential proxies for web scraping, exploring how businesses can optimize their data acquisition processes and drive informed decision-making through effective web scraping strategies.Key Features of Residential Proxies for Web Scraping:IP Rotation: Residential proxies offer IP rotation capabilities, allowing web scrapers to switch between different IPs to avoid detection, prevent IP blocking, and maintain uninterrupted data extraction processes.Anonymity and Unblocking: By masking the true IP address of users, residential proxies provide anonymity, bypass geo-restrictions, and evade anti-scraping measures implemented by websites, ensuring seamless and undetectable web scraping activities.Data Integrity: Residential proxies ensure data integrity by mimicking human-like browsing behaviors, accessing websites from legitimate IP addresses, and preventing data inaccuracies or biases that may arise from IP blocking or cloaking techniques used by target websites.Benefits of Using Residential Proxies for Web Scraping:1. Unrestricted Data Access: Residential proxies enable web scrapers to access geo-restricted content, bypass IP-based restrictions, and extract data from websites that employ anti-scraping mechanisms, expanding data sourcing capabilities and improving data quality for analysis and decision-making.2. Scalable Data Collection: Residential proxies support scalable data collection by providing a pool of diverse IP addresses, enabling web scrapers to distribute requests, parallelize scraping tasks, and extract large volumes of data efficiently from multiple sources, enhancing productivity and performance in web scraping operations.3. Enhanced Anonymity and Security: Residential proxies offer enhanced anonymity and security for web scraping activities by protecting user identities, encrypting data transmissions, and mitigating the risks of IP blocking, bot detection, and security vulnerabilities, ensuring a secure and confidential scraping environment.Best Practices for Implementing Residential Proxies in Web Scraping:1. Proxy Rotations: Configure residential proxies with rotating IP addresses to switch between different IPs at regular intervals, prevent IP bans, and maintain continuous data extraction processes without interruptions or detection by target websites.2. User-Agent Customization: Customize user-agent strings to mimic various web browsers, devices, and operating systems when using residential proxies for web scraping, emulating diverse user behaviors and reducing the likelihood of being flagged as a bot or automated scraper.3. Proxy Pool Management: Regularly monitor and manage proxy pools to ensure IP diversity, high availability, and optimal performance in web scraping operations, selecting reputable residential proxy providers with reliable infrastructure and responsive support services to maximize scraping efficiency.In conclusion, residential proxies serve as essential tools for enhancing web scraping operations, enabling businesses to collect valuable data, gain competitive insights, and drive informed decision-making processes effectively. By implementing best practices, ethical guidelines, and compliance measures when using residential proxies for web scraping, businesses can optimize their data acquisition strategies, mitigate risks, and unlock the full potential of web scraping for competitive advantage and business growth in today's data-driven landscape.
In the world of networking, the use of proxies has become increasingly prevalent. Proxies act as intermediaries between users and the internet, providing various benefits such as improved security, privacy, and access to geo-restricted content. Among the different types of proxies, SOCKS proxies stand out for their ability to facilitate a wide range of network connections and offer unparalleled flexibility.Facilitating Different Types of Network ConnectionsSOCKS proxies excel in facilitating different types of network connections, making them an ideal choice for users with diverse networking needs. Whether it's establishing a secure connection to a remote server or enabling access to region-locked content, SOCKS proxies offer the flexibility to accommodate various use cases.1. Secure Remote Access: In scenarios where users need to connect to a remote server securely, such as accessing company resources from a remote location, SOCKS proxies can serve as a reliable solution. By routing traffic through the proxy server, users can establish a secure connection without exposing their direct IP address, mitigating the risk of unauthorized access or monitoring.2. Bypassing Geographical Restrictions: Many online services restrict access based on the user's geographical location. With a SOCKS proxy, users can route their traffic through servers located in different regions, effectively bypassing geographical restrictions and accessing content that may be otherwise unavailable in their location. This capability is particularly valuable for individuals who wish to access region-locked streaming services or websites.3. Enhanced Anonymity: By directing traffic through a SOCKS proxy, users can obscure their real IP address and location, enhancing their online anonymity and privacy. This feature is especially beneficial for individuals who prioritize anonymity while browsing the internet or engaging in online activities.Flexibility in Application SupportAnother compelling aspect of SOCKS proxies is their compatibility with a wide range of applications. Unlike some other types of proxies that are limited to specific protocols or applications, SOCKS proxies can accommodate diverse applications and network protocols, offering unparalleled flexibility.Email Clients: Users can configure their email clients to communicate through a SOCKS proxy, ensuring that their email traffic is routed securely and privately.Online Gaming: Gamers can leverage SOCKS proxies to enhance their gaming experience by reducing latency and protecting against certain types of attacks, all while maintaining their privacy and security.Challenges and ConsiderationsWhile SOCKS proxies offer remarkable flexibility and utility, there are certain challenges and considerations that users should be mindful of:Performance Considerations: Depending on the proxy server's location and capacity, users may experience varying levels of performance when using a SOCKS proxy. Factors such as latency and bandwidth limitations can impact the overall user experience.Security Implications: While SOCKS proxies can enhance security and privacy, it's essential to select a reputable and trustworthy proxy provider. Using an unsecured or compromised proxy server can expose users to potential security risks.Application Compatibility: Not all applications fully support SOCKS proxies, which may lead to compatibility issues or limitations in certain scenarios. Users should verify the compatibility of their desired applications with SOCKS proxies before implementation.ConclusionSOCKS proxies offer a compelling solution for users seeking flexibility and versatility in their network connections. With support for various types of traffic, authentication capabilities, and compatibility with diverse applications, SOCKS proxies empower users to navigate the internet securely, bypass restrictions, and maintain their privacy. By understanding the capabilities and considerations associated with SOCKS proxies, individuals and organizations can harness the full potential of these versatile networking tools.