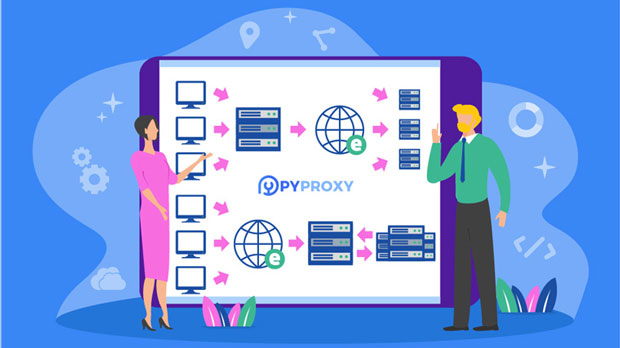
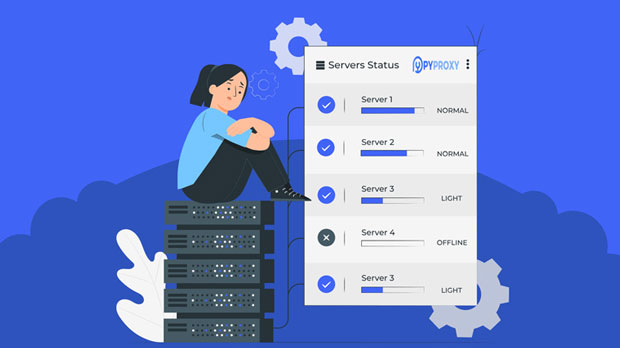
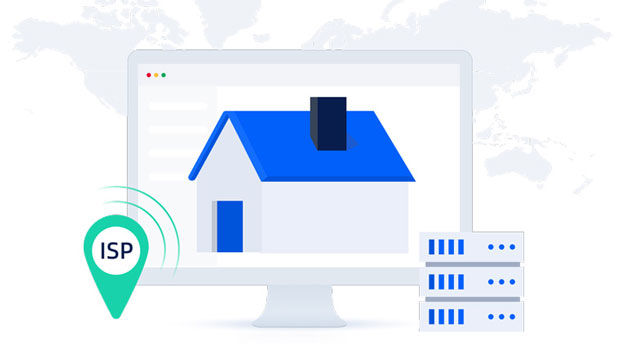
HTTP proxies offer several advantages for web connectivity, but they also come with limitations that users should consider. Understanding the pros and cons of using HTTP proxies can help individuals and organizations make informed decisions about their web connectivity needs.Advantages of Using HTTP Proxies for Web Connectivity:Anonymity and Privacy:HTTP proxies can provide a layer of anonymity by masking the user's IP address. This can be beneficial for individuals who want to browse the web without revealing their location or identity. Additionally, HTTP proxies can help users bypass geo-restrictions and access region-locked content.Security:HTTP proxies can act as a buffer between the user's device and the internet, providing an additional layer of security. By routing web traffic through a proxy server, users can potentially mitigate the risk of direct cyber threats, such as malware and phishing attacks.Content Filtering and Access Control:Organizations can use HTTP proxies to enforce content filtering and access control policies. By routing web traffic through a proxy server, businesses can block access to malicious or inappropriate websites, thereby enhancing network security and productivity.Performance Optimization:HTTP proxies can cache frequently accessed web content, reducing the need for repeated requests to the original server. This can lead to improved load times and reduced bandwidth usage, especially in environments with multiple users accessing the same content.Bandwidth Savings:In a network environment where multiple users are accessing the internet through a proxy server, bandwidth savings can be achieved by caching and compressing web content. This can result in more efficient use of available bandwidth and reduced network congestion.Limitations of Using HTTP Proxies for Web Connectivity:Security Risks:While HTTP proxies can enhance security, they can also introduce security risks if not properly configured. If the proxy server is not adequately secured, it may become a target for cyber attacks or unauthorized access, potentially compromising sensitive data.Performance Impact:In some cases, routing web traffic through a proxy server can introduce latency and slow down the browsing experience. This is especially true if the proxy server is located far from the user's geographical location or if it is under heavy load.Single Point of Failure:When an organization relies heavily on a single HTTP proxy server for web connectivity, any downtime or failure of the proxy server can disrupt internet access for all connected users. Redundancy measures may be necessary to mitigate this risk.Privacy Concerns:While HTTP proxies can offer anonymity, users should be aware that some free or public proxies may log and track user activity. This could potentially compromise user privacy if the proxy provider does not adhere to strict privacy policies.Compatibility Issues:Certain web applications and services may not function properly when accessed through an HTTP proxy. This can be due to protocol restrictions, content filtering rules, or other limitations imposed by the proxy server.In conclusion, HTTP proxies offer various benefits for web connectivity, including anonymity, security, and performance optimization. However, it is essential to consider the potential limitations, such as security risks, performance impact, and privacy concerns. By carefully evaluating the advantages and disadvantages of using HTTP proxies, individuals and organizations can make informed decisions about incorporating proxies into their web connectivity strategies.
A Virtual Private Server (VPS) is a virtual machine that is sold as a service by an Internet hosting service. It runs its own copy of an operating system, and customers have superuser-level access to that operating system instance, so they can install almost any software that runs on that OS.VPS hosting is a popular choice for website owners who need more control over their hosting environment than shared hosting can offer. With a VPS, you get your own virtual server that has its own allocation of resources, including CPU, RAM, and storage. This means that your website will not be affected by the traffic or activities of other websites on the same server.There are several benefits to using a VPS. One of the main advantages is the level of control it provides. With a VPS, you have full root access, which means you can customize the server configuration to meet your specific needs. This level of control is not typically available with shared hosting.Another benefit of VPS hosting is scalability. With a VPS, you can easily scale your resources as your website grows. This means you can start with a smaller package and upgrade as needed, without experiencing any downtime.VPS hosting also offers better security compared to shared hosting. Since each VPS operates in its own environment, any security issues or malware attacks on other VPS instances will not affect your server. This isolation provides an added layer of security for your website and data.Additionally, VPS hosting provides better performance compared to shared hosting. With dedicated resources, your website will load faster and perform better, especially during high traffic periods.In conclusion, a VPS offers website owners a cost-effective way to have more control, security, and performance compared to shared hosting. It is a popular choice for businesses and individuals who require a reliable hosting solution that can be customized to their specific needs. If you are looking for a hosting solution that offers more control and better performance than shared hosting, then VPS hosting may be the right choice for you.
In today's digital age, privacy and security are becoming increasingly important. One way to protect your online identity and maintain anonymity is by using a proxy IP to mask your IP address. In this blog post, we will explore what a proxy IP is, how it works, and the benefits of using one.What is a Proxy IP?A proxy IP, or simply a proxy, is an intermediary server that sits between your device and the internet. When you connect to the internet through a proxy, your device's IP address is hidden, and the proxy server's IP address is used instead. This means that websites and online services will see the proxy server's IP address rather than your own.How Does it Work?When you use a proxy IP, your internet traffic is routed through the proxy server before reaching its final destination. This process involves the following steps:1. Request: When you access a website or online service, your device sends a request to the proxy server instead of directly to the destination server.2. Proxy Server: The proxy server receives your request and forwards it to the destination server on your behalf.3. Response: The destination server sends its response back to the proxy server, which then forwards it to your device.Benefits of Using a Proxy IPThere are several benefits to using a proxy IP to mask your IP address:1. Anonymity: By hiding your IP address, a proxy IP allows you to browse the internet anonymously. This can be useful for protecting your privacy and avoiding online tracking.2. Access Control: Some websites and online services may restrict access based on geographic location. By using a proxy IP with an IP address from a different location, you can bypass these restrictions and access content that may be otherwise unavailable in your region.3. Security: Using a proxy IP can add an extra layer of security to your online activities. It can help protect against cyber threats such as hacking, phishing, and malware by hiding your real IP address from potential attackers.4. Performance: In some cases, using a proxy IP can improve internet performance by caching frequently accessed content and reducing bandwidth usage.Choosing the Right Proxy IPWhen selecting a proxy IP, it's important to consider the following factors:1. Type of Proxy: There are different types of proxies, including HTTP proxies, HTTPS proxies, and SOCKS proxies. Each type has its own advantages and limitations, so it's essential to choose the one that best suits your needs.2. Reliability: Look for a proxy IP provider that offers reliable and stable connections. Unreliable proxies can cause disruptions to your internet access and may compromise your privacy and security.3. Location: Consider the geographic location of the proxy server. If you need to access content from a specific region, choose a proxy IP with an IP address from that location.4. Security Features: Some proxy IP providers offer additional security features such as encryption and malware protection. These features can further enhance your online security and privacy.In conclusion, using a proxy IP to mask your IP address can be a valuable tool for protecting your online privacy and security. By understanding how proxies work and choosing the right proxy IP provider, you can enjoy the benefits of anonymity, access control, and enhanced security while browsing the internet.
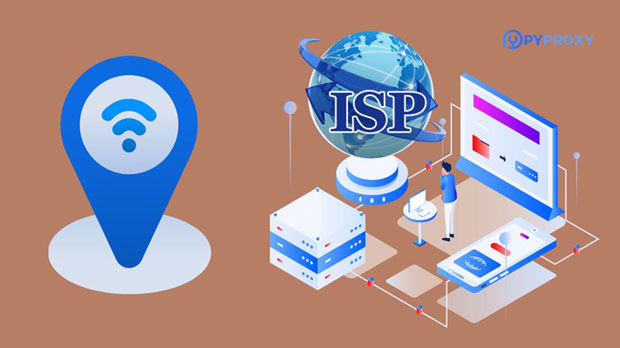
In the digital age, an IP address is as essential as a postal address in the physical world. It's the unique identifier that allows devices to communicate with each other over the internet. Understanding how to obtain an IP address and its importance is crucial for anyone who uses the internet. Here's a guide on obtaining an IP address online.What is an IP Address?An IP address, short for Internet Protocol address, is a numerical label assigned to each device connected to a computer network that uses the Internet Protocol for communication. It serves as the device's unique identifier on the network, allowing it to send and receive data packets.Types of IP AddressesThere are two main types of IP addresses: IPv4 and IPv6. IPv4, the older version, uses a 32-bit numerical address system, while IPv6, the newer version, uses a 128-bit system. IPv6 was developed to address the limitations of IPv4, such as the exhaustion of available addresses. Most modern devices and networks now support both versions.How to Obtain an IP Address· Automatic Configuration (DHCP): The most common way to obtain an IP address is through Dynamic Host Configuration Protocol (DHCP). When a device connects to a network, it sends a request to the DHCP server for an IP address. The server then assigns an available IP address to the device, along with other network configuration settings.· Manual Configuration: In some cases, you may need to manually configure an IP address on a device. This is typically done by accessing the device's network settings and entering the desired IP address, subnet mask, gateway, and DNS server information. However, manual configuration is generally not recommended unless you have a specific reason for doing so, as it can lead to configuration errors and network issues.· Public vs. Private IP Addresses: It's important to note that the IP address you obtain may be either public or private. Public IP addresses are unique and assigned by Internet Service Providers (ISPs) to identify devices on the internet. Private IP addresses, on the other hand, are used within a local network and are not routable on the internet. Most home and small office networks use private IP addresses, with a router handling the translation between private and public IP addresses.Why Do You Need an IP Address?An IP address is essential for any device that needs to communicate over the internet. It allows devices to identify each other and establish connections, enabling a wide range of online activities, from browsing the web to streaming media and playing online games. Without an IP address, devices would be unable to interact with each other on the internet.Obtaining an IP address is a fundamental step in connecting to the internet. Whether it's through automatic configuration or manual setup, having a valid IP address is crucial for any device that wishes to communicate over the internet. Understanding the types of IP addresses and how they work can help you troubleshoot network issues and ensure smooth online connectivity.
In today's digital landscape, privacy and security have become paramount concerns for individuals and businesses alike. One of the most effective tools to safeguard your online activities and bypass geographical restrictions is a proxy server. A proxy acts as an intermediary between your device and the internet, allowing you to browse the web anonymously and potentially access content that might be blocked in your region. This comprehensive guide will walk you through the process of setting up and using a proxy, ensuring you can navigate the web with greater freedom and protection.Understanding ProxiesBefore diving into the setup process, let's briefly understand what a proxy server is and how it works. A proxy server is a computer system or software application that sits between your device (such as a computer, smartphone, or tablet) and the internet. When you request a webpage or any other online resource through a proxy, the request first goes to the proxy server, which then retrieves the information from the internet on your behalf. The proxy can then modify the request or response, filter content, or even cache frequently accessed data to improve performance.Proxies come in various types, including HTTP, HTTPS, SOCKS5, and Transparent proxies, each with its unique use cases and levels of anonymity. HTTP proxies are the most common and suitable for general web browsing, while HTTPS proxies encrypt your data, providing an extra layer of security. SOCKS5 proxies, on the other hand, support a wider range of protocols, making them ideal for applications beyond web browsing, like torrenting or gaming.Setting Up a ProxyStep 1: Choose a Proxy ProviderThe first step in setting up a proxy is selecting a reliable proxy provider. Look for one that offers a good balance between speed, anonymity, and security. Consider factors like server locations, pricing plans, and customer support when making your choice.Step 2: Obtain Proxy CredentialsOnce you've chosen a provider, you'll need to sign up and purchase a plan that suits your needs. The provider will then provide you with proxy credentials, including an IP address, port number, and (in some cases) a username and password.Step 3: Configure Your DeviceFor Web Browsers (e.g., Chrome, Firefox):Open your browser's settings.Navigate to the "Network" or "Connections" section.Look for the "Proxy" settings and enable the "Use a proxy server" option.Enter the proxy server's IP address and port number provided by your proxy provider.If required, enter your username and password for authentication.Save your settings and restart your browser.For Operating Systems (e.g., Windows, macOS):Windows: Go to "Control Panel" > "Internet Options" > "Connections" tab > "LAN settings" button. Check "Use a proxy server for your LAN" and enter the proxy details.macOS: Open "System Preferences" > "Network" > Select your network connection > "Advanced" button > "Proxies" tab. Select the protocols you wish to use a proxy for and enter the details.For Mobile Devices (e.g., Android, iOS):Mobile devices typically don't allow direct proxy configuration within the operating system. However, you can use third-party apps or VPN services that offer proxy functionality.Step 4: Test Your ProxyAfter configuring your proxy, it's essential to test its functionality. Visit websites that check your IP address (e.g., whatismyipaddress.com) to confirm that your IP has changed to the one provided by your proxy server.Using Your ProxyNow that your proxy is set up and tested, you can start using it to browse the web anonymously and potentially access geo-restricted content. Remember, while a proxy can enhance your privacy and security, it's not a panacea. Always practice safe browsing habits, such as using strong passwords, enabling two-factor authentication, and avoiding suspicious links or downloads.Advanced UsageFor more advanced users, proxies can be integrated into various software applications, such as torrent clients, gaming platforms, or even development tools. This often involves configuring the application's network settings to use the proxy server's IP address and port number.ConclusionSetting up and using a proxy server is a straightforward process that can significantly enhance your online privacy and security. By choosing a reliable provider and configuring your device correctly, you can browse the web with greater freedom and peace of mind. Remember, however, that proxies are not foolproof, and it's essential to maintain good online hygiene practices to stay safe. With the right
Socks4 proxies have been a popular choice for users seeking to enhance their online privacy and bypass geographical restrictions. However, not all browsers support Socks4 proxy authentication, which can lead to confusion and frustration. This article will explore the limitations of Socks4 proxy authentication, how it differs from Socks5, and provide solutions for users facing issues.Understanding Socks4 ProxySocks4 is an earlier version of the Socks protocol that allows clients to connect to servers through a proxy. While it supports TCP connections, it lacks some of the advanced features found in Socks5, such as UDP support and authentication methods. This limitation can lead to compatibility issues with modern web applications and services.Limitations of Socks4 Proxy AuthenticationOne of the significant drawbacks of Socks4 is its lack of built-in authentication mechanisms. This means that any user can connect to a Socks4 proxy without providing credentials, which can expose the proxy to misuse and abuse. As a result, many browsers and applications have moved away from supporting Socks4 in favor of more secure protocols.When attempting to use a Socks4 proxy in a browser that does not support its authentication, users may encounter error messages indicating that the browser cannot establish a connection. This can be frustrating, especially for those who rely on proxies for privacy and security.Transition to Socks5Socks5 was developed to address the limitations of Socks4. It includes support for both TCP and UDP protocols, as well as enhanced security features, including authentication methods. This makes Socks5 a more robust option for users who require reliable and secure proxy connections.When switching from Socks4 to Socks5, users will benefit from:Improved Security: Socks5 supports various authentication methods, ensuring that only authorized users can access the proxy.Better Performance: With support for both TCP and UDP, Socks5 can handle a broader range of applications, including streaming and gaming.Enhanced Compatibility: Most modern browsers and applications support Socks5, reducing the likelihood of connection issues.Solutions for UsersIf you find yourself facing issues with Socks4 proxy authentication in your browser, consider the following solutions:Switch to Socks5: Upgrade your proxy server to a Socks5 configuration. This will enhance your security and improve compatibility with modern browsers.Use a Different Browser: Some browsers may have better support for Socks4. However, this is not a long-term solution, as the trend is moving towards Socks5.Check Proxy Settings: Ensure that your proxy settings are correctly configured in your browser. Double-check the IP address, port number, and authentication details.ConclusionThe limitations of Socks4 proxy authentication can lead to compatibility issues with modern browsers, causing frustration for users seeking privacy and security. By transitioning to Socks5, users can take advantage of enhanced security features and improved performance. As the internet continues to evolve, adopting more secure protocols will be crucial for maintaining online privacy.
In the ever-evolving landscape of social media, hashtags have emerged as a force to be reckoned with. These seemingly innocuous symbols have revolutionized the way we communicate online, shaping conversations and driving engagement. From viral trends to social movements, hashtags have become the catalysts that amplify messages and unite communities. Let's delve into the power of hashtags and explore how they shape conversations on various social media platforms.Unleashing the Potential: The Rise of HashtagsHashtags serve as virtual signposts, guiding users to specific topics, events, or discussions. With a simple pound sign (#), individuals can join larger conversations and connect with like-minded individuals. By including a hashtag in their posts, users become part of a broader community, sharing ideas and insights with ease. This inclusivity fosters engagement and encourages active participation.Driving Viral Phenomena: The Hashtag EffectOne of the most remarkable aspects of hashtags is their ability to create viral trends. When a hashtag gains momentum, it can quickly capture the attention of a vast audience, spreading like wildfire across social media platforms. From trending news stories to social causes, hashtags have the power to ignite movements and amplify messages. They enable individuals to raise awareness, mobilize support, and drive meaningful change.Empowering Social Movements: Uniting VoicesHashtags have become essential tools for amplifying social movements. They provide a platform for marginalized voices, enabling individuals to share their experiences, demand justice, and spark crucial conversations. Hashtags like #MeToo, #BlackLivesMatter, and #ClimateAction have galvanized global attention, leading to widespread awareness and societal transformation. By uniting voices under a common banner, hashtags have redefined activism and empowered communities.Harnessing Brand Power: Hashtags as Marketing ToolsBrands have recognized the potential of hashtags as marketing tools. Crafting unique and memorable hashtags allows companies to create brand identities, foster user-generated content, and facilitate consumer engagement. Hashtags serve as a bridge between brands and their audiences, enabling seamless communication and building brand loyalty. Successful campaigns like #ShareACoke and #JustDoIt have showcased the immense marketing power of hashtags.Navigating Conversations: Monitoring and ParticipatingThe dynamic nature of social media conversations necessitates active monitoring and participation. By following relevant hashtags, individuals and brands can stay informed, connect with their target audiences, and contribute to ongoing discussions. Engaging with hashtags allows for real-time feedback, valuable insights, and the opportunity to shape narratives.In conclusion, hashtags have evolved into catalysts for social change, marketing strategies, and community building. They possess the unparalleled ability to shape conversations, drive engagement, and amplify messages across social media platforms. As we navigate the digital realm, understanding and harnessing the power of hashtags is essential for individuals, brands, and movements alike. So, let's embrace hashtags, join the conversations, and make our voices heard in this interconnected world.
In today's interconnected world, having a reliable and secure IP address for your Windows 10 computer is crucial. Whether you're setting up a home network, connecting to a public Wi-Fi, or working in a corporate environment, knowing how to change your IP address can be a useful skill. Here's a step-by-step guide on how to change the IP address on your Windows 10 computer.Understanding IP AddressesBefore we dive into the steps, let's briefly discuss what an IP address is. An IP address (Internet Protocol address) is a unique numerical label assigned to each device connected to a computer network. It allows devices to communicate with each other over the internet. IP addresses can be either public or private, and they can be static (fixed) or dynamic (changing).Reasons to Change Your IP AddressThere are several reasons why you might want to change your IP address:Security: Changing your IP address can help protect your privacy and anonymity on the internet.Troubleshooting: Sometimes, changing your IP address can help resolve network issues or connectivity problems.Access to Specific Services: Some services or websites may restrict access based on IP address. Changing your IP address can allow you to access these services.Steps to Change the IP Address on Windows 10Open Network and Internet SettingsPress the Windows key + I to open the Settings app.Click on "Network & Internet."Select Your Network ConnectionIn the left pane, click on "Status."Under the "Change your network settings" section, click on "Change adapter options."Right-click on the network connection you want to modify (e.g., Wi-Fi or Ethernet) and select "Properties."Configure IPv4 SettingsIn the list of items, scroll down and find "Internet Protocol Version 4 (TCP/IPv4)."Select it and click on the "Properties" button.Change the IP AddressIf you want to use a static IP address, select "Use the following IP address" and enter the desired IP address, subnet mask, default gateway, and DNS server settings.If you want to use a dynamic IP address (assigned by a DHCP server), select "Obtain an IP address automatically" and "Obtain DNS server address automatically."Click "OK" to save the changes.Restart Your Computer (Optional)Restarting your computer is not always necessary, but it can help ensure that the new IP address settings are properly applied.Things to ConsiderPermissions: You may need administrative privileges to change IP address settings.Impact on Other Devices: Changing the IP address on your computer may affect other devices on the network, so be sure to understand the potential implications.Static vs. Dynamic: Unless you have a specific reason to use a static IP address, it's generally recommended to use a dynamic IP address assigned by a DHCP server.Changing the IP address on your Windows 10 computer can be a useful skill for various reasons, including security, troubleshooting, and accessing specific services. By following the steps outlined in this article, you can easily modify the IP address settings on your computer to meet your needs. Remember to consider the potential implications of changing your IP address and ensure that you have the necessary permissions to make the changes.
In today's digital landscape, the need for privacy and secure browsing has never been more pressing. Proxy sites serve as a vital tool that allows users to navigate the internet anonymously, bypassing geographical restrictions, and protecting their online identity. If you're interested in setting up your own proxy site, this guide will walk you through the process step-by-step, from understanding the basics to deploying a functional and secure solution.1. Understanding Proxy Servers and Their TypesBefore diving into the creation process, it's crucial to grasp the concept of proxy servers and their different types. A proxy server acts as an intermediary between your device and the internet, forwarding your requests and delivering responses on your behalf. There are several types of proxies, including:HTTP Proxies: The most common type, used for web browsing.HTTPS Proxies: Similar to HTTP proxies but add an extra layer of security by encrypting your data.SOCKS Proxies: More versatile, supporting various protocols and often used for torrenting and file sharing.Transparent, Anonymous, and Elite Proxies: Categorized by the level of anonymity they provide.2. Choosing a PlatformThere are several approaches to creating a proxy site, ranging from setting up your own server to using pre-built solutions or cloud-based services. Here are some popular options:Self-Hosting: You can set up a server from scratch, requiring knowledge of server administration, networking, and security.VPS (Virtual Private Server): A cost-effective alternative to dedicated servers, offering root access and flexibility.Cloud-Based Services: Providers like Amazon Web Services (AWS), Google Cloud Platform (GCP), or DigitalOcean offer scalable, easy-to-manage infrastructure.Proxy Software: There are software packages designed specifically for setting up proxy servers, like Squid Proxy, Polipo, or TinyProxy.3. Configuring Your Proxy Servera. Installing and Configuring the SoftwareIf you're using software like Squid Proxy, follow these general steps:Install the Proxy Server Software: Use your operating system's package manager (e.g., apt-get install squid for Ubuntu) or download the source and compile it.Configure the Proxy Server: Edit the configuration file (e.g., /etc/squid/squid.conf for Squid) to set up access control, caching policies, port forwarding, and security measures.Set Up Firewall Rules: Ensure only authorized traffic is allowed to pass through your proxy server.Start and Test the Service: Use commands like sudo systemctl start squid to start the service and tools like curl or a web browser configured to use your proxy to test its functionality.b. Securing Your ProxyImplement Authentication: Require users to authenticate before accessing the proxy.Use Encryption: For HTTPS proxies, ensure SSL/TLS certificates are properly configured.Monitor and Log Activity: Keep an eye on your proxy's logs to identify suspicious activity.Update Regularly: Keep your server and proxy software updated to protect against vulnerabilities.4. Optimizing for PerformanceCaching Strategies: Fine-tune your caching policies to improve response times and reduce bandwidth usage.Load Balancing: Distribute incoming requests across multiple servers or instances to handle high traffic loads.Geo-Targeting: Consider setting up proxies in different regions to optimize access speeds for international users.5. Compliance and EthicsRespect Privacy: Ensure your proxy service complies with local and international privacy laws.Terms of Service: Clearly define your terms of service, including what activities are allowed and prohibited through your proxy.Copyright and Illegal Activities: Do not facilitate or encourage illegal activities, such as piracy or accessing restricted content without permission.6. Going Beyond Basic ProxiesFor more advanced use cases, consider integrating additional features like VPN support, web filtering, or custom scripting to automate tasks. You can also explore building a proxy network, also known as a proxy chain, to further enhance anonymity and security.7. ConclusionCreating your own proxy site is a complex yet rewarding project that requires a blend of technical skills and an understanding of internet protocols, networking, and security. Whether you're doing it for personal use, to offer a service to others, or for educational purposes, following the steps outlined in this guide will help you get started on the right foot. Remember, always prioritize security and compliance to ensure a safe and ethical proxy service.
Mobile devices have become essential tools for accessing the internet, and setting up a Socks5 proxy server on a mobile device can enhance privacy and security. This article will guide you through the process of setting up a Socks5 proxy server on your mobile device, ensuring you can access the internet securely.Understanding Socks5 ProxySocks5 is the latest version of the Socks protocol, allowing users to route their internet traffic through a proxy server. It supports various protocols, including TCP and UDP, making it suitable for a wide range of applications. By using a Socks5 proxy, users can mask their IP addresses, bypass geo-restrictions, and secure their internet connections.PrerequisitesBefore setting up a Socks5 proxy server on your mobile device, you will need:A VPS with a Linux operating system (preferably Ubuntu).Basic command-line skills.A mobile device (iOS or Android).Installing the Socks5 Proxy Server on VPSYou will first need to set up the Socks5 proxy server on a VPS. Follow these steps:1. Connect to Your VPS: Use SSH to connect to your VPS.ssh root@your_vps_ip2. Update the Package List:sudo apt update3. Install Python and Pip:sudo apt install python3 python3-pip4. Install Shadowsocks:pip3 install shadowsocks5. Create a Configuration File:sudo nano /etc/shadowsocks.jsonExample configuration:{"server": "0.0.0.0","port_password": {"1080": "your_password"},"timeout": 300,"method": "aes-256-gcm","fast_open": true}6. Start the Proxy Server:sudo ssserver -c /etc/shadowsocks.json -d startConfiguring Your Mobile DeviceOnce the Socks5 proxy server is running, configure your mobile device to use it:For Android:Open Settings: Go to your device's settings.Network & Internet: Tap on "Network & Internet" and select "VPN."Add VPN: Tap on "Add VPN" and enter the required details:Name: Choose a name for your VPN.Type: Select "Socks5."Server address: Enter your VPS IP address.Port: Enter the port number (e.g., 1080).Username and Password: Enter the credentials if required.Save and Connect: Save the configuration and connect to the VPN.For iOS:Open Settings: Go to your device's settings.Wi-Fi: Tap on "Wi-Fi" and select your connected network.Configure Proxy: Scroll down to "HTTP Proxy" and select "Manual."Enter Proxy Details:Server: Input the IP address of your Socks5 proxy server.Port: Enter the port number (default is usually 1080).Authentication: If required, toggle the option and enter your username and password.Save Changes: Exit the settings, and your device will now use the Socks5 proxy.Testing the Proxy ConnectionTo verify that your Socks5 proxy is functioning correctly, you can use a web browser or an app that allows you to check your IP address. If the IP address shown is that of your proxy server, the setup is successful.ConclusionSetting up a Socks5 proxy server on your mobile device can significantly enhance your online privacy and security. By following the steps outlined in this article, you can effectively configure your mobile device to use a Socks5 proxy, allowing for a more secure browsing experience. As online threats continue to evolve, taking proactive measures to protect your privacy is essential.