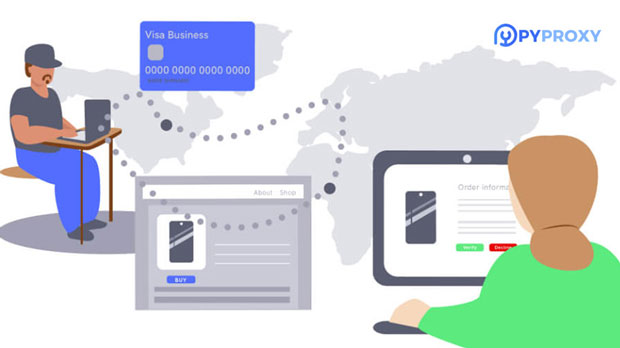
In today's digital world, the need for online privacy and security has become increasingly important. One way to enhance your online anonymity and bypass geographical restrictions is by using a proxy server. A proxy server acts as an intermediary between your device and the internet, routing your traffic through a different IP address. This allows you to browse the web anonymously and access content that might be blocked in your region. In this article, we'll guide you through the process of purchasing a proxy server.Step 1: Understand Your NeedsBefore purchasing a proxy server, it's crucial to understand your specific needs. Consider factors such as the number of devices you'll be using the proxy with, the bandwidth requirements, and the type of activities you'll be performing (e.g., web browsing, streaming, data scraping). This will help you determine the type of proxy server that best suits your needs.Step 2: Research Proxy ProvidersOnce you've identified your needs, it's time to research different proxy providers. Look for companies that offer reliable and secure proxy servers with good uptime and performance. Read reviews and testimonials from other users to get a sense of the provider's reputation and service quality.Step 3: Compare Pricing and FeaturesAs you research different proxy providers, compare their pricing and features. Look for providers that offer competitive prices while still providing the necessary features and support. Consider factors such as bandwidth limits, number of concurrent connections, server locations, and customer support.Step 4: Evaluate Security and PrivacyWhen purchasing a proxy server, security and privacy should be top priorities. Look for providers that offer encryption and other security measures to protect your traffic from unauthorized access. Additionally, ensure that the provider has a strict privacy policy and doesn't log or share your data with third parties.Step 5: Choose a Payment MethodOnce you've found a suitable proxy provider, choose a payment method that suits you. Most providers offer multiple payment options, including credit cards, cryptocurrencies, and PayPal. Make sure to select a secure payment method to protect your financial information.Step 6: Complete the PurchaseAfter selecting a proxy provider and payment method, proceed to complete the purchase. Follow the instructions provided by the provider to set up your account and access your proxy server. This typically involves creating an account, selecting a server location, and configuring your device to use the proxy.Step 7: Test and MaintainOnce you've set up your proxy server, it's important to test its performance and functionality. Perform basic tasks such as web browsing and accessing geo-restricted content to ensure that the proxy is working as expected. Additionally, keep an eye on your proxy's uptime and performance, and contact the provider's customer support if you encounter any issues.Remember, purchasing a proxy server is just the first step. It's crucial to use it responsibly and abide by all relevant laws and regulations. Always ensure that your activities are legal and ethical, and avoid using proxies for malicious or illegal purposes.
In today's digital world, having a reliable and secure internet connection is crucial. A 4G proxy can be a great tool for accessing the internet through a 4G mobile network while maintaining privacy and security. Here's a step-by-step guide on how to make your own 4G proxy.Step 1: Understanding the BasicsBefore we dive into the technical details, it's essential to understand the fundamental principles of a proxy server. A proxy server is a gateway that acts as an intermediary between your device and the internet, allowing you to access websites and online services while hiding your true IP address and location.Step 2: Gathering the Necessary EquipmentTo set up your own 4G proxy, you'll need a few pieces of equipment:1.A 4G-enabled device, such as a smartphone or a 4G router.2.A computer or server to run the proxy software.3.A reliable 4G SIM card with data access.Step 3: Setting Up the 4G ConnectionFirst, you'll need to set up the 4G connection on your device. This typically involves inserting the 4G SIM card into your smartphone or 4G router and configuring the network settings to connect to the internet. Make sure your device is properly configured and can access the internet using the 4G network.Step 4: Choosing a Proxy SoftwareNext, you'll need to select a proxy software that supports 4G connections. There are several options available, both free and paid. Choose a software that meets your needs and requirements, such as encryption, bandwidth management, and access to specific geo-restricted content.Step 5: Installing and Configuring the Proxy SoftwareOnce you've chosen a proxy software, follow the installation instructions provided by the software developer. This typically involves downloading the software, running the installer, and accepting the terms and conditions.After installation, you'll need to configure the proxy software to use your 4G connection. This usually involves specifying the IP address and port number of your 4G device, as well as any necessary authentication credentials. Make sure to follow the software's configuration instructions carefully to ensure a smooth setup.Step 6: Connecting Your DevicesOnce the proxy software is installed and configured, you can start connecting your devices to the 4G proxy. This typically involves configuring the network settings on your devices to use the proxy server's IP address and port number.For example, if you're using a computer, you'll need to go to the network settings and configure the proxy settings to use the IP address and port number provided by your proxy software. If you're using a mobile device, you may need to install a proxy app or configure the device's network settings manually.Step 7: Testing and TroubleshootingAfter connecting your devices to the 4G proxy, it's essential to test the connection to ensure it's working correctly. Try accessing a few websites or online services to see if the proxy is successfully routing your traffic.If you encounter any issues or errors, troubleshoot the problem by checking the proxy software's logs or documentation for potential solutions. You may also need to adjust your network settings or reinstall the proxy software to resolve any technical difficulties.ConclusionMaking your own 4G proxy can be a valuable tool for accessing the internet securely and anonymously. By following the steps outlined in this guide, you can set up a reliable 4G proxy using your own equipment and software. Remember to choose a trusted proxy software, configure your devices correctly, and test the connection regularly to ensure optimal performance and security.
In Windows 7, manually configuring the IP address of your network connection can be necessary for various reasons, such as setting up a static IP for a server, troubleshooting network issues, or connecting to a specific network segment. While Windows 7 automatically manages IP addresses through DHCP (Dynamic Host Configuration Protocol) in most cases, manually changing the IP address can be done through the Network and Sharing Center. This article will guide you through the process of manually changing the IP address in Windows 7, step by step.Step 1: Open the Network and Sharing CenterClick the Start Button: Locate and click the Start button in the lower-left corner of your screen.Select Control Panel: From the Start menu, click "Control Panel."Open Network and Sharing Center: In the Control Panel, find and click "Network and Sharing Center." This will open a new window displaying your network connections and status.Step 2: Change Adapter SettingsLocate Change Adapter Settings: In the Network and Sharing Center window, find the section titled "Tasks" on the left-hand side. Click "Change adapter settings" to open a new window showing all your network connections.Step 3: Select the Network ConnectionIdentify the Connection: In the "Network Connections" window, identify the network connection you want to modify. This could be a wired Ethernet connection, a wireless network connection, or a VPN connection.Right-Click and Select Properties: Right-click on the desired network connection and select "Properties" from the context menu.Step 4: Configure the Internet Protocol VersionSelect Internet Protocol Version 4 (TCP/IPv4): In the properties window, scroll down the list of items and find "Internet Protocol Version 4 (TCP/IPv4)." Select it and click the "Properties" button.Note: If your network uses IPv6, you may also need to configure "Internet Protocol Version 6 (TCP/IPv6)" similarly. However, for the purpose of this guide, we'll focus on IPv4.Step 5: Manually Set the IP AddressSelect 'Use the Following IP Address': In the Internet Protocol Version 4 (TCP/IPv4) Properties window, you'll see two options: "Obtain an IP address automatically (recommended)" and "Use the following IP address." Select the latter option to manually set the IP address.Enter the IP Address and Subnet Mask: In the fields provided, enter the desired IP address and subnet mask. Ensure that the IP address you choose is within the range allowed by your network and does not conflict with any other devices on the network.Optional: Enter Default Gateway and DNS Servers: If necessary, you can also manually enter the default gateway and preferred and alternate DNS server addresses. These are optional but can be helpful in certain network configurations.Click OK: Once you've entered all the necessary information, click "OK" to save your settings.Step 6: Confirm the ChangesClose Open Windows: Close all open windows, including the Network Connections window and the Control Panel.Test the Connection: To confirm that the changes have taken effect, try accessing the internet or other network resources. If you've set a static IP address for a specific purpose, such as connecting to a server, test the connection using the new IP address.Additional ConsiderationsDHCP vs. Static IP: Before manually changing your IP address, consider whether a static IP is necessary. In most home and small office networks, DHCP simplifies network management by automatically assigning IP addresses to devices.Network Administrator Approval: If you're on a corporate or school network, changing your IP address without permission from the network administrator can cause connectivity issues or violate network policies.IP Address Conflicts: Ensure that the IP address you choose is unique on your network to avoid conflicts with other devices.Backup and Restore: Consider making a note of your current network settings before making any changes. This way, if you encounter issues, you can easily restore the previous settings.ConclusionManually changing the IP address in Windows 7 is a straightforward process that can be accomplished through the Network and Sharing Center. By following the steps outlined in this guide, you can configure your network connection to use a static IP address, which can be useful for various networking tasks. Remember to always consider the potential impact of your changes on your network and to seek approval from your network administrator if necessary.
In the digital age, the use of proxy IPs has become a common practice for individuals and organizations seeking to enhance their online privacy, access restricted content, or maintain anonymity. However, there are instances when it is crucial to determine whether a specific proxy IP is being used by a single individual or multiple users. This article explores various methods and considerations for identifying whether a proxy IP is associated with one person, addressing the challenges and implications involved in this process.To begin with, it is important to understand what a proxy IP is and how it functions. A proxy server acts as an intermediary between a user's device and the internet. When a user connects to a proxy, their requests to access websites are routed through the proxy server, which masks their original IP address. This allows users to browse the internet anonymously, but it also raises questions about the ownership and usage of the proxy IP.One of the primary indicators of whether a proxy IP is being used by a single individual is the type of proxy being utilized. There are several types of proxies, including shared proxies, dedicated proxies, and residential proxies. Shared proxies are used by multiple users simultaneously, making it difficult to determine if a specific activity is linked to one person. In contrast, dedicated proxies are assigned to a single user, providing a unique IP address that is not shared with others. Therefore, if a dedicated proxy is in use, it is more likely that the activities associated with that IP can be traced back to one individual.Another factor to consider is the proxy provider. Reputable proxy services often provide detailed information about their offerings, including whether the proxies are shared or dedicated. When selecting a proxy service, it is essential to choose one that clearly states the nature of its proxies. Many users opt for dedicated proxies for activities that require a higher level of anonymity and security, such as web scraping, online gaming, or accessing sensitive information. By using a dedicated proxy from a trustworthy provider, users can be more confident that their activities are not being mixed with those of others.Monitoring traffic patterns can also provide insights into whether a proxy IP is associated with a single user. Analyzing the volume and frequency of requests from a particular proxy IP can help identify unusual or suspicious behavior. For instance, if a proxy IP is generating a high volume of requests within a short period, it may indicate that multiple users are sharing that IP. Conversely, a consistent and moderate level of activity may suggest that the proxy is being used by a single individual. However, this method requires access to network logs and monitoring tools, which may not always be feasible for the average user.User behavior analysis is another effective approach to determining whether a proxy IP is linked to one person. By examining the types of websites accessed, the duration of sessions, and the specific actions taken while connected to the proxy, it is possible to create a behavioral profile. If the activity appears consistent and aligns with the typical usage patterns of a single user, it may indicate that the proxy IP is indeed being used by one person. Conversely, erratic or varied behavior could suggest multiple users are sharing the same IP.IP reputation services can also play a role in identifying the usage of a proxy IP. These services maintain databases of known proxy IPs and their associated behaviors. By querying an IP address against these databases, it is possible to determine if the IP is flagged as a shared or public proxy. If the IP is listed as a shared proxy, it is likely being used by multiple individuals, whereas a dedicated IP may not have such flags. However, it is important to note that these services may not always provide complete or up-to-date information.Another consideration is the geographical location of the proxy IP. Many proxy services offer users the ability to choose IP addresses from specific regions or countries. If a proxy IP is frequently accessed from various locations within a short time frame, it may suggest that multiple users are utilizing the same IP. On the other hand, if the IP is consistently accessed from a single location, it could indicate that it is being used by one individual. However, this method is not foolproof, as sophisticated users may employ techniques to mask their true location.Legal and ethical implications also come into play when determining whether a proxy IP is being used by one person. Privacy laws vary by region, and monitoring user behavior without consent may violate these laws. Organizations must ensure that they comply with relevant regulations when analyzing proxy usage. Additionally, ethical considerations arise when attempting to identify users behind proxy IPs. Respecting user privacy and maintaining transparency in data collection practices is essential for building trust and ensuring responsible use of technology.In conclusion, determining whether a proxy IP is associated with a single individual involves a combination of technical analysis, user behavior examination, and an understanding of the types of proxies in use. Factors such as the type of proxy, the reputation of the proxy provider, traffic patterns, user behavior, and geographical location all play a role in this determination. While dedicated proxies offer a higher likelihood of being used by one person, shared proxies present challenges in identifying individual users. It is crucial to navigate the legal and ethical implications of monitoring proxy usage, ensuring that privacy and transparency are upheld. As the digital landscape continues to evolve, understanding the dynamics of proxy IP usage will remain an important consideration for individuals and organizations alike.
Setting up a server IP address for your Minecraft world can be a great way to create a shared gaming experience with friends or other players. By hosting your own server, you can customize the gameplay, control who has access, and ensure a smooth and reliable connection. In this guide, we'll walk through the steps to set up a server IP address for your Minecraft world.Step 1: Choose a Hosting OptionBefore you can set up a server IP address, you'll need to decide how you want to host your Minecraft server. There are several options to consider:Self-Hosting: If you have a powerful computer and a reliable internet connection, you can host the server on your own hardware. This gives you complete control over the server and allows for customization, but it also requires technical expertise and can impact your computer's performance.Third-Party Hosting: Many companies offer dedicated Minecraft server hosting. This option is often more user-friendly and can provide better performance and reliability, but it typically comes with a monthly fee.Cloud Hosting: Cloud services like Amazon Web Services (AWS) or Microsoft Azure also offer options for hosting Minecraft servers. This can be a scalable and flexible solution, but it may require more technical knowledge to set up.Step 2: Install the Minecraft Server SoftwareOnce you've chosen a hosting option, you'll need to install the Minecraft server software. If you're self-hosting, you can download the server software from the official Minecraft website. If you're using a third-party hosting service, they may have their own installation process or control panel to set up the server software.Step 3: Configure Server SettingsAfter installing the server software, you'll need to configure the server settings to customize your Minecraft world. This can include setting the game mode, difficulty level, player permissions, and other options. You can usually do this through a configuration file or a web-based control panel provided by your hosting service.Step 4: Set Up a Static IP AddressTo ensure a stable connection to your Minecraft server, it's recommended to set up a static IP address for your hosting device. A static IP address will remain constant, making it easier for players to connect to your server without having to update the IP address each time they want to join.Step 5: Port ForwardingIf you're self-hosting your Minecraft server, you'll also need to set up port forwarding on your router. Port forwarding allows external connections to reach your server by redirecting traffic from a specific port to the appropriate device on your local network. The exact process for port forwarding will depend on your router model, so you may need to consult your router's documentation or support resources for specific instructions.Step 6: Obtain Your Server IP AddressOnce your server is set up and running, you'll need to obtain the server IP address. This is the unique identifier that players will use to connect to your server. If you're self-hosting, you can find your server's IP address by searching "What is my IP" in a web browser from the hosting device. If you're using a third-party hosting service, they should provide you with the server IP address through their control panel or support resources.Step 7: Share Your Server IP AddressWith your server IP address in hand, you can now share it with friends or other players who want to join your Minecraft world. They can enter the IP address in the multiplayer menu of their Minecraft client to connect to your server and start playing together.Step 8: Maintain and Moderate Your ServerOnce your Minecraft server is up and running, it's important to maintain and moderate the gameplay experience. This can include enforcing rules, addressing technical issues, and ensuring a positive and inclusive community for all players. Depending on the size of your community, you may also want to consider appointing moderators or administrators to help manage the server.Setting up a server IP address for your Minecraft world can open up new possibilities for gameplay and social interaction. Whether you choose to self-host or use a third-party hosting service, taking the time to configure and maintain your server can create an engaging and enjoyable experience for you and your fellow players. With these steps in mind, you'll be well on your way to creating your own unique Minecraft community.
In the ever-evolving world of technology, the internet has become a vital part of our daily lives. With the increasing demand for faster and more reliable internet connections, the 4G network has emerged as a popular choice. However, the use of 4G proxies is often misunderstood or overlooked. This article aims to provide a comprehensive overview of what a 4G proxy is, its functions, and why it might be useful for individuals or businesses.Definition of a 4G ProxyA 4G proxy is a network intermediary that sits between your device and the internet, specifically utilizing a 4G cellular network for connectivity. It acts as a gateway, routing your internet traffic through a remote server before reaching its destination. This process allows users to access the internet anonymously, bypassing potential restrictions or limitations imposed by ISPs or governments.Functions of a 4G Proxy1.Anonymity: A 4G proxy hides your true IP address, making it difficult for third parties to track your online activities. This is especially useful for those who want to browse the internet without leaving a trace.2.Bypassing Restrictions: By routing your traffic through a remote server, a 4G proxy can help you access geo-restricted content or websites that are blocked in your region.3.Enhanced Security: 4G proxies often provide encryption, adding an extra layer of security to your internet connection. This makes it harder for hackers or malicious actors to intercept and misuse your data.4.Bandwidth Management: For businesses or individuals with limited bandwidth, a 4G proxy can help optimize and manage internet usage, ensuring that critical tasks are prioritized.How Does a 4G Proxy Work?A 4G proxy works by establishing a connection between your device and a remote server that has access to the internet via a 4G network. When you send a request to access a website or online service, the request is first sent to the proxy server. The proxy server then retrieves the requested data from the internet on your behalf and sends it back to your device. This process is transparent to the user, but it allows the proxy server to modify or filter the data before it reaches your device.Advantages of a 4G ProxyPortability: Since 4G proxies rely on cellular networks, they are not tied to a specific location, making them highly portable.Flexibility: 4G proxies can be easily set up and configured to meet the specific needs of users, whether they are individuals or businesses.Cost-Effectiveness: Compared to dedicated VPNs or other internet connection methods, 4G proxies can be a cost-effective solution for those who need occasional or temporary access to the internet.Disadvantages of a 4G ProxySpeed: While 4G networks are faster than previous generations, they may not provide the same speed as wired internet connections.Coverage: The availability and coverage of 4G networks can vary depending on your location, potentially limiting the use of a 4G proxy.In conclusion, a 4G proxy is a valuable tool that can provide anonymity, bypass restrictions, enhance security, and manage bandwidth. While it may have some limitations in terms of speed and coverage, its portability, flexibility, and cost-effectiveness make it a suitable solution for many individuals and businesses.
In today's interconnected world, the internet has become an integral part of our daily lives, facilitating communication, entertainment, education, and business transactions. However, with the convenience it brings, there are also concerns about privacy, security, and access to content that may be restricted due to geographical location or other factors. Proxy servers serve as a valuable tool in addressing these issues by providing anonymity, security, and bypassing geographical barriers. This comprehensive guide will walk you through the steps of how to obtain a proxy server, exploring different types, benefits, and considerations.Understanding Proxy ServersBefore diving into the acquisition process, let's clarify what a proxy server is. A proxy server acts as an intermediary between your device (computer, smartphone, etc.) and the internet. When you make a request for a webpage or any online resource, the request first goes through the proxy server, which then forwards it to the destination server on your behalf. The response from the destination server is then sent back to you via the proxy server. This process can offer several advantages, including:Anonymity: Hiding your IP address, making it difficult for others to track your online activities.Security: Encrypting your data, protecting against potential threats like hackers and malware.Bypassing Restrictions: Accessing content or services that are blocked or unavailable in your region.Types of Proxy ServersHTTP/HTTPS Proxies: Ideal for browsing the web anonymously and bypassing basic restrictions. They work at the application layer, supporting HTTP and HTTPS protocols.SOCKS Proxies: More versatile than HTTP/HTTPS proxies, supporting multiple protocols and often used for applications beyond web browsing, like torrenting or gaming.Transparent, Anonymous, and Elite Proxies: Based on how much they reveal about your identity, proxies can be classified as transparent (revealing your IP), anonymous (concealing your IP but indicating that you're using a proxy), or elite (concealing both your IP and the fact that you're using a proxy).Public vs. Private Proxies: Public proxies are free and shared by many users, often leading to slower speeds and security risks. Private proxies, on the other hand, are dedicated to a single user or a small group, offering faster speeds and better security.How to Obtain a Proxy ServerOption 1: Use Free Proxy ServicesFree proxy services are readily available online, often requiring only a quick search to find. While convenient and cost-effective, they come with several drawbacks:Limited performance: Shared by many users, free proxies can be slow and unreliable.Security risks: They may not encrypt your data, exposing you to potential threats.Unpredictable availability: Services can shut down suddenly, leaving you without a proxy.Option 2: Purchase a Proxy ServiceFor better performance, security, and reliability, purchasing a proxy service is the way to go. Here's a step-by-step process:Research Providers: Start by researching reputable proxy providers. Look for reviews, pricing plans, and the types of proxies they offer (e.g., HTTP/HTTPS, SOCKS, residential).Determine Your Needs: Consider your specific requirements, such as the number of proxies you need, the locations you want to access, and whether you require specific features like high-speed connections or dedicated IPs.Choose a Plan: Based on your needs, select a plan that fits your budget and requirements. Many providers offer tiered pricing plans, allowing you to choose between basic and advanced features.Sign Up and Pay: Follow the provider's sign-up process, providing necessary information and making the payment.Configure Your Proxy: Once you have access to your proxies, you'll need to configure them on your device or software. This process varies depending on the type of proxy and the operating system you're using.Test and Monitor: Once configured, test your proxy to ensure it's working as expected. Regularly monitor its performance and security to ensure ongoing satisfaction.ConsiderationsLegality: Ensure that your use of a proxy server complies with local laws and the terms of service of the websites you're accessing.Privacy Policy: Review the proxy provider's privacy policy to understand how they handle your data.Customer Support: Choose a provider that offers reliable customer support in case you encounter any issues.ConclusionObtaining a proxy server can significantly enhance your online experience, providing anonymity, security, and access to restricted content. While free options exist, investing in a paid proxy service offers numerous benefits, including better performance, reliability
Setting up a router as an IP proxy server can be a valuable solution for enhancing your network's privacy, security, and performance. A proxy server acts as an intermediary between devices on your local network and the internet, allowing you to manage traffic, cache data, and mask IP addresses. This article will guide you through the steps to configure your router as an IP proxy server, ensuring that you can take advantage of these benefits.Understanding Proxy ServersBefore diving into the setup process, it's essential to understand what a proxy server is and how it functions. A proxy server receives requests from client devices, forwards these requests to the internet, and then sends back the responses to the clients. By doing so, the proxy server can provide anonymity, filter content, and improve loading times through caching.RequirementsTo set up your router as a proxy server, you will need:1. A compatible router (preferably one that supports custom firmware).2. Access to the router's web interface.3. Basic knowledge of networking concepts.4. Optional: A computer or device to test the proxy setup.Step 1: Check Router CompatibilityNot all routers have built-in support for proxy services. Before proceeding, check if your router can be configured as a proxy server. Many consumer-grade routers do not have this capability out of the box. However, routers that support custom firmware, such as DD-WRT, OpenWRT, or Tomato, can often be configured to act as proxy servers.Step 2: Install Custom Firmware (if necessary)If your router does not support proxy configuration natively, you may need to install custom firmware. This process can void your warranty, so proceed with caution. Here’s a brief overview of how to install custom firmware:1. Research: Ensure your router model is compatible with the desired firmware.2. Download Firmware: Go to the official website of the firmware you choose (e.g., DD-WRT).3. Backup Settings: Log into your router’s web interface and back up your current settings.4. Access the Firmware Upgrade Page: Navigate to the firmware upgrade section in your router’s settings.5. Upload the Firmware: Select the downloaded firmware file and begin the upgrade process. Wait for the router to reboot.Step 3: Access the Router's Web InterfaceOnce your router is running the appropriate firmware, you can access its web interface:1. Connect to the Router: Use an Ethernet cable or connect via Wi-Fi.2. Open a Web Browser: Enter the router’s IP address (commonly 192.168.1.1 or 192.168.0.1).3. Log In: Enter the username and password. The default credentials are often “admin/admin” or “admin/password.” Change these for security purposes.Step 4: Configure the Proxy ServerNow that you are in the router’s interface, follow these steps to configure it as a proxy server:1. Locate the Proxy Settings: Depending on the firmware, look for sections labeled “Services,” “Proxy,” or “VPN.”2. Enable Proxy Server: Find the option to enable the proxy server feature. This may vary based on the firmware you are using.3. Set the Proxy Type: Choose the type of proxy you want to configure. Common options include HTTP, HTTPS, or SOCKS. For general browsing, HTTP is typically sufficient.4. Configure Port Settings: Set the port number that the proxy server will use. The default port for HTTP proxies is usually 8080, but you can choose any available port.5. Authentication (if necessary): If you want to restrict access to the proxy server, enable authentication. Set up a username and password that clients will need to use when connecting to the proxy.Step 5: Configure Firewall and Security SettingsTo ensure that your proxy server operates securely, you may need to adjust firewall settings:1. Access Firewall Settings: Look for the firewall section in the router’s interface.2. Allow Proxy Traffic: Ensure that the port you chose for the proxy server is open and not blocked by the firewall.3. Enable Security Features: Consider enabling features like intrusion detection and prevention systems (IDPS) to protect your network.Step 6: Connect Devices to the Proxy ServerAfter configuring the router as a proxy server, you will need to connect devices to use the proxy:1. Configure Device Settings: On each device that you want to connect through the proxy, go to the network settings.2. Set Proxy Configuration: Enter the router’s IP address and the port number you configured for the proxy server. This process varies by operating system:- Windows: Go to Settings > Network & Internet > Proxy. Enable manual proxy setup and enter the IP and port.- macOS: Go to System Preferences > Network. Select your network, click Advanced, and go to the Proxies tab to enter the IP and port.- Mobile Devices: On Android or iOS, navigate to Wi-Fi settings, select the network, and enter the proxy information.Step 7: Test the Proxy ServerOnce everything is configured, it’s essential to test the proxy server to ensure it is working correctly:1. Open a Web Browser: On a device connected to the proxy, open a web browser.2. Visit a Website: Go to a website like “whatismyip.com” to check your IP address. If the setup is successful, the displayed IP should be the router's proxy IP instead of your original IP.3. Check for Errors: If you encounter issues, double-check the proxy settings on both the router and the client devices.Step 8: Monitor and Maintain the Proxy ServerAfter successfully setting up your router as a proxy server, it’s important to monitor its performance and make necessary adjustments:1. Monitor Traffic: Use tools available in the router's interface to monitor traffic and identify any unusual activity.2. Regular Updates: Keep your router’s firmware updated to ensure security and performance improvements.3. Adjust Settings: Based on usage patterns, you may need to adjust settings, such as bandwidth limits or access controls.ConclusionSetting up your router as an IP proxy server can significantly enhance your network's privacy and performance. By following the steps outlined in this article, you can configure your router to act as a proxy, allowing you to mask your IP address, manage traffic, and access restricted content. Remember to monitor and maintain your proxy server regularly to ensure optimal performance and security. As technology continues to evolve, understanding how to leverage tools like proxy servers will remain essential for anyone looking to navigate the digital landscape safely and efficiently.
There are several methods to solve browser compatibility issues, ensuring that websites and web applications work consistently across different browsers. Here are some common approaches to address compatibility problems:1. Use Modern CSS and JavaScript Features:Embracing modern CSS3 and JavaScript features can help to minimize compatibility issues. This includes using CSS3 properties like flexbox and grid layout, as well as JavaScript features that are supported by most modern browsers.2. Normalize CSS:Normalizing CSS can help to create a consistent base across different browsers by resetting default styles. Libraries like Normalize.css or CSS Reset can be used to ensure a consistent starting point for styling.3. Feature Detection:Implement feature detection using JavaScript libraries like Modernizr to detect browser capabilities and adjust the behavior of the website or web application accordingly.4. Cross-Browser Testing:Regularly testing websites and web applications across different browsers and devices can help to identify and resolve compatibility issues. Tools like BrowserStack, CrossBrowserTesting, or even built-in developer tools in browsers can be used for testing.5. Progressive Enhancement:Adopt a progressive enhancement approach by building websites and web applications with a basic level of functionality that works across all browsers, and then enhancing the experience for modern browsers with additional features.6. Avoid Browser-Specific Hacks:Minimize the use of browser-specific hacks and workarounds, as they can lead to maintenance issues and potential conflicts with future browser updates.7. Update Browsers:Encourage users to update their browsers to the latest versions, as newer versions often include improved support for modern web standards and technologies.By employing these methods, developers can mitigate browser compatibility issues and ensure a more consistent and reliable experience for users across different browsers and devices.
When managing a server, one of the most common issues that can arise is related to IP configuration. Without a valid IP address, the server will not be able to communicate with other devices on the network, which can lead to various connectivity and accessibility problems. In this blog post, we will discuss some common reasons why a server may not have an IP address and how to troubleshoot and resolve these issues.1. Network Cable ConnectionThe first thing to check when a server does not have an IP address is the network cable connection. Ensure that the network cable is securely plugged into the server's network interface card (NIC) and the corresponding switch or router. A loose or damaged network cable can prevent the server from obtaining an IP address from the network.2. DHCP ConfigurationIn most cases, servers obtain their IP addresses dynamically from a DHCP (Dynamic Host Configuration Protocol) server. If the server is not receiving an IP address, check the DHCP configuration on the network. Ensure that there are available IP addresses in the DHCP pool and that the DHCP server is operational. Additionally, verify that the server's NIC is set to obtain an IP address automatically.3. Static IP Address ConfigurationIf the server is configured to use a static IP address, ensure that the IP address, subnet mask, default gateway, and DNS servers are correctly configured. A misconfiguration in any of these settings can prevent the server from communicating on the network. Verify the settings in the server's network configuration and make any necessary corrections.4. Network Interface Card (NIC) IssuesA faulty or malfunctioning network interface card can also cause issues with obtaining an IP address. Check the server's NIC for any physical damage or malfunction. Additionally, ensure that the NIC drivers are up to date and functioning properly. If necessary, consider replacing the NIC with a known working one to rule out hardware issues.5. Network Infrastructure ProblemsSometimes, the issue may not be with the server itself but with the network infrastructure. Check for any network outages, misconfigured switches or routers, or other network-related issues that may be affecting IP address assignment. Collaborate with the network administrator to troubleshoot and resolve any underlying network problems.6. Firewall and Security SettingsFirewall or security software running on the server may be blocking DHCP requests or preventing the server from obtaining an IP address. Review the server's firewall and security settings to ensure that DHCP traffic is allowed and that there are no restrictions preventing IP address assignment.7. Reboot and ResetIf all else fails, a simple reboot of the server and networking equipment may resolve the issue. Sometimes, a temporary glitch or configuration error can be cleared by restarting the server and associated networking devices. Additionally, consider resetting the server's NIC settings to default and reattempting the IP address acquisition process.Troubleshooting server IP configuration issues requires a systematic approach to identify and resolve underlying problems. By checking network connections, DHCP settings, IP address configurations, hardware components, network infrastructure, and security settings, administrators can effectively diagnose and fix IP address assignment issues on servers. Remember to document any changes made during the troubleshooting process for future reference and to aid in resolving similar issues in the future.By following these troubleshooting steps, administrators can ensure that servers have valid IP addresses and are able to communicate effectively on the network, minimizing downtime and maintaining a reliable IT infrastructure.