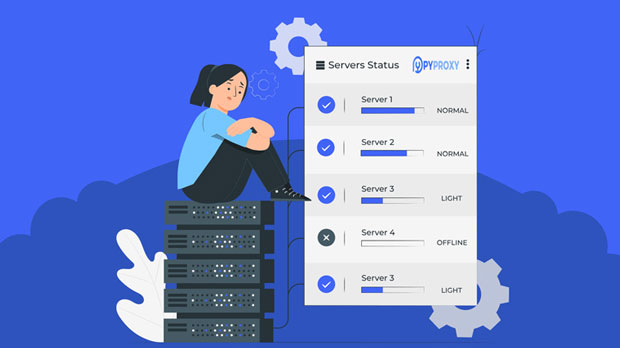
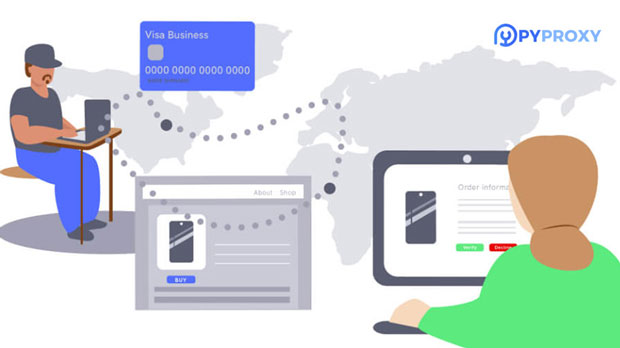
A proxy server acts as an intermediary between a user's device and the internet. It serves as a gateway, receiving requests from the user and forwarding them to the internet. When the internet responds, the proxy server sends the data back to the user. This process allows the user to browse the web anonymously and can also provide other benefits such as improved security and privacy.One of the key functions of a proxy server is to mask the user's IP address. When a user connects to the internet through a proxy server, the server's IP address is used in place of the user's. This means that websites and other online services only see the IP address of the proxy server, not the user's actual IP address. This can be useful for maintaining anonymity and privacy while browsing the web.Proxy servers can also be used to bypass geo-restrictions. Many websites and online services restrict access based on the user's location. By connecting to the internet through a proxy server located in a different region, users can access content that may be otherwise unavailable to them. This is particularly useful for accessing streaming services, online gaming, and other region-locked content.In addition to anonymity and bypassing geo-restrictions, proxy servers can also provide security benefits. By acting as a middleman between the user and the internet, proxy servers can filter web traffic and block malicious content. This can help prevent malware infections, phishing attacks, and other online threats. Some proxy servers also offer encryption capabilities, which can further enhance security and privacy.There are several different types of proxy servers, each with its own unique characteristics and use cases. The most common types include:1. HTTP Proxy: This type of proxy server is specifically designed for web browsing. It can handle HTTP traffic and is often used to bypass content filters or access region-restricted websites.2. HTTPS Proxy: Similar to an HTTP proxy, an HTTPS proxy is designed to handle secure web traffic using the HTTPS protocol. This type of proxy is essential for accessing secure websites and online services.3. SOCKS Proxy: Unlike HTTP and HTTPS proxies, a SOCKS proxy can handle any type of traffic, including email, file sharing, and online gaming. It is a versatile option for users who need to route various types of internet traffic through a proxy server.4. Transparent Proxy: This type of proxy server does not require any configuration on the user's device. It intercepts web traffic without the user's knowledge and is often used in corporate environments for content filtering and monitoring.5. Reverse Proxy: While traditional proxies forward requests from users to the internet, a reverse proxy does the opposite. It sits in front of web servers and forwards incoming requests, providing an additional layer of security and load balancing.When it comes to using a proxy server for web browsing, users have several options for configuring their devices. Most modern web browsers allow users to manually configure proxy settings or use browser extensions to easily switch between different proxy servers. Additionally, there are numerous third-party applications and services that provide access to proxy servers with varying levels of anonymity and security features.In conclusion, a proxy server is a valuable tool for enhancing privacy, security, and access to online content. Whether used for bypassing geo-restrictions, protecting against online threats, or simply maintaining anonymity while browsing the web, proxy servers play a crucial role in today's interconnected digital world. By understanding how proxy servers work and the different types available, users can make informed decisions about when and how to utilize this technology for their online activities.
If you are using an iPhone and want to disable network proxy settings, it's a fairly straightforward process. Network proxies are used to intercept and manage network communications, but sometimes you may want to disable them for various reasons. Here's how you can do it on your Apple iPhone:1. Open the Settings app on your iPhone.2. Scroll down and tap on "Wi-Fi".3. Tap the "i" icon next to the Wi-Fi network you are connected to.4. Scroll down and you will see an option for "HTTP Proxy". If this is set to "Auto" or "Manual", it means that a proxy is currently enabled.5. To disable the proxy, simply tap on "Manual" and then tap the "Off" option.6. If the proxy settings were causing any issues with your network connection, disabling them should resolve those issues.It's important to note that if you were using a proxy for a specific reason, disabling it may affect your ability to access certain websites or services. Make sure you understand the implications of disabling the proxy before doing so.In some cases, your iPhone may have a VPN (Virtual Private Network) configured, which can also act as a form of network proxy. If you want to disable a VPN, you can do so by following these steps:1. Open the Settings app on your iPhone.2. Scroll down and tap on "General".3. Tap on "VPN".4. You will see a list of configured VPN connections. Tap on the toggle switch next to the VPN connection to disable it.Disabling a VPN will also remove any network proxy settings associated with it.By following these simple steps, you can easily disable network proxy settings or VPN configurations on your Apple iPhone. This can be useful if you are experiencing network connectivity issues or if you no longer need to use a proxy or VPN for your internet browsing. Always make sure to consider the implications of disabling such settings before making any changes to your network configuration.
In the realm of networking and telecommunications, IP addresses play a crucial role. They serve as unique identifiers for devices connected to the internet, enabling them to communicate with each other. Understanding the basic characteristics of IP addresses is essential for anyone interested in networking or the internet's inner workings. Here, we explore some of the key features of IP addresses.1. UniquenessOne of the most fundamental characteristics of IP addresses is their uniqueness. Each IP address is distinct and cannot be duplicated. This ensures that data packets are delivered to the correct destination, as each device on the internet has a unique IP address. The uniqueness of IP addresses also helps prevent conflicts and ensures smooth communication on the internet.2. Hierarchical StructureIP addresses have a hierarchical structure that allows for efficient routing and organization. This structure is based on the IP address's subnet mask, which divides the address into network and host portions. The network portion identifies the network segment, while the host portion identifies a specific device on that network. This hierarchical structure enables routers and other network devices to efficiently determine the best path for data packets to travel.3. Static and Dynamic AllocationIP addresses can be allocated statically or dynamically. Static IP addresses are permanently assigned to a device and do not change, even if the device is powered off or disconnected from the network. Dynamic IP addresses, on the other hand, are assigned temporarily by a DHCP (Dynamic Host Configuration Protocol) server and can change over time. Static IP addresses are typically used for servers and other devices that require a consistent IP address, while dynamic IP addresses are common for end-user devices like computers and smartphones.4. IPv4 and IPv6There are two main versions of IP addresses: IPv4 and IPv6. IPv4 is the older version, using 32-bit addresses that can represent approximately 4 billion unique addresses. However, due to the rapid growth of the internet and the exhaustion of IPv4 addresses, IPv6 was developed. IPv6 uses 128-bit addresses, providing a virtually unlimited number of unique IP addresses. IPv6 also introduces new features and improvements compared to IPv4, such as improved security and better support for mobile devices.5. Public and Private AddressesIP addresses can be classified as public or private. Public IP addresses are assigned by internet service providers (ISPs) and are routable on the global internet. They are used by servers and other devices that need to be accessible from anywhere on the internet. Private IP addresses, on the other hand, are used within private networks, such as home or corporate networks. They are not routable on the global internet and are only visible within the local network. Private IP addresses help conserve public IP address space and improve network security.In conclusion, IP addresses are the fundamental building blocks of the internet. Their uniqueness, hierarchical structure, static and dynamic allocation, IPv4 and IPv6 versions, and public and private classification enable devices to communicate efficiently and securely on the global network. Understanding these basic characteristics of IP addresses is crucial for anyone interested in networking or the internet's operation.
In the realm of artificial intelligence and natural language processing, ChatGPT has emerged as a powerful tool capable of engaging in human-like conversations. Its ability to generate coherent and informative text has sparked curiosity about whether it can also be utilized for more technical tasks, such as web scraping. In this article, we'll explore whether ChatGPT can indeed perform web scraping and the challenges involved.What is Web Scraping?Before delving into the question of ChatGPT's capabilities, let's first define web scraping. Web scraping refers to the automated extraction of data from websites using software tools. This process typically involves sending requests to web servers, parsing the returned HTML or XML data, and extracting the desired information. Web scraping can be used for various purposes, including data analysis, market research, and price comparison.ChatGPT's Core FunctionalityChatGPT, developed by OpenAI, is a large language model that has been trained on vast amounts of text data. Its primary function is to generate text that is coherent, contextual, and relevant to the input prompt. ChatGPT is excellent at understanding human language and producing responses that are natural and engaging. However, its design and training do not inherently include the ability to perform web scraping.The Challenge of Integrating Web Scraping with ChatGPTThe integration of web scraping with ChatGPT poses several challenges. Firstly, web scraping requires technical skills and knowledge of web development, network protocols, and data processing. These areas are outside the scope of ChatGPT's core language generation capabilities.Secondly, web scraping often involves interacting with web servers and handling network requests and responses. This requires the ability to send HTTP requests, parse HTML or XML data, and handle potential errors or exceptions. ChatGPT does not have built-in functionality to perform these tasks.Additionally, web scraping can be subject to legal and ethical considerations. Many websites have terms of service that prohibit or restrict automated data extraction. Scraping data without permission can lead to legal issues and ethical concerns. ChatGPT, as a language model, is not equipped to assess or navigate these complexities.Potential ApproachesWhile ChatGPT itself cannot directly perform web scraping, there are potential approaches to integrate the two. One approach could be to develop a separate web scraping tool or library and then utilize ChatGPT's text generation capabilities to interpret and summarize the scraped data. ChatGPT could be trained on scraped data to generate insights, reports, or summaries in a human-readable format.Another approach could be to develop a conversational interface or chatbot that utilizes ChatGPT's language capabilities to interact with users and guide them through a web scraping process. The chatbot could provide instructions, answer questions, and assist users in setting up and executing web scraping tasks. However, the actual scraping process would still need to be performed by a separate tool or library.ConclusionIn conclusion, ChatGPT itself cannot directly perform web scraping due to its core language generation functionality. However, there are potential approaches to integrate web scraping with ChatGPT by utilizing separate tools or libraries and leveraging ChatGPT's text generation capabilities to interpret and summarize scraped data. While the integration poses challenges, the combination of web scraping and ChatGPT's language abilities could enable powerful new applications in data analysis, market research, and other fields.
Changing your computer's IP address can be necessary for various reasons, such as enhancing privacy, bypassing geographical restrictions, or troubleshooting network issues. This article will explore several easy methods to change your IP address, both for Windows and macOS users, as well as some tips on using proxies and VPNs.Understanding IP AddressesAn IP address (Internet Protocol address) is a unique identifier assigned to each device connected to a network. It allows devices to communicate with one another over the internet. There are two main types of IP addresses:1. Static IP Address: This address does not change and is manually assigned to a device. It is often used for servers or devices that need a consistent address.2. Dynamic IP Address: This address is assigned automatically by a DHCP (Dynamic Host Configuration Protocol) server and can change over time.Why Change Your IP Address?Changing your IP address can help you:- Enhance Privacy: Mask your online identity to protect your personal information.- Bypass Restrictions: Access content that may be blocked in your region.- Troubleshoot Issues: Resolve network connectivity problems.Method 1: Restarting Your Modem/RouterOne of the simplest ways to change your IP address is by restarting your modem or router. This method works best if you have a dynamic IP address assigned by your Internet Service Provider (ISP).Steps to Restart Your Modem/Router1. Unplug the Modem/Router: Disconnect the power supply from your modem or router.2. Wait for a Few Minutes: Leave it unplugged for about 5-10 minutes. This allows your ISP to assign a new IP address.3. Reconnect the Power: Plug the modem/router back in and wait for it to fully restart.4. Check Your New IP Address: You can check your new IP address by searching "What is my IP" in a web browser.Method 2: Using the Command Prompt (Windows)If you are using Windows, you can change your IP address through the Command Prompt.Steps to Change IP Address via Command Prompt1. Open Command Prompt: Press `Win + R`, type `cmd`, and hit Enter.2. Release Current IP Address: Type the following command and press Enter:```bashipconfig /release```3. Renew IP Address: After releasing the IP address, type the following command and press Enter:```bashipconfig /renew```4. Check New IP Address: To verify the change, type:```bashipconfig```Look for the "IPv4 Address" under your active network connection.Method 3: Changing IP Address Manually (Windows)If you want to set a specific IP address, you can do this manually through the network settings.Steps to Manually Change IP Address1. Open Network Connections: Right-click on the network icon in the system tray and select "Open Network & Internet settings."2. Change Adapter Options: Click on "Change adapter options."3. Select Your Network: Right-click on your active network connection (Ethernet or Wi-Fi) and select "Properties."4. Select Internet Protocol Version 4 (TCP/IPv4): Highlight it and click on "Properties."5. Use the Following IP Address: Select the option "Use the following IP address" and enter your desired IP address, subnet mask, and default gateway.6. Save Changes: Click "OK" to save the changes and exit the properties window.Method 4: Using System Preferences (macOS)For macOS users, changing the IP address can be done through System Preferences.Steps to Change IP Address on macOS1. Open System Preferences: Click on the Apple logo in the top-left corner and select "System Preferences."2. Select Network: Click on "Network."3. Choose Your Network: Select your active network connection (Wi-Fi or Ethernet) from the left pane.4. Click on Advanced: Click the "Advanced" button in the bottom-right corner.5. Go to TCP/IP Tab: Select the "TCP/IP" tab.6. Configure IPv4: From the "Configure IPv4" dropdown, select "Manually" and enter your desired IP address, subnet mask, and router address.7. Apply Changes: Click "OK" and then "Apply" to save the changes.Method 5: Using a VPNA Virtual Private Network (VPN) not only changes your IP address but also encrypts your internet traffic, enhancing your privacy and security.Steps to Use a VPN1. Choose a Reliable VPN Provider: Research and select a reputable VPN service that meets your needs.2. Install the VPN Application: Download and install the VPN software on your computer.3. Log In: Open the application and log in with your credentials.4. Select a Server Location: Choose a server in the location of your choice. This will assign you a new IP address based on the server location.5. Connect to the VPN: Click the connect button to establish a secure connection. Your IP address will now reflect the chosen server location.Method 6: Using ProxiesProxies can also be used to change your IP address. They act as intermediaries between your device and the internet.Steps to Use a Proxy1. Find a Proxy Server: Search for a reliable proxy server that suits your needs.2. Configure Proxy Settings:- Windows: Go to "Settings" > "Network & Internet" > "Proxy" and enter the proxy details.- macOS: Go to "System Preferences" > "Network," select your network, click "Advanced," and then go to the "Proxies" tab to enter the proxy details.3. Test Your New IP Address: Use a service like "What is my IP" to confirm your new IP address.Method 7: Resetting Your Network SettingsIf you are facing persistent issues or want to ensure a fresh start, resetting your network settings can help.Steps to Reset Network Settings (Windows)1. Open Settings: Press `Win + I` to open the settings menu.2. Go to Network & Internet: Click on "Network & Internet."3. Network Reset: Scroll down and click on "Network reset."4. Confirm Reset: Follow the prompts to reset your network settings. Your computer will restart, and your IP address will likely change.Steps to Reset Network Settings (macOS)1. Open System Preferences: Click on the Apple logo and select "System Preferences."2. Select Network: Click on "Network."3. Remove and Re-add Network: Select your network connection, click the minus (-) button to remove it, and then click the plus (+) button to add it back.4. Reconfigure Your Network: Set up your network connection again, which may assign a new IP address.ConclusionChanging your computer's IP address is a straightforward process that can be accomplished through various methods, depending on your needs and preferences. Whether you choose to restart your modem, use command-line tools, employ a VPN, or configure proxy settings, each method offers unique advantages. By understanding these techniques, you can enhance your online privacy, bypass restrictions, and troubleshoot network issues effectively. Always remember to use reliable services and follow best practices to ensure your online security while changing your IP address.
When using the Internet, proxy IP can help users protect privacy, improve access speed and bypass geographical restrictions. As a powerful cloud service platform, Alibaba Cloud provides rich resources and flexible configuration options, allowing users to easily build their own proxy IP services. This article will introduce in detail how to build a proxy IP through Alibaba Cloud Server, and provide some practical setup steps and precautions.What is a proxy IP?A proxy IP is an intermediary server through which users access the Internet. A proxy IP can hide the user's real IP address so that the target website can only see the IP address of the proxy server. The main benefits of using a proxy IP include:1. Privacy protection: Hide the real IP address to prevent tracking.2. Increase access speed: By optimizing the network path, the speed of accessing specific websites is improved.3. Bypassing geographical restrictions: Access websites and services restricted by regions.Introduction to Alibaba Cloud ServerAlibaba Cloud Server (ECS) is an elastically scalable cloud computing service. Users can choose different configurations and regions according to their needs. The high-performance computing, storage, and network services provided by Alibaba Cloud make it easy and efficient to build a proxy IP service.How to build a proxy IP through Alibaba Cloud ServerStep 1: Purchase an Alibaba Cloud Server1. Register an Alibaba Cloud account: If you don't have an Alibaba Cloud account yet, please register one first.2. Log in to the console: Log in to the Alibaba Cloud Management Console.3. Create an ECS instance:- Select "Cloud Server ECS" in "Products and Services".- Click "Create Instance" and select the appropriate region and availability zone.- Select the instance specifications (CPU, memory, etc.) according to your needs.- Select an operating system (Ubuntu or CentOS is recommended).- Configure the network and security group to ensure that the necessary ports (such as 8080, 1080, etc.) are open.Step 2: Connect to Alibaba Cloud Server1. Connect using SSH: Depending on the operating system you choose, use an SSH tool (such as PuTTY or Terminal) to connect to the Alibaba Cloud Server.- Enter the following command in the terminal (replace `your_ip` with your ECS instance IP address):```bashssh root@your_ip```- Enter your password to complete the connection.Step 3: Install proxy softwareOn Alibaba Cloud servers, you can choose a variety of proxy software to build proxy IP services. The following are two common methods:Method 1: Use Squid to build HTTP proxy1. Update the software package:```bashsudo apt-get update # For Ubuntusudo yum update # For CentOS```2. Install Squid:```bashsudo apt-get install squid # For Ubuntusudo yum install squid # For CentOS```3. Configure Squid:- Open the Squid configuration file:```bashsudo nano /etc/squid/squid.conf```- Modify the following configuration to allow specific IP access (replace `your_ip` with the IP address allowed to access):```plaintextacl allowed_ips src your_iphttp_access allow allowed_ips```- Save and exit the configuration file.4. Start Squid service:```bashsudo systemctl start squidsudo systemctl enable squid```Method 2: Use Shadowsocks to build a SOCKS5 proxy1. Install Python and pip:```bashsudo apt-get install python3 python3-pip # For Ubuntusudo yum install python3 python3-pip # For CentOS```2. Install Shadowsocks:```bashpip3 install https://github.com/shadowsocks/shadowsocks/archive/master.zip```3. Configure Shadowsocks:- Create a configuration file:```bashsudo nano /etc/shadowsocks.json```- Add the following configuration (modify the port and password as needed):```json{"server": "0.0.0.0","port_password": {"8388": "your_password"},"timeout": 300,"method": "aes-256-gcm"}```- Save and exit the configuration file.4. Start Shadowsocks:```bashsslocal -c /etc/shadowsocks.json```Step 4: Configure security groups and firewallsMake sure your Alibaba Cloud security group has opened the ports required for the proxy service. For example, if you are using Squid, make sure port 8080 is open; if you are using Shadowsocks, make sure port 8388 is open.1. Log in to the Alibaba Cloud console.2. Select "Security Group" in "Network and Security".3. Select the security group corresponding to your ECS instance and click "Add Security Group Rule".4. Configure inbound rules to allow access to the specified port.Step 5: Test the proxy service1. Test using a browser or tool:- Set up the proxy in the browser and enter your Alibaba Cloud server IP and port.- Visit a website to check whether it can be accessed normally.2. Test using command line tools:- Test the proxy using the curl command:```bashcurl -x http://your_ip:8080 http://www.example.com```Notes1. Security: Ensure the security of the proxy server to prevent abuse. Access can be restricted by configuring access control lists (ACLs).2. Monitor traffic: Regularly monitor server traffic to prevent abnormal activities.3. Update software: Regularly update the proxy software and operating system to fix security vulnerabilities.4. Comply with laws and regulations: When using a proxy server, be sure to comply with local laws and regulations to avoid illegal activities.By building a proxy IP service through Alibaba Cloud Server, you can effectively protect user privacy, improve access speed and bypass regional restrictions. This article details the entire process from purchasing a server to installing and configuring the proxy software, hoping to help you successfully build your own proxy IP service. Through reasonable configuration and use, you will be able to enjoy a safer and more efficient Internet experience.
The speed and bandwidth of a server are two crucial factors that determine the quality of service provided to users. In this article, we will explore the relationship between server access speed and bandwidth.Before we delve into the specifics, let us understand what these terms mean. Server access speed refers to the time taken by a server to respond to a user's request. This response time is measured in milliseconds (ms) and is also known as latency. Bandwidth, on the other hand, refers to the amount of data that can be transmitted over a network in a given time. It is usually measured in bits per second (bps) or bytes per second (Bps).Now, let us examine how these two factors are related. The bandwidth of a server determines the maximum amount of data that can be transmitted over the network in a given time. The more bandwidth a server has, the more data it can transmit. However, this does not necessarily mean that the server will respond faster to user requests.The server access speed is determined by several factors, including the distance between the server and the user, the number of users accessing the server simultaneously, and the processing power of the server. Bandwidth plays a role in determining server access speed only when the data being transmitted exceeds the available bandwidth. In such cases, the server may take longer to respond to user requests.To illustrate this point, let us consider an example. Suppose a user is accessing a website hosted on a server located in another country. The distance between the user and the server will result in higher latency, which means that the server will take longer to respond to user requests. In such cases, increasing the bandwidth of the server will not improve the response time significantly.However, if multiple users are accessing the server simultaneously, increasing the bandwidth of the server can improve the response time. This is because more bandwidth allows more data to be transmitted simultaneously, reducing the time taken for each user request to be processed.Another factor that affects server access speed is the processing power of the server. A server with higher processing power can handle more requests simultaneously, resulting in faster response times. Increasing the bandwidth of such a server can further improve its performance.In conclusion, the relationship between server access speed and bandwidth is not straightforward. While bandwidth plays a role in determining server access speed, it is not the only factor. The distance between the user and the server, the number of users accessing the server simultaneously, and the processing power of the server also play crucial roles. Therefore, it is essential to consider all these factors when evaluating the performance of a server.
If you are looking to find the IP address of your computer, there are several methods you can use. An IP address is a unique string of numbers that identifies each device using the Internet Protocol to communicate over a network. Here are four different ways to find your computer's IP address:1. Using Command Prompt (Windows):- Press the Windows key + R to open the Run dialog box.- Type "cmd" and press Enter to open the Command Prompt.- In the Command Prompt window, type "ipconfig" and press Enter.- Look for the "IPv4 Address" under the section of your active network connection. This is your computer's IP address.2. Using System Preferences (Mac):- Click on the Apple logo in the top-left corner of the screen and select "System Preferences."- Click on "Network" and select your active network connection on the left-hand side.- Your computer's IP address will be displayed on the right-hand side under the "Status" section.3. Using Settings (iOS):- Open the Settings app on your iOS device.- Tap on "Wi-Fi" and then tap on the connected Wi-Fi network.- Your device's IP address will be listed next to "IP Address."4. Using Settings (Android):- Open the Settings app on your Android device.- Tap on "Network & internet" and then tap on "Wi-Fi."- Tap on the connected Wi-Fi network and then tap on "Advanced."- Your device's IP address will be listed under the "IP address" section.These are just a few methods to find your computer's IP address. Depending on your operating system and device, there may be other ways to access this information. Knowing your IP address can be useful for troubleshooting network issues, setting up a local server, or configuring remote access to your computer. Keep in mind that your IP address may change if you switch networks or if your network uses dynamic IP addressing.
Nginx is a powerful web server and reverse proxy that can be used to efficiently distribute incoming traffic to multiple backend servers. Setting up Nginx as a reverse proxy is a common use case, and it can be done quickly and easily with the right configuration. In this guide, we will walk through the steps to set up Nginx as a reverse proxy for your web applications.Step 1: Install NginxFirst, you need to install Nginx on your server. If you are using a Linux distribution, you can typically install Nginx using the package manager. For example, on Ubuntu, you can use the following command:```bashsudo apt-get updatesudo apt-get install nginx```Step 2: Configure NginxOnce Nginx is installed, you will need to configure it to act as a reverse proxy. The main configuration file for Nginx is typically located at /etc/nginx/nginx.conf. Open this file in a text editor and add the following configuration inside the http block:```nginxserver {listen 80;server_name example.com;location / {proxy_pass http://backend_server;proxy_set_header Host $host;proxy_set_header X-Real-IP $remote_addr;proxy_set_header X-Forwarded-For $proxy_add_x_forwarded_for;proxy_set_header X-Forwarded-Proto $scheme;}}```In this configuration, replace example.com with your domain name and backend_server with the address of your backend server.Step 3: Test ConfigurationAfter making the configuration changes, you can test the syntax of the Nginx configuration files by running the following command:```bashsudo nginx -t```If the syntax is correct, you can reload Nginx to apply the changes:```bashsudo systemctl reload nginx```Step 4: Enable SSL (Optional)If you want to secure the communication between clients and the reverse proxy, you can enable SSL by obtaining an SSL certificate and configuring Nginx to use it. Here is an example of how to configure SSL in Nginx:```nginxserver {listen 443 ssl;server_name example.com;ssl_certificate /path/to/ssl_certificate.crt;ssl_certificate_key /path/to/ssl_certificate.key;location / {proxy_pass http://backend_server;proxy_set_header Host $host;proxy_set_header X-Real-IP $remote_addr;proxy_set_header X-Forwarded-For $proxy_add_x_forwarded_for;proxy_set_header X-Forwarded-Proto $scheme;}}```Replace example.com with your domain name and provide the correct paths to your SSL certificate and key files.Step 5: Verify Reverse Proxy FunctionalityOnce Nginx is configured as a reverse proxy, you can verify its functionality by accessing your web application through the domain name configured in the Nginx server block. Check that the requests are being forwarded to the backend server correctly and that any SSL configurations are working as expected.Setting up Nginx as a reverse proxy is a straightforward process that can greatly improve the performance and security of your web applications. By following the steps outlined in this guide, you can quickly configure Nginx to efficiently distribute incoming traffic to your backend servers while also ensuring secure communication with clients.
In today's digital era, hiding your IP address can be a valuable tool for protecting your privacy and security online. An IP address is a unique identifier that reveals your device's location on the internet, making it vulnerable to potential threats and intrusions. However, there are several ways you can conceal your IP address and enhance your online anonymity. Here's a guide on how to hide your IP address.1. Use a Virtual Private Network (VPN)A VPN is one of the most effective ways to hide your IP address. It encrypts your internet connection and routes your traffic through a remote server, making your actual IP address invisible to others. By connecting to a VPN server, your traffic appears to originate from that server's IP address, not your own. Choose a reputable VPN provider with a strong encryption protocol and a large server network to ensure maximum privacy and anonymity.2. Utilize a Proxy ServerA proxy server is another method to hide your IP address. It acts as an intermediary between your device and the internet, forwarding your requests and receiving responses on your behalf. When you connect to a proxy server, your requests are sent through the proxy's IP address, concealing your actual IP. However, it's worth noting that proxies may not offer the same level of security and encryption as a VPN.3. Use the Tor NetworkThe Tor (The Onion Router) network is a free and open-source software that enables anonymous communication. It routes your internet traffic through a series of volunteer-operated servers, encrypting your data multiple times along the way. This process makes it difficult for anyone to trace your traffic back to your original IP address. Tor is often used by activists, journalists, and other individuals who require a high level of anonymity.4. Connect to a Public Wi-Fi NetworkConnecting to a public Wi-Fi network can also help hide your IP address, though it's not the most secure option. Public Wi-Fi networks typically assign a shared IP address to all connected devices, making it difficult to identify specific users. However, it's essential to be cautious when using public Wi-Fi, as these networks are often unsecured and vulnerable to hackers. Use a VPN or proxy server for added security.5. Employ a Web-based Proxy ServiceWeb-based proxy services allow you to access websites through their servers, concealing your IP address. These services are often free and easy to use, but they may not provide the same level of security and encryption as a VPN or Tor. Additionally, some web-based proxies may log your browsing activity or inject advertisements into the pages you visit.It's important to note that hiding your IP address doesn't guarantee complete anonymity online. However, it can significantly increase your privacy and security by making it more difficult for others to track your online activities and identify your device. Remember to choose a reputable service provider, stay vigilant when using public Wi-Fi, and consider employing multiple methods to enhance your online anonymity.