Which is better for frequent IP address switching, free proxy IP or paid proxy?
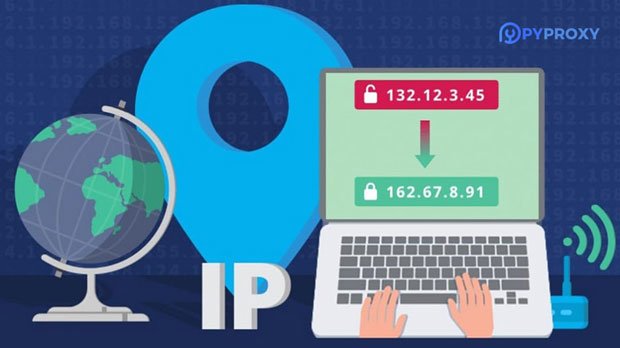
When it comes to frequent IP switching, both free and paid proxies present their unique advantages and challenges. For users seeking to frequently alter their IP address, the choice between free proxy ip and paid proxy depends on factors like reliability, security, speed, and overall performance. Free proxies may seem appealing due to their cost-free nature, but they often come with limitations that can hinder performance in the long run. On the other hand, paid proxies are typically more stable, secure, and offer better speed for high-demand activities. In this article, we will explore these factors in depth to help you make an informed decision regarding which option is best suited for your needs. Understanding proxy ips: A Quick OverviewBefore diving deeper into the comparison between free and paid proxies, it's essential to first understand what proxy IPs are and how they work. A proxy acts as an intermediary between your device and the internet, effectively masking your real IP address with a new one, which can be used to access websites or services as though the request is coming from a different location.The Key Differences Between Free and Paid Proxies1. ReliabilityReliability is a crucial factor when frequently switching IP addresses. Free proxies often suffer from instability. Due to the high demand and low maintenance, many of these proxies can be slow, unreliable, or even stop functioning without notice. In contrast, paid proxies are generally more reliable. Paid services typically have dedicated customer support, regular updates, and maintenance schedules to ensure consistent performance, making them better suited for users who require a stable connection for tasks such as data scraping or browsing anonymity.2. Speed and PerformanceSpeed is another critical consideration, especially when frequent IP switching is required. Free proxies often experience congestion due to a large number of users sharing the same IP addresses. This congestion leads to slow speeds, making them unsuitable for tasks that demand high bandwidth, such as streaming or large-scale web scraping. Paid proxies, on the other hand, are generally faster. They are usually offered in private or dedicated formats, which means that the user doesn’t have to share the connection with others, leading to better speed and performance.3. Security and PrivacyWhen switching IPs frequently, security is a concern, particularly for users dealing with sensitive data. Free proxies are notorious for being less secure. They often lack proper encryption protocols, which makes it easier for hackers or third parties to intercept data. Additionally, some free proxies may log your activities and sell your data. This can put your privacy at risk, especially when accessing private or sensitive websites.In contrast, paid proxies usually come with enhanced security features, such as SSL encryption and strict no-log policies. This makes them more suitable for users who need to protect their data and privacy, especially when switching IPs frequently and accessing websites that require high confidentiality.4. Geographic CoverageFor frequent IP switching, the geographic locations of proxies are also an important factor. Free proxies tend to offer limited locations, and the range may not always meet the specific needs of users. Additionally, free proxies may have inconsistent access to certain regions, which can make them less useful for tasks like geo-targeted marketing or bypassing location-based restrictions.Paid proxies, however, often provide a broader range of server locations. Many paid services allow users to choose from hundreds or even thousands of locations worldwide. This flexibility is invaluable for activities that require precise geographic targeting or avoiding IP bans in specific regions.5. ScalabilityWhen dealing with frequent IP switching, scalability becomes an important factor. Free proxies are not designed to scale, and users may encounter issues when they need to switch IPs frequently or scale their activities. The limited resources of free proxies can result in limited bandwidth, slow performance, and inconsistent access.On the other hand, paid proxies are often designed with scalability in mind. Many paid proxy services allow users to purchase additional proxies or bandwidth as needed. This means that as your need for frequent IP switching grows, paid proxies can easily accommodate higher volumes of traffic and more frequent changes without sacrificing performance.6. Maintenance and Customer SupportMaintaining a proxy service can sometimes be complicated, especially if you encounter technical issues or need specific configurations. Free proxies generally do not offer reliable customer support, leaving users to fend for themselves when problems arise. Additionally, free proxies may be subject to frequent downtime or service interruptions, without any notice or explanation.Paid proxies, however, typically come with dedicated customer support and technical assistance. This support can be crucial, especially when you encounter issues with IP switching or need to troubleshoot connectivity problems. Moreover, paid services often provide regular updates and performance enhancements to ensure a seamless experience.When Should You Use Free Proxies?Free proxies may still be suitable for certain use cases, particularly if your need for IP switching is minimal and not time-sensitive. For instance, casual browsing or testing out IP-switching features on a small scale might be fine with free proxies. However, these services come with notable limitations, and their quality may vary depending on availability and network congestion.Additionally, free proxies might be a viable option if you only need to switch IPs occasionally and do not need to prioritize speed, security, or reliability. They may also be appropriate for non-critical activities where privacy is not a primary concern.When Should You Use Paid Proxies?Paid proxies are the ideal solution for users who need frequent IP switching for more intensive tasks. If your activities involve large-scale web scraping, data mining, geo-targeted marketing, or privacy-conscious browsing, then paid proxies will offer the stability, speed, and security required for such high-demand use cases. Moreover, if your activities require switching IPs regularly and without interruption, the enhanced features of paid proxies—such as dedicated customer support, encryption, and geographic coverage—make them the better choice.Conclusion: Free vs Paid Proxies for Frequent IP SwitchingIn conclusion, while free proxies might seem appealing at first due to their cost-effectiveness, they come with many drawbacks that can significantly affect performance, security, and reliability, especially for those who need to frequently switch IPs. Paid proxies, though requiring an investment, provide a more reliable, secure, and scalable solution for frequent IP switching, making them the preferred choice for users with demanding needs.Choosing between free and paid proxies ultimately depends on your specific use case. For critical, high-volume tasks that require frequent, seamless IP switching, paid proxies offer superior performance. For occasional or non-intensive use, free proxies may suffice, but users must weigh the risks and limitations associated with their use.
2025-01-24