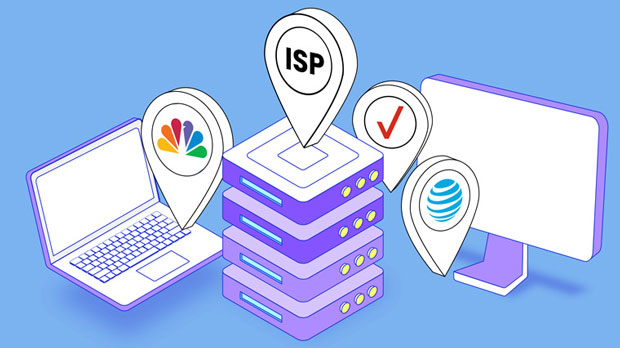
If you want to find out your IP address, there are several methods you can use. Your IP address is a unique identifier for your device on a network, and it can be useful to know what it is for various reasons. In this blog post, we'll explore the different ways you can check your IP address.1. Using a Search EngineOne of the simplest ways to find out your IP address is to use a search engine. Simply type "what is my IP address" into the search bar, and the search engine will display your public IP address at the top of the search results. This method is quick and easy, and it doesn't require any special software or technical knowledge.2. Using a WebsiteThere are many websites that can show you your IP address. These sites typically display your public IP address as well as additional information such as your location and internet service provider. To find your IP address using a website, simply visit one of these sites and it will automatically display your IP address.3. Using Command Prompt (Windows)If you're using a Windows computer, you can also find out your IP address using the Command Prompt. To do this, open the Command Prompt by searching for "cmd" in the Start menu, then type "ipconfig" and press Enter. Your IP address will be displayed under the "IPv4 Address" for the network adapter you are currently using.4. Using Terminal (Mac)For Mac users, you can find out your IP address using the Terminal. Open the Terminal application, then type "ifconfig" and press Enter. Your IP address will be displayed under the "inet" section for the network adapter you are currently using.5. Using Network SettingsAnother way to find your IP address is to check your network settings. On Windows, you can do this by going to Settings > Network & Internet > Wi-Fi (or Ethernet) > Properties, then scroll down to find your IPv4 address. On Mac, you can go to System Preferences > Network, then select your active network connection to view your IP address.6. Using a Mobile AppIf you want to find out the IP address of your mobile device, you can use a variety of apps available on the App Store or Google Play. Simply search for "IP address" in the app store and you'll find several free apps that can display your device's IP address along with other network information.There are many ways to find out your IP address, whether you're using a computer or a mobile device. Whether you prefer using a search engine, website, command prompt, terminal, network settings, or a mobile app, you can easily check your IP address using any of these methods. Knowing your IP address can be useful for troubleshooting network issues, setting up remote access to your device, or simply understanding more about how your device connects to the internet.
In today's digital world, where connectivity and privacy are paramount, knowing how to modify your computer's IP address can be a valuable skill. Whether you're trying to access a geo-restricted service, enhance your online security, or troubleshoot network issues, changing your IP address can be a quick and effective solution. Here are two of the simplest methods to change your computer's IP address.Method 1: Using Network Settings (For Windows)Accessing Network SettingsOpen the "Control Panel" by searching for it in the Start menu or pressing the Windows key + R and typing "control panel."Navigate to "Network and Internet" and click on "Network and Sharing Center."Find the connection you want to modify (e.g., Ethernet or Wi-Fi) and click on it.Changing IP SettingsClick on "Properties" and then select "Internet Protocol Version 4 (TCP/IPv4)."Click on "Properties" again.Under the "General" tab, select "Use the following IP address" and enter the desired IP address, subnet mask, default gateway, and DNS server details. If you're unsure about these settings, consult your network administrator or ISP.Click "OK" to save the changes.Testing the New IPOpen a command prompt (type "cmd" in the Start menu search box) and run the command "ipconfig" to verify the new IP address.Method 2: Using Command Prompt (For Windows)Opening Command PromptPress the Windows key + R to open the Run dialog box.Type "cmd" and press Enter to open the command prompt.Releasing and Renewing IPType "ipconfig /release" and press Enter. This will release your current IP address.Type "ipconfig /renew" and press Enter. This will attempt to obtain a new IP address from your DHCP server.If you're on a static IP configuration, you'll need to use the "netsh" command to manually set the IP address. For example, "netsh interface ipv4 set address name="YourConnectionName" source=static address=YourNewIPAddress mask=YourSubnetMask gateway=YourDefaultGateway."Testing the New IPAfter running "ipconfig /renew" or manually setting the IP, type "ipconfig" again to verify the new IP address.Important ConsiderationsBefore making any changes to your IP settings, ensure you understand the implications and have the necessary permissions. Modifying network settings can disrupt your connectivity if done incorrectly.If you're using a dynamic IP address (DHCP), changing your IP settings manually might conflict with your network's DHCP server.Always consult your network administrator or ISP if you're unsure about making changes to your IP settings.By following these simple steps, you can easily change your computer's IP address using either the network settings or command prompt method. Remember to exercise caution and understand the implications of making these changes before proceeding.
In the realm of online privacy and security, two technologies often come to the forefront: SOCKS5 proxies and Virtual Private Networks (VPNs). Both offer users a way to navigate the internet with enhanced privacy and, in some cases, bypass geo-restrictions. However, despite their similarities in function, SOCKS5 and VPNs are distinct technologies with their own unique features, limitations, and use cases. This article delves into the differences and similarities between SOCKS5 proxies and VPNs, helping readers understand whether they are interchangeable or serve different purposes.Fundamentals: SOCKS5 ProxiesSOCKS5 is a protocol designed specifically for client-server applications that require a reliable way to route network traffic through an intermediate server, known as a proxy. Unlike its predecessor, SOCKS4, SOCKS5 supports UDP traffic in addition to TCP, and it offers authentication mechanisms for added security. SOCKS5 proxies can be used to hide the user's IP address, bypass firewalls, and access content that might be blocked or censored in their location.Fundamentals: Virtual Private Networks (VPNs)A Virtual Private Network (VPN) is a secure and encrypted connection that extends across a public network, such as the internet, enabling users to send and receive data as if they were directly connected to a private network. VPNs route all your internet traffic through a remote server, masking your IP address and encrypting your data to ensure privacy and security. VPNs are widely used for bypassing geo-restrictions, accessing region-locked content, and protecting against surveillance and data breaches.Key Differences· Protocol and Encryption: SOCKS5 is a protocol used by proxies, while VPNs operate at a higher level, encapsulating and encrypting your entire internet connection. VPNs typically use protocols like OpenVPN, IKEv2, or L2TP/IPsec, which offer stronger encryption and security features than SOCKS5 alone.· Traffic Routing: SOCKS5 proxies route specific applications or protocols through the proxy server, while VPNs route all your internet traffic through the VPN server. This means that with a VPN, all your online activities, including browsing, streaming, and downloading, are encrypted and protected.· Configuration and Compatibility: SOCKS5 proxies are often easier to configure for specific applications that support proxy settings, such as web browsers or torrent clients. VPNs, on the other hand, require installation of a VPN client on your device, which can be more complex to set up but provides a more comprehensive solution for all your internet traffic.· Privacy and Anonymity: Both SOCKS5 proxies and VPNs can enhance privacy and anonymity, but VPNs offer a more comprehensive solution. While SOCKS5 proxies can hide your IP address, VPNs encrypt your data, protecting against eavesdropping and ensuring that even your ISP or government can't see what you're doing online.· Performance: In terms of performance, the difference between SOCKS5 proxies and VPNs can be subtle but noticeable. SOCKS5 proxies can sometimes offer faster speeds for specific tasks, like downloading or streaming, because they only route specific traffic. However, VPNs, with their encryption overhead, may slightly slow down your connection.Similarities· Bypassing Geo-Restrictions: Both SOCKS5 proxies and VPNs can be used to bypass geo-restrictions and access content that is otherwise unavailable in your location.· IP Masking: Both technologies mask your IP address, making it harder for third parties to track your online activities.· Security: Both SOCKS5 proxies and VPNs can enhance your online security, although VPNs offer a more comprehensive solution with encryption and protection against various types of attacks.ConclusionIn summary, while SOCKS5 proxies and VPNs share some similarities in terms of their ability to bypass geo-restrictions and mask IP addresses, they are fundamentally different technologies with distinct use cases and features. SOCKS5 proxies are ideal for specific applications that require proxy settings, while VPNs offer a more comprehensive solution for protecting all your internet traffic with encryption and enhanced privacy. When choosing between the two, consider your specific needs and priorities, such as ease of use, compatibility, and the level of security and privacy you require.
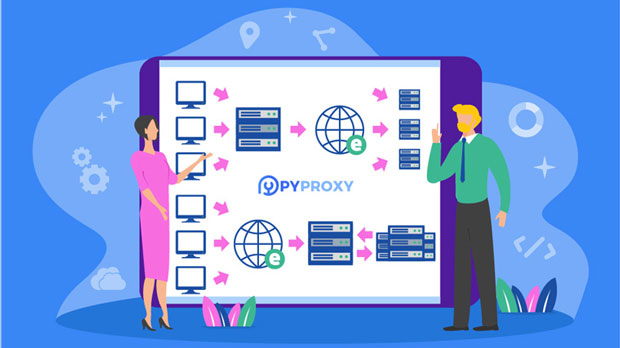
In a digital world where access and security are paramount, PYPROXY Residential Proxies stand out as a reliable solution for bypassing restrictions and accessing content with ease. Dive into unparalleled web scraping efficiency and secure online navigation with PYPROXY's cutting-edge US Residential Proxies.Unmatched Proxy Pool in the US:Covering over 190 countries and regions, our proxies ensure seamless connectivity and reliable data retrieval, empowering you to navigate the digital realm with confidence. With approximately 160,000 IPs online in real time, PYPROXY's US Residential Proxies offer stability and efficiency for your web scraping needs.Key Features of PYPROXY US Residential Proxies:Diverse and Abundant Pool: Explore a diverse and extensive pool of proxies strategically located in the United States, catering to a wide range of online activities.High-Quality IPs: Access top-tier residential IPs that guarantee anonymity, reliability, and exceptional performance for all your online endeavors.Optimized for US-Based Tasks: Tailored specifically for tasks requiring US-based IP addresses, PYPROXY US Residential Proxies offer unmatched efficiency and effectiveness.What Sets PYPROXY Residential Proxies Apart?Cost-Effectiveness: PYPROXY offers cost-effective proxy services tailored to your specific needs, ensuring optimal performance without breaking the bank.Intuitive Settings: Our user-friendly interface allows for effortless configuration and management of your proxy environment, saving you time and effort.Unlimited Concurrent Sessions: Enjoy support for unlimited concurrent sessions, enabling efficient handling of large-scale data scraping and parallel testing.Elevate Your Online Experience with PYPROXY Residential Proxies:Experience enhanced security, efficiency, and reliability with PYPROXY Residential Proxies. Whether you're a seasoned professional or a budding enthusiast, our proxies are tailored to empower you in your online pursuits. Embrace innovation and excellence with PYPROXY as you delve into the future of web scraping and data retrieval.
In today's digital age, internet privacy and security are more important than ever. Using a proxy server, especially a SOCKS5 proxy, can help safeguard your online activities. This article will guide you through the process of setting up a SOCKS5 proxy in the Easy Language Browser, a popular tool for users who need to navigate the web securely.What is a SOCKS5 Proxy?SOCKS5 is a protocol that facilitates the routing of network packets between a client and a server through a proxy server. Unlike HTTP proxies, which are limited to web traffic, SOCKS5 can handle any type of traffic, including TCP and UDP. This flexibility makes it suitable for various applications, from web browsing to online gaming and file sharing.Benefits of Using a SOCKS5 Proxy1. Enhanced Privacy: SOCKS5 proxies mask your real IP address, helping to keep your online activities anonymous.2. Bypassing Geo-Restrictions: With a SOCKS5 proxy, you can access content that may be restricted in your geographic location.3. Improved Security: Using a SOCKS5 proxy adds an extra layer of security, especially when connected to public Wi-Fi networks.4. Versatility: SOCKS5 can handle various types of traffic, making it suitable for different applications beyond just web browsing.Prerequisites for Setting Up a SOCKS5 ProxyBefore you begin, ensure you have the following:- A working installation of Easy Language Browser.- Access to a SOCKS5 proxy server. You can either rent one from a reputable provider or set up your own using a Virtual Private Server (VPS).- Basic knowledge of networking and system configurations.Step-by-Step Guide to Setting Up a SOCKS5 Proxy in Easy Language BrowserStep 1: Obtain a SOCKS5 Proxy ServerIf you don't already have a SOCKS5 proxy server, you can rent one from a reliable provider. Some popular options include:- NordVPN: Offers SOCKS5 proxy alongside its VPN services.- Private Internet Access: Provides SOCKS5 proxy access with its subscription plans.- Vultr or DigitalOcean: You can set up your own SOCKS5 server using these VPS providers.Step 2: Open Easy Language Browser1. Launch Easy Language Browser: Start the application on your computer.2. Access Settings: Look for the settings or configuration menu within the browser. This is usually found in the main menu or through a gear icon.Step 3: Configure Proxy Settings1. Locate Proxy Settings: In the settings menu, find the section dedicated to network or proxy settings. This may be labeled as "Network," "Connections," or "Proxy."2. Select SOCKS5 Proxy: Choose the option to configure a SOCKS5 proxy. This may be a dropdown menu or a checkbox labeled "SOCKS5."3. Enter Proxy Details:- Proxy Address: Input the IP address of your SOCKS5 proxy server.- Port Number: Enter the port number associated with your SOCKS5 proxy (commonly 1080).- Username and Password: If your SOCKS5 proxy requires authentication, enter your username and password.4. Save Settings: After entering the required information, make sure to save your settings. Look for a "Save" or "Apply" button.Step 4: Test the SOCKS5 Proxy ConnectionTo ensure that your SOCKS5 proxy is working correctly, follow these steps:1. Visit an IP Check Website: Open a new tab and visit a website like `https://www.whatismyip.com`. If the SOCKS5 proxy is set up correctly, the IP address displayed should be that of your proxy server, not your local IP address.2. Access Restricted Content: Try accessing content that is typically restricted in your region. If you can access it, your SOCKS5 proxy is functioning correctly.Step 5: Troubleshooting Common IssuesIf you encounter issues while setting up or using your SOCKS5 proxy in Easy Language Browser, consider the following troubleshooting steps:1. Check Proxy Settings: Double-check the IP address and port number in the proxy settings. Ensure they match the configuration of your SOCKS5 server.2. Firewall Settings: Ensure that your firewall or any security software is not blocking the SOCKS5 proxy connection. You may need to create an exception for the proxy server.3. Restart Easy Language Browser: Sometimes, simply restarting the browser can resolve connectivity issues.4. Test with Different Applications: If Easy Language Browser is not working with the SOCKS5 proxy, try using other applications that support SOCKS5, such as torrent clients or chat applications.Step 6: Securing Your SOCKS5 Proxy ConnectionTo enhance the security of your SOCKS5 proxy connection, consider the following practices:1. Limit Access: If you have control over the SOCKS5 server, configure it to allow connections only from specific IP addresses. This prevents unauthorized users from accessing your proxy.2. Use Strong Authentication: If your proxy server software supports it, enable strong authentication methods to ensure that only authorized users can connect.3. Regularly Update Software: Keep your Easy Language Browser and SOCKS5 proxy software up to date to protect against vulnerabilities and security issues.4. Monitor Logs: Regularly check the logs of your SOCKS5 server for any suspicious activity or unauthorized access attempts.Step 7: Alternative Methods to Use SOCKS5 ProxyIf you find that Easy Language Browser does not meet your needs or if you encounter persistent issues, consider these alternatives:1. Use a Different Browser: Some browsers, like Mozilla Firefox, have built-in support for SOCKS5 proxies and may offer a more straightforward setup process.2. Proxy Client Software: Consider using dedicated proxy client software like Proxifier or ProxyCap, which can route all your applications through the SOCKS5 proxy.3. VPN Services: If you are unable to get the SOCKS5 proxy working, consider using a VPN service that offers similar benefits, including enhanced privacy and access to geo-restricted content.ConclusionSetting up a SOCKS5 proxy in Easy Language Browser can significantly enhance your online privacy and security. By following the steps outlined in this guide, you can create a secure environment for browsing the internet, accessing geo-restricted content, and ensuring your data remains private. Whether you choose to rent a SOCKS5 proxy or set up your own, the benefits of using a proxy server are clear. With careful configuration and attention to security, you can enjoy a safer online experience.
In today's digital age, the need for privacy and security has become more important than ever. One way to enhance your privacy and security while using your smartphone is by changing your IP address. An IP address is a unique identifier for your device when it connects to the internet, and changing it can help protect your online identity and data. In this article, we will explore several methods to change the IP address on your smartphone.Method 1: Using a VPN (Virtual Private Network)One of the most popular and effective ways to change your IP address on a smartphone is by using a VPN. A VPN allows you to connect to a server in a different location, effectively masking your original IP address with the server's IP address. This not only changes your IP address but also encrypts your internet traffic, providing an extra layer of security. There are many VPN apps available for both iOS and Android devices, and most of them offer user-friendly interfaces for easy setup and use.Method 2: Using a Proxy ServerAnother method to change your IP address on a smartphone is by using a proxy server. A proxy server acts as an intermediary between your device and the internet, allowing you to route your internet traffic through the server and change your IP address in the process. While not as secure as a VPN, using a proxy server can still provide some level of anonymity and help you access geo-restricted content. There are several proxy apps available for smartphones, and some web browsers also offer built-in proxy settings for easy configuration.Method 3: Changing Network SettingsFor more advanced users, manually changing the network settings on your smartphone can also result in a new IP address. This method involves modifying the network configuration to use a different DNS server or assigning a static IP address. Keep in mind that this method requires some technical knowledge and can potentially lead to network connectivity issues if not done correctly. It's important to research and understand the implications of changing network settings before attempting this method.Method 4: Restarting Your RouterIf you are connected to a Wi-Fi network at home or in the office, simply restarting the router can sometimes result in a new IP address for your smartphone. Routers typically assign IP addresses dynamically, and a simple restart can trigger the router to assign a different IP address to your device. This method is straightforward and doesn't require any technical expertise, making it a quick and easy way to change your IP address.Method 5: Using Mobile DataIf you primarily use Wi-Fi for internet access, switching to mobile data on your smartphone can also change your IP address. Mobile carriers assign dynamic IP addresses to their subscribers, meaning that each time you connect to the mobile network, you are likely to receive a different IP address. Keep in mind that using mobile data may incur additional charges depending on your cellular plan, so it's important to be aware of any potential costs associated with this method.Changing your smartphone's IP address can enhance your privacy, security, and access to online content. Whether you opt for a VPN, proxy server, manual network configuration, router restart, or switching to mobile data, it's important to consider the implications of each method and choose the one that best suits your needs. By taking proactive steps to change your IP address, you can better protect your online identity and data while enjoying a safer and more secure internet experience on your smartphone.
In the digital age, IP addresses play a crucial role in identifying devices connected to the internet. While most people associate IP addresses with computers, smartphones and other mobile devices also have unique IP addresses. This article will explore whether it's possible to change a phone's IP address and provide step-by-step instructions on how to do so.Can I Change My Phone's IP Address?The answer to this question depends on the type of network your phone is connected to. If you're connected to a Wi-Fi network, your phone typically receives an IP address from the router using DHCP (Dynamic Host Configuration Protocol). In this case, your phone's IP address can be changed, but the process varies depending on the type of network and the router's settings.On the other hand, if you're connected to a mobile data network (e.g., 4G, 5G), your phone's IP address is assigned by the mobile carrier. In most cases, it's not possible to directly change your IP address on a mobile data network, as the carrier manages the IP address allocation.How to Change My Phone's IP Address (On Wi-Fi)If you're connected to a Wi-Fi network and want to change your phone's IP address, here's what you can do:Access the Router's SettingsFirst, you need to access the router's settings. This usually involves connecting to the router's web interface using a web browser. The router's IP address is typically printed on the router itself or can be found in the network settings of a device connected to the router.Log In to the RouterOnce you've accessed the router's web interface, you'll need to log in using the administrator credentials. If you haven't changed the default credentials, you can usually find them in the router's documentation or online.Find the DHCP SettingsIn the router's settings, navigate to the DHCP (Dynamic Host Configuration Protocol) section. This is where the router manages the IP address allocation for devices connected to the network.Reserve a New IP AddressIn the DHCP settings, you can usually reserve a specific IP address for a particular device. To do this, you'll need to know the MAC address of your phone. You can find the MAC address in your phone's network settings or by connecting to the router's web interface and checking the list of connected devices.Once you have the MAC address, create a new reservation in the DHCP settings and assign a new IP address to your phone's MAC address.Restart Your PhoneAfter reserving the new IP address, restart your phone to ensure that it connects to the network with the new IP address.Important ConsiderationsChanging your phone's IP address can have implications for network security and functionality. Make sure you understand the risks before proceeding.If you're not familiar with router settings, it's best to consult the router's documentation or seek help from someone who is.Keep in mind that changing your phone's IP address on a mobile data network is not typically possible and requires advanced techniques that may involve contacting your mobile carrier.While it's possible to change your phone's IP address when connected to a Wi-Fi network, the process involves accessing the router's settings and managing the DHCP settings. Be cautious when making changes to your network settings and ensure you understand the potential implications.
In today's digital age, maintaining privacy and security while browsing the internet has become paramount. SOCKS5 proxies, with their ability to route your traffic through an intermediate server and potentially bypass geo-restrictions, are a popular choice for many users seeking enhanced anonymity and access to restricted content. If you're new to the world of SOCKS5 proxies and wondering how to obtain one, this comprehensive guide will walk you through the process.Understanding SOCKS5 ProxiesBefore diving into the steps to obtain a SOCKS5 proxy, it's essential to understand what they are and how they work. SOCKS5 is a protocol designed for client-server applications, allowing them to route their traffic through an intermediate server known as a proxy. Unlike its predecessor, SOCKS5 supports both TCP and UDP protocols, making it more versatile. It also offers authentication mechanisms, enhancing security.Step 1: Determine Your NeedsThe first step in obtaining a SOCKS5 proxy is to determine your specific needs. Consider factors such as: · Purpose: Are you looking to bypass geo-restrictions, hide your IP address, or access content that's blocked in your region? · Compatibility: Ensure the SOCKS5 proxy you choose is compatible with the devices and applications you plan to use. · Speed and Reliability: If you're streaming or downloading large files, speed and reliability are crucial. · Privacy and Security: Look for SOCKS5 proxies that offer encryption or come from reputable sources to minimize the risk of data breaches.Step 2: Research ProvidersOnce you've determined your needs, it's time to research SOCKS5 proxy providers. There are several options available, including: · Free Proxies: While tempting, free proxies can be unreliable, slow, and potentially dangerous as they may not offer encryption or proper authentication. · Paid Proxies: Paid SOCKS5 proxy services offer more reliability, faster speeds, and often come with additional security features. Look for providers with a good reputation and positive reviews. · DIY Proxies: Technically savvy users can set up their own SOCKS5 proxies using servers or virtual private servers (VPS). This option requires technical knowledge and ongoing maintenance.Step 3: Evaluate ProvidersWhen evaluating SOCKS5 proxy providers, consider the following: · Location: Choose proxies located in countries or regions that suit your needs, especially if bypassing geo-restrictions is a priority. · Pricing: Compare prices across different providers, ensuring you get the best value for your money. · Customer Support: Look for providers that offer reliable customer support in case you encounter any issues. · Refund Policy: Check if the provider has a clear refund policy in case you're unhappy with the service.Step 4: Sign Up and ConfigureOnce you've chosen a provider, follow their sign-up process. This typically involves creating an account, selecting a payment plan, and receiving login credentials.Next, you'll need to configure your device or application to use the SOCKS5 proxy. This process can vary depending on the device and application you're using. For web browsers, you can often find proxy settings in the browser's options or preferences menu. For other applications, you may need to consult the application's documentation or support for specific instructions.Step 5: Test and VerifyOnce configured, test your SOCKS5 proxy to ensure it's working correctly. Use tools like IP leak tests or visit websites that show your current IP address to verify that your traffic is indeed being routed through the proxy server.Additional Tips · Keep Your Proxy Secure: Use strong passwords and enable two-factor authentication if your proxy provider offers it. · Rotate Proxies: If you're using proxies for activities that may attract attention, consider rotating your proxies regularly to minimize the risk of detection. · Monitor Performance: Keep an eye on your proxy's performance, especially if you're relying on it for activities like streaming or gaming.ConclusionObtaining a SOCKS5 proxy can be a straightforward process if you follow the steps outlined in this guide. By determining your needs, researching providers, evaluating options, and configuring your device or application, you can easily set up a SOCKS5 proxy that meets your privacy, security, and performance requirements. Remember to keep your proxy secure and monitor its performance to ensure optimal results.
In today's digital landscape, having a reliable server is crucial for businesses and individuals alike. For those targeting the Southeast Asian market, particularly Indonesia, acquiring a local server can significantly enhance website performance, reduce latency, and improve user experience. This article will guide you through the process of obtaining an Indonesian server, covering various aspects such as types of servers, hosting providers, and key considerations.Understanding the Importance of Local ServersBefore diving into the acquisition process, it's essential to understand why having a server in Indonesia is beneficial. Local servers can:1. Reduce Latency: When your server is geographically closer to your users, data travels faster, resulting in quicker load times and improved website performance.2. Enhance SEO: Search engines like Google consider server location as a ranking factor. Hosting your website on an Indonesian server can improve your visibility in local search results.3. Compliance with Regulations: Indonesia has specific regulations regarding data sovereignty. Hosting data locally ensures compliance with local laws, which can be crucial for businesses handling sensitive information.4. Cultural Relevance: Local servers can better cater to the needs of Indonesian users, including language preferences and regional content.Types of ServersWhen looking for an Indonesian server, you will encounter several types of hosting solutions:1. Shared Hosting: This is the most economical option where multiple websites share the same server resources. It's suitable for small websites or blogs but comes with limitations in terms of performance and customization.2. Virtual Private Server (VPS): A VPS offers dedicated resources within a shared environment. It provides more control and better performance than shared hosting, making it ideal for medium-sized businesses.3. Dedicated Server: This option gives you an entire server dedicated to your website. It offers maximum performance, security, and control, making it suitable for large enterprises with high traffic.4. Cloud Hosting: Cloud servers are scalable and can handle fluctuating traffic. They are hosted on a network of servers, ensuring high availability and reliability.Choosing a Hosting ProviderSelecting the right hosting provider is critical to the success of your online presence. Here are some factors to consider when choosing a provider for an Indonesian server:1. Reputation and Reliability: Research the provider's reputation in the industry. Look for reviews and testimonials from current or past clients to gauge their reliability.2. Data Center Location: Ensure that the provider has data centers located in Indonesia. This will help achieve the low latency and high performance you desire.3. Customer Support: Opt for a provider that offers 24/7 customer support. This is vital in case you encounter any issues with your server.4. Scalability: Choose a hosting provider that allows you to scale your resources as your business grows. This flexibility is essential for accommodating increased traffic.5. Security Features: Look for providers that offer robust security measures, including firewalls, DDoS protection, and regular backups.6. Pricing: Compare pricing plans among different providers. While cost is a factor, ensure that you are not compromising on quality for a lower price.Popular Hosting Providers in IndonesiaSeveral reputable hosting providers offer Indonesian servers. Some of the most popular ones include:1. Niagahoster: Known for its excellent customer service and affordable pricing, Niagahoster offers a range of hosting options, including shared, VPS, and dedicated servers.2. IDCloudHost: This provider specializes in cloud hosting solutions and is known for its reliable performance and scalability.3. Dewaweb: Dewaweb offers cloud hosting services with a focus on security and performance. They are also known for their commitment to customer satisfaction.4. Hostinger: A global hosting provider with a strong presence in Indonesia, Hostinger offers a variety of hosting plans at competitive prices.5. Gojek Hosting: As part of the Gojek ecosystem, this provider offers tailored hosting solutions for businesses in Indonesia, focusing on local needs.Steps to Acquire an Indonesian ServerNow that you understand the types of servers and how to choose a provider, here are the steps to acquire an Indonesian server:1. Identify Your Needs: Determine the type of hosting that best suits your requirements. Consider factors such as website size, expected traffic, and budget.2. Research Providers: Use the criteria mentioned earlier to research and shortlist potential hosting providers.3. Compare Plans: Review the hosting plans offered by each provider, focusing on features, pricing, and scalability options.4. Sign Up: Once you have selected a provider, proceed to sign up for the hosting plan that meets your needs. This process typically involves creating an account and providing payment information.5. Set Up Your Server: After signing up, follow the provider's instructions to set up your server. This may include configuring settings, installing necessary software, and uploading your website files.6. Test Performance: Once your server is set up, conduct performance tests to ensure that it meets your expectations. Check load times, uptime, and overall user experience.7. Monitor and Optimize: Regularly monitor your server's performance and make necessary adjustments. This includes optimizing your website for speed, security, and user experience.ConclusionAcquiring an Indonesian server is a strategic move for businesses looking to establish a strong online presence in Southeast Asia. By understanding the types of servers available, choosing the right hosting provider, and following the necessary steps, you can ensure that your website performs optimally for Indonesian users. With the right server in place, you can enhance your digital strategy, improve user experience, and ultimately drive business success.
In an era where online privacy and security are paramount, many users turn to SOCKS5 proxy servers to enhance their browsing experience. SOCKS5 proxies offer numerous benefits, including improved security, the ability to bypass geo-restrictions, and the ability to handle various types of traffic. However, there are times when users encounter issues connecting to their SOCKS5 proxy servers. This article will explore common problems associated with SOCKS5 proxies and provide solutions to help you troubleshoot and resolve these issues.Understanding SOCKS5 Proxy ServersBefore diving into troubleshooting, it’s essential to understand what a SOCKS5 proxy is and how it works. SOCKS5 is a protocol that routes network packets between a client and server through a proxy server. Unlike HTTP proxies, which only handle web traffic, SOCKS5 can manage any type of traffic, including TCP and UDP. This versatility makes SOCKS5 a popular choice for various applications, including web browsing, gaming, and file sharing.Benefits of Using SOCKS5 Proxies1. Enhanced Privacy: By masking your real IP address, SOCKS5 proxies help maintain your anonymity online.2. Access to Geo-Restricted Content: SOCKS5 proxies allow users to access websites and services that may be restricted in their geographic location.3. Improved Security: Using a SOCKS5 proxy can provide an extra layer of security, especially when connected to unsecured networks.4. Versatility: SOCKS5 supports multiple types of traffic, making it suitable for a wide range of applications.Common Issues with SOCKS5 Proxy ConnectionsWhen attempting to connect to a SOCKS5 proxy server, users may encounter various issues. Here are some common problems and their potential solutions:1. Incorrect Proxy SettingsOne of the most common reasons for a failed connection is incorrect proxy settings. This can include an incorrect IP address, port number, or authentication details.Solution:- Double-check the IP address and port number of your SOCKS5 proxy server. Ensure they match the configuration provided by your proxy service.- If your proxy requires authentication, verify that you have entered the correct username and password.2. Firewall or Antivirus Software Blocking the ConnectionFirewalls and antivirus software can sometimes block connections to proxy servers, preventing successful communication.Solution:- Temporarily disable your firewall or antivirus software to see if the connection succeeds. If it does, you may need to create an exception for your SOCKS5 proxy in your firewall or antivirus settings.- Check the logs of your firewall or antivirus software for any blocked connection attempts and adjust the settings accordingly.3. Network Configuration IssuesNetwork configuration problems can also lead to connection failures. This may include issues with your router settings, DNS configuration, or ISP restrictions.Solution:- Restart your router and modem to refresh your network connection.- Ensure that your DNS settings are correctly configured. You may consider using a public DNS service such as Google DNS (8.8.8.8) or Cloudflare DNS (1.1.1.1).- Check with your Internet Service Provider (ISP) to ensure they are not blocking access to SOCKS5 proxy servers.4. Proxy Server UnavailabilitySometimes, the issue lies with the proxy server itself. The server may be down for maintenance or experiencing technical difficulties.Solution:- Check the status of your SOCKS5 proxy server. If you have access to a control panel or dashboard provided by your proxy service, see if there are any notifications about server outages or maintenance.- If possible, try connecting to a different SOCKS5 proxy server to determine if the issue is specific to the server you are currently using.5. Compatibility Issues with ApplicationsSome applications may not fully support SOCKS5 proxies, leading to connection issues.Solution:- Ensure that the application you are using is compatible with SOCKS5 proxies. Some applications may require additional configuration or may only support HTTP proxies.- If the application allows for proxy configuration, double-check that the settings are correctly entered.6. ISP RestrictionsIn some cases, ISPs may restrict access to proxy servers, preventing users from establishing a connection.Solution:- Contact your ISP to inquire if they have any policies regarding proxy servers. If they do, you may need to consider alternative methods, such as using a VPN, which can help bypass these restrictions.7. Using the Wrong ProtocolUsing an incorrect protocol can also lead to connection failures. Ensure you are using the SOCKS5 protocol rather than SOCKS4 or another type.Solution:- When configuring your proxy settings, make sure to select SOCKS5 as the protocol. This is typically found in the proxy settings section of your application or operating system.Advanced Troubleshooting StepsIf you have tried the above solutions and are still unable to connect to your SOCKS5 proxy server, consider the following advanced troubleshooting steps:1. Check Logs for ErrorsMany applications and proxy servers generate logs that can provide insight into connection issues. Check these logs for any error messages that may indicate the root cause of the problem.2. Use a Different Proxy ClientIf you are using a specific application to connect to the SOCKS5 proxy, consider trying a different proxy client. Some clients are better optimized for SOCKS5 connections and may provide a more stable experience.3. Test with a Different DeviceTo determine if the issue is specific to your device, try connecting to the SOCKS5 proxy from a different device. If the second device can connect successfully, the problem may be related to your original device's configuration.4. Reinstall Proxy Client SoftwareIf you are using dedicated proxy client software, consider uninstalling and reinstalling it. This can help resolve any configuration issues or corrupted files that may be causing the connection failure.5. Seek Support from Your Proxy ProviderIf all else fails, reach out to your SOCKS5 proxy provider's support team. They may have specific troubleshooting steps or insights into common issues with their service.ConclusionConnecting to a SOCKS5 proxy server can significantly enhance your online privacy and security. However, issues may arise that prevent a successful connection. By understanding common problems and their potential solutions, you can troubleshoot effectively and get back to enjoying the benefits of your SOCKS5 proxy. Whether it’s checking your settings, adjusting your firewall, or contacting support, taking the right steps can help ensure a smooth and secure browsing experience. Remember, maintaining your online privacy is an ongoing process, and being proactive about your proxy setup is key to a secure internet experience.