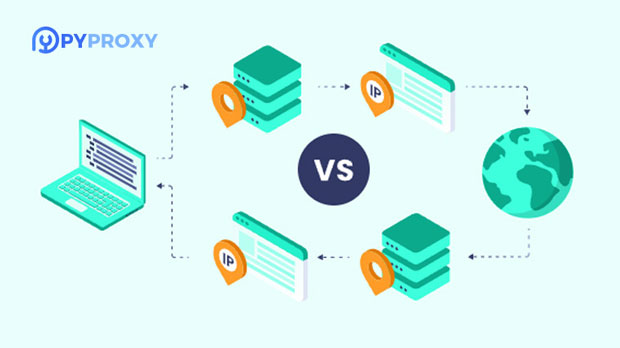
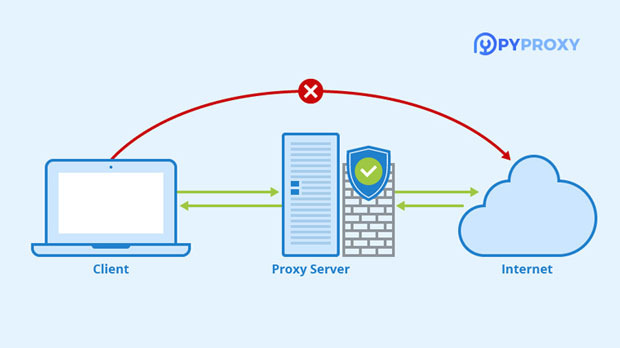
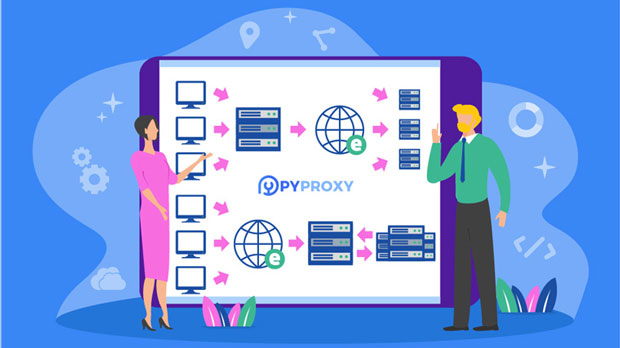
In an era where online privacy is increasingly under threat, protecting your identity while browsing the internet has become a top priority for many users. One effective method to achieve this is by using a proxy server. This article will explore what a proxy server is, how it works, and provide a step-by-step guide on how to use a proxy server to hide your IP address.Understanding IP Addresses and Proxy ServersWhat is an IP Address?An IP (Internet Protocol) address is a unique identifier assigned to each device connected to the internet. It allows devices to communicate with each other and provides information about the geographical location of the device. Your IP address can reveal your location, internet service provider (ISP), and browsing habits, making it a target for advertisers, hackers, and even government surveillance.What is a Proxy Server?A proxy server acts as an intermediary between your device and the internet. When you connect to a proxy server, your internet traffic is routed through this server instead of directly to the websites you visit. The proxy server then forwards your requests to the target website, which responds to the proxy, not your device. This process masks your real IP address, providing anonymity.Types of Proxy Servers1. HTTP Proxies: These are used for web browsing and can handle HTTP requests. They do not encrypt your data, making them less secure.2. HTTPS Proxies: Similar to HTTP proxies but with encryption, making them suitable for secure transactions.3. SOCKS Proxies: These can handle any type of traffic, including email and file transfers, providing more versatility.4. Transparent Proxies: These do not modify requests and are often used for caching content but do not provide anonymity.5. Anonymous Proxies: These hide your IP address but may still reveal that a proxy is being used.6. Elite Proxies: These provide the highest level of anonymity, hiding both your IP address and the fact that a proxy is being used.Benefits of Using a Proxy ServerUsing a proxy server to hide your IP address offers several advantages:1. Enhanced Privacy: By masking your IP address, you protect your identity from websites and advertisers.2. Access to Restricted Content: Proxies can help you bypass geographical restrictions and access content that may be blocked in your region.3. Improved Security: Some proxies encrypt your data, protecting it from potential threats.4. Bypass Censorship: In countries with strict internet censorship, proxies can help users access blocked websites and services.5. Reduced Tracking: Proxies can help minimize tracking by advertisers and data collectors.How to Use a Proxy Server to Hide Your IP AddressStep 1: Choose a Reliable Proxy ServerBefore you can use a proxy, you need to select one. There are many free and paid proxy services available. When choosing a proxy, consider the following:- Reputation: Look for well-reviewed services with a good reputation.- Speed: Free proxies may be slower due to high traffic. Paid options often provide better speed and reliability.- Location: Choose a proxy server located in a region that meets your needs (e.g., accessing content available in the US).- Privacy Policy: Ensure the service has a clear privacy policy and does not log your data.Step 2: Configure Proxy Settings in Your BrowserThe steps to configure proxy settings may vary depending on the browser you are using. Here’s how to set up a proxy in popular browsers:Google Chrome1. Open Settings: Click on the three dots in the upper right corner and select "Settings."2. Advanced Settings: Scroll down and click on "Advanced."3. Open Proxy Settings: Under the "System" section, click on "Open your computer’s proxy settings."4. Manual Setup: Enable the "Use a proxy server" option and enter the IP address and port number of the proxy server.5. Save Changes: Click "OK" to save the settings.Mozilla Firefox1. Open Options: Click on the three horizontal lines in the upper right corner and select "Options."2. Network Settings: Scroll down to the "Network Settings" section and click on "Settings."3. Manual Proxy Configuration: Select "Manual proxy configuration" and enter the proxy IP address and port.4. Save Changes: Click "OK" to apply the settings.Microsoft Edge1. Open Settings: Click on the three dots in the upper right corner and select "Settings."2. Privacy, Search, and Services: Click on "Privacy, search, and services."3. Proxy Setup: Scroll down and click on "Proxy setup."4. Manual Setup: Toggle on "Use a proxy server" and enter the IP address and port.5. Save Changes: Click "Save" to apply the settings.Step 3: Verify Your Proxy ConfigurationAfter configuring the proxy settings, it’s essential to verify that they have been successfully applied. Here are a few methods to check your proxy configuration:1. Check Your IP Address: Use a website like "WhatIsMyIP.com" to see if your IP address has changed after setting up the proxy. If it shows the proxy IP, your configuration is successful.2. Use Proxy Check Tools: Websites like "Whoer.net" can confirm whether you are using a proxy and provide details about the proxy.3. Access Restricted Content: Try to visit a website that is typically blocked in your region. If you can access it, your proxy is working correctly.Step 4: Browse the Internet AnonymouslyOnce you have configured and verified your proxy settings, you can start browsing the internet anonymously. Keep in mind that while proxies can provide a degree of anonymity, they may not offer complete security. For sensitive activities, consider using a VPN for additional protection.Potential Drawbacks of Using a Proxy ServerWhile using a proxy server has many benefits, there are also some drawbacks to consider:1. Slower Speeds: Free proxies may have slower speeds due to high traffic. Paid options usually offer better performance.2. Security Risks: Some free proxies may log your data or inject ads into your browsing experience. Always choose reputable services.3. Incompatibility with Certain Services: Some websites and services actively block access from known proxy IP addresses, which may prevent you from accessing them.4. Limited Encryption: Not all proxies encrypt your data. If security is a concern, consider using a VPN instead.5. Complex Setup: Configuring a proxy can be more complex than simply using your regular internet connection, which may deter some users.Alternatives to Proxy ServersIf you find that proxy servers do not meet your needs, consider these alternatives:1. VPN (Virtual Private Network): A VPN encrypts your internet traffic and routes it through a secure server, providing enhanced privacy and security. Unlike proxies, VPNs protect all traffic from your device, not just browser traffic.2. Tor Network: The Tor network is designed for anonymity and privacy. It routes your internet traffic through multiple servers, making it difficult to trace. However, it can be slower than other options.3. Smart DNS: This service allows you to bypass geographical restrictions without changing your IP address. It works by rerouting specific traffic to make it appear as if you are in a different location.Using a proxy server to hide your IP address is an effective way to enhance your online privacy and security. By following the steps outlined in this article, you can easily set up a proxy server and start browsing the internet anonymously. While proxies offer several advantages, it’s essential to choose a reliable service and be aware of their limitations. For those seeking additional security, consider using a VPN or other privacy-enhancing tools. In an age where data privacy is paramount, taking steps to protect your identity online is more important than ever.
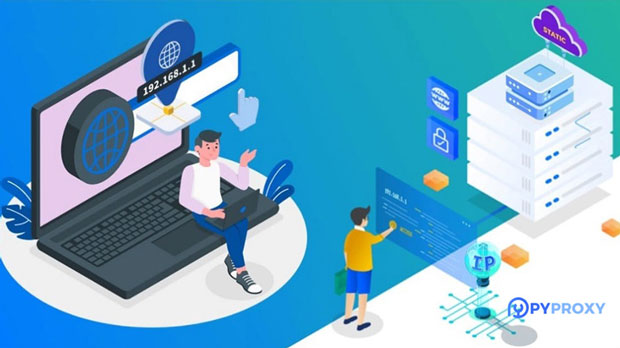
Changing your computer's IP address can be a useful skill, whether you're looking to troubleshoot network issues, enhance privacy, or access content that's restricted to certain IP ranges. While the specific steps may vary depending on your operating system and network configuration, this article will provide a general overview of how to change your IP address on a Windows or macOS computer.WindowsAccessing Network SettingsFirst, you'll need to access your network settings. In Windows 10, you can do this by clicking the Start button, typing "Network Settings" into the search box, and selecting "View network connections" from the results.Selecting Your NetworkFrom the list of available networks, find the one you're currently connected to and right-click on it. Select "Properties" from the context menu.Changing IP SettingsIn the properties window, find the "Internet Protocol Version 4 (TCP/IPv4)" entry and click on it. Then, click the "Properties" button.Configuring IP SettingsYou'll now see a window with options for configuring your IP settings. To change your IP address manually, select "Use the following IP address" and enter the desired IP address, subnet mask, and default gateway. Make sure to consult with your network administrator if you're unsure about these settings.If you want to obtain an IP address automatically from your network's DHCP server, select "Obtain an IP address automatically" and "Obtain DNS server address automatically."Applying the ChangesOnce you've made your changes, click "OK" to save them. You may be prompted to restart your computer for the changes to take effect.macOSAccessing Network SettingsOn macOS, you can access your network settings by clicking the Apple logo in the menu bar and selecting "System Preferences." Then, click "Network."Selecting Your NetworkFrom the list of network connections, select the one you're currently using and click the "Advanced" button.Changing IP SettingsIn the advanced settings window, click the "TCP/IP" tab. Here, you can choose to configure your IP settings manually or automatically.To change your IP address manually, select "Manually" from the "Configure IPv4" dropdown menu and enter the desired IP address, subnet mask, and router. Again, consult with your network administrator if you're unsure about these settings.If you want to obtain an IP address automatically from your network's DHCP server, select "Using DHCP" from the dropdown menu.Applying the ChangesOnce you've made your changes, click "OK" to save them. You may be prompted to enter your administrator password. After that, your computer will apply the new IP settings.Important ConsiderationsBefore changing your IP address, it's important to consider a few things:Changing your IP address may affect your ability to access certain network resources or services.If you're on a corporate or school network, changing your IP address without permission may violate your organization's policies.Make sure you understand the IP addressing scheme and network configuration of your network before making any changes.Remember, changing your IP address is a powerful tool, but it should be used responsibly and with caution.
In an era where online privacy and security are paramount, Virtual Private Networks (VPNs) have become essential tools for internet users. A VPN encrypts your internet connection, masking your IP address and providing anonymity while browsing the web. While many users think of VPNs as standalone applications, several browsers offer built-in VPN features or allow for easy integration with VPN services. This article will guide you through setting up a VPN in your browser, covering popular options like Google Chrome, Mozilla Firefox, and Microsoft Edge.What is a VPN?A Virtual Private Network (VPN) is a service that creates a secure connection over the internet. It routes your internet traffic through a remote server, which means your data is encrypted and your real IP address is hidden. This provides several benefits, including:1. Enhanced Privacy: Your online activities are shielded from prying eyes, including ISPs and hackers.2. Access to Restricted Content: VPNs allow you to bypass geo-restrictions and access content that may be blocked in your region.3. Secure Public Wi-Fi Usage: Using a VPN on public networks protects your data from potential cyber threats.Setting Up a VPN in Your Browser1. Choosing the Right VPN ServiceBefore you can set up a VPN in your browser, you need to choose a reliable VPN service. Consider the following factors:- Reputation: Look for well-reviewed VPNs with a strong track record in privacy protection.- Speed: Ensure the VPN provides fast connection speeds, especially if you plan to stream content.- Server Locations: A wide range of server locations allows you to access content from various regions.- Compatibility: Make sure the VPN is compatible with your browser and operating system.- Customer Support: Good customer support can help you troubleshoot issues quickly.2. Setting Up a VPN in Google ChromeGoogle Chrome does not have a built-in VPN feature, but you can use VPN extensions to integrate VPN functionality directly into the browser. Here’s how to do it:Step 1: Install a VPN Extension1. Open Chrome Web Store: Navigate to the Chrome Web Store.2. Search for VPN Extensions: Type "VPN" in the search bar.3. Choose a VPN Extension: Select a reputable VPN extension, such as NordVPN, ExpressVPN, or TunnelBear.4. Add to Chrome: Click “Add to Chrome” and confirm by clicking “Add extension.”Step 2: Sign In to the VPN Extension1. Open the Extension: Click on the VPN extension icon in the top-right corner of Chrome.2. Log In: Enter your credentials. If you don’t have an account, you may need to sign up for the service.3. Select a Server: Choose a server location from the list provided by the extension.Step 3: Connect to the VPN1. Click Connect: After selecting a server, click the connect button.2. Verify Connection: Once connected, the extension will usually indicate that you are protected.3. Setting Up a VPN in Mozilla FirefoxMozilla Firefox offers a built-in VPN feature through Firefox Private Network (FPN), but you can also use extensions for broader VPN options.Using Firefox Private Network1. Sign Up for Firefox Private Network: Visit the Firefox Private Network website and create an account.2. Install the Extension: If you haven't already, download the Firefox Private Network extension from the Firefox Add-ons site.3. Activate the VPN: Click on the extension icon and log in to activate the VPN.Using a Third-Party VPN Extension1. Visit Firefox Add-ons: Go to the Firefox Add-ons page.2. Search for VPN: Type "VPN" in the search bar.3. Install a VPN Extension: Choose a reputable VPN extension and click “Add to Firefox.”4. Log In and Connect: Follow the same steps as in Chrome to log in and connect to the VPN.4. Setting Up a VPN in Microsoft EdgeMicrosoft Edge, like Chrome, supports VPN extensions. Here’s how to set it up:Step 1: Install a VPN Extension1. Open Edge Add-ons Store: Go to the Microsoft Edge Add-ons store.2. Search for VPNs: Type "VPN" in the search bar.3. Select a VPN Extension: Choose a trusted VPN extension and click “Get.”4. Add to Edge: Confirm the installation.Step 2: Configure the VPN Extension1. Open the Extension: Click on the VPN extension icon in Edge.2. Log In: Enter your VPN account credentials.3. Choose a Server: Select a server location as needed.Step 3: Connect to the VPN1. Click Connect: Press the connect button to establish a secure connection.2. Check Your Status: Ensure that the extension indicates a successful connection.5. Configuring VPN Settings for Optimal PerformanceOnce your VPN is set up in your browser, you may want to adjust some settings for optimal performance:- Select the Right Protocol: Many VPNs offer different protocols (e.g., OpenVPN, IKEv2). Experiment with these to find the best speed and security balance.- Enable Kill Switch: If your VPN has a kill switch feature, enable it to prevent data leaks if the VPN connection drops.- Use Split Tunneling: Some VPNs allow you to choose which apps or websites use the VPN. This can improve performance for non-sensitive activities.6. Troubleshooting Common VPN IssuesIf you encounter problems while using a VPN in your browser, consider the following troubleshooting steps:- Check Your Internet Connection: Ensure your internet connection is stable before troubleshooting the VPN.- Restart the VPN Extension: Sometimes, simply disabling and re-enabling the VPN can resolve connectivity issues.- Try Different Servers: If you experience slow speeds or connectivity issues, switch to a different server location.- Clear Browser Cache: Clearing your browser cache can resolve issues related to old data interfering with the VPN connection.- Update the Extension: Ensure that your VPN extension is updated to the latest version for optimal performance and security.7. Best Practices for Using a VPN in Your BrowserTo maximize your VPN experience, consider these best practices:- Keep Your VPN Active: Always use the VPN when accessing sensitive information or using public Wi-Fi.- Regularly Update Your VPN: Keep your VPN software and browser extensions updated to benefit from the latest security features.- Be Aware of Data Limits: Some VPNs impose data usage limits. Monitor your usage to avoid throttling.- Read the Privacy Policy: Understand what data your VPN provider collects and how it is used.ConclusionSetting up a VPN in your browser is a straightforward process that can significantly enhance your online privacy and security. By choosing a reliable VPN service, installing the appropriate extensions, and configuring the settings correctly, you can enjoy a safer browsing experience. Whether you’re using Google Chrome, Mozilla Firefox, or Microsoft Edge, following the steps outlined in this guide will help you navigate the setup process with ease. Remember to stay informed about best practices and troubleshooting tips to ensure a smooth and secure online experience.
In the world of networking, proxies serve as intermediaries between clients and servers, providing a range of benefits including enhanced privacy, security, and access to restricted content. Among the various types of proxies, SOCKS5 (Socket Secure version 5) is particularly popular due to its versatility and support for a wide range of traffic types. This article will guide you through the process of setting up a SOCKS5 proxy server on a Windows 7 machine, exploring its benefits and practical applications along the way.What is a SOCKS5 Proxy?SOCKS5 is a protocol that allows clients to connect to servers through a proxy server. Unlike HTTP proxies, which only handle web traffic, SOCKS5 can manage all types of traffic, including TCP and UDP. This makes it suitable for various applications such as web browsing, file sharing, and online gaming.When using a SOCKS5 proxy, your original IP address is masked, allowing for anonymous browsing and the ability to bypass geographic restrictions imposed by websites and online services. SOCKS5 also supports authentication, meaning that users can secure their connections with a username and password.Why Use a SOCKS5 Proxy?Using a SOCKS5 proxy server offers several advantages:1. Enhanced Privacy: By masking your IP address, SOCKS5 proxies help protect your identity online, making it harder for websites and services to track your activities.2. Bypassing Geo-Restrictions: Many online services restrict access based on geographic location. SOCKS5 proxies allow users to connect to servers in different regions, enabling access to content that may be blocked in their area.3. Improved Security: SOCKS5 proxies can encrypt your internet traffic, adding an extra layer of security, especially when using public Wi-Fi networks.4. Versatility: SOCKS5 can handle various types of traffic, making it suitable for a wide range of applications beyond just web browsing.Setting Up a SOCKS5 Proxy Server on Windows 7PrerequisitesBefore you begin the setup process, ensure you have the following:- A Windows 7 machine- Administrative privileges on the machine- Basic knowledge of command-line operationsStep 1: Download and Install a SOCKS5 Proxy ServerTo set up a SOCKS5 proxy server, you need to choose a suitable software solution. One popular option is Dante, which is an open-source SOCKS server. However, since Dante is primarily designed for Unix-like systems, Windows users may prefer alternatives like CCProxy or FreeProxy.Installing CCProxy1. Download CCProxy: Visit the official CCProxy website and download the latest version of the software.2. Install CCProxy: Run the installer and follow the on-screen instructions to complete the installation.Step 2: Configure CCProxyOnce CCProxy is installed, you need to configure it to act as a SOCKS5 proxy server.1. Launch CCProxy: Open the CCProxy application. You may need to run it as an administrator to ensure it has the necessary permissions.2. Access the Configuration Settings: Click on the "Options" button to open the configuration window.3. Enable SOCKS5 Proxy: In the options menu, look for the "SOCKS" tab. Check the box to enable the SOCKS5 proxy server. By default, CCProxy uses port 1080 for SOCKS5, but you can change this if needed.4. Set Authentication: If you want to secure your proxy server, you can enable authentication. Go to the "Account" tab and set up usernames and passwords for users who will access the proxy.5. Configure IP Address: Ensure that the "Bind IP" option is set to the local IP address of your machine. This is usually something like `192.168.x.x`.6. Save Settings: After configuring the settings, click "OK" to save your changes.Step 3: Start the Proxy Server1. Start CCProxy: Click the "Start" button in the CCProxy interface to launch the SOCKS5 proxy server.2. Check Status: Once the server is running, you should see an indication that the SOCKS5 service is active. You can also monitor connections and usage statistics from the CCProxy interface.Step 4: Configure Client ApplicationsNow that your SOCKS5 proxy server is running, you need to configure client applications to use it. Here’s how to set up a SOCKS5 proxy in common applications:Web BrowsersMozilla Firefox:1. Open Firefox and go to "Options."2. Scroll down to the "Network Settings" section and click on "Settings."3. Select "Manual proxy configuration."4. Enter the SOCKS5 proxy address (usually `localhost` or `127.0.0.1`) and the port number (default is 1080).5. Check the box for "Proxy DNS when using SOCKS v5" for better anonymity.6. Click "OK" to save the settings.Google Chrome:Google Chrome does not have built-in SOCKS5 proxy settings, so you must configure it through the Windows system settings:1. Open the Control Panel and go to "Network and Internet."2. Click on "Internet Options" and navigate to the "Connections" tab.3. Click on "LAN settings."4. Check the box for "Use a proxy server for your LAN."5. Enter the SOCKS5 proxy address and port number.6. Click "OK" to save the settings.Step 5: Test the Proxy ConnectionTo ensure that your SOCKS5 proxy server is functioning correctly, you can perform a simple test:1. Open your web browser and navigate to a website that displays your IP address, such as "whatismyip.com."2. If the SOCKS5 proxy is working, the displayed IP address should be the address of the proxy server instead of your original IP address.Troubleshooting Common IssuesIf you encounter issues while setting up or using your SOCKS5 proxy server, consider the following troubleshooting tips:1. Check Firewall Settings: Ensure that your Windows Firewall or any third-party firewall is not blocking the proxy server. You may need to create an exception for CCProxy.2. Verify Proxy Settings: Double-check that the proxy settings in your browser or application are correct, including the address and port number.3. Restart the Proxy Server: Sometimes, restarting the CCProxy application can resolve connection issues.4. Consult Logs: CCProxy maintains logs that can help diagnose issues. Check the logs for any error messages or connection attempts.5. Test with Different Applications: If a specific application is not working with the SOCKS5 proxy, try using a different application to see if the issue persists.ConclusionSetting up a SOCKS5 proxy server on Windows 7 can significantly enhance your online privacy and provide access to restricted content. By following the steps outlined in this article, you can easily configure a SOCKS5 proxy server using CCProxy and enjoy the benefits of anonymous browsing and secure connections.As online privacy concerns continue to grow, having a reliable proxy server can be an invaluable tool for individuals and organizations alike. Whether you're looking to bypass geo-restrictions, protect your identity, or improve your online security, a SOCKS5 proxy server is a versatile solution that can meet your needs.
In the field of network security, CC attack (Challenge Collapsar attack) is a common form of DDoS attack, which aims to paralyze the target server through a large number of requests. In order to effectively deal with this attack, many users choose to use CC attackers. However, when using CC attackers, how to configure IP proxy to protect their identity and improve the effectiveness of the attack is an important issue. This article will explore how to configure IP proxy for CC attackers and introduce related services of the PYPROXY brand.1. Understanding CC attackers and IP proxy1. What is CC attacker?CC attacker is a tool specifically used to launch CC attacks. It sends a large number of requests to the target server, trying to overload the server, resulting in service interruption. Although this tool is widely discussed in the field of cybersecurity, its use often involves legal and ethical risks, so it must be treated with caution.2. The role of IP proxyIP proxy is an intermediary service through which users can hide their real IP addresses and use the IP address of the proxy server for network requests. When using CC attackers, configuring IP proxy can help users:- Improve anonymity: By hiding the real IP address, users can reduce the risk of being tracked.- Bypass restrictions: Some target servers may block specific IP addresses, and using a proxy can help users bypass these restrictions.- Enhance the effect of the attack: By using multiple IP addresses, users can disperse requests and thus increase the success rate of the attack.2. Choose the right IP proxy serviceBefore configuring the IP proxy of the CC attacker, it is crucial to choose a reliable IP proxy service. As a well-known IP proxy service provider, PYPROXY provides multiple types of proxies, including:1. High anonymity proxyHigh anonymity proxy can effectively hide the user's real IP address and ensure that the user's online activities are not monitored. This can provide better protection for users using CC attackers.2. Rotating ProxyRotating proxy can change IP address regularly, so that each request uses a different IP, thus reducing the risk of being blocked. The rotating proxy service provided by PYPROXY can help users achieve this goal.3. Geographical location selectionPYPROXY allows users to select proxy IPs in different regions. Users can choose the appropriate proxy according to the geographical location of the target server to improve the attack effect.3. How to configure the IP proxy of CC attackerConfiguring the IP proxy of CC attacker is not complicated. Here are some basic steps:1. Register and obtain proxy informationFirst, users need to register an account on the PYPROXY website and purchase the corresponding proxy service. After completion, users will get the IP address and port number of the proxy, which is the key to configuring CC attacker.2. Enter proxy information in CC attackerMost CC attackers allow users to customize proxy settings. Users need to find the proxy configuration option in the attacker's settings interface and enter the following information:- Proxy type: Select HTTP, HTTPS, or SOCKS proxy, depending on the type of proxy used.- IP address: Enter the proxy IP address obtained from PYPROXY.- Port number: Enter the corresponding proxy port number.3. Test proxy connectionAfter completing the proxy settings, users can use the built-in test function of CC attacker to check whether the proxy is configured successfully. If it can connect normally, it means that the configuration is correct.4. Precautions for using IP proxyWhen using IP proxy, users need to pay attention to the following points:1. Legal and compliantWhen using CC attacker and IP proxy, be sure to follow local laws and regulations to avoid breaking the law. Network security is a complex field and users should be responsible for their own actions.2. Choose a reputable proxy serviceChoosing a reputable proxy service provider like PYPROXY can ensure the stability and security of the proxy. Avoid using proxies from unknown sources to avoid data leakage or other security issues.3. Change proxies regularlyTo improve security and effectiveness, users should change the proxy IP used regularly. This not only reduces the risk of being tracked, but also increases the success rate of attacks.5. FAQ1. How to determine whether the proxy is effective?Users can test the effectiveness of the proxy by visiting some specific websites, or use the proxy test tool to check whether the IP is blocked.2. What if the proxy connection fails?If the proxy connection fails, users can try the following methods:- Check whether the entered IP address and port number are correct.- Ensure that the network connection is normal.- Change other proxy IPs to try.3. Does using a proxy affect the attack speed?Using a proxy may have a certain impact on the attack speed because the request needs to be forwarded through the proxy server. However, choosing a high-quality proxy service can minimize this impact.6. SummaryConfiguring an IP proxy for CC attackers is an important step to improve anonymity and attack effectiveness. By choosing a reliable proxy service such as PYPROXY, users can easily achieve efficient IP proxy settings and provide better protection for their network activities. When using CC attackers, be sure to follow laws and regulations to ensure that your behavior is legal and compliant. I hope this article can provide you with valuable reference and help when configuring IP proxy.
In the digital age, data has become a valuable asset for businesses, researchers, and content creators. Among the vast repositories of data available online, YouTube stands out as a significant source of video content and user engagement metrics. As the platform continues to grow, the need for efficient tools to extract and analyze data from YouTube has led to the development of YouTube scrapers. This article will explore what a YouTube scraper is, how it works, its applications, and the ethical considerations surrounding its use.What is a YouTube Scraper?A YouTube scraper is a software tool or script designed to extract data from YouTube’s website or API. It automates the process of gathering information such as video titles, descriptions, view counts, likes, comments, and other relevant metadata. By leveraging scraping techniques, users can collect large volumes of data quickly and efficiently, which can then be analyzed for various purposes.Key Features of YouTube Scrapers1. Data Extraction: YouTube scrapers can pull a wide range of data, including:- Video titles and descriptions- Channel names and IDs- View counts and likes- Comments and user engagement metrics- Upload dates and video durations2. Automation: Scraping tools automate the data collection process, saving time and reducing the manual effort required to gather information from YouTube.3. Custom Queries: Many scrapers allow users to specify parameters for their data extraction, such as filtering by keywords, date ranges, or specific channels.4. Data Formatting: Scrapers often provide options to export the extracted data in various formats, including CSV, JSON, or Excel, making it easy to analyze and visualize.How Does a YouTube Scraper Work?YouTube scrapers typically operate using one of two methods: web scraping or API interaction.1. Web ScrapingWeb scraping involves programmatically retrieving and parsing the HTML content of a webpage. Here’s how it generally works:- Sending HTTP Requests: The scraper sends requests to YouTube’s servers to retrieve specific pages (e.g., search results, channel pages).- Parsing HTML: Once the HTML content is received, the scraper uses libraries like Beautiful Soup or Scrapy in Python to parse the data and extract relevant information.- Storing Data: The extracted data is then stored in a structured format for further analysis.2. API InteractionYouTube offers an official API (Application Programming Interface) that allows developers to access and retrieve data programmatically. Using the API has several advantages:- Structured Data: The API provides data in a structured format (JSON), making it easier to work with.- Rate Limits: YouTube’s API has rate limits, which means there are restrictions on how many requests can be made in a given time frame. This ensures fair usage and prevents abuse.- Official Support: Using the API complies with YouTube’s terms of service, reducing the risk of being blocked or facing legal issues.Applications of YouTube ScrapersYouTube scrapers have a wide range of applications across various fields. Here are some common use cases:1. Market ResearchBusinesses and marketers use YouTube scrapers to analyze trends, monitor competitors, and understand audience preferences. By extracting data on popular videos, channels, and user engagement, companies can make informed decisions about their content strategies.2. Content CreationContent creators can benefit from scraping data to identify trending topics, popular keywords, and successful video formats. By understanding what resonates with viewers, they can tailor their content to increase engagement and reach.3. Academic ResearchResearchers often use YouTube scrapers to collect data for studies related to media consumption, social behavior, and online trends. The vast amount of user-generated content on YouTube provides valuable insights into various social phenomena.4. Sentiment AnalysisBy scraping comments and engagement metrics, analysts can perform sentiment analysis to gauge public opinion on specific topics, brands, or events. This information can be useful for PR strategies and brand management.5. Data AnalyticsData scientists and analysts use YouTube scrapers to gather large datasets for machine learning models, predictive analytics, and other data-driven projects. The ability to collect historical data allows for trend analysis over time.Ethical ConsiderationsWhile YouTube scrapers offer numerous benefits, their use raises several ethical considerations:1. Terms of Service ComplianceYouTube’s terms of service explicitly prohibit unauthorized scraping of their website. Violating these terms can lead to account suspension, IP bans, or legal action. It is essential for users to understand and comply with these regulations when using scrapers.2. User PrivacyScraping user-generated content, such as comments, raises privacy concerns. Users may not be aware that their comments are being collected and analyzed, leading to potential ethical dilemmas regarding consent and data usage.3. Impact on Platform PerformanceExcessive scraping can put a strain on YouTube’s servers, potentially affecting the performance of the platform for regular users. Responsible scraping practices, such as adhering to rate limits and minimizing request frequency, are crucial.4. Data MisuseThe data extracted using scrapers can be misused for malicious purposes, such as spamming or harassment. Users must ensure that the data collected is used ethically and responsibly.Best Practices for Using YouTube ScrapersTo use YouTube scrapers effectively and ethically, consider the following best practices:1. Use the Official API: Whenever possible, opt for the YouTube API instead of web scraping to ensure compliance with terms of service and obtain structured data.2. Respect Rate Limits: If using web scraping, implement rate limits to avoid overwhelming YouTube’s servers and reduce the risk of being blocked.3. Anonymize Data: If collecting user-generated content, consider anonymizing the data to protect user privacy and comply with ethical standards.4. Stay Informed: Regularly review YouTube’s terms of service and data usage policies to ensure compliance as they may change over time.5. Limit Data Collection: Only collect the data necessary for your analysis to minimize the impact on YouTube’s resources and respect user privacy.ConclusionYouTube scrapers are powerful tools that enable users to extract and analyze vast amounts of data from one of the world’s largest video-sharing platforms. From market research to academic studies, the applications of YouTube scrapers are diverse and impactful. However, it is crucial to navigate the ethical landscape surrounding their use, ensuring compliance with YouTube’s terms of service and respecting user privacy. By following best practices, users can harness the power of YouTube scrapers responsibly and effectively, unlocking valuable insights from the wealth of data available on the platform.
In the vast landscape of online security and privacy tools, HTTP proxies stand out as essential intermediaries between users and the internet. These proxies serve as gateways that facilitate communication between clients and servers, offering a range of benefits such as enhanced security, privacy, and performance optimization. Understanding the functionalities and implications of HTTP proxies is crucial for individuals and organizations seeking to safeguard their online activities effectively.What is an HTTP Proxy?An HTTP proxy, also known as a web proxy, acts as an intermediary server that forwards HTTP requests from clients (such as web browsers) to web servers. By intercepting and routing web traffic, HTTP proxies can enhance security, privacy, and performance for users accessing the internet. These proxies can be deployed at various levels within a network infrastructure, providing different functionalities based on their configuration and purpose.Enhancing Security with HTTP ProxiesOne of the primary advantages of using HTTP proxies is their ability to enhance security for users navigating the web. By acting as a middleman between clients and servers, HTTP proxies can:Filter Content: HTTP proxies can filter web content based on predefined rules, blocking access to malicious websites, phishing attempts, or inappropriate content.Scan for Malware: Proxies can scan incoming and outgoing web traffic for malware, viruses, and other security threats, helping prevent infections and data breaches.Implement Access Controls: HTTP proxies enable administrators to enforce access controls, restrict access to specific websites or services, and monitor user activities for security compliance.Protect IP Addresses: By masking users' IP addresses, HTTP proxies help conceal their online identities and locations, enhancing anonymity and privacy.Safeguarding Privacy and AnonymityIn an era where online privacy is increasingly under threat, HTTP proxies play a vital role in safeguarding user privacy and anonymity. Through features such as:IP Address Masking: HTTP proxies hide users' IP addresses from websites and online services, preventing tracking and profiling of online activities.Encryption: Some HTTP proxies support encryption of web traffic, protecting sensitive data from eavesdropping and interception by malicious actors.Bypassing Geo-Restrictions: HTTP proxies can help users bypass geo-restrictions and access region-locked content by routing their traffic through servers in different locations.Performance Optimization and CachingApart from security and privacy benefits, HTTP proxies offer performance enhancements through caching and content optimization. By caching frequently accessed web content locally, proxies can:Reduce Load Times: Caching commonly requested resources speeds up web page loading times, improving user experience and reducing bandwidth consumption.Optimize Bandwidth Usage: HTTP proxies can compress data, remove unnecessary elements from web pages, and optimize images to reduce bandwidth usage and enhance network efficiency.Load Balancing: Proxies can distribute incoming web traffic across multiple servers to balance load, improve scalability, and ensure high availability of web services.ConclusionIn conclusion, HTTP proxies play a crucial role in enhancing security, privacy, and performance for users navigating the dynamic landscape of the internet. By leveraging the functionalities of HTTP proxies, individuals and organizations can mitigate security risks, protect privacy, and optimize their online experiences effectively. Understanding the capabilities and implications of HTTP proxies empowers users to make informed decisions when selecting and configuring these valuable tools in their digital endeavors.
In the current Internet environment, many users choose to use proxy IPs for the sake of privacy protection or access restrictions. However, in some cases, users may want to connect to the Internet directly through the local IP without using any proxy. This article will explore in detail how to configure settings in the browser to ensure that the proxy IP is not used, and introduce the application of PYPROXY in network management.1. Understand the concepts of proxy IP and direct connection1. What is a proxy IP?A proxy IP is an intermediary service where users send requests through a proxy server to hide their real IP address. A proxy IP can help users achieve:- Anonymous browsing: hide the real IP and protect user privacy.- Bypass geographic restrictions: access blocked websites or services.- Improved security: Ensure data security through encrypted connection.2. Advantages of direct connectionDirect connection means that users access the Internet directly through the local network without going through any proxy server. The advantages of this method include:- Faster connection speed: Avoid the delay of the proxy server and improve the access speed.- More stable connection: Reduce the intermediate links and reduce the risk of connection interruption.- Simplified settings: No complex network configuration is required, suitable for ordinary users.2. Steps to disable proxy IP in the browserTo ensure that the browser does not use the proxy IP, users need to make some settings adjustments. Here are the specific steps to disable the proxy IP in different browsers.1. Google ChromeIn Google Chrome, users can disable the proxy settings by following the steps below:- Open the Chrome browser and click the three dots (menu) in the upper right corner.- Select "Settings".- Scroll to the bottom of the page and click "Advanced".- In the "System" section, click "Open the computer's proxy settings".- In the pop-up window, make sure the "Use a proxy server" option is not selected.- Click "OK" to save the settings.2. Mozilla FirefoxIn Mozilla Firefox, the steps to disable proxy settings are as follows:- Open the Firefox browser and click the three horizontal lines (menu) in the upper right corner.- Select "Options" or "Settings".- Select "Network Settings" in the left menu.- Click the "Settings" button and select the "No Proxy" option.- Click "OK" to save changes.3. Microsoft EdgeIn Microsoft Edge, users can disable proxy settings by following the steps below:- Open the Edge browser and click the three dots (menu) in the upper right corner.- Select "Settings".- Select "Privacy, Search, and Services" in the left menu.- Scroll to the "Security" section and click "Open my computer's proxy settings".- In the pop-up window, make sure "Use a proxy server" is not checked.- Click "OK" to save the settings.4. SafariFor Mac users, the steps to set up the Safari browser are as follows:- Open the Safari browser and click the "Safari" menu in the upper left corner.- Select "Preferences".- Click the "Network" tab.- Select the network connection currently in use and click "Advanced".- In the "Proxy" tab, make sure all proxy settings are unchecked.- Click "OK" to save the changes.3. Check whether the proxy settings are effectiveAfter completing the above settings, the user needs to confirm that the browser is indeed no longer using the proxy IP. You can check it in the following ways:1. Use online IP detection toolsUsers can visit some online IP detection tools, such as "whatismyip.com" or "ipinfo.io", to check the currently displayed IP address. If the local IP address is displayed instead of the proxy IP, it means that the setting is successful.2. Clear the browser cacheIn some cases, the browser may cache old proxy settings. Users can clear the cache and restart the browser to ensure that the new settings are effective.4. Application of PYPROXYIn some cases, users may need to use a proxy IP at certain times and want to connect to the Internet directly at other times. PYPROXY provides flexible proxy management services, and users can easily switch between proxy and direct connections as needed.1. Flexible switchingPYPROXY allows users to quickly switch proxy settings when needed, without complicated manual configuration. Users can save different network configurations in the browser for quick switching.2. Monitor network connectionsPYPROXY also provides network monitoring tools to help users view network connection status in real time. Users can use these tools to determine when to use a proxy and when to connect directly.3. Improve securityUsing PYPROXY's service, users can enable proxy IP to protect privacy when needed, and easily disable the proxy when not needed to ensure the stability of network connections.5. FAQ1. How to confirm that the proxy setting has been disabled?Users can visit the IP detection website to confirm whether the current IP address is a local IP. If it is displayed as a local IP, it means that the proxy setting has been disabled.2. What if the proxy IP is still displayed after setting?If the proxy IP is still displayed after setting, users can try to clear the browser cache, restart the browser, or check if there is other software (such as VPN) running.3. Does using PYPROXY affect direct connections?Using PYPROXY services will not affect direct connections, and users can flexibly choose to use a proxy or direct connection as needed.6. SummaryEnsuring that the browser does not use the proxy IP is relatively simple, and users only need to adjust it according to the steps of different browsers. At the same time, using PYPROXY services can help users flexibly manage network connections and improve the Internet experience. When privacy needs to be protected, users can choose to use a proxy, and when they want to improve speed and stability, they can connect to the Internet directly. I hope this article can provide you with valuable reference and help when managing browser proxy settings.
If you want to enhance your online security and privacy while browsing the internet, using a SOCKS5 proxy with your web browser can be a great option. In this guide, we will walk you through the steps to add a SOCKS5 proxy to Google Chrome, one of the most popular web browsers.What is SOCKS5?Before we dive into the process of adding a SOCKS5 proxy to Chrome, let's first understand what SOCKS5 is. SOCKS5 is a protocol that routes internet traffic between a client and a server through a proxy server. It can be used to bypass internet censorship, access geo-restricted content, and enhance online privacy and security.How to Add SOCKS5 to ChromeAdding a SOCKS5 proxy to Chrome involves a few simple steps. Here's a step-by-step guide to help you get started:Step 1: Choose a SOCKS5 Proxy ProviderThe first step is to choose a reliable SOCKS5 proxy provider. There are many providers available, so make sure to do your research and select a provider that offers fast and secure proxy servers.Step 2: Obtain SOCKS5 Proxy Server DetailsOnce you have chosen a SOCKS5 proxy provider, you will need to obtain the proxy server details, including the server address, port number, and any authentication credentials (if required). This information is usually provided by the proxy provider upon subscription.Step 3: Open Chrome SettingsOpen Google Chrome and click on the three-dot menu icon in the top-right corner of the browser window. From the dropdown menu, select "Settings" to access the browser settings.Step 4: Configure Chrome's Proxy SettingsIn the Chrome settings, scroll down and click on "Advanced" to expand the advanced settings options. Then, under the "System" section, click on "Open your computer's proxy settings" to open the system's proxy settings.Step 5: Add Proxy Server DetailsIn the system's proxy settings window, navigate to the "LAN settings" section. Check the box for "Use a proxy server for your LAN" and enter the SOCKS5 proxy server details obtained in Step 2. This includes entering the server address and port number in the respective fields.Step 6: Save and Apply SettingsAfter entering the proxy server details, click "OK" to save the settings and apply the changes. You may need to restart Chrome for the changes to take effect.Step 7: Test the Proxy ConnectionTo ensure that the SOCKS5 proxy has been successfully added to Chrome, you can test the proxy connection by visiting a website that displays your IP address. If the website shows the IP address associated with the proxy server instead of your actual IP address, it means that the SOCKS5 proxy is working correctly.Benefits of Using SOCKS5 with ChromeAdding a SOCKS5 proxy to Chrome offers several benefits, including:1. Enhanced Privacy: By routing your internet traffic through a SOCKS5 proxy, you can mask your IP address and encrypt your online activities, enhancing your privacy and anonymity.2. Access Geo-Restricted Content: With a SOCKS5 proxy, you can bypass geo-restrictions and access content that may be restricted in your region.3. Improved Security: Using a SOCKS5 proxy can add an extra layer of security to your browsing activities, protecting you from potential online threats and attacks.4. Bypass Censorship: If you live in a region with internet censorship, a SOCKS5 proxy can help you bypass censorship and access unrestricted internet content.Adding a SOCKS5 proxy to Google Chrome is a straightforward process that can significantly enhance your online security and privacy. By following the steps outlined in this guide, you can easily configure Chrome to route your internet traffic through a SOCKS5 proxy server, allowing you to enjoy a more secure and private browsing experience. Whether you want to access geo-restricted content, bypass censorship, or simply protect your online activities, using a SOCKS5 proxy with Chrome can be a valuable tool in achieving these goals.
The Claude ecosystem stands out as a beacon of innovation in the realm of AI-powered solutions, offering businesses a comprehensive suite of tools and services to drive growth, enhance productivity, and unlock new possibilities in the digital age. In this article, we explore the diverse components of the Claude ecosystem and how they are empowering businesses to harness the transformative power of artificial intelligence.1. Claude AI Assistant:At the heart of the Claude ecosystem is the Claude AI Assistant, a virtual assistant powered by advanced natural language processing and machine learning algorithms. The Claude AI Assistant streamlines communication, automates tasks, and provides real-time support to users, enabling businesses to improve customer service, enhance employee productivity, and streamline internal operations through intelligent conversational interfaces.2. Claude Data Analytics Platform:The Claude Data Analytics Platform offers businesses a robust suite of analytics tools and capabilities to unlock the insights hidden within their data. By leveraging AI-driven data processing, visualization, and predictive modeling, the Claude Data Analytics Platform enables organizations to gain actionable insights, make data-driven decisions, and drive strategic initiatives based on a deep understanding of their business metrics and performance indicators.3. Claude Security Suite:The Claude Security Suite provides businesses with comprehensive cybersecurity solutions powered by AI-driven threat detection, anomaly detection, and behavioral analysis capabilities. By monitoring network activities, identifying security threats, and responding to incidents in real time, the Claude Security Suite helps organizations fortify their digital defenses, safeguard sensitive information, and protect against cyber threats in an increasingly complex and dynamic threat landscape.4. Claude Integration Hub:The Claude Integration Hub serves as a central hub for seamless integration with third-party applications, systems, and services, enabling businesses to connect, automate, and streamline their workflows across diverse platforms and environments. By offering pre-built connectors, APIs, and integration tools, the Claude Integration Hub simplifies the process of integrating disparate systems, enhancing interoperability, and enabling businesses to leverage the full potential of their digital ecosystem with ease.Conclusion:In conclusion, the Claude ecosystem represents a holistic approach to AI-powered solutions, providing businesses with a comprehensive suite of tools, services, and capabilities to drive innovation, enhance productivity, and navigate the complexities of the digital landscape with confidence. By leveraging the Claude AI Assistant, Data Analytics Platform, Security Suite, and Integration Hub, businesses can unlock new opportunities, optimize operations, and stay ahead of the curve in a competitive and data-driven business environment.