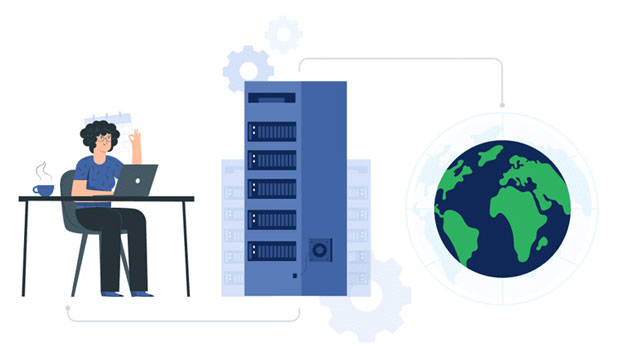
Domain name resolution is the process of converting human-readable domain names into computer-recognizable IP addresses. On the Internet, every device has a unique IP address, which is assigned by ICANN (Internet Corporation for Assigned Names and Numbers). However, an IP address is a string of numbers that is difficult to remember and type, so domain names were created that convert IP addresses into readable strings, making them easier for people to remember and use.The principle of domain name resolution is based on DNS (Domain Name System). DNS is a hierarchical, distributed naming system used to identify and locate devices on the Internet. The DNS server stores the mapping relationship between the domain name and the corresponding IP address. When the user enters the domain name in the browser, the DNS server will resolve the domain name into the corresponding IP address and send the request to the server corresponding to the IP address.The process of domain name resolution can be divided into the following steps:1. The user enters the domain name in the browser.2. The browser sends a request to the local DNS server.3. The local DNS server queries the cache. If the IP address corresponding to the domain name is in the cache, it is returned directly to the browser.4. If the local DNS server does not cache the IP address corresponding to the domain name, send a request to the root DNS server.5. The root DNS server returns the address of the top-level domain name server.6. The local DNS server sends a request to the top-level domain name server.7. The top-level domain name server returns the address of the secondary domain name server.8. The local DNS server sends a request to the secondary domain name server.9. The secondary domain name server returns the IP address corresponding to the domain name.10. The local DNS server returns the IP address to the browser and stores the mapping relationship in the cache.It should be noted that since the DNS system is distributed, domain name resolution may involve interactions between multiple DNS servers, which will cause a certain delay. Therefore, in order to improve access speed, it is recommended to use a local DNS server or a third-party DNS service provider to reduce delays and improve response speed.In short, domain name resolution is the process of converting human-readable domain names into computer-recognizable IP addresses. It relies on the DNS system and involves interactions between multiple DNS servers. Understanding the principles and processes of domain name resolution can help us better understand the Internet infrastructure and optimize the network access experience.
When setting up nginx as a reverse proxy to handle HTTPS requests for a domain, it's not uncommon to encounter a 502 Bad Gateway error. This error can be frustrating and difficult to diagnose, but with the right approach, it can be resolved. In this blog post, we will explore the common causes of this issue and provide troubleshooting steps to help you address it effectively.1. Check nginx ConfigurationThe first step in troubleshooting a 502 error is to review the nginx configuration. Ensure that the proxy_pass directive is correctly configured to point to the upstream server handling the HTTPS requests. Verify that the SSL configuration is set up correctly, including the SSL certificate and key files. Any misconfiguration in these areas can lead to a 502 error.2. Verify Upstream Server StatusA 502 error can occur if the upstream server is not responding or is experiencing issues. Check the status of the upstream server to ensure that it is operational and able to handle incoming requests. Monitor the server logs for any errors or warnings that may indicate issues with the upstream server.3. Check SSL Certificate ConfigurationIf the SSL certificate configuration is incorrect or outdated, it can result in a 502 error. Ensure that the SSL certificate files are valid and up to date. Verify that the certificate chain is properly configured and that there are no issues with certificate revocation or expiration.4. Review Error LogsReview the nginx error logs for any relevant error messages that may provide insight into the cause of the 502 error. Look for any connection timeouts, SSL handshake failures, or other errors that could point to underlying issues with the proxying of HTTPS requests.5. Test with a Simple ConfigurationTo isolate the cause of the 502 error, consider testing with a simplified nginx configuration. Temporarily remove any complex directives or customizations and configure a basic proxy_pass setup to see if the error persists. This can help identify if the issue is related to specific configuration settings.6. Monitor Network TrafficUse network monitoring tools to analyze the traffic between nginx and the upstream server. Look for any anomalies in the network traffic that could be contributing to the 502 error, such as packet loss, high latency, or connection failures. Addressing network-related issues can help resolve the error.7. Consider Load BalancingIf the upstream server is experiencing high load or performance issues, consider implementing load balancing to distribute incoming requests across multiple servers. This can help alleviate the load on individual servers and reduce the likelihood of encountering 502 errors due to server overload.8. Update nginx VersionEnsure that you are using a stable and up-to-date version of nginx. Older versions of nginx may have known issues related to handling HTTPS requests and could be prone to triggering 502 errors. Upgrading to the latest stable release can help resolve such issues.9. Consult Community ResourcesIf you are still unable to resolve the 502 error, consider reaching out to the nginx community for assistance. Forums, discussion boards, and online communities dedicated to nginx can provide valuable insights and support in troubleshooting complex issues.By following these troubleshooting steps, you can effectively diagnose and address the 502 Bad Gateway error when using nginx as a reverse proxy for handling HTTPS requests. Remember to approach each step methodically and carefully, and don't hesitate to seek assistance from the community if needed. With patience and persistence, you can overcome this challenge and ensure smooth operation of your nginx reverse proxy setup for HTTPS domains.
In today's digital age, privacy and security are of utmost importance. With the widespread use of smartphones, our personal data and information are constantly at risk. One way to protect our privacy is by hiding our smartphone's IP address.An IP address is a unique identifier for any device connected to the internet. It can reveal your geographical location and be used to track your online activities. By hiding your smartphone's IP address, you can protect your privacy and anonymity while browsing the web.There are several methods to hide your smartphone's IP address. One common way is to use a virtual private network (VPN). A VPN creates a secure, encrypted connection between your smartphone and the internet, masking your IP address and providing an extra layer of security.Another method is to use a proxy server. A proxy server acts as an intermediary between your smartphone and the internet, hiding your IP address and routing your internet traffic through a different location.Additionally, you can use the Tor network, which is designed to anonymize your internet traffic by routing it through a series of volunteer-operated servers. This can help hide your smartphone's IP address and protect your online privacy.It's important to note that while hiding your smartphone's IP address can provide an added layer of privacy and security, it is not foolproof. It's still crucial to be mindful of the websites you visit and the information you share online.Hiding your smartphone's IP address is an important step in protecting your online privacy and security. Whether you choose to use a VPN, a proxy server, or the Tor network, taking proactive measures to safeguard your personal information is essential in today's digital world. By being aware of the risks and taking steps to mitigate them, you can enjoy a safer and more secure online experience.
If you want to browse the internet anonymously or access websites that are restricted in your region, using a proxy in your web browser can be a useful solution. In this blog post, we will guide you through the steps to set up and use a proxy in the Firefox web browser.What is a Proxy?A proxy server acts as an intermediary between your computer and the internet. When you connect to the internet through a proxy, your IP address is masked, and your internet traffic is routed through the proxy server. This can help you bypass geo-restrictions, access blocked content, and protect your online privacy.Setting Up a Proxy in FirefoxTo configure a proxy in Firefox, follow these simple steps:1. Open Firefox and click on the menu button (three horizontal lines) in the top-right corner of the browser window.2. Select "Options" from the dropdown menu.3. In the Options window, click on the "General" tab on the left-hand side.4. Scroll down to the "Network Settings" section and click on the "Settings" button.5. In the Connection Settings window, select the "Manual proxy configuration" option.6. Enter the IP address and port number of the proxy server you want to use in the "HTTP Proxy" and "Port" fields.7. If the proxy server requires authentication, check the "Use this proxy server for all protocols" box and enter your username and password in the respective fields.8. Click "OK" to save your changes and close the Connection Settings window.Using a Proxy in FirefoxOnce you have set up the proxy in Firefox, you can start browsing the internet with the proxy server. Here's how to verify that your browser is using the proxy:1. Visit a website that displays your IP address, such as whatismyip.com.2. Check if the IP address displayed on the website matches the IP address of the proxy server you configured.If the IP addresses match, it means that Firefox is successfully using the proxy server for your internet connection.Tips for Using Proxies in FirefoxHere are some additional tips for using proxies in Firefox effectively:1. Use reputable proxy servers: When choosing a proxy server, opt for reputable providers to ensure security and reliability.2. Test your proxy: Before relying on a proxy for sensitive activities, test its performance and reliability to ensure it meets your requirements.3. Disable the proxy when not needed: If you no longer need to use a proxy, remember to disable it in Firefox to avoid unintended browsing issues.Using a proxy in Firefox can help you protect your privacy and access restricted content on the internet. By following the steps outlined in this post, you can easily set up and use a proxy in your Firefox browser. Just remember to use proxies responsibly and comply with applicable laws and regulations when accessing online content.
In the digital age, access to information is crucial. However, sometimes due to various reasons, certain websites may be blocked or restricted in specific regions. This can pose a challenge for those seeking content that's not available locally. While there are methods like using proxy IPs to bypass these restrictions, it's important to approach them with caution.Proxy IPs act as intermediaries between your device and the internet. By routing your traffic through these servers, they allow you to browse anonymously, hiding your real IP address. Some proxies even go further, encrypting your data to prevent third-party interception. However, this does not mean they are entirely secure or ethical.The first step towards using a proxy IP is finding a reliable source. There are numerous free and paid options available online, but not all of them are trustworthy. Some may log your browsing history, sell your data, or even engage in malicious activities themselves. Therefore, it's essential to research and choose a provider carefully.Once you have set up the proxy, accessing forbidden websites becomes relatively straightforward. You simply enter the URL through the proxy server instead of directly. However, this does not guarantee anonymity or security. In fact, using an unsecured or unethical proxy can put you at risk of various threats such as malware infection, identity theft, and more.Moreover, it's important to note that bypassing regional blocks using proxies may violate local laws and regulations. Depending on where you live, doing so could lead to legal consequences. Even if it doesn't, using proxies can still have negative consequences for your online privacy and security.In conclusion, while the temptation might be great to use a proxy IP to access blocked websites, it's crucial to exercise caution. Consider the risks involved and ensure that any proxy you use is secure and legitimate. If possible, explore alternative ways of obtaining the desired content without compromising your privacy or safety. After all, education and awareness are powerful tools in today's interconnected world.
In the intricate world of internet proxies, two primary categories often capture the attention of users seeking anonymity, speed, and reliability: ISP (Internet Service Provider) proxies and residential proxies. While both have their unique merits, ISP proxies frequently emerge as the preferred choice for specific use cases, owing to a combination of factors that contribute to their enhanced performance. This article delves into the reasons why ISP proxies often outperform residential proxies.Infrastructure and DedicationOne of the key advantages of ISP proxies lies in their infrastructure. ISP proxies are inherently part of the robust network infrastructure maintained by large Internet Service Providers. These networks are designed to handle vast amounts of data and traffic efficiently, ensuring that ISP proxies can offer reliable and stable connections. In contrast, residential proxies rely on individual residential IP addresses, which can be less stable and prone to disconnections due to factors beyond the user's control, such as internet outages or changes in service providers.Performance and SpeedISP proxies also excel in terms of performance and speed. Since they are part of the ISP's network, they benefit from the high-bandwidth and low-latency connections that the ISP provides. This allows ISP proxies to process and transmit data quickly, making them ideal for tasks that require high-speed internet access, such as web scraping or data mining. Residential proxies, on the other hand, can experience slower speeds due to the limitations of residential internet connections and the shared nature of their IP addresses.Anonymity and TrustworthinessWhile residential proxies are often touted for their ability to mimic genuine user behavior and bypass advanced detection mechanisms, ISP proxies can offer a level of anonymity that is both trustworthy and effective. ISP proxies are not associated with any specific user or device, making them less likely to trigger security alerts or be flagged as suspicious. In contrast, residential proxies can sometimes be traced back to individual users, which can compromise their anonymity and potentially lead to detection.Cost-EffectivenessAnother factor that favors ISP proxies over residential proxies is cost-effectiveness. Residential proxies can be expensive, especially when purchased in large quantities or from premium providers. ISP proxies, on the other hand, can be more cost-effective, as they are inherently part of the ISP's network and do not require additional hardware or software investments.Scalability and CustomizationISP proxies also offer greater scalability and customization options. As the network infrastructure of large ISPs grows, so does the pool of available ISP proxies. This allows users to easily scale their proxy usage as needed, without worrying about limitations on the number of available IP addresses. Additionally, ISP proxies can be customized to meet specific requirements, such as location, speed, or connection type, providing users with the flexibility to tailor their proxy setup to their exact needs.ConclusionWhile residential proxies have their place in the world of internet proxies, ISP proxies often outperform them in terms of performance, speed, anonymity, cost-effectiveness, scalability, and customization. The robust infrastructure, dedicated resources, and inherent advantages of ISP proxies make them a compelling choice for users who require reliable, high-performance proxies for their internet-based activities. Whether you're engaged in web scraping, data mining, or simply seeking a secure and anonymous way to browse the internet, ISP proxies offer a compelling alternative to residential proxies.
Your local IP address serves as a unique identifier for your device within a network, allowing it to communicate with other devices and access the internet. Changing this address can help resolve connectivity issues, enhance security, or optimize network performance. In this blog article, we will delve into the significance of altering your local IP address and provide step-by-step instructions on how to do so on different operating systems.1. Importance of Changing Your Local IP Address:Changing your local IP address can offer several benefits, including:Network Troubleshooting: Resolving connectivity issues or conflicts within the network.Enhanced Security: Preventing unauthorized access and securing your network from potential threats.Optimizing Network Performance: Improving network speed and efficiency by adjusting IP settings.2. How to Change Your Local IP Address on Windows:Access Network Settings: Navigate to the Control Panel and open the Network and Sharing Center.Change Adapter Settings: Click on "Change adapter settings" on the left sidebar.Access Properties: Right-click on your network connection and select "Properties."Configure TCP/IPv4: Double-click on "Internet Protocol Version 4 (TCP/IPv4)".Manually Specify IP Address: Choose "Use the following IP address" and enter the new IP address, subnet mask, and default gateway.Save Changes: Click "OK" to save your new settings.3. How to Change Your Local IP Address on macOS:Access Network Preferences: Go to the Apple menu, select "System Preferences," and click on "Network."Select Network Connection: Choose the network connection you want to modify (Wi-Fi or Ethernet).Advanced Settings: Click on "Advanced" and navigate to the "TCP/IP" tab.Configure IPv4: From the "Configure IPv4" dropdown menu, select "Manually."Enter New IP Address: Input the new IP address, subnet mask, and router address.Apply Changes: Click "OK" to apply the new settings.4. How to Change Your Local IP Address on Linux:Access Network Settings: Open a terminal window and enter the command: sudo nano /etc/network/interfaces.Edit Configuration File: Locate the network interface you want to modify and change the IP address, subnet mask, and gateway.Save Changes: Press Ctrl + X, then Y to confirm changes, and Enter to save.Restart Networking Service: Restart the networking service with the command: sudo service networking restart.By following these step-by-step guides tailored to different operating systems, you can confidently change your local IP address to troubleshoot network issues, enhance security, or optimize network performance. Mastering the art of network configuration empowers you to take control of your digital connectivity and ensure a seamless and secure online experience.
In the era of increasing online privacy concerns and the need for secure internet access, setting up a SOCKS5 proxy server can be a valuable solution. A SOCKS5 proxy allows users to route their internet traffic through a remote server, providing anonymity and access to geo-restricted content. This article will guide you through the process of setting up a multi-IP SOCKS5 proxy server on Alibaba Cloud, enabling you to manage multiple IP addresses for enhanced flexibility and privacy.What is SOCKS5?SOCKS5 is an internet protocol that facilitates the routing of network packets between a client and server through a proxy server. Unlike HTTP proxies, SOCKS5 supports various types of traffic, including TCP and UDP, making it suitable for a wide range of applications such as web browsing, gaming, and P2P file sharing. Its features include:- Anonymity: By masking your real IP address, SOCKS5 provides a layer of anonymity while browsing.- Versatility: It can handle any type of traffic, including HTTP, HTTPS, and FTP.- Authentication: SOCKS5 supports user authentication, enhancing security.Why Use a Multi-IP SOCKS5 Proxy?1. Enhanced Anonymity: Using multiple IP addresses reduces the chances of your activities being traced back to a single IP.2. Access to Geo-Restricted Content: Different IP addresses can be used to access content available in specific regions.3. Load Balancing: Distributing traffic across multiple IPs can improve performance and reduce the risk of IP bans.PrerequisitesBefore you begin, ensure you have the following:1. An Alibaba Cloud account.2. Basic knowledge of Linux command line.3. A Virtual Private Server (VPS) instance running a compatible Linux distribution (e.g., Ubuntu, CentOS).Step-by-Step Guide to Setting Up a Multi-IP SOCKS5 Proxy ServerStep 1: Create and Configure Your Alibaba Cloud VPS1. Log in to Alibaba Cloud: Access the Alibaba Cloud console and log in to your account.2. Launch a New Instance:- Go to the Elastic Compute Service (ECS) section.- Click on “Create Instance.”- Choose an appropriate region and instance type based on your needs.- Select a Linux distribution (Ubuntu is recommended for beginners).3. Configure Networking:- Ensure that your instance has a public IP address.- Configure security group rules to allow traffic on the desired ports (e.g., 1080 for SOCKS5).4. Access Your VPS: Use SSH to connect to your VPS. Open a terminal and run:```bashssh root@your_server_ip```Step 2: Install Required Packages1. Update Your System: It’s a good practice to update your package list and upgrade installed packages.```bashsudo apt update && sudo apt upgrade -y```2. Install Necessary Software: You will need to install `dante-server`, a popular SOCKS5 server.```bashsudo apt install dante-server -y```Step 3: Configure the SOCKS5 Server1. Edit the Configuration File: Open the configuration file for the Dante server.```bashsudo nano /etc/danted.conf```2. Basic Configuration: Here’s a sample configuration that you can modify according to your needs:```plaintextlogoutput: /var/log/danted.loginternal: eth0 port = 1080external: your_public_ip_addressmethod: username noneclient pass {from: 0.0.0.0/0 to: 0.0.0.0/0log: connect disconnect}pass {from: 0.0.0.0/0 to: 0.0.0.0/0log: connect disconnect}```Replace `your_public_ip_address` with the actual public IP of your VPS.3. Save and Exit: Press `CTRL + X`, then `Y`, and hit `Enter` to save the changes.Step 4: Set Up Multiple IP AddressesTo create a multi-IP proxy setup, you will need to assign additional IP addresses to your VPS. This can be done in two ways:1. Elastic IPs: Allocate additional Elastic IPs in your Alibaba Cloud console and bind them to your instance.2. Virtual Network Interface: Configure additional network interfaces on your VPS. This requires editing the network configuration files, which can vary by Linux distribution.Step 5: Configure Multiple IPs in SOCKS51. Modify the Configuration: Update the `danted.conf` file to include multiple external IPs. For example:```plaintextexternal: your_first_public_ipexternal: your_second_public_ip```2. Restart the SOCKS5 Service: After making changes, restart the Dante server to apply the new configuration.```bashsudo systemctl restart danted```Step 6: Configure Firewall RulesEnsure that your firewall settings allow traffic on the SOCKS5 port (e.g., 1080). You can use `ufw` for this purpose:```bashsudo ufw allow 1080/tcpsudo ufw enable```Step 7: Connect to Your SOCKS5 ProxyNow that your SOCKS5 proxy server is set up, you can connect to it from your local device.1. Configure Proxy Settings:- On your device, go to network settings and find the proxy configuration section.- Set the proxy type to SOCKS5.- Enter the public IP address of your VPS and the port number (1080).2. Authentication: If you have configured user authentication, make sure to enter the correct username and password.3. Test the Connection: To verify that your connection is working, visit a website that displays your IP address. You should see the IP of your SOCKS5 proxy.ConclusionSetting up a multi-IP SOCKS5 proxy server on Alibaba Cloud is a powerful way to enhance your online privacy and access geo-restricted content. By following the steps outlined in this article, you can create a secure and efficient proxy server tailored to your needs. Remember to keep your server updated and monitor its performance to ensure optimal operation. Enjoy your enhanced internet experience!
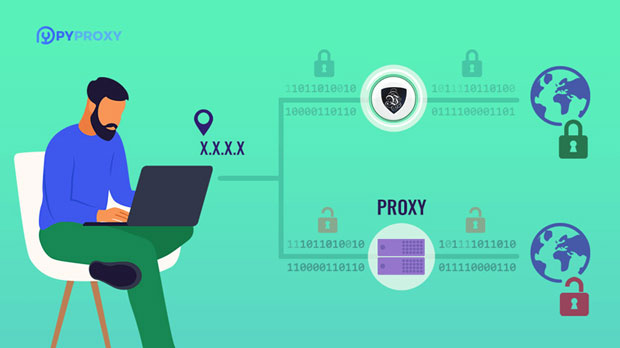
In the modern Internet environment, the use of proxy servers has become more and more common. Proxy servers can not only help users protect privacy and increase Internet speed, but also bypass geographical restrictions and access blocked websites. This article will discuss in detail how the IP address of a proxy server is used, including its working principle, configuration method, application scenarios, and usage precautions.1. What is a proxy server?A proxy server is an intermediary server located between the user and the target website. When a user accesses a website through a proxy server, the user's request is first sent to the proxy server, which is then forwarded to the target website by the proxy server. The response of the target website is also returned to the user through the proxy server. In this way, the proxy server can hide the user's real IP address, thereby protecting the user's privacy.Types of proxy servers1. HTTP proxy: Mainly used to process HTTP protocol requests, suitable for web browsing.2. HTTPS proxy: Used to process encrypted HTTPS requests, providing higher security.3. SOCKS proxy: Supports multiple network protocols and is suitable for various network applications, such as games, video streaming, etc.2. Working principle of proxy server IP addressThe IP address of the proxy server is the key to its identification and communication in the network. The user connects through the IP address and port of the proxy server, and the proxy server forwards the request to the target website. The specific workflow is as follows:1. User request: The user enters the URL in the browser, and the browser sends the request to the IP address of the proxy server.2. Request forwarding: After the proxy server receives the request, it forwards it to the server of the target website.3. Response return: The server of the target website processes the request and returns a response, and the proxy server forwards the response back to the user.In this way, the target website can only see the IP address of the proxy server, but cannot obtain the user's real IP address.3. How to use the proxy server IP address1. Get the proxy IP addressUsers can get the proxy server IP address in a variety of ways:- Free proxy website: Many websites provide free proxy lists.- Paid proxy service: Some professional proxy service providers provide stable and high-speed proxy IP services, which usually require a paid subscription.2. Configure the proxy serverAfter obtaining the proxy IP address, users need to configure it on their devices to use these proxies. The following are the steps to configure the proxy server on different devices.Windows system1. Open network settings: Click the "Start" menu, select "Settings", and then go to "Network and Internet".2. Select proxy settings: Select "Proxy" in the left menu.3. Manual settings: In the "Manual proxy settings" section, turn on the "Use a proxy server" option.4. Fill in IP and port: Enter the IP address of the proxy server in the "Address" box and the corresponding port number in the "Port" box.5. Save settings: Click "Save" to apply the changes.macOS system1. Open network settings: Click the Apple icon in the upper-left corner of the screen, select "System Preferences", and then select "Network".2. Select a network connection: Select the network connection currently in use (such as Wi-Fi or Ethernet) on the left, and then click "Advanced".3. Set up a proxy: Select the "Proxy" tab and check the type of proxy you want to use (such as "HTTP Proxy" or "HTTPS Proxy").4. Fill in proxy information: Enter the IP address in the "Proxy server" box and enter the port number in the "Port" box.5. Save settings: Click "OK", then click "Apply" to save the changes.Android devices1. Open Wi-Fi settings: Open the Settings app, select Network & Internet, and then tap Wi-Fi.2. Modify network settings: Find and long-press the connected network, select Modify network.3. Set proxy: Find the Proxy setting in Advanced options and select Manual.4. Fill in IP and port: Enter the IP address of the proxy server in the Proxy host name box and the port number in the Proxy port box.5. Save settings: Tap Save to apply the changes.iOS devices1. Open Wi-Fi settings: Open the Settings app, select Wi-Fi, find and tap the connected network.2. Set proxy: Scroll down, find the HTTP proxy option, and select Manual.3. Fill in proxy information: Enter the IP address of the proxy server in the Server box and the port number in the Port box.4. Save settings: Return to the previous menu and the settings will be saved automatically.3. Test the availability of the proxy serverAfter the configuration is complete, users can test whether the proxy is working properly by visiting some websites. You can use some online tools, to check whether the displayed IP address is the IP of the proxy server. If the displayed IP address is the proxy IP, the proxy configuration is successful.4. Application scenarios of proxy serversThe IP address of the proxy server can be used in a variety of scenarios, including but not limited to:1. Protect privacy: By hiding the real IP address, users can remain anonymous online and protect personal privacy.2. Bypassing geographical restrictions: Users can access restricted websites and content through proxy servers, such as streaming services that are not accessible in certain regions.3. Increase Internet speed: Some proxy servers can cache data from commonly used websites, thereby speeding up access.4. Network monitoring and filtering: In an enterprise or school environment, a proxy server can be used to monitor and filter the Internet behavior of employees or students.5. Precautions for using proxy serversWhen using the IP address of a proxy server, users need to pay attention to the following points:1. SecurityWhen using a proxy server, especially a free proxy, users need to pay attention to security. Many free proxies may be unsafe and may record users' online behavior or inject malicious code. It is recommended to avoid entering sensitive information such as passwords and credit card information when using a proxy.2. StabilityFree proxies are generally less stable and may fail at any time. It is recommended to test the availability and speed of the proxy before using it to ensure that it works properly.3. Anonymity levelWhen choosing a proxy, pay attention to its anonymity level. Proxies with high anonymity levels can better protect user privacy and avoid leaking real IP addresses.4. Legal complianceWhen using a proxy server, make sure to comply with local laws and regulations. Some regions have strict restrictions on the use of proxies, so be cautious when using them.The IP address of a proxy server plays an important role in modern Internet use. By properly configuring and using proxy servers, users can effectively protect personal privacy, bypass geographical restrictions and increase Internet speed. However, during use, users should pay attention to security and stability to ensure legal compliance. I hope this article can help you better understand how the IP address of the proxy server is used, thereby improving your Internet experience.
In today's digital age, having a secure and reliable internet connection is crucial for both personal and professional use. One way to ensure the security and reliability of your internet connection is by using a residential IP address.What is a residential IP?A residential IP address is an IP address that is assigned to a device by an Internet Service Provider (ISP). Unlike data center IPs, which are assigned to servers located in data centers, residential IPs are assigned to devices in residential locations, such as homes and apartments. This means that residential IPs are associated with real physical addresses, making them more trustworthy and reliable.Why use a residential IP?There are several reasons why using a residential IP can be beneficial:1. Security: Residential IPs are less likely to be flagged as suspicious or fraudulent by websites and online services, as they are associated with legitimate residential locations. This can help prevent account bans, captchas, and other security measures that can disrupt your online activities.2. Reliability: Residential IPs are generally more stable and reliable than other types of IPs, such as data center IPs. This is because residential IPs are less likely to be blocked or blacklisted by websites and online services, ensuring a smoother and more consistent internet experience.3. Anonymity: Residential IPs provide a higher level of anonymity compared to other types of IPs, as they are not easily associated with proxy or VPN services. This can be beneficial for users who value their privacy and want to avoid being tracked or targeted by online advertisers and other entities.4. Access: Some websites and online services restrict access based on the type of IP address being used. Residential IPs can help bypass these restrictions, allowing users to access content and services that may be otherwise unavailable or limited.How to obtain a residential IP?There are several ways to obtain a residential IP address:1. Internet Service Provider: The most common way to obtain a residential IP address is through an Internet Service Provider (ISP). When you sign up for internet service at your home or apartment, your ISP will assign you a residential IP address as part of the service.2. Proxy and VPN services: Some proxy and VPN services offer residential IP addresses as part of their offerings. These services route your internet traffic through their network, allowing you to use a residential IP address even if you are not physically located at the associated address.3. Residential proxy providers: There are companies that specialize in providing residential proxy services, allowing you to rent or purchase residential IP addresses for your specific needs.Best practices for using a residential IPWhen using a residential IP address, it's important to follow best practices to ensure a secure and reliable internet experience:1. Use reputable providers: If you are obtaining a residential IP address through a third-party service, make sure to choose reputable providers with a track record of reliability and security.2. Avoid illegal activities: Using a residential IP address does not give you a free pass to engage in illegal activities online. Always use the internet responsibly and in compliance with the law.3. Protect your privacy: While residential IPs provide a higher level of anonymity, it's still important to take steps to protect your privacy online, such as using encryption and secure connections when accessing sensitive information.In conclusion, having a residential IP address can greatly enhance the security and reliability of your internet connection. Whether for personal use or business purposes, using a residential IP can provide peace of mind and ensure a smoother online experience. By understanding the benefits of residential IPs and following best practices for their use, you can make the most of this valuable resource in today's digital landscape.