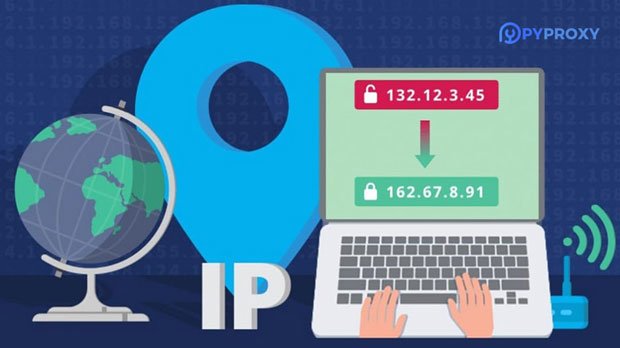
Changing the IP address of your TP-Link router can be essential for various reasons, such as improving security, managing network traffic, or resolving connectivity issues. This article will guide you through the steps to modify your TP-Link router's IP address, ensuring you have a seamless experience.Understanding IP AddressesBefore diving into the modification process, it's crucial to understand what an IP address is. An Internet Protocol (IP) address is a unique identifier assigned to each device connected to a network. It allows devices to communicate with each other over the internet. TP-Link routers typically use a default IP address, such as 192.168.0.1 or 192.168.1.1. Changing this address can help avoid conflicts with other devices and enhance your network's security.Reasons to Change Your Router's IP Address1. Avoiding IP Conflicts: If multiple devices on the same network have the same IP address, it can lead to connectivity issues. Changing the router's IP address can resolve these conflicts.2. Improving Security: Using a non-default IP address can make it harder for unauthorized users to access your router’s settings, enhancing your network security.3. Network Management: Changing the IP address can help you organize your network better, especially if you have multiple routers or devices.Steps to Change the IP Address of Your TP-Link RouterStep 1: Connect to Your RouterTo change the IP address, you need to be connected to your TP-Link router. You can do this via a wired Ethernet connection or wirelessly.Step 2: Access the Router's Admin Panel1. Open a Web Browser: Launch your preferred web browser (Chrome, Firefox, Safari, etc.).2. Enter the Router’s IP Address: In the address bar, type the default IP address of your TP-Link router (usually 192.168.0.1 or 192.168.1.1) and press Enter.3. Log In: You will be prompted to enter a username and password. The default credentials are usually:- Username: admin- Password: adminIf you have changed these credentials previously, use your custom username and password.Step 3: Navigate to the Network Settings1. Locate the Network Tab: Once logged in, look for the “Network” tab in the main menu. The exact wording may vary slightly depending on your router model.2. Select LAN Settings: Click on “LAN” from the dropdown menu under the Network tab.Step 4: Change the IP Address1. Modify the IP Address: In the LAN settings, you will see the current IP address of your router. Change it to your desired IP address. Make sure to choose an address within the same subnet (e.g., if your current IP is 192.168.1.1, you can choose 192.168.1.2 or any other address that doesn’t conflict with existing devices).2. Subnet Mask: Ensure that the subnet mask remains as 255.255.255.0 unless you have specific network requirements.3. Save Changes: After entering the new IP address, click the “Save” button to apply the changes.Step 5: Reboot the RouterAfter saving the changes, you will need to reboot your router for the new IP address to take effect. Most TP-Link routers will prompt you to reboot automatically. If not, you can manually reboot the router by unplugging it for a few seconds and then plugging it back in.Step 6: Reconnect to the RouterOnce the router has rebooted, you will need to reconnect to it using the new IP address. Open your web browser and enter the new IP address to access the router's admin panel again. You may need to log in using your credentials.Troubleshooting Common Issues1. Cannot Access the Router: If you cannot access the router after changing the IP address, ensure you are using the correct new IP address. If necessary, reset the router to factory settings and try again.2. IP Address Conflict: If you encounter an IP address conflict, make sure no other device is using the same IP address. You can check connected devices in the router's admin panel.3. Loss of Internet Connection: If you lose internet connectivity after changing the IP address, check your WAN settings. Ensure your ISP settings are correctly configured.ConclusionChanging the IP address of your TP-Link router is a straightforward process that can greatly enhance your network's security and performance. By following the steps outlined in this article, you can easily modify your router's IP address and manage your network more effectively. Always remember to keep your router's firmware updated and regularly check for any security vulnerabilities to maintain a secure and efficient network environment.
In an era where online privacy and security are paramount, setting up your own SOCKS5 proxy server can be a valuable asset. A SOCKS5 proxy allows you to route your internet traffic through a server, effectively masking your IP address and providing a layer of anonymity. Evoxt is a cloud hosting provider that offers affordable Virtual Private Servers (VPS), making it a suitable choice for setting up your SOCKS5 proxy. This article will guide you through the process of setting up a SOCKS5 proxy server using Evoxt.What is a SOCKS5 Proxy?SOCKS5 (Socket Secure version 5) is a protocol that facilitates the transfer of network packets between a client and a server through a proxy server. Unlike HTTP proxies, which only handle web traffic, SOCKS5 can manage any type of traffic, including TCP and UDP. This versatility makes SOCKS5 suitable for various applications, such as web browsing, gaming, and file sharing.Benefits of Using a SOCKS5 Proxy1. Enhanced Privacy: By routing your internet traffic through your own server, you can mask your IP address and protect your online identity.2. Bypass Geo-Restrictions: You can access content that may be restricted in your region by routing your connection through a server in another location.3. Improved Security: Setting up your own server allows you to implement security measures that suit your needs, reducing the risk of data leaks.4. Greater Control: You have complete control over the server configuration, allowing you to customize it to meet your specific requirements.Requirements for Setting Up a SOCKS5 Proxy Server on EvoxtBefore you begin, you will need the following:1. Evoxt VPS: Sign up for a VPS plan from Evoxt that suits your budget and needs. A basic plan is usually sufficient for running a SOCKS5 proxy server.2. Basic Knowledge of Command Line: Familiarity with the command line interface (CLI) is essential, as you will need to execute commands to set up the server.3. A Domain Name (Optional): While not necessary, having a domain name can make it easier to connect to your server.Step-by-Step Guide to Setting Up a SOCKS5 Proxy Server on EvoxtStep 1: Create an Evoxt Account1. Sign Up: Go to the Evoxt website and create an account by providing the necessary information.2. Select a VPS Plan: Choose a plan that fits your needs. For a SOCKS5 proxy, a basic plan with minimal resources is usually sufficient.Step 2: Deploy Your VPS1. Choose Your Operating System: After selecting your plan, you will need to choose an operating system for your VPS. Ubuntu is a popular choice due to its user-friendly interface and extensive community support.2. Configure Your Server: Follow the prompts to configure your server. This may include selecting data center locations and setting up SSH keys for secure access.3. Launch Your VPS: Once configured, launch your VPS. You will receive an IP address and login credentials to access your server.Step 3: Access Your VPS1. Connect via SSH: Use an SSH client (like PuTTY for Windows or Terminal for macOS/Linux) to connect to your server. Open your terminal and enter the following command:```bashssh root@your_server_ip```Replace `your_server_ip` with the actual IP address of your VPS.Step 4: Update Your SystemBefore installing any software, it’s essential to update your package list and upgrade existing packages. Run the following commands:```bashsudo apt updatesudo apt upgrade```Step 5: Install a SOCKS5 Proxy Server SoftwareFor this guide, we will use `Dante`, a popular and reliable SOCKS5 server. Follow these steps to install it:1. Install Dante: Use the following command to install the Dante server:```bashsudo apt install dante-server```Step 6: Configure the Dante ServerOnce Dante is installed, you need to configure it to run as a SOCKS5 proxy.1. Edit the Configuration File: Open the configuration file using a text editor (like `nano` or `vim`):```bashsudo nano /etc/danted.conf```2. Basic Configuration: Replace the contents of the file with the following configuration. Adjust the settings as necessary:```plaintextlogoutput: /var/log/danted.loginternal: your_server_ip port = 1080external: your_server_ipmethod: username noneuser.notprivileged: nobodyclient pass {from: 0.0.0.0/0 to: 0.0.0.0/0log: connect disconnect}sock pass {from: 0.0.0.0/0 to: 0.0.0.0/0log: connect disconnect}```- Replace `your_server_ip` with the actual IP address of your VPS.- The `port` directive specifies the port on which your SOCKS5 proxy will listen. The default is usually 1080.3. Save and Exit: If you are using `nano`, press `CTRL + X`, then `Y`, and hit `Enter` to save the changes.Step 7: Start the SOCKS5 Proxy Server1. Start Dante: Use the following command to start the Dante server:```bashsudo systemctl start danted```2. Enable Dante to Start on Boot: To ensure that the SOCKS5 proxy starts automatically when the server reboots, enable the service:```bashsudo systemctl enable danted```Step 8: Configure Firewall RulesIf your VPS has a firewall enabled, you need to allow traffic on the SOCKS5 port (default 1080).1. Allow Port 1080: Use the following command to allow traffic on port 1080:```bashsudo ufw allow 1080```2. Check Firewall Status: Verify that the firewall rules are correctly set:```bashsudo ufw status```Step 9: Testing Your SOCKS5 Proxy ServerAfter setting up your SOCKS5 proxy server, you should test it to ensure it works correctly.1. Use a Proxy Client: Download a SOCKS5-compatible application or use a web browser that supports proxy settings. Popular options include:- Shadowsocks- ProxyCap- Firefox (with manual proxy configuration)2. Configure the Proxy Client: Set the proxy settings in your application:- SOCKS Host: your_server_ip- Port: 1080- Username/Password: If you set up authentication, enter your credentials.3. Test the Connection: Visit a website like whatismyip.com to check if your IP address has changed to that of your SOCKS5 server.Step 10: Securing Your SOCKS5 ProxyTo enhance the security of your SOCKS5 proxy, consider implementing the following measures:1. Set Up Authentication: Modify the `danted.conf` file to require a username and password for connections. You can manage user accounts using the system’s user management commands.2. Limit Access: Restrict access to your SOCKS5 proxy by specifying allowed IP addresses in the configuration file. For example:```plaintextclient pass {from: your_client_ip to: 0.0.0.0/0log: connect disconnect}```3. Regularly Update Your Server: Keep your server and software up to date to protect against vulnerabilities.Step 11: Monitoring and MaintenanceOnce your SOCKS5 proxy server is up and running, it’s crucial to monitor its performance and maintain it regularly.1. Log Monitoring: Check the log files located at `/var/log/danted.log` to monitor connections and identify any potential issues.2. Resource Usage: Regularly check the resource usage of your VPS to ensure it can handle the traffic. You can use commands like `top` or `htop` to monitor CPU and memory usage.3. Backup: Regularly back up your configuration files and any important data to prevent loss in case of server failure.ConclusionSetting up a SOCKS5 proxy server using Evoxt is a straightforward process that can significantly enhance your online privacy and security. By following the steps outlined in this guide, you can create a reliable proxy server tailored to your needs. With your own SOCKS5 proxy, you can enjoy greater control over your internet traffic and access content that may be restricted in your region. Always remember to secure and maintain your server to ensure optimal performance and safety.
In today's digital age, the term "IP banned" is often thrown around, but what does it actually mean? In this blog post, we'll explore the concept of IP banning, why it happens, and what it means for internet users.What is an IP Address?First, let's start with the basics. An IP address, or Internet Protocol address, is a unique string of numbers separated by periods that identifies each device using the internet. Every device that connects to the internet, whether it's a computer, smartphone, or any other internet-enabled device, is assigned an IP address.What Does "IP Banned" Mean?When a user's IP address is banned, it means that they are restricted from accessing certain websites or online services. This ban can be implemented by website administrators, internet service providers, or other entities in control of the online platform.Reasons for IP BanningThere are several reasons why an IP address might be banned. Some of the most common reasons include:1. Violating Terms of Service: Many websites and online services have terms of service that users must adhere to. If a user violates these terms, such as by engaging in spamming, hacking, or other malicious activities, their IP address may be banned.2. Security Concerns: In some cases, an IP address may be banned due to security concerns. For example, if a website detects unusual or suspicious activity coming from a specific IP address, they may choose to ban it in order to protect their platform and other users.3. Legal Compliance: Websites and online platforms may ban certain IP addresses in order to comply with legal requirements, such as copyright infringement or other legal issues.Consequences of IP BanningWhen an IP address is banned, the user associated with that IP address will no longer be able to access the banned website or online service. This can be a significant inconvenience for the user, especially if the ban affects a website or service that they rely on for work, communication, or entertainment.In some cases, an IP ban may also have broader implications. For example, if an internet service provider bans an IP address due to suspicious activity, it could impact all devices using that IP address, potentially disrupting multiple users' ability to access the internet.How to Check if Your IP Address is BannedIf you suspect that your IP address has been banned from a specific website or online service, there are a few ways to check:1. Use a Different Device: If possible, try accessing the website or service from a different device using a different internet connection. If you can access the site from a different device and IP address, it's likely that your original IP address has been banned.2. Use an IP Address Lookup Tool: There are several online tools available that allow you to look up the status of your IP address. By entering your IP address into one of these tools, you can see if it has been flagged or banned by any websites or online services.What to Do if Your IP Address is BannedIf you discover that your IP address has been banned from a website or online service, there are a few steps you can take:1. Contact the Website Administrator: If you believe that your IP address was banned in error or if you have resolved any issues that led to the ban, you can try reaching out to the website administrator to request that the ban be lifted.2. Contact Your Internet Service Provider: If your entire IP address range has been banned by a website or online service, you may need to contact your internet service provider to address the issue. They may be able to assign you a new IP address or take other steps to resolve the ban.3. Use a VPN: In some cases, using a virtual private network (VPN) can help you bypass an IP ban. By connecting to the internet through a VPN server with a different IP address, you can potentially access the banned website or service.In conclusion, being "IP banned" means that your device's unique identifier has been restricted from accessing certain websites or online services. This can happen for a variety of reasons, including violating terms of service, security concerns, or legal compliance. If you find yourself facing an IP ban, there are steps you can take to address the issue and potentially regain access to the affected websites or services. Whether it's reaching out to website administrators, contacting your internet service provider, or using a VPN, there are options available to mitigate the impact of an IP ban.
In today's globalized world, the ability to change your IP location to an Indian address can have numerous benefits. Whether you are a business looking to expand your market reach in India or an individual wanting to access region-specific content, having an Indian IP address can open up a world of opportunities. In this blog post, we will explore the various methods and considerations for changing your IP location to an Indian address.Method 1: Virtual Private Network (VPN)One of the most popular and effective ways to change your IP location to an Indian address is by using a Virtual Private Network (VPN). A VPN allows you to connect to a server in India, thereby masking your original IP address and providing you with an Indian IP address. This not only enables you to access geo-restricted content and services in India but also ensures a secure and private internet connection.When choosing a VPN provider, it is important to consider factors such as server locations in India, connection speed, and security features. Look for a reputable VPN service that offers a wide range of servers in India and employs robust encryption protocols to safeguard your online activities.Method 2: Proxy ServersAnother method to change your IP location to an Indian address is by using proxy servers. A proxy server acts as an intermediary between your device and the internet, allowing you to route your internet traffic through a server located in India. By doing so, you can effectively mask your original IP address and appear as though you are browsing from India.While proxy servers can be a cost-effective solution for changing your IP location, they may not offer the same level of security and privacy as a VPN. Additionally, the reliability and speed of proxy servers can vary, so it is important to choose a reputable proxy service that prioritizes performance and uptime.Method 3: Tor BrowserFor those seeking a free and decentralized solution to change their IP location to an Indian address, the Tor browser can be a viable option. The Tor network routes your internet traffic through a series of volunteer-operated servers, making it difficult for anyone to trace your online activities back to your original IP address.While the Tor browser provides anonymity and can help change your IP location, it is important to note that it may not offer the same level of speed and performance as a VPN or proxy server. Additionally, accessing certain websites and services through the Tor network may be restricted or blocked.Considerations for Changing IP Location to an Indian AddressBefore changing your IP location to an Indian address, there are several considerations to keep in mind. Firstly, ensure that the method you choose complies with local laws and regulations regarding internet usage in India. Additionally, be mindful of any potential impact on your internet speed and performance, especially when accessing content from servers located in India.Furthermore, it is important to prioritize security and privacy when changing your IP location. Look for solutions that offer robust encryption, no-logs policies, and advanced security features to protect your online identity and data.Changing your IP location to an Indian address can offer numerous advantages, from accessing region-specific content to expanding your business presence in India. By employing methods such as VPNs, proxy servers, or the Tor browser, individuals and businesses can effectively change their IP location and enjoy the benefits of an Indian IP address. However, it is crucial to consider factors such as security, privacy, and local regulations when undertaking this process.In conclusion, having the ability to change your IP location to an Indian address can open up new opportunities and enhance your online experience. With the right approach and considerations in place, individuals and businesses can leverage an Indian IP address for various purposes while ensuring a secure and seamless internet connection.
If you are wondering how to find out your router's IP address or how to change it, you've come to the right place. In this blog post, we will explore the basics of router IP addresses, how to locate your router's IP address, and how to change it if necessary.What is a Router IP Address?First, let's clarify what we mean by a router IP address. Every device connected to a network, whether it's a computer, smartphone, or a printer, has an IP address. This unique identifier allows devices to communicate with each other within the network.A router is a device that forwards data packets between computer networks. It acts as the gateway between your local network and the internet. In the context of a router, the term "router IP address" typically refers to the IP address assigned to the router itself.How to Find Your Router's IP AddressNow that we understand what a router IP address is, let's discuss how to find it. There are several methods to locate your router's IP address, and we will cover a few of the most common ones.1. Using Command Prompt (Windows)If you are using a Windows computer, you can use the Command Prompt to find your router's IP address. Follow these steps:- Press the Windows key + R to open the Run dialog box.- Type "cmd" and press Enter to open the Command Prompt.- In the Command Prompt window, type "ipconfig" and press Enter.- Look for the "Default Gateway" under the section related to your network connection. The number next to it is your router's IP address.2. Using Network Preferences (Mac)For Mac users, you can find your router's IP address through Network Preferences. Here's how:- Click on the Apple menu and select "System Preferences."- Click on "Network."- Select your active network connection from the list on the left.- Click on the "Advanced" button.- Go to the "TCP/IP" tab. The router's IP address will be listed next to "Router."3. Checking the Router LabelAnother simple method is to check the label on your router. Many routers have the default IP address printed on a label attached to the device. Look for terms like "Default Gateway" or "Router IP Address" on the label.How to Change Your Router's IP AddressIn some cases, you may need to change your router's IP address. This could be due to network conflicts, security reasons, or other specific requirements. Here's how you can change your router's IP address:1. Access Your Router's Admin PanelTo change your router's IP address, you will need to access its admin panel. You can do this by entering the current IP address of your router into a web browser. This will take you to the router's login page, where you will need to enter your username and password.2. Navigate to Network SettingsOnce you have logged into the admin panel, navigate to the network settings or LAN settings section. Look for an option related to "IP Address," "LAN IP," or "Router Settings."3. Change the IP AddressIn the network settings, you should find an option to change the router's IP address. Enter the new IP address that you want to assign to your router. Make sure that the new address is within the acceptable range for your network.4. Save and RebootAfter entering the new IP address, save the changes and reboot your router. This will apply the new IP address settings.It's important to note that changing your router's IP address can temporarily disrupt your network connection, so it's best to do this during a time when network usage is low.Final ThoughtsUnderstanding how to find and change your router's IP address is an essential skill for managing your home or office network. Whether you need to troubleshoot network issues or customize your network settings, knowing how to locate and modify your router's IP address can be incredibly useful.Remember that changing your router's IP address should be done with caution and only when necessary. If you are unsure about making changes to your router's settings, it's always best to consult the user manual or seek assistance from a knowledgeable professional.By following the steps outlined in this blog post, you can confidently locate and, if needed, change your router's IP address with ease.
In the realm of online anonymity and data access, residential proxies have become a crucial tool for individuals and businesses alike. They offer a unique advantage over traditional datacenter proxies by leveraging actual IP addresses assigned to residential internet connections, thereby mimicking natural browsing patterns and bypassing many geo-restrictions and anti-scraping measures. However, a common question that arises among potential users is: "Are residential proxies shared?" This article delves into the nature of residential proxy networks, exploring whether they are shared, the implications of sharing, and the alternatives available.Understanding Residential Proxy NetworksResidential proxies are typically sourced from a network of internet service providers (ISPs) that offer internet access to residential customers. These proxies are not dedicated servers housed in data centers but rather represent actual internet connections used by households and individuals. When a user employs a residential proxy, they are essentially borrowing the IP address and internet connection of a residential subscriber.Are Residential Proxies Shared?The answer to whether residential proxies are shared is nuanced and depends on the specific proxy provider and their service model.Shared Residential Proxies:Many residential proxy providers offer shared proxies, where multiple users share access to a pool of residential IPs. This model allows for cost-effective access to a large number of IPs, as the cost is shared among users. However, it also means that the same IP can be used by multiple users simultaneously or sequentially, potentially increasing the risk of detection or IP blocking if the proxy is overused or misused.Dedicated Residential Proxies:Alternatively, some providers offer dedicated residential proxies, where a single user has exclusive access to a specific IP address for a specified period. This approach minimizes the risk of overuse or misuse, as the user is solely responsible for the behavior associated with that IP. Dedicated proxies tend to be more expensive than shared proxies but offer greater control and security.Implications of Sharing Residential Proxies · Risk of Detection: Shared proxies increase the risk of detection, as multiple users' activities are associated with the same IP. This can lead to IP blocking, especially if the proxy is used for high-volume scraping or other activities that attract the attention of website administrators. · Performance Issues: Shared proxies can experience performance issues, such as slower speeds and increased latency, due to the simultaneous use by multiple users. · Security Concerns: Sharing proxies can also introduce security risks, as users' activities may be inadvertently linked to each other's, potentially exposing sensitive information or leading to reputational damage.Alternatives to Shared Residential Proxies · Dedicated Residential Proxies: As mentioned earlier, dedicated proxies offer a more secure and controlled environment, eliminating the risks associated with sharing. · Rotating Residential Proxies: Some providers offer rotating residential proxies, where IPs are automatically changed at regular intervals, reducing the risk of overuse and detection. · Hybrid Solutions: Some providers offer hybrid solutions that combine residential and datacenter proxies, allowing users to tailor their proxy needs based on the specific requirements of their tasks.ConclusionWhether residential proxies are shared depends on the service model offered by the proxy provider. While shared proxies offer cost-effective access to a large pool of IPs, they also come with risks of detection, performance issues, and security concerns. Dedicated proxies, rotating proxies, and hybrid solutions provide alternatives that offer greater control, security, and performance. Ultimately, the choice between shared and dedicated residential proxies should be based on the specific needs and risk tolerance of the user.
In the digital age, the Internet Protocol (IP) has become an integral part of how we connect to the internet. However, as internet users seek privacy, security, and access to restricted content, the concept of "IP jumping" has gained popularity. This article will delve into what IP jumping is, its benefits, methods to achieve it, and the potential risks involved.What is IP Jumping?IP jumping refers to the practice of changing or masking your IP address to appear as though you are accessing the internet from a different location. This can be done for various reasons, including bypassing geo-restrictions, enhancing online privacy, and evading censorship. When a user jumps their IP, they can access content that may be blocked in their region or protect their online activities from being tracked by third parties.Why Do People Use IP Jumping?1. Bypassing Geo-RestrictionsMany online services and platforms restrict content based on geographical location. For instance, streaming services like Netflix, Hulu, andBBC iPlayer offer different libraries of content depending on where you are accessing them from. By jumping their IP address, users can access content that is otherwise unavailable in their region.2. Enhancing Privacy and SecurityWith growing concerns about online privacy, many users opt to jump their IP address to protect their identity. By masking their real IP address, they make it more difficult for websites, advertisers, and even hackers to track their online activities. This can be particularly important for individuals who are concerned about government surveillance or data collection.3. Evading CensorshipIn some countries, governments impose strict censorship on the internet, blocking access to certain websites and services. IP jumping allows users in such regions to circumvent these restrictions and access the open internet.4. Avoiding Bandwidth ThrottlingSome internet service providers (ISPs) throttle bandwidth for specific activities, such as streaming or gaming. By changing their IP address, users may be able to avoid these restrictions and enjoy a smoother online experience.Methods of IP JumpingThere are several methods that individuals can use to jump their IP address. Each method has its own set of advantages and disadvantages.1. Virtual Private Network (VPN)A VPN is one of the most popular and effective methods for jumping an IP address. A VPN creates a secure connection between your device and a remote server, encrypting your internet traffic and masking your real IP address. By connecting to a server in a different location, you can appear to be accessing the internet from that location.Advantages:- Strong encryption for enhanced security.- Access to a wide range of servers in different countries.- Bypasses geo-restrictions effectively.Disadvantages:- May slow down internet speed due to encryption.- Some websites may block known VPN IP addresses.2. Proxy ServersA proxy server acts as an intermediary between your device and the internet. When you connect to a proxy, your requests are sent through the proxy server, which then accesses the internet on your behalf. This means your real IP address is hidden.Advantages:- Simple to set up and use.- Can be faster than a VPN, depending on the proxy.Disadvantages:- Generally less secure than VPNs.- Does not encrypt your traffic, making it vulnerable to interception.3. Tor NetworkThe Tor network is designed for anonymity and privacy. It routes your internet traffic through multiple volunteer-operated servers (nodes), making it extremely difficult to trace back to your original IP address.Advantages:- High level of anonymity.- Free to use.Disadvantages:- Significantly slower than VPNs or proxies.- Some websites may block Tor traffic.4. Public Wi-Fi NetworksUsing public Wi-Fi networks can also change your IP address, as you will be assigned an IP address from the network you are connected to. However, this method is not recommended for sensitive activities due to security risks.Advantages:- Easy and free access to different IPs.Disadvantages:- High risk of data theft and hacking.- Unreliable connection quality.Risks of IP JumpingWhile IP jumping can offer many benefits, it is essential to be aware of the potential risks involved.1. Legal ImplicationsIn some jurisdictions, using certain methods to change your IP address may violate local laws or terms of service agreements. Always ensure you understand the legal implications of IP jumping in your region.2. Security RisksNot all methods of IP jumping are secure. For instance, free proxy servers may log your data or inject ads into your browsing experience. It’s crucial to choose reputable services that prioritize user privacy.3. Data LossIf you are not careful when using public Wi-Fi or unsecured networks, you may expose yourself to data loss or theft. Always use encryption and avoid accessing sensitive information on such networks.4. Performance IssuesUsing VPNs or Tor can sometimes lead to slower internet speeds due to the extra layers of encryption and routing. This may affect your online activities, especially streaming or gaming.ConclusionIP jumping is a powerful tool for enhancing online privacy, bypassing geo-restrictions, and evading censorship. With various methods available, users can choose the one that best suits their needs, whether it be a VPN for security or a proxy for speed. However, it is essential to remain aware of the potential risks and legal implications associated with changing your IP address. By understanding these factors, you can make informed decisions about your online activities and enjoy a safer, more unrestricted internet experience.
SOCKS5 proxies are widely used for enhancing online privacy, bypassing geo-restrictions, and improving internet security. However, users may sometimes encounter issues when trying to connect to a SOCKS5 proxy server. This article aims to explore common reasons for connection failures, troubleshooting steps, and best practices to ensure a stable and secure SOCKS5 proxy connection.Understanding SOCKS5 ProxiesBefore diving into troubleshooting, it is essential to understand what a SOCKS5 proxy is and why it is used. SOCKS5 (Socket Secure version 5) is a network protocol that facilitates the transfer of data between a client and a server through a proxy server. Unlike HTTP proxies, which only handle web traffic, SOCKS5 can manage any type of traffic, including TCP and UDP. This flexibility makes it suitable for various applications, including web browsing, gaming, and file sharing.Benefits of Using SOCKS5 Proxies1. Anonymity: SOCKS5 proxies help mask your IP address, providing a layer of anonymity while browsing the internet.2. Bypassing Geo-Restrictions: Users can access content that may be blocked in their region by routing their connection through a server located in another country.3. Improved Security: SOCKS5 proxies can encrypt your data, offering enhanced security, especially on public Wi-Fi networks.4. Versatility: They support various protocols and applications, making them a versatile tool for internet users.Common Reasons for SOCKS5 Proxy Connection IssuesWhen you encounter problems connecting to a SOCKS5 proxy server, several factors could be at play. Here are some common reasons for connection failures:1. Incorrect Proxy SettingsOne of the most frequent causes of connection issues is incorrect proxy settings. Ensure that you have entered the correct IP address and port number for the SOCKS5 proxy server. Additionally, if the proxy requires authentication, verify that your username and password are correct.2. Firewall or Antivirus InterferenceFirewalls and antivirus software can sometimes block connections to proxy servers. Check your firewall settings to ensure that the necessary ports (typically 1080 for SOCKS5) are open. Similarly, your antivirus software may have settings that block proxy connections. Temporarily disabling these applications can help identify if they are the source of the issue.3. Server DowntimeThe SOCKS5 proxy server you are trying to connect to may be down or experiencing technical difficulties. To verify this, you can check the server status on the provider's website or contact their support team. If the server is indeed down, you may need to wait until it is back online or switch to a different server.4. Network IssuesNetwork problems can also prevent a successful connection to a SOCKS5 proxy server. This could be due to issues with your internet service provider (ISP), router configurations, or local network settings. Restarting your router or switching to a different network can sometimes resolve these issues.5. ISP BlockingSome ISPs may block access to proxy servers, particularly in regions where the use of proxies is restricted. If you suspect that your ISP is blocking the SOCKS5 connection, you may want to try using a VPN service, which can help bypass such restrictions.6. Outdated Client SoftwareIf you are using outdated software to connect to the SOCKS5 proxy, it may lead to compatibility issues. Ensure that you are using the latest version of your proxy client or application. Regular updates often include bug fixes and improvements that can enhance connectivity.Troubleshooting Steps for SOCKS5 Proxy Connection IssuesIf you are unable to connect to your SOCKS5 proxy server, follow these troubleshooting steps to identify and resolve the issue:Step 1: Verify Proxy Settings1. Check IP Address and Port: Ensure that you have entered the correct IP address and port number for the SOCKS5 proxy server.2. Authentication: If the proxy requires authentication, confirm that your username and password are correct.Step 2: Test the Proxy Server1. Use Online Tools: There are various online tools available that allow you to check the status of a SOCKS5 proxy server. You can use these tools to see if the server is up and running.2. Try a Different Proxy: If the current proxy server is not working, try connecting to a different SOCKS5 proxy server to see if the issue persists.Step 3: Check Firewall and Antivirus Settings1. Firewall Configuration: Access your firewall settings and ensure that the SOCKS5 port (typically 1080) is open. You may need to add an exception for your proxy client.2. Antivirus Settings: Temporarily disable your antivirus software to check if it is blocking the connection. If the connection works with the antivirus disabled, consider adding an exception for the proxy client.Step 4: Restart Your Network Devices1. Reboot Your Router: Power cycle your router by unplugging it for a few seconds and then plugging it back in. This can resolve temporary network issues.2. Reconnect to the Network: Disconnect and reconnect to your internet connection to refresh your network settings.Step 5: Check for ISP Restrictions1. Contact Your ISP: If you suspect that your ISP is blocking proxy connections, contact them for clarification. They may have policies in place that restrict the use of proxies.2. Use a VPN: If your ISP is blocking the SOCKS5 connection, consider using a VPN service that can help bypass these restrictions.Step 6: Update Your Proxy Client1. Check for Updates: Ensure that your proxy client or application is up to date. Visit the official website or app store to download the latest version.2. Reinstall the Client: If updating does not resolve the issue, consider uninstalling and reinstalling the proxy client.Step 7: Consult Support Resources1. Provider Support: If you continue to experience issues, reach out to your SOCKS5 proxy provider's support team. They can provide assistance and help troubleshoot the problem.2. Online Forums: Consider visiting online forums or communities related to proxy usage. Other users may have experienced similar issues and can offer solutions.Best Practices for Using SOCKS5 ProxiesTo ensure a smooth and reliable experience when using SOCKS5 proxies, consider the following best practices:1. Choose a Reliable ProviderSelect a reputable SOCKS5 proxy provider known for its reliability and performance. Research user reviews and check for uptime guarantees to ensure you are getting a quality service.2. Regularly Update Your SoftwareKeep your proxy client and any related software up to date to avoid compatibility issues and benefit from the latest features and security updates.3. Use Strong AuthenticationIf your SOCKS5 proxy supports authentication, always use strong, unique passwords to protect your proxy access.4. Monitor Connection PerformanceRegularly check your connection speed and stability when using a SOCKS5 proxy. If you notice significant slowdowns or interruptions, consider switching to a different server or provider.5. Be Aware of Legal ImplicationsUnderstand the legal implications of using proxies in your region. While proxies can provide anonymity, they should be used responsibly and in compliance with local laws and regulations.ConclusionEncountering connection issues with a SOCKS5 proxy server can be frustrating, but understanding the common causes and following systematic troubleshooting steps can help resolve the problem. By verifying your settings, checking for network issues, and consulting support resources, you can often restore your connection quickly. Remember to choose a reliable proxy provider, keep your software updated, and stay informed about the legal aspects of proxy usage to ensure a smooth and secure online experience.
In the digital age, data is being generated at an unprecedented rate. Big data refers to the massive volume of structured and unstructured data that is generated by individuals, organizations, and devices on a daily basis. Big data can come from various sources, including social media platforms, IoT devices, financial transactions, and more. It is a complex and dynamic phenomenon that requires specialized tools and techniques to manage and analyze.One of the challenges of big data is the sheer volume of information that needs to be processed. Traditional data analysis methods are often insufficient to handle such large datasets. Therefore, new technologies have emerged to deal with the complexities of big data, such as distributed computing, data mining, and machine learning.Proxies, on the other hand, are intermediaries between clients and servers that help to hide the client's IP address and protect their privacy. Proxies can be used for a variety of purposes, such as accessing content that is not available in certain regions, bypassing internet censorship, or protecting sensitive information from potential cyber attacks.So what do proxies have to do with big data? Proxies can play a crucial role in big data analysis by helping to manage the massive amounts of data that need to be processed. For instance, a proxy server can be used to distribute data processing tasks across multiple servers, reducing the load on any one server and improving overall performance.Another way proxies can help with big data analysis is by providing a layer of security. Since big data often contains sensitive information, it is important to protect it from unauthorized access. Proxies can be used to encrypt data transmissions and provide a secure tunnel for data to pass through, ensuring that sensitive information remains protected.Moreover, proxies can be used to collect data from different sources, especially from websites that use web scraping prevention techniques. Web scraping involves extracting data from websites using automated tools, which can be detected and blocked by websites to prevent unauthorized data collection. Proxies can help overcome these roadblocks by masking the IP address of the scraper, making it more difficult for websites to detect and block data collection.In conclusion, big data is a massive volume of data that requires specialized tools and techniques to manage and analyze. Proxies can play an important role in big data analysis by helping to manage data processing tasks, providing a layer of security, and enabling data collection from various sources. With the right tools and techniques, big data can provide valuable insights that can be used to drive business decisions and innovation.
Are you tired of encountering restrictions and limitations while browsing the internet? Do you wish to access blocked websites and content without revealing your identity? If so, web proxies are the solution you've been looking for. In this blog post, we will explore the best web proxies available and how they can enhance your online experience.What are Web Proxies?Web proxies act as intermediaries between your device and the internet. When you use a web proxy, your internet traffic is routed through a separate server before reaching its destination. This server can be located in a different geographical location, allowing you to bypass regional restrictions and access content that may be blocked in your area.Web proxies also provide anonymity by masking your IP address. This means that websites and online services cannot trace your online activity back to your device, ensuring your privacy and security while browsing the web.How to Use Web ProxiesUsing web proxies is simple and straightforward. Most web proxy services require you to visit their website and enter the URL of the website you wish to access anonymously. Once you submit the URL, the web proxy will fetch the content from the website and display it to you without revealing your IP address.Some web proxies also offer browser extensions or add-ons, allowing you to enable proxy services directly from your web browser. This streamlines the process of accessing blocked content and ensures that all your internet traffic is routed through the proxy server.Benefits of Using Web Proxies1. Access Blocked Content: Web proxies enable you to bypass censorship and access websites and content that may be restricted in your region.2. Anonymity: By masking your IP address, web proxies protect your identity and online activity from being tracked by websites and online services.3. Security: Many web proxies offer encryption and secure connections, safeguarding your data and personal information from potential threats.4. Bypass Restrictions: Whether it's a workplace or school network, web proxies allow you to bypass network restrictions and access the content of your choice.5. Privacy: Using a web proxy ensures that your online behavior remains private, giving you peace of mind while browsing the internet.In conclusion, web proxies are valuable tools for anyone seeking unrestricted and anonymous access to the internet. By utilizing the best web proxies available, you can enjoy a seamless browsing experience while safeguarding your privacy and security. Whether you're looking to bypass regional restrictions or protect your online identity, web proxies offer a reliable solution for enhancing your online activities.