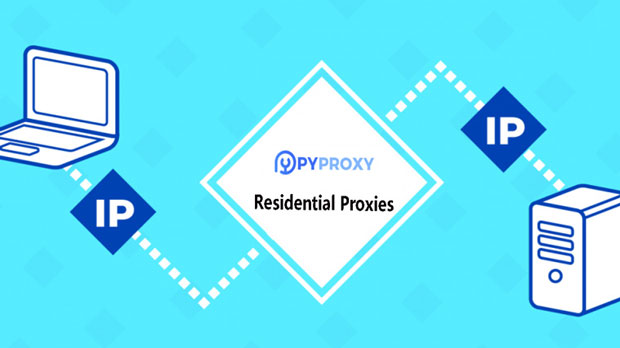
In the digital age, WiFi has become an integral part of our daily lives, enabling us to stay connected to the internet almost anywhere. However, there are times when we need to configure our devices to use a proxy server for various reasons, such as accessing blocked content, enhancing security, or managing network traffic. This article will discuss the basics of WiFi proxy addresses and ports, their significance, and how to configure them on your devices.What Are Proxy Addresses and Ports?A proxy server is an intermediary server that sits between your device and the internet. It forwards requests from your device to the internet and returns the responses back to you. A proxy address is the IP address of the proxy server, while the port is the specific entry point on that server for the desired service or application.Why Use a Proxy?There are several reasons why you might want to use a proxy server:Access Blocked Content: Some websites or services may be blocked in your region. Using a proxy server located in a different country can help you access those blocked resources.Enhance Security: Proxies can help protect your online privacy by hiding your IP address and encrypting your internet traffic. This makes it harder for hackers or government agencies to track your online activities.Manage Network Traffic: Proxies can be used to cache frequently accessed web pages, reducing bandwidth usage and improving overall network performance.Configuring WiFi Proxy SettingsThe process of configuring WiFi proxy settings varies depending on the operating system and device you are using. However, the general steps are similar across most platforms:Access Network Settings: Open the network settings on your device and locate the WiFi section.Select Your WiFi Network: Tap or click on the WiFi network you are currently connected to.Access Advanced Settings: Look for an option to access the advanced settings or network properties of your WiFi connection.Configure Proxy Settings: Under the advanced settings, you will find options to configure the proxy server. Enter the proxy address (IP address) and port number provided by your proxy service. If your proxy requires authentication, you may also need to enter your username and password.Save and Apply Settings: Save your changes and apply the new proxy settings.Note: Before configuring any proxy settings, it's important to ensure that you trust the proxy service you are using. Using an untrusted proxy server can pose security risks and compromise your online privacy.Understanding WiFi proxy addresses and ports is crucial for anyone who wants to configure their devices to use a proxy server. Whether you want to access blocked content, enhance your online security, or manage network traffic, proxies can be a valuable tool. Just remember to use a trusted proxy service and follow the steps outlined in this article to configure your WiFi proxy settings correctly.
In today's digital world, WhatsApp has become an integral part of our daily communication. However, due to various reasons such as geographical restrictions or privacy concerns, sometimes we need to use a proxy server to access it. In this article, we will explore the steps involved in setting up a proxy for WhatsApp on your device.First and foremost, it's important to understand that using a proxy server involves certain risks. Therefore, it's crucial to ensure that you are doing so legally and ethically. Make sure to check your country's laws and regulations regarding proxy usage before proceeding further.Now let's move on to the actual process of setting up a proxy for WhatsApp. The first step is selecting a suitable proxy server. There are numerous proxy servers available online, but not all of them may be suitable for WhatsApp. It's recommended to choose a reliable and secure proxy server that offers good speed and anonymity options.Once you have selected a proxy server, the next step is configuring it on your device. This process may vary depending on the type of device you are using (iOS, Android, Windows, etc.). Generally speaking, you would need to go into your device's network settings and configure the proxy server details there. This usually involves entering the proxy server's IP address and port number along with any required authentication details.After configuring the proxy server, you should test its functionality by trying to access WhatsApp through it. If everything is set up correctly, you should be able to successfully log in to WhatsApp using the proxy server without any issues. However, if you encounter any problems such as connection failures or slow speeds, it might be necessary to troubleshoot the issue by checking your proxy server settings or contacting customer support for assistance.It's also worth noting that using a proxy server can affect your overall internet speed and performance since traffic needs to pass through an additional server between your device and the internet. Therefore, it's important to weigh up the pros and cons of using a proxy server before making a decision about whether or not it's right for you.Overall, setting up a proxy server for WhatsApp is not a complex task provided you follow the correct steps and have access to appropriate resources. Just make sure to always act within legal boundaries when utilizing such services to ensure both your safety and compliance with relevant regulations.
In today's digital age, proxy servers play a crucial role in enhancing the security, privacy, and anonymity of users while accessing the internet. However, sometimes, these servers can encounter various issues, including errors related to their configuration or incorrect addresses, which can significantly impact the user experience.A proxy server acts as an intermediary between a user's device and the internet, facilitating the flow of information. It masks the user's IP address, preventing direct exposure to potential threats and malicious activities. Additionally, proxies can help bypass geolocation restrictions, allowing users to access content that may be blocked in their region.However, when a proxy server encounters a problem, it can become a hindrance rather than a help. One common issue is incorrect configuration, which can lead to connectivity issues and failed requests. This can be caused by a misconfigured proxy address, port number, or authentication settings. To resolve this, users need to ensure that all the necessary details, such as the proxy's IP address and port, are entered correctly.Another common problem is the use of an outdated or unreliable proxy server. These servers may be slow, unstable, or even infected with malware, resulting in sluggish internet speeds, frequent disconnections, and potential security risks. It is essential to use trusted and up-to-date proxy servers to ensure a smooth and secure browsing experience.Incorrect addresses are also a significant issue when dealing with proxy servers. Typographical errors, outdated information, or simply entering the wrong address can lead to connection failures and errors. To avoid this, users should always double-check the proxy address they are using and ensure it is accurate and up-to-date.When encountering issues with proxy servers, it is essential to troubleshoot the problem effectively. Users can start by checking their network connection and ensuring that their device is properly connected to the internet. If the connection is stable, they should then verify the proxy settings on their device, ensuring that all the necessary details are entered correctly.If the problem persists, users may need to consider alternative options. This could include switching to a different proxy server, using a VPN (Virtual Private Network), or contacting the network administrator for assistance. It is also worth noting that some websites and services may block access from known proxy servers, so users should be aware of this and take appropriate measures.In conclusion, while proxy servers provide numerous benefits, they can also encounter issues that can impact the user experience. By understanding the common problems associated with proxy servers and taking appropriate measures to troubleshoot and resolve them, users can ensure a smooth and secure browsing experience.
In the age of digitization and connectivity, the SIM card has become an integral part of our daily lives. It is a small, removable chip that stores critical information about a mobile device and its subscriber. One of the lesser-known yet equally significant features of a SIM card is its ability to provide IP address information. This article explores the intricacies of SIM card IP address lookup, its applications, and why it's essential in today's world.What Is a SIM Card?A Subscriber Identity Module (SIM) card is a smart card that securely stores the international mobile subscriber identity (IMSI), its related key, and the network authentication information of the mobile phone user. It's inserted into a mobile device, allowing it to connect to a cellular network and access various services.What Is an IP Address?An Internet Protocol (IP) address is a numerical label that identifies each device connected to a computer network that uses the Internet Protocol for communication. It serves as a unique identifier, allowing devices to communicate with each other over the internet.Linking SIM Cards and IP AddressesWhen a mobile device with a SIM card is connected to the internet, it's assigned an IP address by the network service provider. This IP address is dynamic, meaning it can change over time, depending on various factors like the device's location or the network it's connected to.SIM card IP address lookup refers to the process of determining the IP address associated with a particular SIM card. This information can be retrieved by the network operator or authorized third-party services.Applications of SIM Card IP Address LookupSecurity and Fraud Detection: By tracking the IP addresses associated with a SIM card, network operators can detect suspicious activities like fraud or unauthorized access. This helps in preventing security breaches and protecting subscribers' data.Location-Based Services: IP addresses can provide an approximate geographical location of a mobile device. This information can be used to provide location-based services like weather updates, nearby restaurants, or emergency assistance.Network Optimization: Understanding the IP addresses used by subscribers can help network operators optimize their network infrastructure. They can identify areas of congestion and take measures to improve coverage and speed.Compliance and Regulatory Requirements: In some jurisdictions, service providers are required to retain IP address information for compliance with laws and regulations. SIM card IP address lookup helps in fulfilling these obligations.Importance of SIM Card IP Address LookupThe ability to lookup IP addresses associated with SIM cards is crucial in today's digital world. It not only enhances the security of mobile devices and networks but also enables the provision of personalized and location-based services. Furthermore, it aids in network optimization and compliance with regulatory requirements.In conclusion, SIM card IP address lookup is a valuable tool that enables network operators and authorized third-party services to gain insights into the connectivity patterns and activities of mobile subscribers. It's essential for maintaining network security, providing enhanced services, and fulfilling regulatory obligations.
In today's digital age, the internet has become an integral part of our daily lives. However, there are times when we need to bypass network restrictions or enhance our online privacy by using a proxy server. A proxy server acts as an intermediary between your device and the internet, routing your requests through a different IP address. Here's a step-by-step guide on how to set up a proxy on your laptop.Understanding Proxy ServersBefore we dive into the steps, let's briefly understand what a proxy server is. A proxy server is a computer or system that sits between your computer and the internet. It receives requests from your computer, forwards them to the internet, and then sends the responses back to your computer. By routing your internet traffic through a proxy server, you can hide your IP address, access geo-blocked content, or bypass network restrictions.Steps to Set Up a Proxy on a LaptopThe steps to set up a proxy on a laptop vary depending on the operating system you're using. Here, we'll provide instructions for Windows and macOS, as they are the most common operating systems.For Windows:Open the Settings App: Click on the Start button and select the Settings icon (it looks like a gear).Navigate to Network & Internet: In the Settings window, click on "Network & Internet."Select Proxy: In the left-hand menu, scroll down and click on "Proxy."Enable Proxy: Under "Manual proxy setup," toggle the "Use a proxy server" switch to "On."Enter Proxy Details: In the fields provided, enter the address and port of your proxy server. If you need to bypass the proxy for certain addresses or domains, you can configure those settings as well.Save Changes: Click on the "Save" button to apply the changes.For macOS:Open System Preferences: Click on the Apple logo in the menu bar and select "System Preferences."Select Network: In the System Preferences window, click on "Network."Select Your Connection: In the left-hand sidebar, select the network connection you want to configure (e.g., Wi-Fi or Ethernet).Click on Advanced: In the right-hand pane, click on the "Advanced" button.Select Proxies: In the Advanced window, click on the "Proxies" tab.Configure Proxy Settings: Select the services you want to use a proxy for (e.g., Web Proxy or Secure Web Proxy) and enter the address and port of your proxy server.Apply Changes: Click on the "OK" button to save the changes and close the Advanced window. Then, click on "Apply" in the Network window to apply the proxy settings.Tips and ConsiderationsSecurity: Make sure you trust the proxy server you're using. Using an untrusted proxy can compromise your privacy and security.Performance: Proxy servers can slow down your internet connection, especially if they're located far away from your physical location. Choose a proxy server that's close to you for better performance.Bypassing Restrictions: If you're using a proxy to bypass network restrictions, be aware that some networks may detect and block proxy usage.In conclusion, setting up a proxy on your laptop can help you bypass network restrictions, enhance your online privacy, or access geo-blocked content. By following the steps outlined in this article, you can easily configure a proxy server on your Windows or macOS laptop. Remember to choose a trusted proxy server and consider its location for optimal performance.
In today's interconnected world, understanding how your devices communicate on the internet is crucial. One of the fundamental concepts in networking is the IP address, which stands for Internet Protocol address. It is a unique identifier for each device connected to the internet or a local network. This article will guide you through the steps to check your laptop's IP address, explain its importance, and discuss some common scenarios where knowing your IP address comes in handy.Why is an IP Address Important?An IP address is essential because it allows devices to communicate with each other over the internet. It works as a postal address for your device, ensuring that data packets are delivered to the correct destination. Whether you're browsing the web, sending an email, or streaming a video, your laptop's IP address plays a crucial role in facilitating these communications.Steps to Check Your Laptop's IP AddressThere are several ways to check your laptop's IP address, depending on your operating system. Here are the steps for the most common operating systems:For Windows:Open the Command Prompt. You can do this by searching for "cmd" in the Start menu or pressing the Windows key + R, typing "cmd," and pressing Enter.Once the Command Prompt window opens, type "ipconfig" and press Enter.Look for the line that starts with "IPv4 Address." The number next to it is your laptop's IP address.For macOS:Open the Terminal application. You can find it in the Applications folder under Utilities.Type "ifconfig" (without quotes) and press Enter.Look for the line that starts with "inet " under the section for your network interface (usually "en0" for Wi-Fi or "eth0" for Ethernet). The number next to "inet " is your laptop's IP address.For Linux:Open a Terminal window.Type "ifconfig" or "ip addr" (depending on your Linux distribution) and press Enter.Find the section for your network interface (e.g., "wlan0" for Wi-Fi or "eth0" for Ethernet). Look for the line that starts with "inet " or "inet6 " (for IPv6 addresses). The number next to it is your laptop's IP address.Common Scenarios Where Knowing Your IP Address Comes in HandyTroubleshooting Network Issues: If you're experiencing connectivity problems, knowing your IP address can help you determine whether the issue is with your device, your network, or your internet service provider.Remote Access: If you need to access your laptop remotely, such as using a virtual private network (VPN) or remote desktop software, you'll often need to know your laptop's IP address to establish the connection.Sharing Files or Printers: When setting up a network to share files or printers, knowing the IP addresses of the devices involved can help you configure the sharing options correctly.Security and Privacy: In some cases, knowing your public IP address can help you protect your privacy by identifying potential security threats or unauthorized access attempts.In conclusion, checking your laptop's IP address is a simple but essential task that can help you troubleshoot network issues, set up remote access, share files and printers, and protect your privacy. By following the steps outlined in this article, you can easily find your laptop's IP address and utilize it in various scenarios.
MySQL Proxy is a lightweight middleware that sits between the client and the MySQL server, allowing you to intercept, inspect, and modify the communication between them. It's often used for load balancing, query filtering, or as a gateway for security and access control. Here's a guide on how to configure MySQL Proxy for basic usage.1. Installing MySQL ProxyBefore you can configure MySQL Proxy, you need to have it installed on your system. The installation process varies depending on your operating system. For Linux distributions, you can often find MySQL Proxy in the package repositories or download it from the MySQL website.Once downloaded, you'll need to compile and install MySQL Proxy from source if you're using a tarball. Follow the instructions provided in the official documentation.2. Creating the Configuration FileMySQL Proxy uses a Lua script as its configuration file. This script defines the behavior of the proxy, including which servers it should route queries to, any query rewriting rules, and any other advanced functionality.A basic configuration file might look like this:lua-- Proxy definitionproxy.global_proxy_read_only = falseproxy.connect_backend_timeout = 4000proxy.lua_script = "proxy.lua"-- Backend serversproxy.servers = {{ address = "127.0.0.1", port = 3306 },{ address = "192.168.1.100", port = 3306 }}-- Default routing ruleproxy.default_query_rules = {{ rule = "proxy.tables.is_master()" }}In this example, the proxy is configured to connect to two backend MySQL servers. The proxy.default_query_rules section defines the default routing behavior, which in this case is to send all queries to the master server (assuming you have a Lua script named proxy.lua that defines the is_master function).3. Writing Lua ScriptsMySQL Proxy's flexibility comes from its ability to execute Lua scripts that can inspect and modify queries. You can write Lua scripts to implement complex routing logic, query rewriting, or even custom authentication mechanisms.The proxy.lua script in the example above would need to define the is_master function to determine which server is the master. This function would typically inspect the query or use some other logic to make the decision.4. Starting MySQL ProxyOnce you have your configuration file and any necessary Lua scripts in place, you can start MySQL Proxy by passing the configuration file as an argument:bashmysql-proxy --proxy-address=127.0.0.1:4040 --proxy-backend-addresses=127.0.0.1:3306 --proxy-lua-script=/path/to/your/proxy.luaIn this command, --proxy-address specifies the address and port that MySQL Proxy should listen on, and --proxy-backend-addresses lists the addresses of the backend MySQL servers. --proxy-lua-script points to your Lua script.5. Testing the ConfigurationAfter starting MySQL Proxy, you can test your configuration by connecting to it using a MySQL client and executing some queries. You should see the queries being routed to the appropriate backend server based on your Lua script and configuration file.6. Monitoring and TroubleshootingMySQL Proxy provides various logging and monitoring options to help you troubleshoot issues. You can configure MySQL Proxy to log queries, errors, and other events to a file or send them to a remote logging system.Additionally, you can use tools like mysql-proxy-admin to inspect the status of MySQL Proxy and its backends. This can be helpful for monitoring performance, identifying bottlenecks, and debugging problems.Remember to consult the official MySQL Proxy documentation for more detailed information on configuring and using MySQL Proxy, as well as examples of Lua scripts and advanced configuration options.
In today's interconnected world, having a reliable and secure IP address for your Windows 10 computer is crucial. Whether you're setting up a home network, connecting to a public Wi-Fi, or working in a corporate environment, knowing how to change your IP address can be a useful skill. Here's a step-by-step guide on how to change the IP address on your Windows 10 computer.Understanding IP AddressesBefore we dive into the steps, let's briefly discuss what an IP address is. An IP address (Internet Protocol address) is a unique numerical label assigned to each device connected to a computer network. It allows devices to communicate with each other over the internet. IP addresses can be either public or private, and they can be static (fixed) or dynamic (changing).Reasons to Change Your IP AddressThere are several reasons why you might want to change your IP address:Security: Changing your IP address can help protect your privacy and anonymity on the internet.Troubleshooting: Sometimes, changing your IP address can help resolve network issues or connectivity problems.Access to Specific Services: Some services or websites may restrict access based on IP address. Changing your IP address can allow you to access these services.Steps to Change the IP Address on Windows 10Open Network and Internet SettingsPress the Windows key + I to open the Settings app.Click on "Network & Internet."Select Your Network ConnectionIn the left pane, click on "Status."Under the "Change your network settings" section, click on "Change adapter options."Right-click on the network connection you want to modify (e.g., Wi-Fi or Ethernet) and select "Properties."Configure IPv4 SettingsIn the list of items, scroll down and find "Internet Protocol Version 4 (TCP/IPv4)."Select it and click on the "Properties" button.Change the IP AddressIf you want to use a static IP address, select "Use the following IP address" and enter the desired IP address, subnet mask, default gateway, and DNS server settings.If you want to use a dynamic IP address (assigned by a DHCP server), select "Obtain an IP address automatically" and "Obtain DNS server address automatically."Click "OK" to save the changes.Restart Your Computer (Optional)Restarting your computer is not always necessary, but it can help ensure that the new IP address settings are properly applied.Things to ConsiderPermissions: You may need administrative privileges to change IP address settings.Impact on Other Devices: Changing the IP address on your computer may affect other devices on the network, so be sure to understand the potential implications.Static vs. Dynamic: Unless you have a specific reason to use a static IP address, it's generally recommended to use a dynamic IP address assigned by a DHCP server.Changing the IP address on your Windows 10 computer can be a useful skill for various reasons, including security, troubleshooting, and accessing specific services. By following the steps outlined in this article, you can easily modify the IP address settings on your computer to meet your needs. Remember to consider the potential implications of changing your IP address and ensure that you have the necessary permissions to make the changes.
In the digital age, an IP address is as essential as a postal address in the physical world. It's the unique identifier that allows devices to communicate with each other over the internet. Understanding how to obtain an IP address and its importance is crucial for anyone who uses the internet. Here's a guide on obtaining an IP address online.What is an IP Address?An IP address, short for Internet Protocol address, is a numerical label assigned to each device connected to a computer network that uses the Internet Protocol for communication. It serves as the device's unique identifier on the network, allowing it to send and receive data packets.Types of IP AddressesThere are two main types of IP addresses: IPv4 and IPv6. IPv4, the older version, uses a 32-bit numerical address system, while IPv6, the newer version, uses a 128-bit system. IPv6 was developed to address the limitations of IPv4, such as the exhaustion of available addresses. Most modern devices and networks now support both versions.How to Obtain an IP Address· Automatic Configuration (DHCP): The most common way to obtain an IP address is through Dynamic Host Configuration Protocol (DHCP). When a device connects to a network, it sends a request to the DHCP server for an IP address. The server then assigns an available IP address to the device, along with other network configuration settings.· Manual Configuration: In some cases, you may need to manually configure an IP address on a device. This is typically done by accessing the device's network settings and entering the desired IP address, subnet mask, gateway, and DNS server information. However, manual configuration is generally not recommended unless you have a specific reason for doing so, as it can lead to configuration errors and network issues.· Public vs. Private IP Addresses: It's important to note that the IP address you obtain may be either public or private. Public IP addresses are unique and assigned by Internet Service Providers (ISPs) to identify devices on the internet. Private IP addresses, on the other hand, are used within a local network and are not routable on the internet. Most home and small office networks use private IP addresses, with a router handling the translation between private and public IP addresses.Why Do You Need an IP Address?An IP address is essential for any device that needs to communicate over the internet. It allows devices to identify each other and establish connections, enabling a wide range of online activities, from browsing the web to streaming media and playing online games. Without an IP address, devices would be unable to interact with each other on the internet.Obtaining an IP address is a fundamental step in connecting to the internet. Whether it's through automatic configuration or manual setup, having a valid IP address is crucial for any device that wishes to communicate over the internet. Understanding the types of IP addresses and how they work can help you troubleshoot network issues and ensure smooth online connectivity.
In today's digital world, where every click and connection leaves a digital footprint, hiding your IP address has become a crucial aspect of maintaining online privacy and security. Your IP address is a unique identifier that reveals your approximate location and can be used to track your online activities. Here's a guide on how to effectively hide your IP address while browsing the internet.Understanding the Importance of Hiding Your IPYour IP address is essentially your digital fingerprint. It's how websites, servers, and other online services identify your device and your connection to the internet. However, this information can also be used by advertisers, hackers, or government agencies to track your online behavior, leaving you vulnerable to privacy breaches and cyberattacks.Using a VPN (Virtual Private Network)One of the most effective ways to hide your IP address is by using a VPN. A VPN encrypts your internet traffic and routes it through a secure server, masking your true IP address and making it appear as if you're connecting from a different location. This not only hides your IP but also enhances your overall online privacy and security.When choosing a VPN, ensure it has a strong reputation, offers robust encryption protocols, and doesn't log or store your data. Additionally, look for a VPN that provides servers in multiple locations, allowing you to choose the most suitable one based on your needs.Utilizing Proxy ServersProxy servers can also be used to hide your IP address. They act as intermediaries between your device and the internet, forwarding your requests and responses while concealing your true IP. However, proxies are generally less secure than VPNs and may not encrypt your traffic.When using a proxy server, ensure it's reliable and trustworthy. Free proxies, especially, should be avoided as they may be compromised or used for malicious purposes.Tor NetworkThe Tor network is a volunteer-operated system that enables anonymous communication online. It routes your traffic through a series of relays, encrypting it at each step and making it difficult to trace back to your original IP address. Tor offers a high level of anonymity but can be slower than other methods due to its complex routing process.Avoiding Public Wi-FiConnecting to public Wi-Fi networks can be risky as they often lack proper security measures. Using public Wi-Fi can expose your IP address and other sensitive information, making you vulnerable to cyberattacks. Whenever possible, avoid connecting to public Wi-Fi and opt for a secure, private connection instead.Hiding your IP address is an important step in protecting your online privacy and security. By using a VPN, proxy server, or Tor network, you can effectively mask your IP and reduce the risk of being tracked or targeted online. Remember to stay vigilant and exercise caution when connecting to the internet, especially when using public networks or accessing sensitive information.