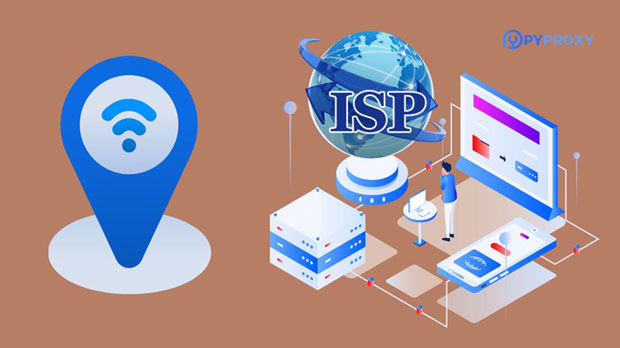
In an increasingly connected world, having a reliable and accessible network is essential for both personal and professional use. One way to enhance your home network's capabilities is by purchasing a public IP address. This article will guide you through the process of acquiring a public IP, configuring it, and exploring its applications.Understanding Public vs. Private IP AddressesBefore diving into the specifics of purchasing a public IP address, it's important to understand the difference between public and private IP addresses.- Public IP Address: This is an IP address that is accessible over the internet. It is assigned by your Internet Service Provider (ISP) and can be reached from any device connected to the internet. Public IPs are unique across the entire internet.- Private IP Address: These addresses are used within a local network and are not routable on the internet. Common private IP address ranges include `192.168.x.x`, `10.x.x.x`, and `172.16.x.x` to `172.31.x.x`. Devices within a private network communicate with each other using these addresses, but they need a public IP to communicate with the outside world.Why Purchase a Public IP Address?There are several reasons why you might want to purchase a public IP address for your home network:1. Remote Access: A public IP allows you to access your home network remotely, making it easier to manage devices, access files, or run applications that require external access.2. Hosting Services: If you want to host a website, game server, or any other service that needs to be accessible over the internet, a public IP is essential.3. Improved Stability: Static public IPs provide a consistent address for remote access, unlike dynamic IPs, which can change frequently.4. Enhanced Security: With a public IP, you can set up firewalls and other security measures to control access to your network.How to Purchase a Public IP AddressStep 1: Contact Your ISPThe first step in acquiring a public IP address is to contact your Internet Service Provider. Most ISPs offer the option of obtaining a public IP, but the availability and pricing may vary.1. Inquire About Options: Ask your ISP if they provide public IP addresses and whether they offer static or dynamic options. Static IPs are generally more expensive but provide greater stability.2. Understand the Costs: Be sure to inquire about any associated costs, including installation fees, monthly charges, and whether there are any contracts involved.Step 2: Complete the PurchaseOnce you’ve gathered all the necessary information, you can proceed to purchase the public IP address. This usually involves signing a service agreement and possibly configuring your router.Step 3: Configure Your NetworkAfter acquiring the public IP address, you will need to configure your home network to utilize it effectively.1. Access Your RouterLog into your router’s web interface. This is typically done by entering the router's IP address (often `192.168.1.1` or `192.168.0.1`) into your web browser. Enter the admin credentials to access the settings.2. Configure Internet SettingsNavigate to the WAN (Wide Area Network) settings. Here, you will need to:- Set Connection Type: Choose the type of connection your ISP uses (usually DHCP or Static). If you purchased a static public IP, select the static option.- Enter Public IP Details: If using a static IP, input the public IP address, subnet mask, gateway, and DNS servers provided by your ISP.3. Configure NAT (Network Address Translation)If you are using multiple devices within your home network, you will need to set up NAT to allow these devices to share the public IP address while maintaining their private IP addresses.- Enable NAT: Most routers have NAT enabled by default. Ensure that it is active in your router settings.- Port Forwarding: If you plan to host services (like a web server or game server), you will need to set up port forwarding. This directs traffic from the public IP to the specific internal IP and port of the device hosting the service.4. Save and RebootAfter making the necessary changes, save the settings and reboot your router to apply the new configuration.Applications of a Public IP AddressOnce your public IP address is configured, you can explore various applications:1. Remote AccessWith a public IP, you can access your home network remotely using tools like:- Remote Desktop Protocol (RDP): For accessing Windows machines.- SSH (Secure Shell): For accessing Linux servers.- VPN (Virtual Private Network): To securely connect to your home network from anywhere.2. Hosting ServicesA public IP allows you to host various services, such as:- Web Hosting: Run your own website using software like Apache or Nginx.- Game Servers: Host multiplayer games for friends or the public.- File Servers: Set up a file-sharing service using FTP or cloud solutions.3. Surveillance SystemsIf you have security cameras, a public IP allows you to access the camera feeds remotely. You can monitor your home from anywhere in the world.4. Smart Home DevicesMany smart home devices require remote access. A public IP allows you to manage these devices, such as smart thermostats, lights, and security systems, from outside your home network.Security ConsiderationsWhile having a public IP address offers many advantages, it also comes with security risks. Here are some tips to enhance your security:1. Use Strong Passwords: Ensure all devices connected to your network have strong, unique passwords.2. Enable Firewall: Most routers come with a built-in firewall. Make sure it is enabled to protect against unauthorized access.3. Regularly Update Firmware: Keep your router and connected devices updated to protect against vulnerabilities.4. Consider a VPN: Using a VPN can add an extra layer of security, especially when accessing your network remotely.5. Monitor Network Traffic: Regularly check your network for any suspicious activity.ConclusionPurchasing a public IP address can significantly enhance your home network's capabilities, allowing for remote access, hosting services, and improved connectivity for smart devices. By following the steps outlined in this article, you can successfully acquire and configure a public IP address for your home network. Always remember to prioritize security to protect your network and connected devices from potential threats. With the right setup, you can enjoy a more robust and versatile home network.
OpenWrt is a powerful, open-source router firmware that provides advanced features and flexibility, making it a popular choice for tech enthusiasts and network administrators. One of the many applications you can run on OpenWrt is Shadowsocks, a secure proxy protocol designed to protect privacy and circumvent internet censorship. This article will guide you through the process of installing and configuring a Shadowsocks server on OpenWrt.PrerequisitesBefore we start, ensure you have the following:1. OpenWrt Installed: Make sure your router is running OpenWrt. You can check this by accessing the router's web interface, usually at `192.168.1.1`.2. Internet Connection: Your router should be connected to the internet.3. Basic Knowledge of SSH: Familiarity with the command line and SSH will be beneficial.Step 1: Accessing Your Router1. Connect to Your Router: Use an SSH client (like PuTTY for Windows or Terminal for macOS/Linux) to connect to your router. The command is as follows:```bashssh root@192.168.1.1```Replace `192.168.1.1` with your router's IP address if it's different.2. Log In: Enter your password when prompted. If you haven't changed it, the default password is usually empty.Step 2: Updating Package ListsBefore installing any new packages, it's a good practice to update the package lists:```bashopkg update```This command fetches the latest package information from the OpenWrt repositories.Step 3: Installing ShadowsocksOpenWrt supports Shadowsocks through various packages. You can choose between Shadowsocks-libev and ShadowsocksR. Here, we will install Shadowsocks-libev, which is lightweight and efficient.1. Install Shadowsocks-libev:```bashopkg install shadowsocks-libev-server```2. Install Additional Dependencies (if necessary):You might need to install additional packages for DNS resolution and other functionalities:```bashopkg install dnsmasq-full```Step 4: Configuring ShadowsocksAfter installation, you need to configure Shadowsocks. The configuration file is typically located at `/etc/shadowsocks-libev/config.json`. You can create or edit this file using a text editor like `vi` or `nano`.1. Create/Edit the Configuration File:```bashvi /etc/shadowsocks-libev/config.json```If you prefer `nano`, install it first:```bashopkg install nano```Then open the file:```bashnano /etc/shadowsocks-libev/config.json```2. Add Configuration Settings: Here’s a sample configuration:```json{"server": "0.0.0.0","server_port": 8388,"local_address": "127.0.0.1","local_port": 1080,"password": "your_password","timeout": 300,"method": "aes-256-gcm","fast_open": false}```- server: Set to `0.0.0.0` to listen on all interfaces.- server_port: Choose a port (e.g., `8388`).- password: Set a strong password for your Shadowsocks server.- method: Choose an encryption method (e.g., `aes-256-gcm`).3. Save and Exit: If using `vi`, press `Esc`, type `:wq`, and hit `Enter`. If using `nano`, press `Ctrl + X`, then `Y`, and `Enter` to save.Step 5: Starting the Shadowsocks ServerNow that you have configured Shadowsocks, you can start the server:```bash/etc/init.d/shadowsocks-libev-server start```To ensure that Shadowsocks starts automatically on boot, run:```bash/etc/init.d/shadowsocks-libev-server enable```Step 6: Configuring Firewall RulesYou need to ensure that your router's firewall allows traffic on the Shadowsocks port. By default, OpenWrt uses `iptables` for firewall management.1. Open Firewall Configuration:```bashvi /etc/config/firewall```2. Add a New Rule: Add the following lines to allow traffic on the Shadowsocks port:```plaintextconfig ruleoption src 'wan'option target 'ACCEPT'option proto 'tcp'option dest_port '8388'option name 'Allow Shadowsocks'```Adjust the `dest_port` if you chose a different port in the configuration.3. Save and Exit: Save the changes as before.4. Restart the Firewall:```bash/etc/init.d/firewall restart```Step 7: Testing the Shadowsocks ServerTo test if your Shadowsocks server is working correctly, you can use a Shadowsocks client on your device (Windows, macOS, Android, or iOS).1. Download a Shadowsocks Client: Choose a client suitable for your platform. For example, you can use Shadowsocks for Windows or Shadowsocks for Android.2. Configure the Client:- Server Address: Enter your router's public IP address.- Server Port: Use the port you set in the configuration (e.g., `8388`).- Password: Use the password set in the configuration.- Encryption Method: Match the method used in the server configuration (e.g., `aes-256-gcm`).3. Connect: Start the Shadowsocks client and connect to the server. If everything is set up correctly, you should be able to access blocked content and enjoy a secure connection.Step 8: Monitoring and MaintenanceAfter installation, it’s essential to monitor your Shadowsocks server for performance and security:1. Check Logs: You can view the logs to troubleshoot any issues:```bashlogread | grep shadowsocks```2. Update Regularly: Keep your OpenWrt firmware and Shadowsocks packages updated to ensure security and stability.3. Change Passwords Regularly: To maintain security, change your Shadowsocks password periodically.ConclusionInstalling a Shadowsocks server on OpenWrt is a straightforward process that enhances your internet privacy and allows you to bypass restrictions. With the steps outlined in this article, you can set up your own Shadowsocks server and enjoy secure browsing from any connected device. Always remember to keep your server updated and monitor its performance for the best experience.
In today’s digital landscape, ensuring that servers are operating smoothly is critical for businesses and organizations. Network issues can lead to downtime, lost revenue, and frustrated users. Therefore, understanding how to check if a server has network problems is essential for system administrators and IT professionals. This article will explore various methods and tools to diagnose network issues effectively.Understanding Network IssuesNetwork issues can manifest in various forms, including:- Latency: High latency can cause delays in data transmission, leading to slow response times.- Packet Loss: This occurs when data packets traveling across a network fail to reach their destination, resulting in incomplete data transmission.- Connection Timeouts: These happen when a server does not respond within a specified time frame, causing applications to fail.- DNS Issues: Problems with Domain Name System (DNS) can prevent users from accessing services by translating domain names into IP addresses.Identifying the root cause of these issues is crucial for maintaining server performance and reliability.Initial ChecksBefore diving into complex diagnostics, it’s essential to perform some basic checks:1. Check Server StatusThe first step is to verify whether the server is up and running. You can do this by:- Ping the Server: Use the command line to ping the server’s IP address. This command sends packets to the server and measures the response time. If the server is unresponsive, you may see timeouts or packet loss.```bashping <server-ip-address>```- Access the Server: Try accessing the server via a web browser or SSH (for Linux servers). If you cannot connect, it may indicate a network issue.2. Check Local Network ConnectivityEnsure that the problem is not localized to your network:- Test Other Devices: Check if other devices on the same network can access the server. If they can, the issue may be with the specific device or configuration.- Restart Router/Modem: Sometimes, simply restarting your network equipment can resolve connectivity issues.Advanced DiagnosticsIf initial checks do not reveal the issue, you may need to perform more advanced diagnostics.1. TracerouteTraceroute is a network diagnostic tool that tracks the path data takes to reach the server. It can help identify where delays or failures occur in the network.- Run Traceroute: Use the following command in the command line:```bashtraceroute <server-ip-address>```On Windows, use:```bashtracert <server-ip-address>```- Analyze the Output: The output will show each hop along the route to the server. Look for any hops with high latency or timeouts, which may indicate network issues.2. Check for Packet LossPacket loss can significantly affect server performance. To check for packet loss:- Use Ping with Count: You can send a specific number of packets to the server and analyze the results:```bashping -c 100 <server-ip-address>```- Analyze Results: Review the output to see if there are any dropped packets. A packet loss rate higher than 1% may indicate network issues.3. Network Monitoring ToolsSeveral network monitoring tools can help diagnose and monitor network issues:- Wireshark: This powerful network protocol analyzer captures and displays data packets traveling over the network. It allows you to inspect the traffic in detail and identify any anomalies.- Nagios: An open-source monitoring tool that can alert you to server and network issues in real-time.- SolarWinds: A commercial tool that provides comprehensive network performance monitoring, including latency, packet loss, and bandwidth usage.These tools can provide deeper insights into network performance and help identify issues that may not be apparent through basic checks.4. Check DNS ConfigurationDNS issues can prevent users from accessing the server. To check DNS:- Use nslookup: This command-line tool queries DNS records to verify that the domain name resolves to the correct IP address.```bashnslookup <domain-name>```- Check DNS Settings: Ensure that the DNS settings on the server are configured correctly. If there are issues, consider switching to a reliable public DNS service like Google DNS (8.8.8.8) or Cloudflare DNS (1.1.1.1).Analyzing Server LogsServer logs can provide valuable information regarding network issues. Examine the following logs:- Web Server Logs: Check the access and error logs for any unusual patterns or errors that may indicate connectivity problems.- System Logs: Review system logs for any network-related error messages or warnings.- Application Logs: If specific applications are experiencing issues, their logs may contain error messages related to network connectivity.Conducting a Stress TestIf you suspect that network issues are related to high traffic or load, consider conducting a stress test:- Use Load Testing Tools: Tools like Apache JMeter or Locust can simulate traffic to the server and help identify how it performs under load.- Monitor Performance: While conducting the test, monitor server performance metrics such as CPU usage, memory usage, and network bandwidth to identify potential bottlenecks.Collaborate with Your ISPIf you’ve conducted all the necessary checks and still cannot identify the issue, it may be time to contact your Internet Service Provider (ISP):- Report the Problem: Provide detailed information about the issue, including any diagnostics you’ve performed.- Ask for Network Status: Inquire if there are any known outages or maintenance activities affecting connectivity.ConclusionDiagnosing network issues on a server requires a systematic approach, starting with basic checks and moving towards more advanced diagnostics. By using tools like ping, traceroute, and network monitoring software, you can identify and resolve network problems effectively.Understanding how to check for network issues not only helps maintain server performance but also ensures a seamless experience for users. Regular monitoring and proactive maintenance can prevent many common network issues, keeping your servers running smoothly and efficiently.
In today’s digital world, having a reliable internet connection is essential. For Android devices, obtaining an IP address dynamically is a common requirement, especially when connecting to different networks. This article explores various methods and techniques for dynamically acquiring an IP address on Android devices, ensuring you stay connected wherever you go.Understanding IP AddressesBefore diving into the methods, it’s crucial to understand what an IP address is. An IP (Internet Protocol) address is a unique identifier assigned to each device connected to a network. It allows devices to communicate with each other over the internet. There are two main types of IP addresses: static and dynamic.- Static IP Address: This is a fixed address that doesn’t change. It is manually assigned and remains constant.- Dynamic IP Address: This address is assigned by a DHCP (Dynamic Host Configuration Protocol) server and can change over time. Most home networks and mobile data connections use dynamic IP addressing.Dynamic IP addresses are advantageous because they minimize the need for manual configuration and allow for easier network management.How Android Obtains a Dynamic IP AddressWhen you connect your Android device to a network, it typically uses DHCP to obtain an IP address automatically. Here’s a step-by-step breakdown of how this process works:1. DHCP Discover: When your device connects to a network, it sends a broadcast message to find any available DHCP servers.2. DHCP Offer: The DHCP server responds with an offer, providing an available IP address and other network configuration details (like subnet mask and gateway).3. DHCP Request: The device then sends a request to the DHCP server, indicating that it would like to use the offered IP address.4. DHCP Acknowledgment: Finally, the DHCP server acknowledges the request, and the device is assigned the IP address.This process happens automatically, allowing users to connect to networks without needing to configure settings manually.Methods to Dynamically Obtain an IP Address on AndroidMethod 1: Connecting to Wi-Fi NetworksOne of the most common ways to obtain a dynamic IP address on Android is by connecting to Wi-Fi networks. Here’s how to do it:1. Open Settings: Go to your device’s settings by tapping the gear icon.2. Select Network & Internet: Tap on "Network & Internet" or "Connections," depending on your Android version.3. Choose Wi-Fi: Select "Wi-Fi" from the list of options.4. Connect to a Network: Tap on the desired Wi-Fi network and enter the password if prompted.5. Automatic Configuration: Once connected, your device will automatically obtain an IP address from the DHCP server of the router.Method 2: Using Mobile DataWhen you enable mobile data on your Android device, it also dynamically obtains an IP address from your mobile carrier’s network. Here’s how to enable mobile data:1. Open Settings: Access your settings menu.2. Select Network & Internet: Tap on "Network & Internet."3. Choose Mobile Network: Select "Mobile network."4. Enable Mobile Data: Toggle the switch to enable mobile data.Once enabled, your Android device will automatically connect to your mobile carrier’s network and obtain a dynamic IP address.Method 3: Renewing IP AddressIf you are experiencing connectivity issues or want to change your current dynamic IP address, you can renew your IP address. Here’s how:1. Open Settings: Navigate to your device’s settings.2. Select Network & Internet: Tap on "Network & Internet."3. Choose Wi-Fi: Tap on "Wi-Fi" and select the connected network.4. Forget Network: Tap on "Forget" to disconnect from the network.5. Reconnect to the Network: Go back to the Wi-Fi list, select the network again, and enter the password. Your device will obtain a new IP address upon reconnection.Method 4: Using a Static IP Address TemporarilyWhile dynamic IP addresses are typically assigned automatically, you can temporarily configure a static IP address if needed. This method can help in troubleshooting connectivity issues or when connecting to specific networks. Here’s how to do it:1. Open Settings: Go to your device’s settings.2. Select Network & Internet: Tap on "Network & Internet."3. Choose Wi-Fi: Select "Wi-Fi" and tap on the connected network.4. Modify Network: Tap on "Advanced" or "Modify Network."5. Change IP Settings: Change the IP settings from "DHCP" to "Static."6. Enter IP Address: Manually enter an IP address within the range of the network. You’ll also need to input the gateway, subnet mask, and DNS servers.7. Save Changes: Save the changes and reconnect to the network.Remember to switch back to DHCP when you no longer need a static IP address.Method 5: Using Third-Party AppsThere are several third-party applications available on the Google Play Store that can help manage your IP address settings. These apps often provide more advanced features for network management. Here’s how to use one:1. Download a Network Management App: Search for and download a network management app (e.g., Fing, IP Tools).2. Open the App: Launch the app and follow the on-screen instructions.3. Scan for Networks: Use the app to scan for available networks and see your current IP address.4. Manage Settings: Some apps allow you to renew your IP address or change network settings directly from the app.Method 6: Resetting Network SettingsIf you continue to experience issues with obtaining an IP address, resetting your network settings can help. This will erase all saved networks and settings, so use this method as a last resort.1. Open Settings: Go to your device’s settings.2. Select System: Tap on "System" or "General Management."3. Choose Reset Options: Look for "Reset" or "Reset Options."4. Select Reset Network Settings: Choose "Reset Network Settings" and confirm your choice.Your device will restart, and you will need to reconnect to Wi-Fi networks and re-enable mobile data.ConclusionDynamically obtaining an IP address on Android devices is a straightforward process, primarily managed through DHCP. By connecting to Wi-Fi networks, enabling mobile data, renewing IP addresses, or using network management apps, users can ensure a seamless internet experience.Understanding how to manage your IP address can help troubleshoot connectivity issues, improve network performance, and enhance your overall mobile experience. Whether you’re at home, in a café, or on the go, these methods will keep you connected and ready to explore the digital world.
In an era where online privacy and security are increasingly important, many users seek ways to change their mobile IP addresses. While Virtual Private Networks (VPNs) are a popular choice for masking IP addresses, there are several methods to change your IP without relying on a VPN. This article will explore various techniques to change your mobile IP address, the reasons for doing so, and the potential implications.Understanding IP AddressesAn IP (Internet Protocol) address is a unique identifier assigned to each device connected to the internet. It serves two primary functions: identifying the host or network interface and providing the location of the device in the network. There are two types of IP addresses: IPv4 and IPv6. Most mobile devices use IPv4 addresses, which are formatted as four sets of numbers separated by periods (e.g., 192.168.1.1).Changing your IP address can help enhance your privacy, bypass geo-restrictions, and resolve connection issues. Here are several methods to change your mobile IP address without a VPN.Method 1: Restarting Your DeviceOne of the simplest ways to change your mobile IP address is by restarting your device. When you reboot your phone, it disconnects from the network and reconnects, often resulting in a new IP address assigned by your Internet Service Provider (ISP).Steps to Restart Your Device:1. Power Off: Hold down the power button until you see the option to power off.2. Wait: Leave your device off for about 30 seconds.3. Power On: Turn your device back on and reconnect to your mobile network.This method works best with dynamic IP addresses, which most ISPs use.Method 2: Switching Airplane Mode On and OffAnother quick method to change your mobile IP address is toggling Airplane Mode. This action forces your device to disconnect from the network and reconnect, often resulting in a new IP address.Steps to Toggle Airplane Mode:1. Open Settings: Go to your phone's settings.2. Activate Airplane Mode: Find the Airplane Mode option and turn it on.3. Wait a Moment: Leave Airplane Mode on for about 10-20 seconds.4. Deactivate Airplane Mode: Turn off Airplane Mode to reconnect to the mobile network.Similar to restarting your device, this method is effective for dynamic IP addresses.Method 3: Changing Wi-Fi NetworksIf you’re connected to Wi-Fi, changing networks can easily alter your IP address. Each network assigns its own IP addresses, so connecting to a different Wi-Fi network will give you a new IP.Steps to Change Wi-Fi Networks:1. Open Wi-Fi Settings: Go to your device's Wi-Fi settings.2. Disconnect from Current Network: Select your current network and disconnect.3. Connect to a Different Network: Choose another available network and enter the password if required.If you don’t have access to multiple Wi-Fi networks, consider using public Wi-Fi hotspots, such as those found in cafes or libraries.Method 4: Using a Mobile HotspotIf you have access to another device, such as a tablet or another phone, you can create a mobile hotspot. This method allows you to connect your phone to a different network, resulting in a new IP address.Steps to Create a Mobile Hotspot:1. Enable Hotspot on Another Device: Go to the settings of the device you want to use as a hotspot and enable the mobile hotspot feature.2. Connect Your Phone: On your phone, go to Wi-Fi settings and connect to the hotspot created by the other device.3. Check Your IP Address: You can verify your new IP address using an IP checking website.Method 5: Contacting Your ISPIf you require a permanent change to your IP address, consider contacting your Internet Service Provider. ISPs can often assign a new IP address upon request, especially if you explain your reasons.Steps to Contact Your ISP:1. Gather Information: Before contacting your ISP, gather any necessary account information.2. Call Customer Service: Reach out to your ISP’s customer service via phone or their online chat support.3. Request a New IP Address: Politely request a new IP address and explain your reason for the change.While this method may take longer than others, it is a reliable way to obtain a new IP address.Method 6: Resetting Network SettingsResetting your network settings can also result in a new IP address. This method will erase all saved Wi-Fi networks and Bluetooth connections, so use it as a last resort.Steps to Reset Network Settings:1. Open Settings: Go to your phone's settings.2. Find Reset Options: Look for "Reset" or "Backup & Reset" in the settings menu.3. Select Reset Network Settings: Choose the option to reset network settings and confirm your choice.Your device will restart, and you’ll need to reconnect to your Wi-Fi networks afterward.Implications of Changing Your IP AddressWhile changing your IP address can provide benefits, it’s essential to understand the implications:1. Privacy: A new IP address can enhance your privacy, but it doesn’t guarantee complete anonymity. Other tracking methods may still reveal your identity.2. Access to Content: Changing your IP can help bypass geo-restrictions, but it may violate terms of service for some platforms.3. Connection Issues: Frequent changes to your IP address may lead to connectivity issues or problems accessing specific websites.ConclusionChanging your mobile IP address without using a VPN is achievable through various methods, including restarting your device, toggling Airplane Mode, switching Wi-Fi networks, using a mobile hotspot, contacting your ISP, or resetting network settings. Each method has its advantages and limitations, so choose the one that best suits your needs.By understanding how to change your IP address, you can enhance your online privacy, access restricted content, and troubleshoot connectivity issues. Always remember that while these methods can help mask your IP, they do not provide complete anonymity. For a more secure online experience, consider using additional privacy measures alongside these techniques.
In today's digital age, privacy and security are paramount. One way to enhance your online privacy is by using a proxy server. A proxy server acts as an intermediary between your device and the internet, allowing you to browse anonymously and access restricted content. This article will guide you through the steps to set up a proxy server and change proxy settings on your Mac.Understanding Proxy ServersBefore diving into the setup process, it’s essential to understand what a proxy server is and how it works. When you connect to the internet through a proxy server, your requests are sent to the proxy first. The proxy then forwards these requests to the target website, retrieves the data, and sends it back to you. This process masks your IP address, providing a layer of anonymity.There are various types of proxy servers, including:- HTTP Proxies: Used for web traffic, they can cache web pages to improve loading times.- HTTPS Proxies: Secure proxies that encrypt your data, ensuring privacy.- SOCKS Proxies: Versatile proxies that can handle any kind of traffic, including email or P2P.- Transparent Proxies: These do not modify requests and are often used for content filtering.Why Use a Proxy Server?There are several reasons to use a proxy server:1. Anonymity: It hides your IP address, making it difficult for websites to track your online activities.2. Access to Restricted Content: Some websites are geo-restricted. A proxy can help you bypass these restrictions.3. Improved Security: Proxies can provide an additional layer of security when browsing, especially on public Wi-Fi networks.4. Bandwidth Control: Organizations often use proxies to monitor and control employee internet usage.Setting Up a Proxy Server on MacStep 1: Open System Preferences1. Click on the Apple logo in the top-left corner of your screen.2. Select System Preferences from the dropdown menu.Step 2: Access Network Settings1. In the System Preferences window, click on Network.2. You will see a list of network connections on the left side. Select the network connection you are using (Wi-Fi or Ethernet).Step 3: Configure Proxy Settings1. Click on the Advanced button located in the lower right corner.2. In the new window, navigate to the Proxies tab.Step 4: Choose Your Proxy ProtocolIn the Proxies tab, you will see a list of different proxy protocols. Here’s how to set them up:- Web Proxy (HTTP): Check the box next to "Web Proxy (HTTP)" if you want to use an HTTP proxy. Enter the proxy server address and port number in the respective fields.- Secure Web Proxy (HTTPS): Check the box next to "Secure Web Proxy (HTTPS)" for HTTPS connections. Again, enter the proxy address and port number.- SOCKS Proxy: If you want to use a SOCKS proxy, check the box next to "SOCKS Proxy" and enter the required information.Step 5: Authentication (if required)If your proxy server requires authentication, check the box for "Proxy server requires password" and fill in your username and password.Step 6: Apply SettingsAfter entering the necessary information, click OK to close the advanced settings window. Then, click Apply in the Network window to save your changes.Testing Your Proxy ConnectionOnce you have configured your proxy settings, it's essential to test the connection to ensure everything is working correctly.1. Open your web browser and visit a website like [WhatIsMyIP.com](https://www.whatismyip.com). This site will display your current IP address.2. If the proxy is set up correctly, you should see the IP address of the proxy server instead of your actual IP address.Changing Proxy SettingsIf you need to change your proxy settings in the future, you can follow the same steps outlined above. Simply revisit the Network settings in System Preferences, and modify the proxy settings as needed.Disabling the Proxy ServerIf you want to disable the proxy server, follow these steps:1. Go back to System Preferences > Network.2. Select your network connection and click on Advanced.3. In the Proxies tab, uncheck all the boxes next to the proxy protocols you enabled.4. Click OK, then Apply to save the changes.Common Issues and TroubleshootingWhile setting up a proxy server on your Mac is generally straightforward, you may encounter some issues. Here are common problems and their solutions:- Proxy Connection Error: If you receive an error when trying to connect, double-check the proxy address and port number. Ensure that you are using the correct protocol (HTTP, HTTPS, or SOCKS).- Slow Internet Speed: Using a proxy can sometimes slow down your internet speed, especially if the proxy server is overloaded. Consider switching to a different proxy server.- Websites Not Loading: If certain websites are not loading, try disabling the proxy temporarily to see if that resolves the issue.ConclusionSetting up a proxy server on your Mac is a simple yet effective way to enhance your online privacy and security. By following the steps outlined in this article, you can easily configure your proxy settings and enjoy a more secure browsing experience. Remember to choose a reliable proxy service and keep your settings updated as needed. With the right setup, you can browse the internet with greater confidence and freedom.
In an era where online privacy is becoming increasingly important, many users seek ways to hide their IP addresses on their devices, including Android smartphones and tablets. An IP address can reveal your geographic location and browsing habits, making it a target for advertisers, hackers, and even government surveillance. This article will explore various methods to hide your IP address on Android, ensuring your online activities remain private and secure.Understanding IP AddressesWhat is an IP Address?An IP (Internet Protocol) address is a unique identifier assigned to each device connected to the internet. It serves two primary purposes:1. Identification: It identifies the device on a network.2. Location Addressing: It provides information about the device's geographical location.Why Hide Your IP Address?There are several reasons to hide your IP address:1. Privacy Protection: Prevents websites and advertisers from tracking your online activities.2. Security: Reduces the risk of being targeted by cybercriminals.3. Accessing Geo-Restricted Content: Allows you to access content that may be restricted in your region, such as streaming services or websites.4. Bypassing Censorship: Helps users in countries with strict internet censorship access blocked websites.Methods to Hide Your IP Address on Android1. Using a VPN (Virtual Private Network)A VPN is one of the most effective ways to hide your IP address. It encrypts your internet traffic and routes it through a remote server, masking your actual IP address.How to Set Up a VPN on Android:1. Choose a Reliable VPN Service: Research and select a reputable VPN provider that meets your needs. Popular options include NordVPN, ExpressVPN, and CyberGhost.2. Download the VPN App: Go to the Google Play Store, search for your chosen VPN service, and install the app.3. Create an Account: Open the app and sign up for an account. Most VPN services require a subscription.4. Connect to a Server: Once logged in, select a server location. This will change your IP address to that of the server.5. Enable the VPN: Tap the connect button. You should see a key icon in the notification bar, indicating that your VPN is active.2. Using a Proxy ServerA proxy server acts as an intermediary between your device and the internet. When you use a proxy, your requests are sent to the proxy server, which then forwards them to the desired website, hiding your IP address.How to Set Up a Proxy on Android:1. Find a Proxy Server: Search for a reliable proxy server. Free proxies are available, but they may not be secure. Paid proxies often offer better performance and security.2. Go to Wi-Fi Settings: Open your device’s Settings app, tap on Network & Internet, then Wi-Fi.3. Modify Network: Long-press your connected Wi-Fi network and select Modify network.4. Advanced Options: Expand the Advanced options section.5. Set Proxy: Under Proxy, select Manual. Enter the proxy hostname and port number provided by your proxy service.6. Save Changes: Tap Save to apply the settings.3. Using Tor BrowserTor is a free, open-source browser that helps users stay anonymous online by routing internet traffic through a series of volunteer-operated servers. This makes it difficult to trace your IP address.How to Use Tor on Android:1. Download the Tor Browser: Go to the Google Play Store and search for "Tor Browser." Download and install the app.2. Open the Tor Browser: Launch the app and follow the on-screen instructions to connect to the Tor network.3. Browse Anonymously: Once connected, you can browse the internet without revealing your IP address.4. Using Mobile Data Instead of Wi-FiSometimes, switching from Wi-Fi to mobile data can help mask your IP address. Mobile networks assign dynamic IP addresses that can change frequently.How to Switch to Mobile Data:1. Open Settings: Go to the Settings app on your Android device.2. Select Network & Internet: Tap on Network & Internet.3. Turn Off Wi-Fi: Disable Wi-Fi by toggling the switch off.4. Enable Mobile Data: Toggle the mobile data switch on. Your device will now use mobile data, and you will be assigned a different IP address.5. Using Public Wi-Fi NetworksConnecting to public Wi-Fi networks can also help hide your IP address, as you will be using the IP address of the public network. However, this method comes with significant security risks.How to Connect to Public Wi-Fi:1. Find a Public Wi-Fi Network: Locate a nearby café, library, or other public place offering free Wi-Fi.2. Connect to the Network: Open the Settings app, tap on Wi-Fi, and select the public network.3. Use Caution: Be aware that public Wi-Fi networks are often insecure. Avoid accessing sensitive information or logging into accounts while connected.6. Changing Your IP Address ManuallyIf you’re using a static IP address assigned by your ISP, you can try to change it by resetting your connection.How to Change Your IP Address:1. Turn Off Your Device: Power off your Android device.2. Disconnect from Wi-Fi: If you are connected to Wi-Fi, disconnect from the network.3. Restart Your Router: Unplug your router, wait for about 30 seconds, and then plug it back in.4. Reconnect Your Device: Once the router is back online, turn on your Android device and reconnect to the Wi-Fi network. This may assign you a new IP address.Best Practices for Online PrivacyWhile hiding your IP address is important, consider these additional practices to enhance your online privacy:1. Use HTTPS WebsitesAlways look for websites that use HTTPS, which encrypts data exchanged between your browser and the website, adding an extra layer of security.2. Clear Your Browsing HistoryRegularly clear your browsing history, cookies, and cached data to minimize tracking.3. Enable Two-Factor AuthenticationFor added security, enable two-factor authentication on your online accounts. This provides an extra layer of protection against unauthorized access.4. Be Cautious with AppsBe selective about the apps you install on your Android device. Research their privacy policies and permissions before downloading.5. Regularly Update Your DeviceKeep your Android operating system and apps updated to protect against security vulnerabilities.ConclusionHiding your IP address on Android is crucial for maintaining online privacy and security. Whether you choose to use a VPN, a proxy server, the Tor browser, or simply switch to mobile data, each method offers its own benefits and limitations. Always prioritize your security by being cautious about the networks you connect to and the information you share online. By implementing these strategies, you can enjoy a more private and secure browsing experience on your Android device.
Managing your IP address is an essential skill for anyone using a computer, especially when troubleshooting network issues or configuring network settings. In Windows 10, you have the flexibility to manually change your IP address, whether you want to set a static IP or refresh your dynamic IP. This article will guide you through the process of manually modifying your IP address in Windows 10.Understanding IP AddressesWhat is an IP Address?An IP (Internet Protocol) address is a unique identifier assigned to each device connected to a network. It allows devices to communicate with each other over the internet or a local network. There are two types of IP addresses:1. IPv4: The most common format, consisting of four numbers separated by periods (e.g., 192.168.1.1).2. IPv6: A newer format designed to replace IPv4, consisting of eight groups of hexadecimal numbers.Dynamic vs. Static IP Addresses- Dynamic IP Address: Assigned by a DHCP (Dynamic Host Configuration Protocol) server, these addresses can change over time. Most home networks use dynamic IP addresses.- Static IP Address: Manually assigned and does not change unless modified. Static IPs are often used for servers or devices that need consistent access.Why Change Your IP Address?There are several reasons you might want to change your IP address:1. Troubleshooting Network Issues: Sometimes, changing your IP can resolve connectivity problems.2. Avoiding IP Conflicts: If two devices on the same network have the same IP address, it can cause conflicts.3. Remote Access: Setting a static IP can make it easier to access devices remotely.4. Privacy: Changing your IP can help maintain privacy when browsing the internet.How to Manually Change Your IP Address in Windows 10Step 1: Open Network Settings1. Right-click on the Network Icon: In the system tray (bottom right corner), right-click the network icon (Wi-Fi or Ethernet).2. Select "Open Network & Internet settings": This will open the settings window for your network.Step 2: Access Network Properties1. Click on "Change adapter options": This link is found on the left side of the window.2. Locate Your Network Connection: You will see a list of network connections. Identify the one you are currently using (e.g., Ethernet or Wi-Fi).Step 3: Open the Properties of Your Connection1. Right-click on Your Connection: Select the connection you want to modify and right-click on it.2. Select "Properties": This will open the properties window for that connection.Step 4: Select Internet Protocol Version1. Find "Internet Protocol Version 4 (TCP/IPv4)": In the list of items, locate and click on "Internet Protocol Version 4 (TCP/IPv4)".2. Click on "Properties": This will open the properties window for IPv4.Step 5: Manually Set Your IP Address1. Select "Use the following IP address": You will see two options: one for obtaining an IP address automatically and one for using a specific IP address. Choose the latter.2. Enter Your IP Address:- IP Address: Enter the desired static IP address (e.g., 192.168.1.100).- Subnet Mask: This is usually `255.255.255.0` for home networks. It defines the range of IP addresses available on your network.- Default Gateway: This is typically the IP address of your router (e.g., 192.168.1.1). It allows your device to communicate with devices outside your local network.3. Enter DNS Server Addresses: You can use your ISP’s DNS servers or public DNS servers like Google (8.8.8.8 and 8.8.4.4) or Cloudflare (1.1.1.1).Step 6: Save Changes1. Click "OK": After entering the information, click "OK" to save your settings.2. Click "Close": Close the properties window for your network connection.Step 7: Verify Your New IP AddressTo ensure your changes have taken effect:1. Open Command Prompt: Press `Windows + R`, type `cmd`, and hit Enter.2. Type `ipconfig`: This command will display your current network configuration.3. Check Your IP Address: Look for your network adapter and verify that the IP address matches the one you set.Troubleshooting Common IssuesIf you encounter issues after changing your IP address, consider the following troubleshooting steps:1. IP Address ConflictIf you receive an error indicating an IP address conflict, it means another device on the network is using the same IP address. Change your IP address to a different one within the same subnet.2. Cannot Connect to the InternetIf you cannot access the internet after changing your IP address, check the following:- Ensure that the default gateway is correctly set to your router’s IP address.- Verify that the subnet mask is appropriate for your network.- Check your DNS settings. You may want to revert to automatic DNS settings to see if that resolves the issue.3. Reverting ChangesIf you need to revert to automatic IP addressing:1. Go back to the IPv4 properties window.2. Select "Obtain an IP address automatically" and "Obtain DNS server address automatically."3. Click "OK" to save changes.Advanced IP Address ManagementFor more advanced users, consider the following options:1. Using PowerShellYou can also change your IP address using PowerShell:1. Open PowerShell as Administrator: Right-click the Start button and select "Windows PowerShell (Admin)."2. Use the following command:```powershellNew-NetIPAddress -InterfaceAlias "Ethernet" -IPAddress "192.168.1.100" -PrefixLength 24 -DefaultGateway "192.168.1.1"```Replace "Ethernet" with your connection name and adjust the IP address and gateway accordingly.2. Using Command PromptYou can also use the `netsh` command to change your IP address:1. Open Command Prompt as Administrator.2. Enter the following command:```cmdnetsh interface ip set address name="Ethernet" static 192.168.1.100 255.255.255.0 192.168.1.1```Adjust the interface name, IP address, subnet mask, and gateway as needed.ConclusionChanging your IP address in Windows 10 is a straightforward process that can help resolve network issues, avoid conflicts, and improve your online experience. By following the steps outlined in this article, you can easily set a static IP address or refresh your dynamic IP. Whether you’re troubleshooting connectivity problems or configuring a home server, understanding how to manage your IP address is a valuable skill for any Windows 10 user. Always ensure that your settings are correct to maintain a stable and secure network connection.
Setting up a private server can be an exciting project, whether for gaming, hosting a website, or running applications. However, ensuring that your server is accessible from the outside world (the external internet) adds another layer of complexity. This article will guide you through the steps to set up a private server and enable external access.Understanding Private ServersWhat is a Private Server?A private server is a dedicated server that you manage and control. Unlike shared hosting, where multiple users share resources, a private server gives you full access to the hardware and software. This setup allows for greater customization and control over the server environment.Common Uses for Private Servers1. Gaming: Hosting multiplayer game servers for friends or the public.2. Web Hosting: Hosting personal websites or applications.3. File Storage: Creating a personal cloud for file storage and sharing.4. Development: Setting up a testing environment for software development.Step 1: Choosing the Right HardwareBefore diving into software configuration, consider the hardware requirements for your server:1. Processor: A multi-core processor is recommended for handling multiple tasks.2. RAM: The amount of RAM will depend on the applications you plan to run. A minimum of 8GB is often suggested for basic tasks.3. Storage: Use SSDs for faster performance, especially if you plan to host databases or heavy applications.4. Network Interface: Ensure your server has a reliable network interface card (NIC) for stable connectivity.Step 2: Selecting the Operating SystemYou can choose between various operating systems for your server. The most popular options include:1. Linux: Common distributions like Ubuntu Server, CentOS, or Debian are widely used for their stability and performance.2. Windows Server: Ideal for users familiar with the Windows environment, especially for hosting .NET applications or Windows-specific software.Installation- Linux: Download the ISO file of your chosen distribution and create a bootable USB drive. Boot from the USB and follow the installation instructions.- Windows: Similar to Linux, download the Windows Server ISO, create a bootable USB, and follow the installation prompts.Step 3: Configuring Your ServerOnce the operating system is installed, you'll need to configure your server:1. Update the SystemAlways start by updating your system to ensure you have the latest security patches and features.- Linux: Use the terminal to run:```bashsudo apt update && sudo apt upgrade```- Windows: Use Windows Update to install the latest updates.2. Install Required SoftwareDepending on your server's purpose, you may need to install additional software:- Web Server: For hosting websites, install Apache, Nginx, or IIS.- Database: Install MySQL, PostgreSQL, or MongoDB if you require a database.- Game Server: Follow specific instructions for the game you want to host.3. Set Up User AccountsFor security reasons, create user accounts with specific permissions instead of using the root or administrator account for daily operations.Step 4: Configuring Network SettingsTo enable external access, you need to configure your network settings.1. Assign a Static IP AddressAssigning a static IP address to your server ensures that its address doesn’t change, making it easier to access.- Linux: Edit the network configuration file (usually found in `/etc/netplan/` or `/etc/network/interfaces`).- Windows: Go to the Network and Sharing Center, select your connection, and set a static IP under the properties.2. Configure Firewall SettingsA firewall helps protect your server from unauthorized access. Configure your firewall to allow traffic on the necessary ports.- Linux: Use `ufw` (Uncomplicated Firewall) to allow specific ports:```bashsudo ufw allow 80 for HTTPsudo ufw allow 443 for HTTPSsudo ufw allow 22 for SSHsudo ufw enable```- Windows: Use Windows Firewall to create inbound rules for the necessary ports.Step 5: Port ForwardingTo allow external access to your server, you need to set up port forwarding on your router:1. Access Your Router: Open a web browser and enter your router's IP address (commonly `192.168.1.1` or `192.168.0.1`).2. Log In: Enter your router’s credentials.3. Find Port Forwarding Section: This is usually under the “Advanced” or “NAT” settings.4. Create a New Port Forwarding Rule:- Service Name: Name it something recognizable (e.g., “Web Server”).- Internal IP Address: Enter the static IP address of your server.- External Port: Enter the port you want to use (e.g., 80 for HTTP).- Internal Port: This is usually the same as the external port.- Protocol: Select TCP, UDP, or both, depending on your needs.5. Save Changes: After entering the details, save your changes and restart your router if necessary.Step 6: Dynamic DNS (Optional)If you have a dynamic public IP address (which can change), consider using Dynamic DNS (DDNS) services. DDNS allows you to map a domain name to your dynamic IP address, so you can access your server using a consistent domain name.1. Choose a DDNS Provider: Popular options include No-IP, DynDNS, and DuckDNS.2. Create an Account: Sign up for a DDNS service and follow their instructions to set it up.3. Configure Your Router: Many routers support DDNS. Enter your DDNS credentials in the router's DDNS settings.Step 7: Testing External AccessOnce everything is set up, test external access to your server:1. Use Your Public IP Address: Open a web browser and enter your public IP address. If you configured a web server, you should see your website.2. Use a Domain Name: If you set up DDNS, enter your domain name in the browser to test access.Step 8: Securing Your ServerSecurity is paramount when exposing your server to the internet. Here are some best practices:1. Regular Updates: Keep your operating system and software updated to protect against vulnerabilities.2. Use Strong Passwords: Ensure all accounts have strong, unique passwords.3. Implement SSH Key Authentication: If you're using SSH, consider using key-based authentication instead of passwords.4. Monitor Logs: Regularly check server logs for any suspicious activity.5. Backup Regularly: Implement a backup strategy to protect your data.ConclusionSetting up a private server and enabling external access can seem daunting, but by following these steps, you can create a secure and functional server tailored to your needs. Whether for gaming, hosting websites, or running applications, a private server offers flexibility and control. Always prioritize security and keep your system updated to ensure a smooth and safe experience. With the right configuration and precautions, you can enjoy the benefits of your private server while keeping it secure from potential threats.
In the digital age, having a public IP address is essential for various online activities, including hosting websites, gaming, and accessing remote servers. A public IP address allows your device to communicate over the internet and be accessible to others. This article will guide you through the process of obtaining your own public IP address, exploring the different types of IP addresses, and discussing the implications of having one.Understanding IP AddressesWhat is an IP Address?An IP (Internet Protocol) address is a unique numerical label assigned to each device connected to a computer network that uses the Internet Protocol for communication. It serves two main functions:1. Identification: It identifies the host or network interface.2. Location Addressing: It provides the location of the device within the network.Types of IP Addresses1. Public IP Address: This is the address assigned to your network by your Internet Service Provider (ISP) and is accessible from the internet. It allows other devices on the internet to find your network.2. Private IP Address: This is used within a local network and is not accessible from the internet. Devices within your home or office network use private IP addresses to communicate with each other.Dynamic vs. Static IP Addresses- Dynamic IP Address: Most ISPs assign dynamic IP addresses, which can change periodically. This means your public IP address may change whenever you restart your router or after a certain period.- Static IP Address: A static IP address does not change and is manually configured. This is often required for hosting servers or services that need a consistent address.Why You Might Need a Public IP AddressThere are several reasons why you might want a public IP address:1. Hosting a Website: If you want to host a website from your home or office, a public IP address is necessary for users to access it.2. Remote Access: You may want to access your home network or devices remotely, such as security cameras or a home server.3. Online Gaming: Some online games require a public IP address for hosting multiplayer sessions.4. Running Servers: If you plan to run a game server, FTP server, or any other type of server, a public IP address is essential.How to Obtain Your Own Public IP AddressStep 1: Check Your Current IP AddressBefore obtaining a public IP address, check if you already have one. You can do this by:1. Using Online Tools: Visit websites like `whatismyip.com` or `ipinfo.io`. These sites will display your current public IP address.2. Command Prompt: On Windows, open Command Prompt and type:```bashnslookup myip.opendns.com resolver1.opendns.com```On Linux or macOS, you can use:```bashdig +short myip.opendns.com @resolver1.opendns.com```Step 2: Contact Your Internet Service Provider (ISP)If you want a static public IP address, you will need to contact your ISP. Here’s how to approach this:1. Research ISPs: Not all ISPs offer static IP addresses. Research your ISP's policies regarding public IP addresses.2. Request a Static IP: Reach out to your ISP’s customer service and request a static IP address. Be prepared to provide information about your account.3. Inquire About Costs: Some ISPs charge an additional fee for a static IP address. Make sure to ask about any associated costs.Step 3: Configure Your RouterOnce you have obtained a public IP address, you may need to configure your router to use it effectively. Here’s how:1. Access Router Settings: Open a web browser and enter your router’s IP address (usually something like `192.168.1.1` or `192.168.0.1`). Log in with your credentials.2. Navigate to WAN Settings: Find the section labeled WAN, Internet, or similar.3. Set IP Address Type: If you have a static IP, select the option for static IP and enter the details provided by your ISP, including IP address, subnet mask, gateway, and DNS servers.4. Save Changes: After entering the information, save the changes and restart your router.Step 4: Test Your Public IP AddressAfter configuring your router, it’s essential to test your public IP address:1. Recheck Your IP: Use the same methods mentioned in Step 1 to verify that your public IP address is correctly configured.2. Port Forwarding: If you plan to host services (like a web server or game server), you may need to set up port forwarding on your router to direct traffic to the correct device on your network.Step 5: Secure Your NetworkHaving a public IP address exposes your network to the internet, so it’s crucial to secure it:1. Use a Firewall: Ensure that your router’s firewall is enabled to protect against unauthorized access.2. Change Default Credentials: Change the default username and password for your router to prevent unauthorized access.3. Regularly Update Firmware: Keep your router’s firmware updated to protect against vulnerabilities.4. Use Strong Passwords: For any services you host, use strong, unique passwords to prevent unauthorized access.Alternatives to Obtaining a Public IP AddressIf obtaining a public IP address directly from your ISP is not feasible, consider these alternatives:1. Dynamic DNS (DDNS)Dynamic DNS services allow you to map a domain name to your dynamic IP address. This way, even if your IP changes, you can still access your services using the domain name. Popular DDNS providers include:- No-IP- DynDNS- DuckDNS2. VPN ServicesUsing a Virtual Private Network (VPN) can provide you with a public IP address assigned by the VPN provider. This can be useful for accessing geo-restricted content or enhancing privacy.3. Cloud Hosting ServicesIf you need a public IP address for hosting, consider using cloud hosting services like Amazon Web Services (AWS), Google Cloud Platform (GCP), or DigitalOcean. These platforms provide public IP addresses for your virtual servers.ConclusionObtaining your own public IP address is a straightforward process that can enhance your online experience. Whether you need it for hosting a website, accessing devices remotely, or running servers, following the steps outlined in this article will help you secure a public IP address. Always remember to prioritize network security when exposing your devices to the internet. By doing so, you can enjoy the benefits of a public IP address while keeping your network safe and secure. With the right configuration and precautions, you can leverage your public IP address for various online activities and services.