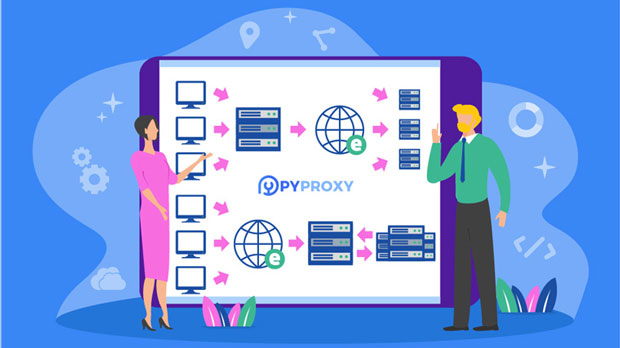
In today's digital age, privacy and security are of utmost importance. With the increasing use of mobile devices and the internet, it's crucial to protect our personal information, including our IP address. An IP address is a unique identifier for a device connected to a network, and it can reveal a lot about your location and online activities. Therefore, it's essential to know how to hide your IP address, especially when using an Android device.There are several methods to hide your IP address on an Android device, and each method has its own advantages and limitations. Here are some of the most common ways to achieve this:1. Use a VPN (Virtual Private Network):A VPN is one of the most effective and popular tools for hiding your IP address. It works by routing your internet traffic through a secure and encrypted connection to a remote server, effectively masking your IP address. There are many VPN apps available for Android devices, such as ExpressVPN, NordVPN, and CyberGhost, which offer easy-to-use interfaces and a wide selection of servers to choose from.2. Use a Proxy Server:A proxy server acts as an intermediary between your device and the internet. By connecting to a proxy server, your IP address is hidden from the websites you visit, as they only see the IP address of the proxy server. There are several proxy apps available on the Google Play Store that allow you to easily connect to a proxy server and browse the web anonymously.3. Use Tor Browser:The Tor network is a decentralized network that routes your internet traffic through a series of volunteer-operated servers, making it extremely difficult for anyone to trace your online activities back to your IP address. The Tor Browser for Android is a free and open-source web browser that allows you to browse the internet anonymously and access websites that may be blocked in your region.4. Use a Mobile Data Connection:If you're concerned about hiding your IP address while using public Wi-Fi networks, using your mobile data connection instead can provide an extra layer of privacy. Since your mobile data connection assigns you a different IP address than the one provided by public Wi-Fi networks, it can help protect your online privacy.While these methods can help hide your IP address on an Android device, it's important to note that no method is foolproof. Additionally, some of these methods may impact your internet speed or have other limitations, so it's essential to choose the method that best suits your needs.In conclusion, hiding your IP address on an Android device is crucial for maintaining your online privacy and security. By using tools such as VPNs, proxy servers, the Tor network, or your mobile data connection, you can take proactive steps to protect your personal information and browse the internet anonymously. It's important to stay informed about the latest privacy tools and best practices to ensure that you're taking the necessary steps to safeguard your online activities.
Are you looking to change the IP address on your Windows 10 computer? Whether you need to troubleshoot network connectivity issues, improve security, or access region-restricted content, changing your IP address can be a useful solution. In this guide, we will walk you through the step-by-step process of modifying your IP address on a Windows 10 system.Before we begin, it's important to understand the basics of IP addresses. An IP address is a unique identifier assigned to each device connected to a network. It allows devices to communicate with each other and enables data transfer across the internet. There are two types of IP addresses: dynamic and static. Dynamic IP addresses are assigned automatically by a network router, while static IP addresses are manually configured and remain constant.Now, let's explore the methods for changing your IP address on a Windows 10 computer.Method 1: Change IP Address via Network Settings1. Open the "Settings" app by clicking on the Start menu and selecting the gear icon.2. In the Settings window, click on "Network & Internet."3. Select "Ethernet" or "Wi-Fi," depending on your connection type.4. Under the "Related settings" section, click on "Change adapter options."5. Right-click on your network connection (Ethernet or Wi-Fi) and select "Properties."6. In the Properties window, select "Internet Protocol Version 4 (TCP/IPv4)" and click "Properties."7. Choose the option "Use the following IP address" and enter the new IP address, subnet mask, default gateway, and DNS server information as provided by your network administrator or ISP.8. Click "OK" to save the changes.Method 2: Release and Renew IP Address via Command Prompt1. Press the Windows key + X and select "Command Prompt (Admin)" to open Command Prompt with administrative privileges.2. In the Command Prompt window, type the following commands and press Enter after each one:ipconfig /releaseipconfig /renew3. Wait for the commands to execute and release your current IP address, then renew it with a new one from the DHCP server.Method 3: Change IP Address via Router SettingsIf you have access to your router's administration interface, you can change your computer's IP address by modifying the router settings. Here's how:1. Open a web browser and enter your router's IP address in the address bar. Typically, the router's IP address is 192.168.1.1 or 192.168.0.1, but it may vary based on your specific router model.2. Log in to the router using your username and password. If you haven't changed these credentials before, check the router's manual for the default login information.3. Navigate to the LAN or DHCP settings section of the router's interface.4. Locate the option to assign a static IP address and enter the desired IP address, subnet mask, default gateway, and DNS server information for your computer.5. Save the changes and restart your computer to apply the new IP address settings.It's important to note that changing your IP address can affect your network connectivity and may require reconfiguration of other network-related settings. Additionally, if you are part of a corporate or organizational network, it's advisable to consult with your network administrator before making any changes to your IP address.Modifying your IP address on a Windows 10 system can be accomplished using various methods, including adjusting network settings, releasing and renewing IP addresses via Command Prompt, and configuring router settings. By following these steps, you can effectively change your IP address to suit your specific requirements.We hope this guide has been helpful in understanding how to change the IP address on a Windows 10 computer. If you have any further questions or encounter any difficulties during the process, feel free to seek assistance from a qualified IT professional or refer to Microsoft's official support resources. Thank you for reading!
In the world of networking, obtaining a public IP address is crucial for various applications and services, such as hosting a website, setting up a remote access server, or implementing intranet penetration. However, there are situations where obtaining a public IP address may not be feasible or cost-effective. In such cases, alternative methods such as Dynamic DNS, VPN, or using a reverse proxy can be employed to achieve similar functionalities. This article explores the various methods to obtain a public IP address and discusses alternative approaches for implementing intranet penetration without leasing a public IP.Methods to Obtain Public IP1. Internet Service Provider (ISP) Allocation:The most common method of obtaining a public IP address is through an Internet Service Provider (ISP). When a device connects to the internet via an ISP, the ISP assigns a public IP address to the device, allowing it to communicate with other devices on the internet.2. Dynamic Host Configuration Protocol (DHCP):DHCP is a network management protocol used to dynamically assign IP addresses to devices on a network. Some ISPs use DHCP to assign public IP addresses to their customers, especially in consumer-grade internet connections.3. Static IP Address Allocation:For businesses or organizations with specific networking requirements, ISPs can allocate static public IP addresses that do not change over time. This is useful for hosting servers or services that require a consistent public IP address.4. Dynamic DNS (DDNS):Dynamic DNS is a method of automatically updating a domain name in real time when the IP address assigned to the domain name changes. This allows devices with dynamic (changing) public IP addresses to be accessible using a domain name. Services like No-IP, DynDNS, and DuckDNS provide DDNS functionality.5. Virtual Private Network (VPN):A VPN can provide a method for obtaining a public IP address by connecting to a remote server that has a static public IP. By routing traffic through the VPN server, the device appears to have the same public IP address as the VPN server.Implementing Intranet Penetration without Public IP LeasingIn scenarios where obtaining a public IP address is not feasible or practical, implementing intranet penetration without public IP leasing can be achieved using alternative methods:1. Virtual Private Network (VPN):A VPN can be used to establish secure connections between internal network resources and remote users or offices. By using VPN technologies such as site-to-site VPN or client-to-site VPN, users can securely access internal resources without the need for a public IP address.2. Port Forwarding and NAT Traversal:Port forwarding allows inbound traffic on a specific port to be forwarded from the router to a specific device on the internal network. NAT traversal techniques such as UPnP (Universal Plug and Play) or NAT-PMP (NAT Port Mapping Protocol) can dynamically manage port forwarding without requiring a public IP address.3. Reverse Proxy:A reverse proxy server can act as an intermediary between external clients and internal servers. By configuring the reverse proxy to forward incoming requests to the appropriate internal servers, intranet services can be made accessible without exposing the internal network's public IP address.4. Cloud-based Services:Leveraging cloud-based services such as AWS (Amazon Web Services) or Azure can provide alternative solutions for intranet penetration. By deploying resources in the cloud and using cloud networking features, organizations can establish secure connections and access internal resources without relying on a dedicated public IP address.While obtaining a public IP address is often essential for various networking requirements, alternative methods such as Dynamic DNS, VPN, port forwarding, reverse proxy, and cloud-based services offer viable solutions for implementing intranet penetration without leasing a public IP. By understanding these methods and technologies, organizations can adapt to diverse networking challenges and achieve secure and efficient connectivity for their internal resources and services.
When managing a server, one of the most common issues that can arise is related to IP configuration. Without a valid IP address, the server will not be able to communicate with other devices on the network, which can lead to various connectivity and accessibility problems. In this blog post, we will discuss some common reasons why a server may not have an IP address and how to troubleshoot and resolve these issues.1. Network Cable ConnectionThe first thing to check when a server does not have an IP address is the network cable connection. Ensure that the network cable is securely plugged into the server's network interface card (NIC) and the corresponding switch or router. A loose or damaged network cable can prevent the server from obtaining an IP address from the network.2. DHCP ConfigurationIn most cases, servers obtain their IP addresses dynamically from a DHCP (Dynamic Host Configuration Protocol) server. If the server is not receiving an IP address, check the DHCP configuration on the network. Ensure that there are available IP addresses in the DHCP pool and that the DHCP server is operational. Additionally, verify that the server's NIC is set to obtain an IP address automatically.3. Static IP Address ConfigurationIf the server is configured to use a static IP address, ensure that the IP address, subnet mask, default gateway, and DNS servers are correctly configured. A misconfiguration in any of these settings can prevent the server from communicating on the network. Verify the settings in the server's network configuration and make any necessary corrections.4. Network Interface Card (NIC) IssuesA faulty or malfunctioning network interface card can also cause issues with obtaining an IP address. Check the server's NIC for any physical damage or malfunction. Additionally, ensure that the NIC drivers are up to date and functioning properly. If necessary, consider replacing the NIC with a known working one to rule out hardware issues.5. Network Infrastructure ProblemsSometimes, the issue may not be with the server itself but with the network infrastructure. Check for any network outages, misconfigured switches or routers, or other network-related issues that may be affecting IP address assignment. Collaborate with the network administrator to troubleshoot and resolve any underlying network problems.6. Firewall and Security SettingsFirewall or security software running on the server may be blocking DHCP requests or preventing the server from obtaining an IP address. Review the server's firewall and security settings to ensure that DHCP traffic is allowed and that there are no restrictions preventing IP address assignment.7. Reboot and ResetIf all else fails, a simple reboot of the server and networking equipment may resolve the issue. Sometimes, a temporary glitch or configuration error can be cleared by restarting the server and associated networking devices. Additionally, consider resetting the server's NIC settings to default and reattempting the IP address acquisition process.Troubleshooting server IP configuration issues requires a systematic approach to identify and resolve underlying problems. By checking network connections, DHCP settings, IP address configurations, hardware components, network infrastructure, and security settings, administrators can effectively diagnose and fix IP address assignment issues on servers. Remember to document any changes made during the troubleshooting process for future reference and to aid in resolving similar issues in the future.By following these troubleshooting steps, administrators can ensure that servers have valid IP addresses and are able to communicate effectively on the network, minimizing downtime and maintaining a reliable IT infrastructure.
Setting up a server IP address for your Minecraft world can be a great way to create a shared gaming experience with friends or other players. By hosting your own server, you can customize the gameplay, control who has access, and ensure a smooth and reliable connection. In this guide, we'll walk through the steps to set up a server IP address for your Minecraft world.Step 1: Choose a Hosting OptionBefore you can set up a server IP address, you'll need to decide how you want to host your Minecraft server. There are several options to consider:Self-Hosting: If you have a powerful computer and a reliable internet connection, you can host the server on your own hardware. This gives you complete control over the server and allows for customization, but it also requires technical expertise and can impact your computer's performance.Third-Party Hosting: Many companies offer dedicated Minecraft server hosting. This option is often more user-friendly and can provide better performance and reliability, but it typically comes with a monthly fee.Cloud Hosting: Cloud services like Amazon Web Services (AWS) or Microsoft Azure also offer options for hosting Minecraft servers. This can be a scalable and flexible solution, but it may require more technical knowledge to set up.Step 2: Install the Minecraft Server SoftwareOnce you've chosen a hosting option, you'll need to install the Minecraft server software. If you're self-hosting, you can download the server software from the official Minecraft website. If you're using a third-party hosting service, they may have their own installation process or control panel to set up the server software.Step 3: Configure Server SettingsAfter installing the server software, you'll need to configure the server settings to customize your Minecraft world. This can include setting the game mode, difficulty level, player permissions, and other options. You can usually do this through a configuration file or a web-based control panel provided by your hosting service.Step 4: Set Up a Static IP AddressTo ensure a stable connection to your Minecraft server, it's recommended to set up a static IP address for your hosting device. A static IP address will remain constant, making it easier for players to connect to your server without having to update the IP address each time they want to join.Step 5: Port ForwardingIf you're self-hosting your Minecraft server, you'll also need to set up port forwarding on your router. Port forwarding allows external connections to reach your server by redirecting traffic from a specific port to the appropriate device on your local network. The exact process for port forwarding will depend on your router model, so you may need to consult your router's documentation or support resources for specific instructions.Step 6: Obtain Your Server IP AddressOnce your server is set up and running, you'll need to obtain the server IP address. This is the unique identifier that players will use to connect to your server. If you're self-hosting, you can find your server's IP address by searching "What is my IP" in a web browser from the hosting device. If you're using a third-party hosting service, they should provide you with the server IP address through their control panel or support resources.Step 7: Share Your Server IP AddressWith your server IP address in hand, you can now share it with friends or other players who want to join your Minecraft world. They can enter the IP address in the multiplayer menu of their Minecraft client to connect to your server and start playing together.Step 8: Maintain and Moderate Your ServerOnce your Minecraft server is up and running, it's important to maintain and moderate the gameplay experience. This can include enforcing rules, addressing technical issues, and ensuring a positive and inclusive community for all players. Depending on the size of your community, you may also want to consider appointing moderators or administrators to help manage the server.Setting up a server IP address for your Minecraft world can open up new possibilities for gameplay and social interaction. Whether you choose to self-host or use a third-party hosting service, taking the time to configure and maintain your server can create an engaging and enjoyable experience for you and your fellow players. With these steps in mind, you'll be well on your way to creating your own unique Minecraft community.
Are you looking to change the proxy settings on your computer? Whether it's for security, privacy, or accessing geo-restricted content, changing your computer's proxy settings can be a useful skill to have. In this guide, we'll walk you through the steps to change the proxy settings on Windows, macOS, and Linux.Changing Proxy Settings on Windows:1. Open the Control Panel: Click on the Start button, then type "Control Panel" and press Enter.2. Click on "Internet Options": In the Control Panel, click on "Network and Internet," then "Internet Options."3. Go to the "Connections" tab: In the Internet Properties window, go to the "Connections" tab and click on the "LAN settings" button.4. Change the proxy settings: In the Local Area Network (LAN) Settings window, check the box for "Use a proxy server for your LAN" and enter the address and port of the proxy server you want to use.5. Click "OK" to save the changes: Once you've entered the proxy server details, click "OK" to save the changes and close the windows.Changing Proxy Settings on macOS:1. Open System Preferences: Click on the Apple menu, then select "System Preferences."2. Go to "Network": In the System Preferences window, click on "Network."3. Select your network connection: In the list of network connections on the left, select the network connection for which you want to change the proxy settings.4. Click on "Advanced": Once you've selected the network connection, click on the "Advanced" button in the lower right corner.5. Go to the "Proxies" tab: In the Advanced settings, go to the "Proxies" tab and configure the proxy settings according to your preferences.6. Click "OK" to save the changes: After you've configured the proxy settings, click "OK" to save the changes and close the windows.Changing Proxy Settings on Linux:1. Open Network Settings: The process for changing proxy settings can vary depending on the Linux distribution you're using. In general, open the network settings or network manager on your Linux system.2. Configure proxy settings: Look for an option to configure proxy settings within the network settings or network manager interface. Enter the details of the proxy server you want to use.3. Save the changes: After configuring the proxy settings, save the changes and close the network settings window.Changing the proxy settings on your computer can be a straightforward process once you know where to look. Whether you're using Windows, macOS, or Linux, understanding how to change proxy settings can give you more control over your internet connection and online activities. Keep in mind that using a proxy server may have implications for privacy, security, and internet access, so always make sure to use reputable and trusted proxy servers. With these steps, you'll be able to change your computer's proxy settings with confidence and ease.
If you want to change the proxy server settings in Chrome, you have come to the right place. Whether you need to access websites that are blocked in your region or you want to improve your online privacy, changing your proxy server settings can help you achieve your goals. In this blog post, we will walk you through the process of changing the proxy server settings in Chrome.Why Change Proxy Server Settings in Chrome?Before we dive into the details of how to change the proxy server settings in Chrome, let's first understand why you might want to do so. A proxy server acts as an intermediary between your device and the internet. By routing your internet traffic through a proxy server, you can hide your IP address, bypass geo-restrictions, and access websites that may be blocked in your region.Changing the proxy server settings in Chrome can also help improve your online security and privacy. By using a proxy server, you can encrypt your internet traffic and protect your sensitive information from potential threats.Now that we understand the benefits of changing proxy server settings, let's explore how to do it in Chrome.How to Change Proxy Server Settings in ChromeChanging the proxy server settings in Chrome is a straightforward process. Here's a step-by-step guide to help you get started:Step 1: Open Chrome and Access SettingsFirst, open Google Chrome on your computer. Then, click on the three-dot menu icon located at the top-right corner of the browser window. From the drop-down menu, select "Settings" to access the Chrome settings.Step 2: Navigate to Advanced SettingsIn the Chrome settings, scroll down to the bottom of the page and click on the "Advanced" option. This will expand the settings menu and reveal additional options.Step 3: Open Proxy SettingsUnder the "System" section, click on "Open your computer's proxy settings." This will open the system's network settings where you can configure the proxy server settings for your computer.Step 4: Configure Proxy Server SettingsIn the network settings window, navigate to the "Proxy" tab. Here, you can configure the proxy server settings according to your preferences. You can choose to use a manual proxy configuration or specify an automatic proxy configuration URL.If you want to use a manual proxy configuration, enter the IP address and port number of the proxy server in the designated fields. You can also configure other advanced settings such as bypassing proxy for specific websites or using a secure proxy connection.Step 5: Save and Apply SettingsOnce you have configured the proxy server settings according to your preferences, click "OK" or "Apply" to save the changes. Your computer will now use the new proxy server settings when accessing the internet through Chrome.It's important to note that changing proxy server settings may affect your internet connection and browsing experience. Make sure to test the new settings to ensure they work as intended.Changing the proxy server settings in Chrome can help you access blocked websites, improve your online security, and protect your privacy. Whether you need to bypass geo-restrictions or encrypt your internet traffic, configuring proxy server settings in Chrome is a useful tool for achieving your goals.By following the step-by-step guide outlined in this blog post, you can easily change the proxy server settings in Chrome and customize them according to your preferences. Just remember to test the new settings to ensure they work as intended and consider the potential impact on your internet connection.We hope this blog post has been helpful in guiding you through the process of changing proxy server settings in Chrome. If you have any questions or need further assistance, feel free to reach out to us. Happy browsing!
There are several methods to set up a proxy server, each with its own advantages and disadvantages. In this blog post, we will explore some of the most popular and effective methods for building a proxy server.1. Using Open Source Software:One of the most common ways to build a proxy server is by using open source software such as Squid, Varnish, or Apache HTTP Server with mod_proxy. These software packages are widely used and well-supported, making them a popular choice for building proxy servers. They offer a wide range of features and can be easily customized to meet specific requirements.2. Using Proxy-as-a-Service Providers:Another option for setting up a proxy server is to use a proxy-as-a-service provider. These companies offer proxy server solutions that are hosted in the cloud, making them easy to set up and manage. Some popular proxy-as-a-service providers include Luminati, Oxylabs, and Smartproxy. These services often provide advanced features such as rotating IP addresses, geotargeting, and session control.3. Building a Custom Proxy Server:For organizations with specific requirements or security concerns, building a custom proxy server may be the best option. This approach allows for complete control over the proxy server's configuration and can be tailored to meet the organization's unique needs. Custom proxy servers can be built using programming languages such as Python, Node.js, or Go, and can be deployed on-premises or in the cloud.4. Using Reverse Proxy Servers:Reverse proxy servers are another popular method for setting up a proxy server. These servers sit in front of web servers and act as intermediaries between clients and servers. Reverse proxy servers can be used to improve performance, provide load balancing, and add an extra layer of security to web applications. Popular reverse proxy servers include Nginx and Apache HTTP Server with mod_proxy.5. Using Residential Proxies:For web scraping, data collection, or ad verification, residential proxies are often used. Residential proxies are IP addresses provided by Internet Service Providers (ISPs) to homeowners, making them appear as regular residential users. These proxies are often used for tasks that require a high level of anonymity and can be obtained from specialized providers such as PYPROXY.There are many good methods for building a proxy server, each with its own strengths and use cases. Whether you choose to use open source software, proxy-as-a-service providers, custom solutions, reverse proxy servers, or residential proxies, it's important to carefully consider your requirements and choose the method that best meets your needs. With the right approach, a well-built proxy server can provide enhanced security, improved performance, and greater control over network traffic.
If you're concerned about your privacy and want to hide your IP address while using your iPhone, you might be wondering if it's possible to do so. While it's not possible to completely hide your IP address on an iPhone, there are some steps you can take to enhance your privacy and security while browsing the internet.1. Use a Virtual Private Network (VPN)One of the most effective ways to hide your IP address on an iPhone is by using a Virtual Private Network (VPN). A VPN encrypts your internet traffic and routes it through a server in a location of your choice, effectively masking your IP address. There are many VPN apps available on the App Store, such as ExpressVPN, NordVPN, and CyberGhost, that offer easy-to-use interfaces and strong encryption protocols. Simply download and install the app, choose a server location, and enable the VPN to hide your IP address.2. Use the Tor BrowserThe Tor Browser is another option for hiding your IP address on an iPhone. Tor is a free and open-source software that directs internet traffic through a free, worldwide, volunteer overlay network consisting of more than seven thousand relays to conceal a user's location and usage from anyone conducting network surveillance or traffic analysis. While there is no official Tor Browser app for iOS, you can use third-party apps such as Onion Browser to access the Tor network on your iPhone.3. Disable Location ServicesWhile not directly related to hiding your IP address, disabling location services on your iPhone can help enhance your privacy. By turning off location services for specific apps or altogether, you can prevent them from tracking your physical location and potentially linking it to your IP address.4. Use HTTPS and Encrypted ConnectionsWhen browsing the internet on your iPhone, make sure to use websites that use HTTPS encryption. This ensures that the data exchanged between your device and the website is encrypted, making it more difficult for third parties to intercept and monitor your online activities. Additionally, using encrypted messaging apps and email services can further protect your communications from prying eyes.5. Use Private Browsing ModeMost modern web browsers, including Safari on iOS, offer a private browsing mode that does not store your browsing history, search history, or form data. While this does not hide your IP address, it can help prevent others who have access to your device from seeing your browsing activity.It's important to note that while these methods can enhance your privacy and security while using your iPhone, they are not foolproof. It's always important to be mindful of the websites you visit, the apps you download, and the information you share online. Additionally, using strong, unique passwords and enabling two-factor authentication can further protect your online accounts from unauthorized access.While it's not possible to completely hide your IP address on an iPhone, there are several steps you can take to enhance your privacy and security while browsing the internet. Using a VPN, the Tor Browser, disabling location services, using encrypted connections, and private browsing mode are all effective ways to minimize the exposure of your IP address and protect your online activities. By being proactive about your online privacy and security, you can enjoy a safer and more private browsing experience on your iPhone.
Configuring an IP address to an IPv6 address is an essential task for network administrators and individuals looking to transition to the next generation of internet protocol. IPv6 offers numerous advantages over its predecessor, IPv4, including a larger address space, improved security, and better support for mobile devices and Internet of Things (IoT) devices. In this blog post, we will explore the steps to configure an IP address to an IPv6 address.Before we dive into the configuration process, let's first understand the basics of IPv6 addressing. Unlike IPv4, which uses a 32-bit address scheme, IPv6 uses a 128-bit address scheme. This significantly increases the number of available IP addresses, allowing for the continued growth of the internet and the proliferation of connected devices.To configure an IP address to an IPv6 address, you will need to follow these general steps:1. Determine the IPv6 Addressing Scheme: IPv6 addresses are typically represented as eight groups of four hexadecimal digits, separated by colons. For example, 2001:0db8:85a3:0000:0000:8a2e:0370:7334. It's important to understand the different types of IPv6 addresses, including unicast, multicast, and anycast addresses.2. Enable IPv6 on the Network Interface: Most modern operating systems have built-in support for IPv6. You will need to enable IPv6 on the network interface of the device for which you want to configure the IPv6 address. This can usually be done through the network settings or configuration files.3. Obtain an IPv6 Address: There are several methods for obtaining an IPv6 address. One common method is stateless address autoconfiguration (SLAAC), in which a device automatically generates its own IPv6 address based on the network prefix advertised by a router. Another method is dynamic host configuration protocol version 6 (DHCPv6), which allows a device to obtain its IPv6 address from a DHCPv6 server.4. Configure DNS Settings: Once you have obtained an IPv6 address, you will need to configure the DNS settings to ensure that the device can resolve IPv6 addresses to domain names. This typically involves updating the device's DNS resolver settings with the appropriate IPv6 DNS server addresses.5. Test Connectivity: After configuring the IPv6 address and DNS settings, it's important to test the connectivity to ensure that the device can communicate over the IPv6 network. This can be done by pinging other devices on the network or accessing IPv6-enabled websites.It's important to note that the specific steps for configuring an IP address to an IPv6 address may vary depending on the operating system and network configuration. Additionally, organizations may have specific requirements or guidelines for IPv6 address configuration, so it's important to consult any relevant documentation or network administrators.Configuring an IP address to an IPv6 address is an important task for embracing the next generation of internet protocol. By understanding the basics of IPv6 addressing and following the general steps outlined in this post, individuals and organizations can successfully configure IPv6 addresses and take advantage of the many benefits that IPv6 offers.