Your form has been submitted. We'll contact you in 24 hours.
Close
Home/Blog/How to set up a SOCKS5 proxy with PyProxy?
How to set up a SOCKS5 proxy with PyProxy?
PYPROXY·Apr 07, 2025
Setting up a socks5 proxy using PYPROXY can significantly enhance your privacy and security online. SOCKS5 is a popular protocol because it offers high levels of anonymity by routing your internet traffic through a proxy server, masking your IP address, and allowing access to geo-blocked content. PyProxy, a Python package, simplifies the process of integrating a SOCKS5 proxy into your Python scripts, offering a reliable solution for developers and individuals who wish to maintain their privacy. This article will walk you through the step-by-step procedure to configure PyProxy for SOCKS5 proxy usage.
What is SOCKS5 Proxy?
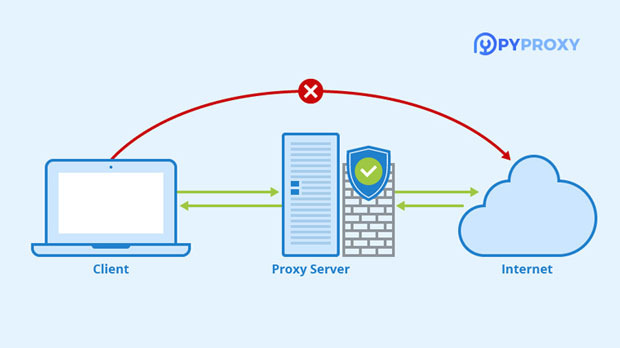
SOCKS5 (Socket Secure version 5) is an advanced version of the SOCKS protocol, which acts as a firewall and proxy server to securely handle your internet connections. Unlike traditional proxies that only work with specific protocols (e.g., HTTP or HTTPS), SOCKS5 is versatile, supporting all types of internet traffic, including email, file transfers, and video streaming. This makes SOCKS5 ideal for users who require flexible and anonymous browsing capabilities.
Some of the standout features of SOCKS5 include:
- No interference with internet traffic: Unlike other proxies, SOCKS5 does not alter or filter the content of the traffic, providing a transparent connection.
- Support for various protocols: SOCKS5 works with almost any internet application, from web browsers to chat clients, enhancing its usability.
- Increased security and anonymity: By hiding your real IP address, SOCKS5 ensures that your identity remains masked from websites or online services you interact with.
Introduction to PyProxy
PyProxy is a Python library that enables users to route their internet traffic through sock s5 proxies. By integrating PyProxy with your Python projects, you can easily configure proxy settings and handle requests through a SOCKS5 server. PyProxy simplifies the setup process, offering a straightforward interface for developers to implement proxies into their applications or scripts.
With PyProxy, developers can:
- Efficiently route network traffic through SOCKS5 proxies.
- Manage connections for tasks such as web scrpyproxyng or automated browsing.
- Enhance privacy by masking the real IP address in their code.
In the following sections, we will explore how to install PyProxy and configure it to use a SOCKS5 proxy.
Step 1: Installing PyProxy
Before setting up the SOCKS5 proxy with PyProxy, you first need to install the library. Fortunately, PyProxy is available through Python’s package manager, pip, which makes installation simple.
1. Open your terminal or command prompt.
2. Run the following command to install PyProxy:
```bash
pip install pyproxy
```
This will download and install the latest version of PyProxy along with any necessary dependencies.
Step 2: Configuring the SOCKS5 Proxy
Once PyProxy is installed, the next step is to configure the SOCKS5 proxy within your script. PyProxy allows you to specify the proxy server’s IP address and port, which are essential for routing your traffic through the SOCKS5 server. Below is an pyproxy of how to configure a SOCKS5 proxy using PyProxy.
1. Import PyProxy: First, import the PyProxy library into your Python script.
```python
import pyproxy
```
2. Set Proxy Details: Next, define the socks5 proxy server’s IP address and port. Replace these placeholders with the actual values of your SOCKS5 server.
```python
proxy_ip = "your_proxy_ip"
proxy_port = "your_proxy_port"
```
3. Create Proxy Configuration: Create a PyProxy configuration object and specify the proxy type as SOCKS5.
4. Set Up the Proxy for Requests: To ensure all your requests are routed through the SOCKS5 proxy, configure the proxy with your request handling library, such as `requests`.
With this configuration, your internet traffic for requests will pass through the specified SOCKS5 proxy server. Any subsequent requests made using the `requests` library will be routed through the proxy.
Step 3: Testing the Proxy Connection
Once the proxy is configured, it’s essential to verify that the connection is successful and that the proxy is functioning as expected. The easiest way to test the proxy is to check your IP address before and after setting up the proxy.
1. Before using the proxy, check your real IP address:
If the IP address returned after the proxy setup differs from your real IP, then the SOCKS5 proxy is properly configured and functioning.
Step 4: Handling Authentication with SOCKS5 Proxy
Some SOCKS5 proxies require authentication to access their services. PyProxy makes it easy to handle authentication by allowing you to pass your username and password when creating the proxy configuration.
Here is how you can set up authentication with your SOCKS5 proxy:
1. Define Username and Password: If your SOCKS5 proxy requires authentication, set the username and password.
```python
proxy_username = "your_username"
proxy_password = "your_password"
```
2. Configure Proxy with Authentication: Add the username and password to the proxy configuration.
With these adjustments, your requests will include the necessary authentication details.
Step 5: Managing Proxy Failures and Error Handling
When using proxies, especially in production environments, it’s crucial to handle errors and failures gracefully. PyProxy does not directly handle proxy failures, so you’ll need to implement your own error handling.
Consider implementing a try-except block to catch common errors, such as connection failures or timeouts:
This will help ensure your application remains robust, even when there are issues with the proxy server.
Conclusion
Using PyProxy to configure a SOCKS5 proxy in your Python scripts provides a simple, efficient way to route internet traffic securely and anonymously. By following the steps outlined above, you can easily set up a SOCKS5 proxy, test the connection, handle authentication, and manage errors. Whether you're scrpyproxyng websites, automating tasks, or just browsing securely, PyProxy makes integrating SOCKS5 proxies into your projects straightforward and effective.