Your form has been submitted. We'll contact you in 24 hours.
Close
Home/Blog/How to configure Dynamic Residential Proxy on Windows and macOS?
How to configure Dynamic Residential Proxy on Windows and macOS?
Author:PYPROXY
2025-03-06
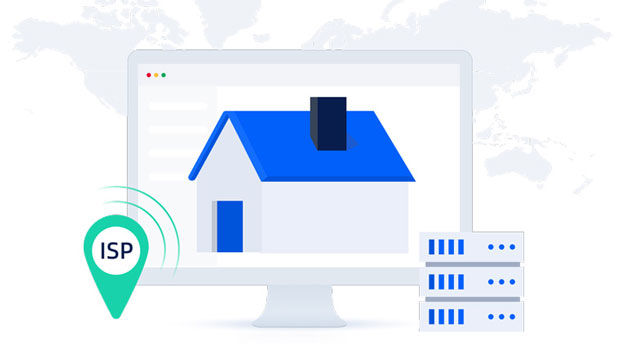
Dynamic residential proxies offer an effective way to maintain anonymity and bypass geographical restrictions while browsing the internet. These proxies use IP addresses provided by internet service providers (ISPs), making them appear as regular residential users, which allows users to evade detection by websites and services that track unusual activity. Configuring dynamic residential proxies on Windows and macOS allows users to make the most of these advantages on both operating systems. In this guide, we will walk through the process of setting up dynamic residential proxies on both platforms. Whether you are using a Windows PC or a macOS device, following this guide will ensure seamless integration and efficient proxy usage.
Understanding Dynamic Residential Proxies
Before diving into the configuration process, it's important to understand what dynamic residential proxies are and how they differ from other types of proxies. A dynamic residential proxy assigns a new residential IP address every time a connection is made, making it ideal for tasks that require anonymity, such as web scraping, accessing geo-restricted content, or preventing IP bans. These proxies are sourced from real residential networks, as opposed to data centers, which helps avoid detection by websites that may flag data center IP addresses.
The key benefit of using dynamic residential proxies is their ability to rotate IP addresses regularly. This feature is particularly useful for high-volume tasks like automated browsing or scraping, where using a single IP for prolonged periods might lead to IP bans or throttling. In this section, we will explore how to configure these proxies for Windows and macOS users.
Setting Up Dynamic Residential Proxies on Windows
Windows is a widely used operating system, and configuring dynamic residential proxies on it is a straightforward process. To ensure the best results, you should follow these steps carefully:
1. Choose a Proxy Provider
The first step in setting up a dynamic residential proxy on Windows is to choose a reliable proxy provider. Many services offer residential proxy solutions, so it’s essential to choose one that aligns with your needs, whether it's for browsing, web scraping, or data collection. Make sure the provider supports dynamic IP rotation to avoid being detected by websites.
2. Download Proxy Configuration Software
Once you have chosen a provider, download the software or configuration files they provide. These might be proxy settings that you can input manually into your Windows network settings, or they might come with an application that automates the configuration process.
3. Configure Proxy Settings in Windows
If you're manually setting up the proxy on your Windows machine, follow these steps:
1. Open the "Settings" menu and navigate to "Network & Internet."
2. Select "Proxy" from the menu on the left.
3. Turn on the "Manual Proxy Setup" toggle.
4. Enter the proxy server IP address and port provided by your proxy service. Additionally, if authentication is required, input your username and password.
5. Save the settings.
By following these steps, you will be able to use the dynamic residential proxy on your Windows device.
4. Testing Your Proxy Connection
After configuring your dynamic residential proxy, it’s crucial to test the connection to ensure everything is working as expected. You can use websites that show your current IP address to check if the proxy is functioning correctly. If the IP shown matches the one provided by your proxy service, your configuration is successful.
Setting Up Dynamic Residential Proxies on macOS
Configuring dynamic residential proxies on macOS is similarly straightforward. The process on macOS involves inputting the proxy settings into the system preferences, allowing you to route traffic through your residential proxy. Here’s how to set it up:
1. Choose a Proxy Provider
Just like on Windows, the first step is to choose a provider that offers dynamic residential proxies. Make sure the provider supports rotating IPs, and check their pricing and features to find the best fit for your needs.
2. Download Proxy Configuration Software
After selecting a provider, you will need to download the necessary proxy configuration details or the app that helps you configure the proxy automatically.
3. Configure Proxy Settings in macOS
To configure the dynamic residential proxy on macOS:
1. Open the "System Preferences" window and select "Network."
2. Select your active network connection (Wi-Fi or Ethernet).
3. Click on the "Advanced" button and go to the "Proxies" tab.
4. Check the box for "Web Proxy (HTTP)" and "Secure Web Proxy (HTTPS)."
5. Enter the proxy server's IP address and port provided by your proxy service.
6. If authentication is required, enter your username and password.
7. Click "OK" and then "Apply" to save your settings.
Your macOS device will now use the dynamic residential proxy.
4. Testing Your Proxy Connection
To verify that your proxy setup is working properly on macOS, visit an IP-checking website. If the IP address matches the one provided by your proxy service, the proxy is successfully configured.
Advanced Configuration for Specific Use Cases
While the basic setup for dynamic residential proxies on Windows and macOS is relatively easy, some users may require more advanced configurations based on specific use cases. These can include:
1. Automated Rotation
For users who need frequent IP rotation, consider using proxy management software that supports automatic IP rotation. These tools allow the proxy to switch IP addresses at regular intervals, ensuring you avoid detection or bans when engaging in high-volume activities like web scraping.
2. Geo-Targeting
Many dynamic residential proxy providers offer geo-targeting features that allow you to choose IPs from specific countries or cities. This feature is particularly useful for tasks such as local market research, bypassing geo-blocks, or accessing region-restricted content.
3. Proxy Authentication
Some proxy services require authentication for added security. Make sure to input the correct username and password during setup. If your proxy provider offers more advanced authentication methods (such as token-based authentication), follow their documentation for proper setup.
Best Practices for Using Dynamic Residential Proxies
To maximize the effectiveness of your dynamic residential proxy, keep these best practices in mind:
1. Use Rotation Wisely
While rotating IPs can help you avoid detection, excessive or rapid IP changes might lead to slower speeds. Consider adjusting the rotation frequency based on your specific needs.
2. Monitor Your Traffic
Constantly monitor your network traffic to ensure there are no issues or slowdowns. If you notice performance degradation, adjust your proxy settings or consider upgrading to a higher-tier service for more resources.
3. Adhere to Legal Guidelines
When using dynamic residential proxies, ensure that you follow all applicable legal guidelines. Avoid using proxies for illegal activities such as data theft or accessing copyrighted content without permission.
Conclusion
Configuring dynamic residential proxies on both Windows and macOS can enhance your online privacy and open up new possibilities for bypassing geographical restrictions. Whether you're using a proxy for web scraping, accessing region-specific content, or ensuring anonymity during online activities, following the steps outlined above will help you get the most out of your dynamic residential proxy. Be sure to choose a reliable provider, configure your settings correctly, and apply best practices to ensure smooth and effective use.