Your form has been submitted. We'll contact you in 24 hours.
Close
Home/Blog/How to build your own Socks5 proxy? From Scratch
How to build your own Socks5 proxy? From Scratch
PYPROXY·Jan 13, 2025
Setting up your own socks5 proxy server can significantly improve your privacy, internet speed, and access control. Whether you're looking to bypass geographical restrictions, ensure anonymous browsing, or simply enhance your network security, creating a socks5 proxy server from scratch provides you with full control over your proxy service. This guide will walk you through the process of setting up a Socks5 proxy server from the ground up. You’ll understand each step clearly and learn how to manage your server effectively.
Understanding Socks5 Proxy and Its Benefits
Before diving into the setup process, it’s important to understand what a Socks5 proxy is and why you might want to set one up.
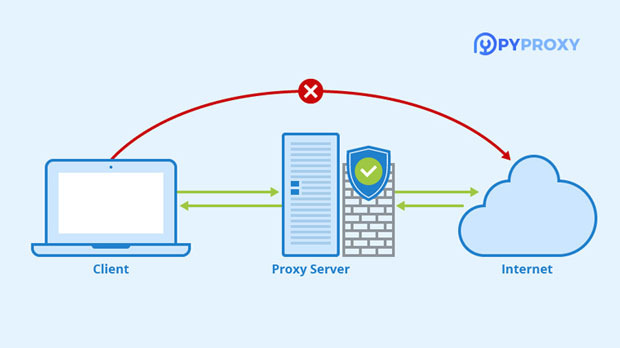
Socks5 (Socket Secure version 5) is a protocol used to route internet traffic through a proxy server. It’s an upgraded version of the earlier Socks4, providing more features like support for both UDP and TCP traffic, better authentication methods, and enhanced security. Unlike HTTP proxies that only work with web traffic, socks5 proxies can handle all types of internet traffic, including P2P, torrents, and gaming data. This flexibility makes it an attractive option for a variety of users.
The key benefits of setting up your own Socks5 proxy server include:
1. Enhanced Privacy: By routing your traffic through a proxy server, your original IP address is masked, ensuring greater anonymity.
2. Access Control: You have full control over who accesses your server, allowing you to manage and restrict connections based on IP or user credentials.
3. Bypass Geoblocks: Socks5 proxies enable you to access content that might be restricted in your region, such as streaming services or websites.
4. Improved Security: With proper encryption, Socks5 proxies can enhance your data security, especially when using public networks.
5. Bandwidth Efficiency: A well-configured proxy can help optimize bandwidth, reduce latency, and ensure a smoother internet experience.
Choosing the Right Environment for Your Socks5 Proxy
The first step in setting up your own Socks5 proxy is choosing a server environment. Typically, you’ll use a Linux server for this purpose, as Linux offers robust support for proxy services and is cost-effective.
1. Select a Server: You can either rent a virtual private server (VPS) from a hosting provider or use a dedicated server. Make sure the server has enough resources (RAM, CPU, bandwidth) to handle the traffic you anticipate.
2. Choose the Operating System: Most users opt for a Linux-based OS, such as Ubuntu or CentOS, as it is lightweight, secure, and easy to manage.
3. Ensure Security: Set up a firewall and enable SSH (Secure Shell) access for remote management of your server.
Installing Socks5 Proxy Software
Once you’ve set up the server environment, you need to install software that supports the Socks5 protocol. There are several software options available, but one of the most widely used and reliable ones is Dante.
1. Install Dante on Linux:
Dante is a high-performance Socks5 server that works on most Linux distributions. To install Dante, follow these steps:
- First, update your server’s package list:
```
sudo apt-get update
```
- Next, install Dante via the package manager:
```
sudo apt-get install dante-server
```
This will install the necessary packages to run a Socks5 proxy on your server.
2. Configure Dante:
After installation, you need to configure Dante to act as a Socks5 proxy. The configuration file is usually located at `/etc/danted.conf`. Open this file with a text editor like nano:
```
sudo nano /etc/danted.conf
```
The basic configuration structure looks like this:
```
logoutput: /var/log/danted.log
internal: eth0 port = 1080
external: eth0
method: username none
user.notprivileged: nobody
clientmethod: none
```
Key points:
- `internal`: Specifies the internal network interface and port on which the proxy will listen (e.g., port 1080).
- `external`: The external network interface that the proxy will use to route traffic.
- `method`: Authentication method for users. You can use 'none' for no authentication or set up a username/password method.
- `user.notprivileged`: Defines the user under which the proxy process runs. It’s crucial to use a non-privileged user for security.
3. Start Dante Server:
After configuring Dante, you can start the Socks5 proxy service:
```
sudo service danted start
```
To ensure Dante starts on boot, you can enable it:
```
sudo systemctl enable danted
```
You can now check whether the server is running by visiting the logs or using the `netstat` command to see if the proxy port (1080) is listening.
Testing and Managing Your Socks5 Proxy
After setting up your Socks5 proxy server, it's time to test and ensure everything works correctly. You can test the proxy using various methods:
1. Testing with Proxy Software:
You can use software like Proxychains on your local machine to route traffic through your new Socks5 proxy. Install Proxychains and configure it to use your proxy server IP and port.
- Install Proxychains (on Ubuntu):
```
sudo apt-get install proxychains
```
- Configure Proxychains:
Edit the configuration file:
```
sudo nano /etc/proxychains.conf
```
Add the following line at the end of the file, replacing `your-server-ip` with the IP address of your server:
```
socks5 your-server-ip 1080
```
Once configured, use Proxychains with any command (e.g., to access a website via curl):
```
proxychains curl http://pyproxy.com
```
If everything is set up correctly, your traffic will be routed through your Socks5 proxy.
2. Monitoring the Server:
Use tools like netstat, iftop, or htop to monitor traffic and server performance. Checking your server’s logs can also help identify any issues:
```
tail -f /var/log/danted.log
```
3. Security Considerations:
Always ensure that your server is secure. Regularly update your software, use strong authentication methods, and monitor the logs for unusual activity. Consider using a VPN alongside your Socks5 proxy for added security.
Advanced Configuration and Optimization
Once your Socks5 proxy is set up and running, you can explore additional configurations to improve its functionality:
1. Bandwidth Limiting: Set up bandwidth restrictions to ensure your server doesn’t get overwhelmed by too much traffic. Dante allows you to configure traffic limits in the configuration file.
2. Access Control Lists (ACLs): You can set up ACLs to limit which IP addresses or ranges can use your proxy. This helps enhance security by restricting access to trusted clients.
3. Encryption: Though Socks5 itself doesn't provide encryption, you can combine it with SSL/TLS encryption or a VPN to secure your traffic.
4. Log Rotation: To prevent log files from becoming too large, set up log rotation to automatically archive or delete old logs after a set period.
Conclusion
Setting up your own Socks5 proxy server offers numerous benefits in terms of privacy, security, and control. While the setup process involves several steps, each part is crucial for building a secure and efficient proxy system. By following this guide, you can ensure that your Socks5 proxy server is configured properly, secure, and running smoothly. With full control over the server, you can tailor its functionality to meet your specific needs and enjoy a more private and efficient internet experience.