Your form has been submitted. We'll contact you in 24 hours.
Close
Home/Blog/How do I use proxies in Chrome and Firefox?
How do I use proxies in Chrome and Firefox?
PYPROXY·Apr 10, 2025
Using proxies is an essential method for enhancing online privacy and security, allowing users to mask their IP addresses and bypass geographical restrictions. Both Chrome and Firefox offer ways to configure proxy settings to suit users' needs, whether for browsing securely, accessing region-locked content, or maintaining anonymity. This article will guide you through the process of setting up and using proxies on these two popular browsers. The guide covers both manual configurations and automatic setups, ensuring you can adapt to various use cases. By the end, you'll have a clear understanding of how to configure proxies in Chrome and Firefox for both Windows and macOS systems.
Understanding Proxies: What Are They and Why Use Them?
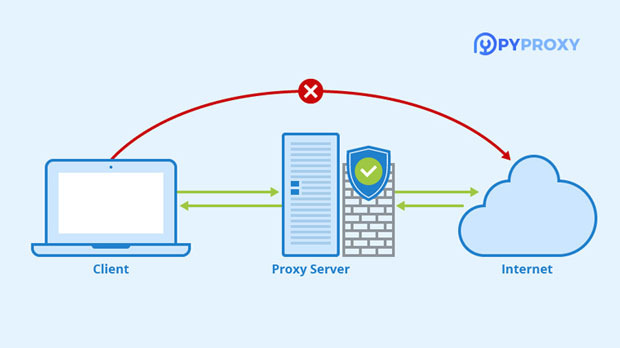
Before diving into the configuration steps, it's important to understand what proxies are and why they are used. A proxy server acts as an intermediary between your device and the internet. When you use a proxy, your internet traffic is routed through this server, masking your actual IP address and replacing it with the server's IP address. This process can help users in several ways:
1. Privacy Protection: By masking your real IP address, proxies add a layer of privacy, making it harder for websites or online services to track your activities.
2. Accessing Geo-restricted Content: Proxies allow users to bypass regional restrictions and access websites or services that may not be available in their country.
3. Security and Malware Protection: Some proxies offer extra layers of security by blocking potentially harmful websites, ads, or malware.
4. Bypassing Network Restrictions: Proxies can help users access content or services that might be restricted on certain networks, such as in schools or workplaces.
Now, let's look at how to configure proxy settings in Chrome and Firefox.
How to Set Up Proxy in Chrome
Chrome doesn't have built-in proxy settings but uses the system's default proxy configurations. Therefore, when you configure a proxy on your computer, Chrome will automatically use those settings. Below are the steps for both Windows and macOS systems.
Setting Up Proxy on Windows
1. Open Windows Settings: Click on the Start menu and select Settings.
2. Navigate to Network & Internet: Click on Network & Internet, then choose the Proxy tab.
3. Enable Manual Proxy Setup: Toggle the Manual proxy setup switch to On.
4. Enter Proxy Details: In the fields provided, enter the proxy server's address and port number. You may also need to enter your username and password if the proxy requires authentication.
5. Save Settings: Once you’ve entered the details, click Save to apply the changes.
6. Test Chrome: Open Chrome and check if it routes your internet traffic through the proxy.
Setting Up Proxy on macOS
1. Open System Preferences: Click on the Apple logo and choose System Preferences.
2. Access Network Settings: Go to Network and select the network you are currently using.
3. Advanced Settings: Click on Advanced, then go to the Proxies tab.
4. Enable Proxy Configuration: Check the box next to Web Proxy (HTTP) or Secure Web Proxy (HTTPS).
5. Enter Proxy Details: Type in the proxy server's address and port number. If authentication is needed, enter the required credentials.
6. Apply Settings: Click OK, then Apply to confirm your changes.
Once you have configured the proxy, Chrome will route all your traffic through the set proxy server.
How to Set Up Proxy in Firefox
Firefox allows users to configure proxy settings directly within the browser, giving more control over the browsing experience compared to Chrome. Here's how you can set up a proxy in Firefox.
Setting Up Proxy in Firefox on Windows
1. Open Firefox: Launch the Firefox browser on your computer.
2. Access Settings: Click on the three horizontal lines in the top right corner and select Settings.
3. Go to Network Settings: Scroll down to the Network Settings section and click on Settings.
4. Configure Proxy Settings: In the Connection Settings window, choose Manual proxy configuration.
5. Enter Proxy Details: Type the proxy server address and port number in the respective fields. You can also check the box for using the proxy for all protocols (HTTP, HTTPS, FTP).
6. Save and Close: After entering the details, click OK to save the settings.
Setting Up Proxy in Firefox on macOS
1. Open Firefox: Launch Firefox on your macOS device.
2. Open Preferences: Click Firefox in the top-left corner and select Preferences.
3. Navigate to Network Settings: Scroll to the Network Settings section at the bottom.
4. Manual Proxy Configuration: Choose the Manual proxy configuration option.
5. Enter Proxy Details: Enter the proxy server’s address and port in the respective fields.
6. Save Settings: After entering the proxy details, click OK to apply the changes.
Once these steps are completed, Firefox will begin using the specified proxy settings for browsing.
Advanced Proxy Configurations: Socks5, HTTPS, and More
In addition to basic proxy configurations, there are several advanced proxy types you can use for enhanced functionality.
1. SOCKS Proxy
SOCKS proxies are more versatile and can handle various types of traffic, including HTTP, FTP, and more. They are particularly useful when you want to route your traffic for specific applications, such as torrenting. When configuring a SOCKS proxy in Firefox or Chrome, ensure that you specify the correct version (SOCKS5 is the most commonly used).
2. HTTPS Proxy
HTTPS proxies are designed to encrypt your traffic, offering a higher level of security than standard HTTP proxies. These proxies are ideal for protecting your data while browsing sensitive websites.
3. Proxy Auto-Config (PAC) Files
For more advanced setups, you can use a Proxy Auto-Config (PAC) file. A PAC file automatically determines the appropriate proxy server based on the URL requested. This is particularly useful in large networks or environments where different URLs need to be routed through different proxy servers.
Testing and Troubleshooting Proxy Settings
After setting up the proxy, it’s essential to verify that it works as expected. There are several ways to test your proxy settings:
1. Check IP Address: Visit a website that shows your IP address. If the proxy is working, the displayed IP address should be the one associated with the proxy server, not your real IP.
2. Access Blocked Content: Test accessing a website or service that was previously restricted in your region.
3. Use Online Tools: Some online tools can verify your proxy connection and provide troubleshooting tips.
If you encounter issues, ensure that the proxy server's address and port are entered correctly, and check that your internet connection is stable.
Using a proxy in Chrome and Firefox is a straightforward process, whether for enhancing privacy, accessing geo-restricted content, or bypassing network restrictions. By following the steps outlined above, you can easily configure proxy settings for both browsers on Windows and macOS. Additionally, advanced configurations, such as SOCKS and HTTPS proxies, can further enhance your browsing experience. Whether you're an everyday user or a privacy-conscious individual, setting up a proxy is a simple yet effective way to take control of your online security.